Advertisement
Quick Links
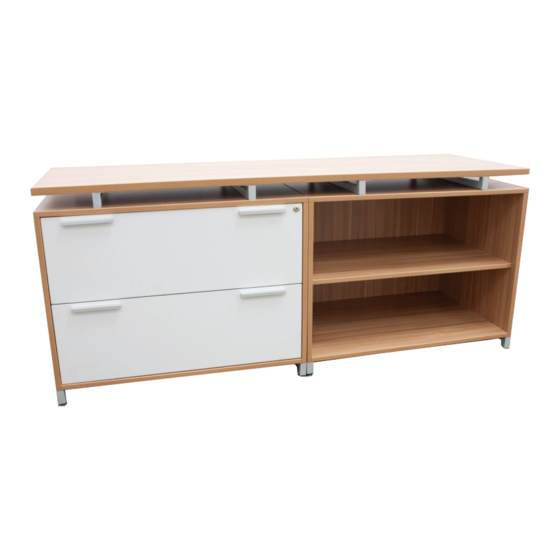
Lateral/ Single Shelf Credenza • ONCSLFBK7124 • INSTRUCTIONS
Lateral/ Storage Cabinet Credenza • ONCSLFSC7124 • INSTRUCTIONS
CARTONS: OTT7124, OPLF3624, OPSC3624, OSCD3624
Organize your parts and hardware. You will need (2) people, a Phillips head screwdriver and a rubber mallet.
Hardware :
A: Glides(8) • B: Assembly Key • C: Shelf Pins(4) • D: Cam Pins(15) • E: Wood Screws(12) • F: Small
Bolts(24) • G: Medium Bolts(20) • H: Cam Covers(4) • I: Cam Caps(9) • U: Long Bolts(4) • V: Washers(12)
A
B C
Parts :
J: Back Panel • K: Base Panel • L: Floating Top • M: Left Side Panel • N: Right Side Panel • O: Shelf • P: Top
Panel • Q: Foot Bracket(4) • R: Top Bracket(4) • S: Leg Connector Bracket(2) • T: Lateral
J
O
STEP 1 : Insert 2 Cam Pins(D) into Back Panel(J). Attach
Base Panel(K) to Back Panel by inserting Cam Pins into
Cam Locks. Lock Cams (Figure 1). NOTE: Cam locks face
down.
D
IMPORTANT NOTICE:
Place all wooden parts on a clean and smooth surface such as a rug or carpet to avoid the parts from being scratched.
Check to be sure that you have all parts and hardware.
Remove all wrapping materials, including staples & packing straps before you start to assemble.
Do not tighten all screws/bolts until completely assembled.
Keep all hardware parts out of reach of children.
Any problems or questions call Regency Office Furniture at 1-866-816-9822
CARTONS: OTT7124, OPLF3624, OPSC3624
D E F G H
K
P
J
D
K
U
V
I
Figure 1: To open
Cam, point arrow toward
Cam Pin hole. To lock
Cam, turn clockwise.
L
Q
S
R
STEP 2 : Insert 4 Cam Pins(D) into Left Side Panel(M) &
Right Side Panel(N).
D
M
D
D
D
M
N
T
D
N
D
D
D
Advertisement

Related Manuals for Regency ONCSLFBK7124


Summary of Contents for Regency ONCSLFBK7124
- Page 1 Remove all wrapping materials, including staples & packing straps before you start to assemble. Do not tighten all screws/bolts until completely assembled. Keep all hardware parts out of reach of children. Any problems or questions call Regency Office Furniture at 1-866-816-9822...
- Page 2 Bolts(G) and 2 long bolts(U) according to placement below. Finish fastening with 6 Screws(E). NOTE: When the two units are next to each other the long bolts are next to each other (see step 12). Figure 2 Any problems or questions call Regency Office Furniture at 1-866-816-9822...
- Page 3 STEP 10 : Attach 4 Top Brackets(R) to Floating Top(L) using 6 STEP 11 : Attach Floating Top(L) to both components using 3 Small Bolts(F) per Bracket. Long Bolts(G) per Top Bracket(R). Any problems or questions call Regency Office Furniture at 1-866-816-9822...
- Page 4 STEP 13 : Insert 4 Shelf Pins(C) at desired height. Place Shelf(O). Re-Install Drawers. Finish by concealing Cam Locks with Cam Caps(I) & Cam Covers(H). IF YOU HAVE DOORS, PLEASE CONTINUE INSTRUCTIONS. Any problems or questions call Regency Office Furniture at 1-866-816-9822...
- Page 5 STEP C : Attach 1 Handle(A) to each Door(J,K) with 2 STEP D : Attach 4 Hinges(B) to Doors(J,K) with 8 Wood Bolts(E). Screws(F). Any problems or questions call Regency Office Furniture at 1-866-816-9822...
- Page 6 Note.The screw EB is an adjustment for the door position. Turn right to adjust door to center and left to adjust toward the side. Your Final Door(O,P) interior should look like this. Any problems or questions call Regency Office Furniture at 1-866-816-9822...