Table of Contents
Advertisement
Advertisement
Table of Contents

Related Manuals for Yaesu FTM-6000R


Summary of Contents for Yaesu FTM-6000R
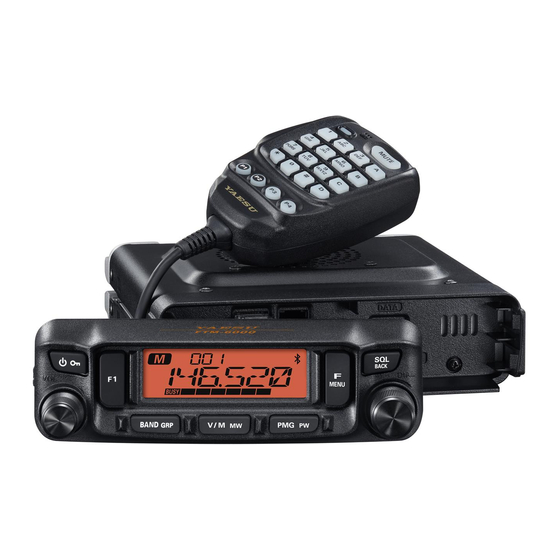
- Page 1 144/430MHz DUAL BAND FM TRANSCEIVER FTM-6000R FTM-6000E Advance Manual...
-
Page 2: Table Of Contents
Contents Basic Operation ..........................1 Microphone Gain Setting .......................1 Setting the volume of the beep ......................1 Communicating with specified stations ..................2 Selecting the Squelch Type ......................2 Tone squelch feature ........................3 Setting CTCSS Tone frequency ....................3 Searching for the CTCSS Tone transmitted by the other Station ..........4 Digital Code Squelch (DCS) feature ....................5 Setting the DCS CODE ......................5 Searching for the DCS Code Used by the Other Station ............6... - Page 3 11 DT MEM ..........................28 12 HOME ..........................28 13 MIC.GIN ..........................28 14 MIC.PGM ..........................28 15 PAGER ..........................29 16 PKT.SPD..........................29 17 RX MOD ..........................29 18 BND.SEL ..........................29 19 RPT.REV ..........................29 20 RPT.SET ..........................30 21 RPT.OTR ..........................30 22 SCN.ON ..........................30 23 SCAN TYP ..........................30 24 SQL TYPE ...........................31 25 SQL CODE ..........................31 26 SQL EXP ..........................31...
-
Page 4: Basic Operation
Basic Operation Microphone Gain Setting The microphone gain has been programmed at the factory to a level that should be sat- isfactory for the supplied SSM-85D Microphone. If an after-market microphone is used, you may wish to set a different Mic Gain level. 1. -
Page 5: Communicating With Specified Stations
Communicating with specified stations Selecting the Squelch Type 1. Press and hold the [F menu] key. 2. Rotate the DIAL knob to select [24 SQL.TYP] then press the DIAL knob. 3. Rotate the DIAL knob to select the squelch type, refer to the table below. Squelch Type Icon indication Description... -
Page 6: Tone Squelch Feature
4. Press the DIAL knob to save the setting and return to normal operation. • The squelch type may be set for each frequency band (BAND). • The CTCSS and DCS squelch settings are also active during scanning. If scanning is performed with the CTCSS and DCS squelch function activated, scanning stops only when a signal containing the specified CTCSS tone or DCS code is received. -
Page 7: Searching For The Ctcss Tone Transmitted By The Other Station
Searching for the CTCSS Tone transmitted by the other Station Search and display the CTCSS tone transmitted by the other station. 1. Press and hold the [F menu] key. 2. Rotate the DIAL knob to select [24 SQL.TYP] then press the DIAL knob. 3. -
Page 8: Digital Code Squelch (Dcs) Feature
Digital Code Squelch (DCS) feature The Digital Code Squelch opens the speaker audio only when a signal containing the specified DCS code is received. Setting the DCS CODE The DCS code may be selected from 104 types (from 023 to 754). 1. -
Page 9: Searching For The Dcs Code Used By The Other Station
Searching for the DCS Code Used by the Other Station Search for the DCS code used by the other station. 1. Press and hold the [F menu] key. 2. Rotate the DIAL knob to select [24 SQL.TYP] then press the DIAL knob. 3. -
Page 10: Epcs (Enhanced Paging & Code Squelch) Function
EPCS (Enhanced Paging & Code Squelch) Function When using FTM-6000R/E transceivers with a group of friends, setting the Two-Tone CTCSS personal codes allows calling just the specific stations. Even when the person who is called is not near the transceiver, the information on the LCD indicates that a call was received. -
Page 11: Setting The Code For Partner Station
Setting the Code for partner Station Set the pager code for directing a call to a specific partner station. 1. Press and hold the [F menu] key. 2. Rotate the DIAL knob to select [15 PAGER] then press the DIAL knob. “PAG.CDR”... -
Page 12: Activating The Pager Function
Activating the pager function 1. Press and hold the [F menu] key. 2. Rotate the DIAL knob to select [24 SQL.TYP] then press the DIAL knob. 3. Rotate the DIAL knob to select “PAGER”. 4. Press the DIAL knob to save the setting and return to normal operation. -
Page 13: Dtmf Operation
DTMF Operation DTMF (Dual Tone Multi Frequencies) are the tone signals sent to make telephone calls, or control repeaters and network links. Up to 9 registers of 16-digit DTMF tone codes can be stored as telephone numbers to make calls through the public telephone network using a phone patch or to connect through the WIRES-X analog node station. -
Page 14: Transmitting The Registered Dtmf Code
• Using the numeric key: The DTMF codes from “0” to “9”, “A” to “D”, “ Û ” and “#” may be input. “ ” is displayed “E”, “#” is displayed “F”. Û • Using the DIAL knob: Rotate the DIAL knob to set the DTMF code. • • • ... -
Page 15: Functions To Use As Needed
Functions to Use as Needed Split Memory Two different frequencies, one for receive and another for transmit, may be registered to a memory channel. 1. Register the receive frequency to a memory chan- nel first, as described below: Enter the VFO receive frequency → Press and hold the [V/M mw] key → Rotate the DIAL knob to select the desired channel number → Press and hold the [V/M mw] key 2. -
Page 16: Skip Memory Channels
Scan skip settings cannot be set for the PMS memory channels: L01 / U01 to L50 / U50. Programmable Memory Channel Scan (PMS) The FTM-6000R/E can be set to tune or scan only the frequencies between user defined lower and upper band limits. Registering to the Programmable Memory Channels 50 sets of PMS memory channels (L01/U01 to L50/U50) are available. -
Page 17: Performing Programmable Memory Channel Scan
Performing Programmable Memory Channel Scan 1. Recall the PMS memory channel to which the lower limit (Lxx) or upper limit (Uxx) of the frequency band is registered. 2. Press and hold the microphone [UP] or [DWN] switch. Programmable memory channel scanning starts. • During scanning, “P”... -
Page 18: Dual Watch (Dw) Feature
Dual Watch (DW) feature The FTM-6000R/E’s scanning features include a two-channel scanning capability which allows operating on a VFO or Memory channel, while periodically checking a Home channel for activity. If a station received on the Home channel is strong enough to open the Squelch, the scanner will pause on that station. -
Page 19: Receiving Weather Broadcast Channels
Receiving Weather Broadcast Channels This transceiver includes the preprogrammed VHF Weather Broadcast Station Memory Channel Bank, and can receive the broadcast or the weather alert by recalling or scan- ning a desired channel. The following channels are stored in the transceiver weather station memory bank: Channel No. -
Page 20: Arts (Automatic Range Transponder System)
ARTS (Automatic Range Transponder System) The ARTS feature uses DCS signaling to inform both parties when ARTS equipped sta- tions are within communications range. In Range Out of Range • If the signal of the partner station cannot be received for 1 minute 20 seconds, it is judged as “cannot communicate”. -
Page 21: Activating The Arts Feature
5. Rotate the DIAL knob to select “DCS” then press the [SQL back] key. 6. Rotate the DIAL knob to select [25 SQL.COD] then press the DIAL knob. 7. Rotate the DIAL knob to select the same DCS code as the partner station, and then press the DIAL knob. -
Page 22: Arts Polling Time Options
ARTS Polling Time Options The ARTS feature may be programmed to poll in 30 second (default value) or 1 minute intervals. To change the polling interval: 1. Press and hold the [F menu] key. 2. Rotate the DIAL knob to select [03 AR INT] then press the DIAL knob. -
Page 23: Clone
“SND.ING” is displayed on the screen, and data transfer begins. 9. When cloning is completed, the copy destination FTM-6000R/E will automatically restart, and the copy source FTM-6000R/E will change from “SND.ING” to “SND. CMP”. 10. This completes cloning (copying). Turn both transceivers OFF, then disconnect the clone cable. -
Page 24: Connecting An External Device
Connecting an external device A TNC (Terminal Node Controller) may be connected to the transceiver to enable packet communications. z Preparation • TNC • Computer • Data cable* (Prepare a cable suitable for the connected device.) *The following optional products are available. z Data cable “CT-164”... - Page 25 z Data cable “CT-167” (MDIN 10 pin ←→ MDIN 6 pin) To the TNC etc. To the transceiver PKD (packet data input) Brown PKD (packet data input) À À Black thick wire Á Á PSK (PTT) PSK (PTT) Â Â RX 9600 (9600 bps packet data output) Orange RX 9600 (9600 bps packet data output)
-
Page 26: Using Menu List
Using Menu List The Menu List Mode permits configuring the various functions to accommodate individu- al operating needs and preferences. Menu List Operation 1. Press and hold the [F menu] key. The Menu list will be displayed. 2. Rotate the DIAL knob to select the desired item in the Menu list, then press the DIAL knob. -
Page 27: Tables Of Menu List Operations
Tables of Menu list Operations Number / Selectable options Description Menu Item (Options in bold are the default settings) Enables/Disables the Automatic Power 01: APO OFF / 0.5H 1.0H / 1.5H / 2.0H to 12.0H Off feature OFF / IN RNG / OUTRNG 02: AR MOD Select the ARTS Beep mode Select the Polling Interval during ARTS... - Page 28 Number / Selectable options Description Menu Item (Options in bold are the default settings) 21: RPT.OTR Activate/Deactivate the Automatic Re- RPT.ARS OFF / ON peater Shift feature 0.00 - 99.95 (MHz) RPT.FRQ Set the magnitude of the Repeater Shift (Depends on the transceiver version.) 22: SCN.ON Engages the Scan operation 23: SCN.TYP...
-
Page 29: Apo
01 APO Set the Automatic Power-Off feature The transceiver can be set to automatically power OFF when there is no operation for a period. Does not turn the power OFF automatically. 0.5 H / 1.0H / 1.5H / Turns the power OFF when no operation is performed for a specified time. -
Page 30: Beep
05 BEEP Set the volume of the Beep Adjust the Beep Volume. The beep does not sound. LOW / HIGH LOW (minimum) / HIGH (maximum) Rotating the DIAL knob each time sounds beep for checking the volume. 06 BELL Set the number of times the bell rings Set the Bell sound to alert when a call from another station contains a corresponding tone, DCS or pager code. -
Page 31: Dt Tx
10 DT TX Transmitting the registered DTMF code To send the DTMF code automatically, select the channel on which the DTMF code to send is registered. For more details, see “Transmitting the registered DTMF code”. ( page 11) 11 DT MEM Select and edit the DTMF auto dialer memory channel. -
Page 32: Pager
15 PAGER Specify the receive & transmit personal Enhanced CTCSS Paging code. Set the pager receive/transmit code to recognize paging stations or transmit calls to other stations. 01 - 05 - 50 Set the Receive or transmit pager code. 01 - 47 - 50 For more details, see “EPCS (Enhanced Paging &... -
Page 33: Rpt.set
20 RPT.SET In the factory default setting, [20 RPT.SET] is registered in the “Function List” that is displayed when the [F menu] key is pressed. Set the Repeater shift direction Set the TX frequency shift direction for repeater use. SIMP No TX frequency offset. -
Page 34: Sql Type
DW RVRT (Turn the “Dual Watch Revert” feature ON or OFF during Dual Receive.) Determines the operation of the PTT switch when pressed during the Dual Watch. When a signal is received on the HOME Channel, duel watch pauses. Press the PTT switch to transmit on the HOME Chan- nel. -
Page 35: Xx.xxf (C)
28 xx.xxF (C) Displays the temperature near the final stage of the transceiver If the temperature is about 50°F (10°C) or less, “LOWTMP” is displayed. 29 TOT Set the timeout timer. Set the transceiver to automatically return to receive mode after transmitting continu- ously for a certain period of time. -
Page 36: Wx Alt
34 WX ALT Set the weather Alert Feature Set the weather Alert Feature to notify of storms and hurricanes, ON or OFF. Disables the Weather Alert Feature. Enables the Weather Alert Feature. 35 BLT ® ® Bluetooth (Setting the Bluetooth ®... - Page 37 Copyright 2021 YAESU MUSEN CO., LTD. All rights reserved. No portion of this manual may be reproduced without the permission of YAESU MUSEN CO., LTD. YAESU MUSEN CO., LTD. Tennozu Parkside Building 2-5-8 Higashi-Shinagawa, Shinagawa-ku, Tokyo 140-0002 Japan YAESU USA 6125 Phyllis Drive, Cypress, CA 90630, U.S.A.