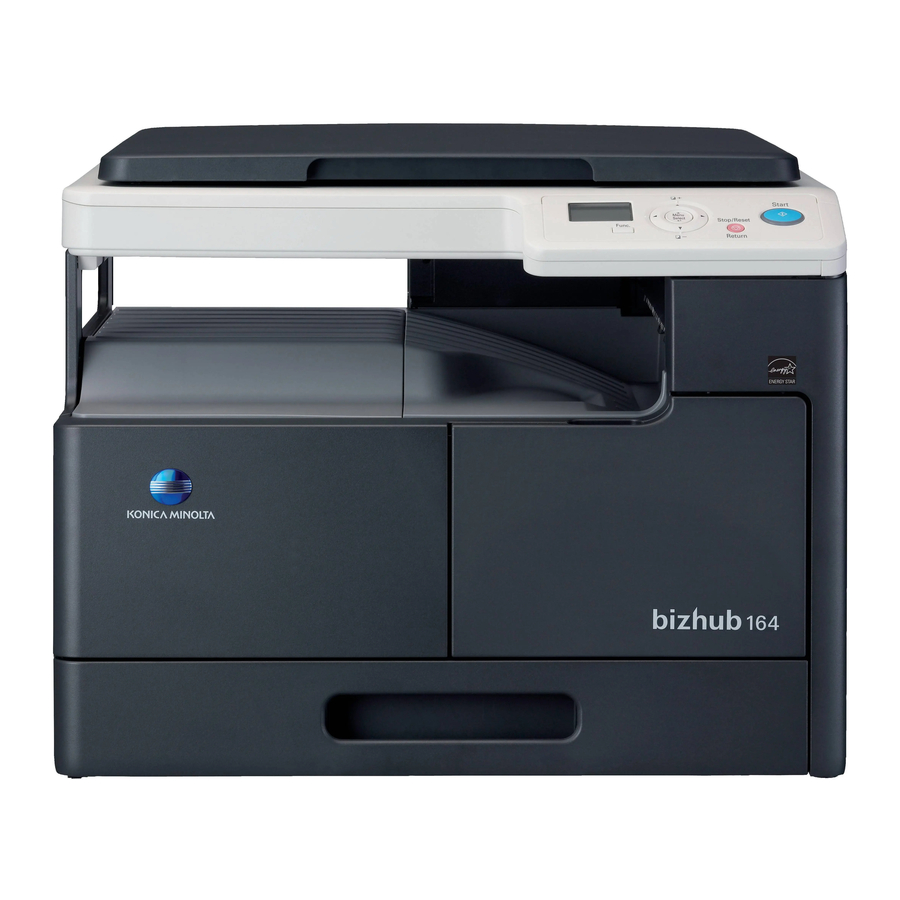
Konica Minolta bizhub 164 Service Manual
Hide thumbs
Also See for bizhub 164:
- Service manual (206 pages) ,
- User manual (138 pages) ,
- Installation manual (6 pages)
Table of Contents
Advertisement
Quick Links
Advertisement
Chapters
Table of Contents

Related Manuals for Konica Minolta bizhub 164


Summary of Contents for Konica Minolta bizhub 164
- Page 1 SERVICE MANUAL THEORY OF OPERATION 2010.04 2010.04 Ver. 1.1 Ver. 1.1...
-
Page 2: Table Of Contents
SAFETY WARNINGS ....................S-2 WARNING INDICATIONS ON THE MACHINE ............S-17 MEASURES TO TAKE IN CASE OF AN ACCIDENT ............S-19 Composition of the service manual ................. C-1 Notation of the service manual ..................C-2 bizhub 164 main body OUTLINE ........................1 COMPOSITION/OPERATION..................9... - Page 3 Blank Page...
-
Page 4: Safety And Important Warning Items
IMPORTANT NOTICE Because of possible hazards to an inexperienced person servicing this product as well as the risk of damage to the product, KONICA MINOLTA BUSINESS TECHNOLOGIES, INC. (hereafter called the KMBT) strongly recommends that all servicing be performed only by KMBT-trained service technicians. -
Page 5: Safety Warnings
[1] MODIFICATIONS NOT AUTHORIZED BY KONICA MINOLTA BUSINESS TECHNOLOGIES, INC. KONICA MINOLTA brand products are renowned for their high reliability. This reliability is achieved through high-quality design and a solid service network. Product design is a highly complicated and delicate process where numerous mechanical, physical, and electrical aspects have to be taken into consideration, with the aim of arriving at proper tolerances and safety factors. - Page 6 SAFETY AND IMPORTANT WARNING ITEMS [2] POWER PLUG SELECTION In some countries or areas, the power plug provided with the product may not fit wall outlet used in the area. In that case, it is obligation of customer engineer (hereafter called the CE) to attach appropriate power plug or power cord set in order to connect the product to the supply.
- Page 7 SAFETY AND IMPORTANT WARNING ITEMS [3] CHECKPOINTS WHEN PERFORMING ON-SITE SERVICE KONICA MINOLTA brand products are extensively tested before shipping, to ensure that all applicable safety standards are met, in order to protect the customer and customer engi- neer (hereafter called the CE) from the risk of injury. However, in daily use, any electrical equipment may be subject to parts wear and eventual failure.
- Page 8 SAFETY AND IMPORTANT WARNING ITEMS Power Plug and Cord WARNING • When using the power cord set (inlet type) that came with this product, make sure the connector is securely inserted in the inlet of the product. When securing measure is provided, secure the cord with the fixture properly.
- Page 9 SAFETY AND IMPORTANT WARNING ITEMS Wiring WARNING • Never use multi-plug adapters to plug multiple power cords in the same outlet. If used, the risk of fire exists. • When an extension cord is required, use a specified one. Current that can flow in the extension cord is limited, so using a too long extension cord may result in fire.
- Page 10 SAFETY AND IMPORTANT WARNING ITEMS Ventilation CAUTION • The product generates ozone gas during operation, but it will not be harmful to the human body. If a bad smell of ozone is present in the following cases, ventilate the room. a.
- Page 11 SAFETY AND IMPORTANT WARNING ITEMS Inspection before Servicing CAUTION • Do not leave the machine unattended during transporta- tion, installation, and inspection of the machine. If it is to be unavoidably left unattended, face protrusions toward the wall or take other necessary risk reducing action. The user may stumble over a protrusion of the machine or be caught by a cable, falling to the floor or being injured.
- Page 12 SAFETY AND IMPORTANT WARNING ITEMS Safety Checkpoints WARNING • When mounting an option on the machine, be careful about the clearance between the machine and the option. You may be injured with your finger or hand pinched between the machine and the option. •...
- Page 13 SAFETY AND IMPORTANT WARNING ITEMS Safety Checkpoints WARNING • Before disassembling or adjusting the write unit (P/H unit) incorporating a laser, make sure that the power cord has been disconnected. The laser light can enter your eye, leading to a risk of loss of eyesight.
- Page 14 SAFETY AND IMPORTANT WARNING ITEMS Handling of Consumables WARNING • Toner and developer are not harmful substances, but care must be taken not to breathe excessive amounts or let the substances come into contact with eyes, etc. It may be stimulative.
- Page 15 SAFETY AND IMPORTANT WARNING ITEMS [4] Laser Safety • This is a digital machine certified as a Class 1 laser product. There is no possibility of danger from a laser, provided the machine is serviced according to the instruction in this manual.
- Page 16 SAFETY AND IMPORTANT WARNING ITEMS All Areas CAUTION • Use of controls, adjustments or performance of procedures other than those specified in this manual may result in hazardous radiation exposure. semiconductor laser Maximum power of the laser diode 7 mW Wavelength 770 - 800 nm Denmark...
- Page 17 SAFETY AND IMPORTANT WARNING ITEMS VARO! • Avattaessa ja suojalukitus ohitettaessa olet alttiina näkymättomälle laser- säteilylle. Älä katso säteeseen. VARNING! • Osynlig laserstråining när denna del är öppnad och spärren är urkopplad. Betrakta ej stråien. Norway ADVERSEL • Dersom apparatet brukes på annen måte enn spesifisert i denne bruksanvisn- ing, kan brukeren utsettes för unsynlig laserstrålning, som overskrider grensen for laser klass 1.
- Page 18 SAFETY AND IMPORTANT WARNING ITEMS Laser Safety Label • A laser safety label is attached to the inside of the machine as shown below. A0XXP0E501DA S-15...
- Page 19 SAFETY AND IMPORTANT WARNING ITEMS Laser Caution Label • A laser caution label is attached to the outside of the machine as shown below. A0XXP0E502DA PRECAUTIONS FOR HANDLING THE LASER EQUIPMENT • When laser protective goggles are to be used, select ones with a lens conforming to the above specifications.
-
Page 20: Warning Indications On The Machine
SAFETY AND IMPORTANT WARNING ITEMS WARNING INDICATIONS ON THE MACHINE Caution labels shown below are attached in some areas on/in the machine. When accessing these areas for maintenance, repair, or adjustment, special care should be taken to avoid burns and electric shock. CAUTION •... - Page 21 SAFETY AND IMPORTANT WARNING ITEMS High voltage • This area generates high voltage. Be careful not to touch here when the power is turned ON to avoid getting an electric shock. High voltage • This area generates high voltage. Be careful not to touch here when the power is turned ON to avoid getting an electric shock.
-
Page 22: Measures To Take In Case Of An Accident
MEASURES TO TAKE IN CASE OF AN ACCIDENT MEASURES TO TAKE IN CASE OF AN ACCIDENT 1. If an accident has occurred, the distributor who has been notified first must immediately take emergency measures to provide relief to affected persons and to prevent further damage. - Page 23 MEASURES TO TAKE IN CASE OF AN ACCIDENT Blank Page S-20...
-
Page 24: Composition Of The Service Manual
Composition of the service manual This service manual consists of Theory of Operation section and Field Service section to explain the main machine and its corresponding options. Theory of Operation section gives, as information for the CE to get a full understanding of the product, a rough outline of the object and role of each function, the relationship between the electrical system and the mechanical system, and the timing of operation of each part. -
Page 25: Notation Of The Service Manual
Notation of the service manual A. Product name In this manual, each of the products is described as follows: (1) bizhub 164 Main body (2) Microsoft Windows NT 4.0: Windows NT 4.0 or Windows NT Microsoft Windows 2000: Windows 2000... - Page 26 SERVICE MANUAL THEORY OF OPERATION 2010.04 Ver. 1.1...
- Page 27 Revision history After publication of this service manual, the parts and mechanism may be subject to change for improvement of their performance. Therefore, the descriptions given in this service manual may not coincide with the actual machine. When any change has been made to the descriptions in the service manual, a revised version will be issued with a revision mark added as required.
- Page 28 Theory of Operation Ver. 1.1 Apr. 2010 CONTENTS bizhub 164 main body OUTLINE SYSTEM CONFIGURATION................... 1 PRODUCT SPECIFICATIONS ................2 Type ........................2 Functions ......................2 Paper ........................3 Materials ....................... 3 Print volume......................4 Machine specifications..................4 Operating environment ..................4 Print function......................
- Page 29 Theory of Operation Ver. 1.1 Apr. 2010 Drive ........................19 Operation......................20 9.3.1 Toner Replenishing Mechanism..............20 9.3.2 Toner Replenishing Control ................ 21 9.3.3 T/C Recovery Mode..................21 9.3.4 Detection of toner empty condition ............. 22 IMAGING UNIT SECTION ..................23 10.1 Configuration ......................
- Page 30 Theory of Operation Ver. 1.1 Apr. 2010 16.2 Drive ........................39 16.3 Operation ......................40 16.3.1 Up/down control ..................40 16.3.2 Paper feed control ..................41 16.3.3 Paper size detection control................ 41 16.3.4 Remaining paper level detection control ............. 42 MULTI BYPASS SECTION (MB-503) ..............
- Page 31 Theory of Operation Ver. 1.1 Apr. 2010 22.1.2 Operation ....................60 FAN CONTROL..................... 61 23.1 Configuration ...................... 61 23.2 Operation......................61 23.2.1 Function ...................... 61 23.2.2 Fan control ....................61...
-
Page 32: Outline
Theory of Operation Ver. 1.1 Apr. 2010 1. SYSTEM CONFIGURATION OUTLINE SYSTEM CONFIGURATION 1/2 System front view A0XXT1C501AA bizhub 164 Multi bypass tray (MB-503) -
Page 33: Product Specifications
(Values in conditions of paper fed from tray 1 at a room temperature of 23°C and with a rated power source) Processing speed 77 mm/s Copying/printing speed for bizhub 164 16 sheets/min. (Plain paper) multi-copy cycle 7 sheets/min. (Card1/2) (A4, 8... -
Page 34: Paper
Theory of Operation Ver. 1.1 Apr. 2010 2. PRODUCT SPECIFICATIONS Fixed zoom ratios Europe, china Full size: x 1.00 Reduction: x 0.50, x 0.70, x 0.81 Enlargement: x 1.15, x 1.41, x 2.00 Latin america Full size: x 1.00 areas for inch Reduction: x 0.50, x 0.64, x 0.78 Enlargement: x 1.21, x 1.29, x 2.000 Latin america... -
Page 35: Print Volume
2. PRODUCT SPECIFICATIONS Theory of Operation Ver. 1.1 Apr. 2010 Print volume A. bizhub 164 China Average 2,300 prints/month Maximum 12,000 prints/month Non- China Average 1,700 prints/month Maximum 12,000 prints/month Machine specifications Power requirements Voltage AC110 V, AC120-127V, AC220-240V Current... -
Page 36: Print Function
Theory of Operation Ver. 1.1 Apr. 2010 2. PRODUCT SPECIFICATIONS Print function Type Built-in printer controller 32 MB (shared with the copier) Interface USB2.0/1.1 Printer language Print resolution 600 x 600 dpi Printer fonts Windows font Supported OS for printer Windows 2000 Professional (SP4 or later) driver Windows 2000 Server (SP3 or later) -
Page 37: Scan Function
2. PRODUCT SPECIFICATIONS Theory of Operation Ver. 1.1 Apr. 2010 Scan function Scanner Scannable range Same as the copier Scanning 150/300/600 dpi resolution TWAIN Driver TWAIN Driver Supported OS Windows 2000 Professional (SP4 or later) Windows 2000 Server (SP3 or later) Windows XP Home Edition (SP1 or later) Windows XP Professional (SP1 or later) Windows Server 2003, Standard Edition (SP1 or later) -
Page 38: Cross Sectional View
Theory of Operation Ver. 1.1 Apr. 2010 3. CROSS SECTIONAL VIEW CROSS SECTIONAL VIEW Scanner Exit section Fusing unit Toner supply section Imaging unit Transfer section Write section Multiple bypass tray Tray1 A0XXT1C500AA... -
Page 39: Paper Path
4. PAPER PATH Theory of Operation Ver. 1.1 Apr. 2010 PAPER PATH A0XXT1C502AA... -
Page 40: Composition/Operation
Theory of Operation Ver. 1.1 Apr. 2010 5. OVERALL CONFIGRATION COMPOSITION/OPERATION OVERALL CONFIGRATION Control Block Diagram Operation panel High voltage unit Printer control board (PRCB) MB-503 Process (Motor, Sensor, DC power) Control system line Image bus line A0XXT2C501AA... -
Page 41: Image Creation Process
5. OVERALL CONFIGRATION Theory of Operation Ver. 1.1 Apr. 2010 Image creation process [13] Paper exit [1] Photoelectric Fusing [12] conversion [2] IR Image [4] Drum processing [5] Drum charging [3] PH Image [10] Paper separation processing [6] Laser exposure [9] Image transfer [7] Developing [8] Paper feed... -
Page 42: Timing Chart At Print Start
Theory of Operation Ver. 1.1 Apr. 2010 5. OVERALL CONFIGRATION Timing chart at print start A0XXT2C500AA 5.3.1 Process speed • The main body has a process speed of 77 mm/s. • The process speed is not changed according to the size or type of the paper. Instead, the main body controls the intervals between sheets of paper (paper transport timing). -
Page 43: Interface Section
6. INTERFACE SECTION Theory of Operation Ver. 1.1 Apr. 2010 INTERFACE SECTION Configuration A0XXT2C503AA Type [1] USB Port (Type A) USB2.0/1.1 For connection between pc and main body... -
Page 44: Scanner Section
Theory of Operation Ver. 1.1 Apr. 2010 7. SCANNER SECTION SCANNER SECTION Configuration A0XXT2C546AA CIS module (CIS) Scanner motor (M4) A0XXT2C543AA... -
Page 45: Drive
7. SCANNER SECTION Theory of Operation Ver. 1.1 Apr. 2010 Drive A0XXT2C544AA... -
Page 46: Operation
Theory of Operation Ver. 1.1 Apr. 2010 7. SCANNER SECTION Operation 7.3.1 Control when the Start key is pressed 1. If the start key is pressed, the scanner starts a shading sequence from the standby position to shading end position. If any key but start key is pressed, the scanner starts a pre-shading sequence from the standby position to shading end position. -
Page 47: Writing Section
8. WRITING SECTION Theory of Operation Ver. 1.1 Apr. 2010 WRITING SECTION Configuration PH unit A0XXT2C566AA SOS sensor LD board Polygon motor A0XXT2C504AA... -
Page 48: Operation
Theory of Operation Ver. 1.1 Apr. 2010 8. WRITING SECTION Operation 8.2.1 Overview • When a laser beam strikes the polygon mirror, light reflected off the Polygon Mirror is directed at the drum by way of the lens and return mirror. •... -
Page 49: Laser Emission Area
8. WRITING SECTION Theory of Operation Ver. 1.1 Apr. 2010 8.2.2 Laser emission area A. Main scan direction (CD) • The print start position in the CD direction is determined by the CD print start signal (HSYNC) that is output from the printer control board and the width of the media. •... -
Page 50: Toner Supply Section
Theory of Operation Ver. 1.1 Apr. 2010 9. TONER SUPPLY SECTION TONER SUPPLY SECTION Configuration A0XXT2C547AA Drive Toner supply motor A0XXT2C521AA... -
Page 51: Operation
9. TONER SUPPLY SECTION Theory of Operation Ver. 1.1 Apr. 2010 Operation 9.3.1 Toner Replenishing Mechanism • Toner is supplied from the toner bottle to the developer mixing chamber. 1. The toner replenishing motor (M2) turns the coupling, which turns the toner bottle. 2. -
Page 52: Toner Replenishing Control
Theory of Operation Ver. 1.1 Apr. 2010 9. TONER SUPPLY SECTION 9.3.2 Toner Replenishing Control • The amount of toner consumed for the image (number of dots) is calculated for each print during printing. The calculated value is compared with the T/C ratio read by the TCR sensor. -
Page 53: Detection Of Toner Empty Condition
9. TONER SUPPLY SECTION Theory of Operation Ver. 1.1 Apr. 2010 B. T/C recovery sequence B • This sequence is executed when: The front cover or right door is opened and closed in a toner empty condition. Power is turned OFF and ON in a toner empty condition. A Toner Supply command is issued. -
Page 54: Imaging Unit Section
Theory of Operation Ver. 1.1 Apr. 2010 10. IMAGING UNIT SECTION 10. IMAGING UNIT SECTION 10.1 Configuration A0XXT2C548AA Toner conveyance screw/1 Toner scooping screw Cleaning Blade Drum Charge Corona drum Paper Separator Fingers Drum Developing Roller Agitating screw Toner supply screw A0XXT2C511AA TCR sensor board 10.2 Operation... -
Page 55: Imaging Unit Section (Drum)
11. IMAGING UNIT SECTION (Drum) Theory of Operation Ver. 1.1 Apr. 2010 11. IMAGING UNIT SECTION (Drum) 11.1 Configuration Aluminum base Charge transport layer Charge generating A08EC582AA A0XXT2C513AA layer Drum A0XXT2C512AA... -
Page 56: Drive
Theory of Operation Ver. 1.1 Apr. 2010 11. IMAGING UNIT SECTION (Drum) 11.2 Drive Main motor (M1) Drum A0XXT2C514AA 11.3 Operation 11.3.1 Drum drive • The drum is driven by the main motor via a gear train. • The main motor drives not only the drum, but also the image transfer system and paper feed and timing drive systems. -
Page 57: Imaging Unit Section (Charge Corona)
12. IMAGING UNIT SECTION (charge corona) Theory of Operation Ver. 1.1 Apr. 2010 12. IMAGING UNIT SECTION (charge corona) 12.1 Configuration A08EC583AA Charging unit Drum A0XXT2C515AA... -
Page 58: Operation
Theory of Operation Ver. 1.1 Apr. 2010 12. IMAGING UNIT SECTION (charge corona) 12.2 Operation • The surface of the drum is deposited with charge through corona discharge from the drum charge corona. • The grid mesh interposed between the corona wire and the drum ensures that a uniform charge is deposited across the entire surface of the drum. -
Page 59: Imaging Unit Section (Developing)
13. IMAGING UNIT SECTION (developing) Theory of Operation Ver. 1.1 Apr. 2010 13. IMAGING UNIT SECTION (developing) 13.1 Configuration A0XXT2C549AA Developing roller TCR sensor board Toner supply screw Agitating screw A0XXT2C516AA... -
Page 60: Drive
Theory of Operation Ver. 1.1 Apr. 2010 13. IMAGING UNIT SECTION (developing) 13.2 Drive Main motor (M1) Developing roller A0XXT2C517AA... -
Page 61: Operation
13. IMAGING UNIT SECTION (developing) Theory of Operation Ver. 1.1 Apr. 2010 13.3 Operation 13.3.1 Toner flow 1. Toner in the toner bottle is conveyed to the toner supply port of the developing unit via toner conveying screw/2. 2. The toner is conveyed to the rear side of the main body by the agitating screw and to the front side of the main body by the toner supply screw. -
Page 62: Developing Bias
Theory of Operation Ver. 1.1 Apr. 2010 13. IMAGING UNIT SECTION (developing) 13.3.2 Developing Bias • Vb (-DC, AC) is applied to the developing roller. • Vb (-DC) is applied to prevent toner from sticking to the background of the image. •... -
Page 63: Transfer/Separation Section
14. TRANSFER/SEPARATION SECTION Theory of Operation Ver. 1.1 Apr. 2010 14. TRANSFER/SEPARATION SECTION 14.1 Configuration A0XXT2C552AA Transfer roller A0XXT2C519AA... -
Page 64: Drive
Theory of Operation Ver. 1.1 Apr. 2010 14. TRANSFER/SEPARATION SECTION 14.2 Drive Drum Main motor (M1) Transfer roller A0XXT2C520AA 14.3 Operation 14.3.1 Transfer voltage output control • A positive charge is applied to the image transfer roller to transfer the toner image formed on the surface of the drum onto the paper. -
Page 65: Paper Separation Control
14. TRANSFER/SEPARATION SECTION Theory of Operation Ver. 1.1 Apr. 2010 14.3.3 Paper Separation control A. Paper neutralization • To neutralize any charge potential left in the paper which has undergone the image trans- fer stage, there is the charge neutralizing plate fitted to the guide plate after the transfer roller. -
Page 66: Toner Collection Section
Theory of Operation Ver. 1.1 Apr. 2010 15. TONER COLLECTION SECTION 15. TONER COLLECTION SECTION 15.1 Configuration Toner collection port A0XXT2C555AA Toner scooping screw Cleaning blade Toner conveyance screw/1 Agitating screw Toner supply screw Toner conveyance screw/2 A0XXT2C522AA... -
Page 67: Drive
15. TONER COLLECTION SECTION Theory of Operation Ver. 1.1 Apr. 2010 15.2 Drive Main motor A0XXT2C523AA... -
Page 68: Operation
Theory of Operation Ver. 1.1 Apr. 2010 15. TONER COLLECTION SECTION 15.3 Operation 15.3.1 Toner collecting path • The cleaning blade is used to scrape residual toner off the surface of the drum. • The toner removed by the cleaning blade is scooped up by the toner scooping screw and conveyed by way of toner conveyance screw/1 and toner conveyance screw/2 onto the developer mixing chamber. -
Page 69: Paper Feed Section (Tray1)
16. PAPER FEED SECTION (Tray1) Theory of Operation Ver. 1.1 Apr. 2010 16. PAPER FEED SECTION (Tray1) 16.1 Configuration A0XXT2C556AA Tray1 empty sensor (PS2) Paper guide (CD) Feed roller Paper lifting plate Paper guide (FD) Paper guide (CD) A0XXT2C525AA... -
Page 70: Drive
Theory of Operation Ver. 1.1 Apr. 2010 16. PAPER FEED SECTION (Tray1) 16.2 Drive Main motor (M1) Tray1 paper feed clutch (CL1) Feed roller A0XXT2C526AA... -
Page 71: Operation
16. PAPER FEED SECTION (Tray1) Theory of Operation Ver. 1.1 Apr. 2010 16.3 Operation 16.3.1 Up/down control • The media lift plate is pressed down into the locked position (in which the media is loaded in position). • Load a media stack and then slide the tray into the main body. This causes the lock release lever to unlock the media lift plate. -
Page 72: Paper Feed Control
Theory of Operation Ver. 1.1 Apr. 2010 16. PAPER FEED SECTION (Tray1) 16.3.2 Paper feed control A. Pick-up control • When the Tray1 paper feed clutch (CL1) is energized, drive from the main motor (M1) is transmitted to the paper feed roller via the paper pick-up clutch and the pick-up roller is rotated. -
Page 73: Remaining Paper Level Detection Control
16. PAPER FEED SECTION (Tray1) Theory of Operation Ver. 1.1 Apr. 2010 16.3.4 Remaining paper level detection control A. Paper empty detection • The Tray1 empty sensor (PS2) detects a paper-empty condition in the drawer. • When paper runs out, the actuator is raised to unblock the tray1 empty sensor and the corresponding message appears on the control panel. -
Page 74: Multi Bypass Section (Mb-503)
Theory of Operation Ver. 1.1 Apr. 2010 17. MULTI BYPASS SECTION (MB-503) 17. MULTI BYPASS SECTION (MB-503) *: Standard on the product shipped to China. 17.1 Configuration A0XXT2C559AA Bypass paper empty sensor (PS3) Bypass pick-up sole- Feed roller noid (SD1) Separation roller Bypass lift sensor (PS4) -
Page 75: Drive
17. MULTI BYPASS SECTION (MB-503) Theory of Operation Ver. 1.1 Apr. 2010 17.2 Drive Main motor (M1) Bypass paper feed clutch (CL3) A0XXT2C528AA... -
Page 76: Operation
Theory of Operation Ver. 1.1 Apr. 2010 17. MULTI BYPASS SECTION (MB-503) 17.3 Operation 17.3.1 Up/down control • The paper lifting plate is raised to press the paper stack on the tray up against the feed roller. • When the bypass paper feed clutch is energized, the cam is rotated to raise the paper lifting plate. -
Page 77: Paper Feed Control
17. MULTI BYPASS SECTION (MB-503) Theory of Operation Ver. 1.1 Apr. 2010 17.3.2 Paper feed control A. Pick-up control • The feed roller is driven by the main motor through the bypass paper feed clutch. • When the bypass paper feed clutch (CL3) is energized, drive from the main motor (M1) is transmitted to the pick-up roller via the paper pick-up clutch and the pick-up roller is rotated. -
Page 78: Remaining Paper Level Detection Control
Theory of Operation Ver. 1.1 Apr. 2010 17. MULTI BYPASS SECTION (MB-503) 17.3.3 Remaining paper level detection control A. Paper empty detection • The bypass paper empty sensor (PS3) detects a paper-empty condition in the drawer. • When paper runs out, the actuator is raised to block the tray1 empty sensor. •... -
Page 79: Registration Section
18. REGISTRATION SECTION Theory of Operation Ver. 1.1 Apr. 2010 18. REGISTRATION SECTION 18.1 Configuration A0XXT2C560AA Registration roller Transfer roller Registration roller Registration sensor A0XXT2C531AA... -
Page 80: Drive
Theory of Operation Ver. 1.1 Apr. 2010 18. REGISTRATION SECTION 18.2 Drive Main motor (M1) Registration clutch (CL1) Registration sensor (PS1) A0XXT2C532AA... -
Page 81: Operation
18. REGISTRATION SECTION Theory of Operation Ver. 1.1 Apr. 2010 18.3 Operation 18.3.1 Registration control • The main motor provides the drive for the registration roller. • The registration roller clutch is connected to the registration roller. When the registration clutch is energized, the driving force of the main motor is transmitted to the registration roller. -
Page 82: Fusing Section
Theory of Operation Ver. 1.1 Apr. 2010 19. FUSING SECTION 19. FUSING SECTION 19.1 Configuration A0XXT2C561AA Thermistor/2 (TH2) Thermistor/1 (TH1) Exit sensor (PS5) Thermostat (TS1) Pressure roller Heat roller Fusing heater lamp A0XXT2C534AA... -
Page 83: Drive
19. FUSING SECTION Theory of Operation Ver. 1.1 Apr. 2010 19.2 Drive • The main motor (M1) provides the drive for the fusing unit. Main motor (M1) A0XXT2C535AA 19.3 Operation 19.3.1 Fusing speed correction A. Heat roller speed control • The heat roller is driven by the main motor. •... -
Page 84: Fusing Temperature Control
Theory of Operation Ver. 1.1 Apr. 2010 19. FUSING SECTION 19.3.3 Fusing temperature control • The fusing heater lamp is turned on and off to keep a set temperature on the surface of the Fusing Roller. • The fusing roller surface temperature is detected by using a thermistor that translates the temperature to a corresponding electrical signal. - Page 85 19. FUSING SECTION Theory of Operation Ver. 1.1 Apr. 2010 A. Temperature control during warm-up • Control is provided until the Heat roller reaches the predetermined level. (1) Control start timing • The power switch is turned ON. • A door is closed. •...
-
Page 86: Protection From Abnormally High Temperature
Theory of Operation Ver. 1.1 Apr. 2010 19. FUSING SECTION 19.3.4 Protection from abnormally high temperature A. First approach: Thermistor protection (Software protection) • The main body determines that there is a condition of an abnormally high temperature when thermistor/1 continuously detects a predetermined temperature or more for a pre- determined period of time or more. -
Page 87: New Article Detection
19. FUSING SECTION Theory of Operation Ver. 1.1 Apr. 2010 19.3.7 New article detection • The fusing unit is not mounted with any new article detection mechanism. • If the fusing unit is replaced with a new one, reset the counter using [CLEAR DATA] of the service mode. -
Page 88: Paper Exit Section
Theory of Operation Ver. 1.1 Apr. 2010 20. PAPER EXIT SECTION 20. PAPER EXIT SECTION 20.1 Configuration A0XXT2C565AA Exit roller Exit roll A0XXT2C537AA... -
Page 89: Drive
20. PAPER EXIT SECTION Theory of Operation Ver. 1.1 Apr. 2010 20.2 Drive Heat roller Main motor (M1) A0XXT2C538AA 20.3 Operation 20.3.1 Conveyance control A. Conveyance path • The exit roller is driven by the main motor. • The media conveyed from the fusing section is fed out into the exit tray. Exit roller Exit roll A0XXT2C539AA... -
Page 90: Image Stabilization Control
Theory of Operation Ver. 1.1 Apr. 2010 21. IMAGE STABILIZATION CONTROL 21. IMAGE STABILIZATION CONTROL 21.1 Configuration • The following image stabilization controls are provided to ensure stabilized copy image. Purpose Means Control The Vg/Vb control voltage is varied to bring Vg/Vb to an appropriate level according to the following settings. -
Page 91: Power Supply Section
22. POWER SUPPLY SECTION Theory of Operation Ver. 1.1 Apr. 2010 22. POWER SUPPLY SECTION 22.1 When the main power switch is turned ON 22.1.1 Configuration Power switch A0XXT2C541AA 22.1.2 Operation • When the main power switch is turned ON, power is supplied from the dc power supply to the following components. - Page 92 Theory of Operation Ver. 1.1 Apr. 2010 23. FAN CONTROL 23. FAN CONTROL 23.1 Configuration DC power supply fan motor (FM5) Ozone filter A0XXT2C542AA 23.2 Operation 23.2.1 Function Motor Name Function (purpose) • A fan motor draws air from the area around the fusing unit to the out- side to prevent the machine interior temperature from running high.
- Page 93 23. FAN CONTROL Theory of Operation Ver. 1.1 Apr. 2010 Blank Page...
- Page 94 © 2010 KONICA MINOLTA BUSINESS TECHNOLOGIES, INC. © 2010 KONICA MINOLTA BUSINESS TECHNOLOGIES, INC. Printed in Japan Printed in Japan Use of this manual should be strictly supervised to Use of this manual should be strictly supervised to DDA0XX-M-TE1 DDA0XX-M-TE1 avoid disclosure of confidential information.