Table of Contents
Advertisement
Available languages
Available languages
Quick Links
Advertisement
Chapters
Table of Contents

Related Manuals for BEMIS bioBidet HD-5000


Summary of Contents for BEMIS bioBidet HD-5000
- Page 1 HD-5000 BIDET SEAT OWNER’S MANUAL Manual del Propietario...
-
Page 2: Table Of Contents
TABLE OF CONTENTS PRODUCT INFORMATION Main Unit & Parts............4 Product Diagram............5 PRODUCT INSTALLATION Pre-Installation............6 Installation..............8 Water Connection............12 Operation..............16 Night Light Instructions.........17 PRODUCT MAINTENANCE Cleaning & Maintenance........20 Troubleshooting............22 Specifications............24 WARRANTY Warranty..............25... -
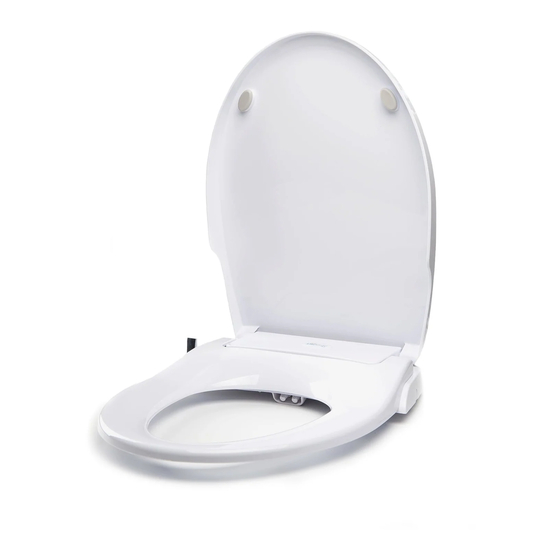
Page 3: Main Unit & Parts
MAIN UNIT & PARTS PRODUCT DIAGRAM Method 1 Method 2 NOTE: There are two methods for installation. The recommended way is using the rubber expansion nuts. The second option is using the butterfly nuts. Please select the option best suited for your specific installation needs. -
Page 4: Pre-Installation
PRE-INSTALLATION Please make sure you read the instructions carefully and install it properly. 3. Example of how the bolts fit through the mounting brackets and how they are placed onto the catch plate and secured to Caution the toilet. 1. The water pressure limit is from 10 to 110 PSI. Please use as instructed. 2. -
Page 5: Installation
INSTALLATION First Installation Method (Recommended) 1. Completely remove the 2. Install expansion nuts. 3. Attach the catch plate. 4. Install the bidet seat. old toilet seat and lid. • Be sure to firmly press down • Attach the catch plate in the •... - Page 6 INSTALLATION (CONT.) Second Installation Method 1. Remove the old 2. Attach the catch plate. 3. Install the bidet seat, line toilet seat. up the bidet with the • Put the catch plate over catch plate, you will hear the toilet seat mounting the seat click into place.
-
Page 7: Water Connection
WATER CONNECTION 1. Close the water supply 2. Unscrew the water 3. Attach the T-valve to the 4. Re-attach the water valve. Flush the toilet. supply hose from the water tank where you supply hose to the water tank. Place a towel removed the water supply bottom of the T-valve. - Page 8 WATER CONNECTION (CONT.) 5. Connect the bidet 6. Slowly open the water 7. Wipe the hoses and connectors thoroughly with a towel and supply hose. valve to check if there is carefully observe for any leaks for at least 10 minutes. any leakage.
-
Page 9: Operation
OPERATION NIGHT LIGHT INSTRUCTIONS 1. Installing the battery Stop • Return the lever to the upright • Remove the battery pack. • Insert 4AA batteries, and put position to turn it off. the battery pack in the control box. Replace the cover firmly. Bidet (Front Feminine Wash) •... - Page 10 NIGHT LIGHT INSTRUCTIONS (CONT.) 2. Instructions 3. Replacing the battery. Operation • Insert the battery pack back • When the light turns red please • Press the button once to activate the night light. into the bidet seat. replace the battery. •...
-
Page 11: Cleaning & Maintenance
CLEANING & MAINTENANCE 1. Cleaning the exterior of 2. Cleaning the 3. Clean the filter 4. Remove the main body. the bidet seat. spray nozzles. and regulator. • Using a sponge/cloth with • Pull out the nozzle softly • Turn off the water supply, •... -
Page 12: Troubleshooting
TROUBLESHOOTING If any failure still occurs after above troubleshooting, please Status Cause Solution contact support@biobidet.com or call 847.458.2334. Water is too Low water pressure of During use, turn the lever low during the unit. forward or backward to WASH/BIDET highest setting Do not disassemble, repair, or remodel the unit, as this will void the warranty. -
Page 13: Specifications
SPECIFICATIONS WARRANTY Your product is warranted against defects in materials or workmanship for Classifications Description one (1) year from the date of original purchase. Defective parts or a defective Model Number Sta-Clean Bidet Seat product returned to Bio Bidet Innovation LLC will be repaired with new or comparable rebuilt parts by Bio Bidet Innovation LLC at their sole discretion. - Page 14 WARRANTY (CONT.) No implied warranty, included any implied warranty of merchantability or Thank You fitness or a particular purpose, applies to Bio Bidet Innovation LLC after the applicable period of the express limited warranty stated above, and no other express warranty or guarantee, except as mentioned above, given by any person or entity with respect to Bio Bidet Innovation LLC shall bind Bio Bidet Innovation LLC, (some states and provinces do not allow limitations of the length of an implied warranty) so the above limitation may not apply...
- Page 15 Español...
- Page 16 TABLA DE CONTENIDO INFORMACIÓN DEL PRODUCTO Unidad principal y piezas........32 Diagrama de producto.........33 INSTALACION DEL PRODUCTO Preinstalación............34 Instalación..............36 Conexión de agua...........42 Operación..............44 Instrucciones para la luz nocturna....45 MANTENIMIENTO DEL PRODUCTO Limpieza y mantenimiento........48 Solución de problemas........50 Especificaciones............52 GARANTÍA Garantía...............53...
-
Page 17: Unidad Principal Y Piezas
UNIDAD PRINCIPAL Y PIEZAS DIAGRAMA DEL PRODUCTO Pestaña de liberación del asiento Paquete de baterías Control de luz nocturna Entrada de agua metálica y compartimento Método 1 a la izquierda para batería 2 pernos de 2 tuercas de 2 soportes de placa de retención montaje metálicos expansión de goma... -
Page 18: Preinstalación
PRE-INSTALACIîN Asegúrese de leer las instrucciones detenidamente e instalarlo correctamente. 3. Ejemplo de cómo encajan los pernos a través de los soportes de montaje y cómo se colocan en la placa de retención y se Precaución aseguran al sanitario. 1. El límite de presión del agua es de 10 a 110 PSI. Utilice según las instrucciones. 2. -
Page 19: Instalación
INSTALACIîN Primer método de instalación (recomendado) 1. Retire completamente 2. Instale las tuercas 3. Coloque la placa 4. Instale el asiento del el asiento y la tapa del de expansión. de retención. bidet. sanitario viejo. • Asegúrese de presionar • Coloque la placa de retención •... - Page 20 INSTALACIîN (CONTINUACIîN) Segundo método de instalación 1. Quitar el viejo asiento 2. Coloque la placa 3. Instale el asiento del del baño. de retención. bidet, alinee el bidet con la placa de retención, • Ponga la placa de retención escuchará que el asiento en los orificios de montaje del encaja en su lugar.
-
Page 21: Conexión De Agua
CONEXIîN DE AGUA 1. Cierre la válvula de 2. Desenrosque la manguera 3. Conecte la válvula en 4. Vuelva a conectar la suministro de agua. de suministro de agua del T al tanque de agua manguera de suministro Descargue el baño. tanque de agua. - Page 22 CONEXIîN DE AGUA (CONTINUACIîN) 5. Conecte el bidet a la 6. Abra lentamente la 7. Limpie las mangueras y los conectores a fondo con una manguera de suministro. válvula de agua para toalla y observe cuidadosamente si hay fugas durante al comprobar si hay menos 10 minutos.
- Page 23 OPERACIîN INSTRUCCIONES DE LUZ NOCTURNA Detener 1. Instalación de la batería • Regrese la palanca a la posición • Retire la batería. • Inserte 4 baterías AA y coloque vertical para apagarla. el paquete de baterías en la caja de control. Vuelva a colocar la tapa firmemente.
-
Page 24: Operación
INSTRUCCIONES DE LUZ NOCTURNA (CONTINUACIîN) 1. Instrucciones 2. Reemplazo de la batería. Operación • Presione el botón una vez para activar la luz nocturna. • Inserte la batería nuevamente • Cuando la luz se ponga roja, en el asiento del bidet. reemplace la batería. -
Page 25: Limpieza Y Mantenimiento
LIMPIEZA Y MANTENIMIENTO 1. Limpieza del exterior del 2. Limpieza de las boquillas 3. Limpie el filtro 4. Retire el cuerpo principal. asiento del bidet. de pulverización. y regulador. • Utilizando una esponja / trapo • Saque la boquilla suavemente •... -
Page 26: Solución De Problemas
SOLUCIîN DE PROBLEMAS Si se produce alguna falla aún después de la solución de problemas Estado Causa Solución anterior, por favor póngase en contacto con support@biobidet.com El agua es Baja presión de agua de Durante el uso, gire la palanca o llame al 847.458.2334. -
Page 27: Especificaciones
ESPECIFICACIONES GARANTêA Su producto está garantizado contra defectos de materiales o mano de Clasificaciones Descripción obra durante un (1) año a partir de la fecha de compra original. Las piezas defectuosas o un producto defectuoso devuelto a Bio Bidet Innovation LLC Número de modelo Asiento para bidet HD-5000 serán reparadas con piezas reconstruidas nuevas o comparables por Bio Bidet... - Page 28 Ninguna garantía implícita, incluida cualquier garantía implícita de comerciabilidad o idoneidad o un propósito en particular, se aplica a Bio Bidet Innovation LLC después del período aplicable de la garantía limitada expresa establecida anteriormente, y ninguna otra garantía expresa o garantía, excepto como se mencionó...
- Page 29 Gracias Soporte técnico / Servicio al cliente 7900 S Route 31 Crystal Lake, IL 60014 T: 847.458.2334 U.S. TOLL FREE: 877.339.5214 support@biobidet.com www.biobidet.com...