Table of Contents
Advertisement
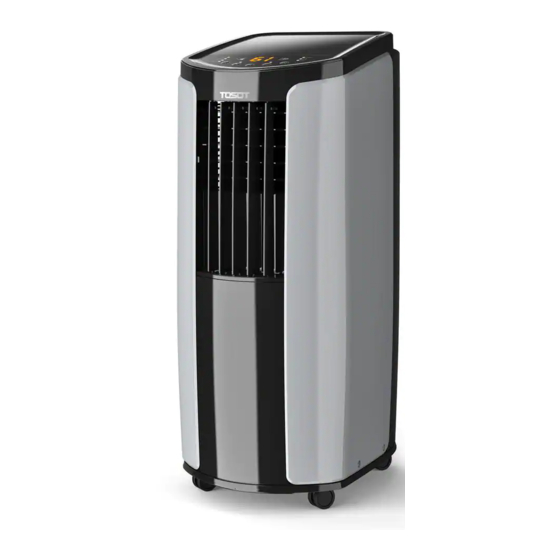
P O R TA B L E A I R C O N D I T I O N E R
OWNER'S MANUAL
MODELS : GPC05AK-A3NNA2B
GPC06AK-A3NNA2B
Thank you for choosing our product. Please read this owner's manual
carefully before operation and retain it for future reference.
TOLL-FREE : 1 866 680-4733
www.gree.ca
Saint-Mathieu-de-Beloeil (Quebec) Canada
Made in China
042021
© Copyright, GREE Canada, 2021
Advertisement
Table of Contents

Related Manuals for Gree GPC05AK-A3NNA2B


Summary of Contents for Gree GPC05AK-A3NNA2B
- Page 1 MODELS : GPC05AK-A3NNA2B GPC06AK-A3NNA2B Thank you for choosing our product. Please read this owner’s manual carefully before operation and retain it for future reference. TOLL-FREE : 1 866 680-4733 www.gree.ca Saint-Mathieu-de-Beloeil (Quebec) Canada Made in China 042021 © Copyright, GREE Canada, 2021...
-
Page 2: Table Of Contents
Children should be supervised to ensure that they do not play with the appliance. © Copyright, GREE Canada, 2021... -
Page 3: Operation Environment
• This air conditioner is equipped with castors. Castors should slide at smooth and flat ground. • Prohibit inclining or turning over the air conditioner. If there's abnormity, please disconnect power immediately and contact dealer. • Avoid direct sunshine. 12 INCHES 12 INCHES © Copyright, GREE Canada, 2021... -
Page 4: Safety Warning
• Do not put or hang dripping objects above the air conditioner. • Do not repair or disassemble the air conditioner by yourself. • Prohibit inserting any objects into the air conditioner. • Do not use an extension cord © Copyright, GREE Canada, 2021... -
Page 5: Part's Name
Joint A Heat discharge pipe Joint B+C Remote controller This picture is only for reference. Please refer to the actual product for the appearance. NOTICE: Heat discharge pipe and other installation accessories can't be discarded. © Copyright, GREE Canada, 2021... -
Page 6: Operation Introduction For Control Panel
OPERATION INTRODUCTION FOR CONTROL PANEL NAME OF CONTROL PANEL OPERATION OF CONTROL PANEL © Copyright, GREE Canada, 2021... - Page 7 1 hour, and by 2 degrees within 2 hours; the unit will maintain this temperature. The Sleep function is not available under fan, drying or auto mode. If the sleep function is activated, the upper indicator will display. © Copyright, GREE Canada, 2021...
-
Page 8: Buttons On Remote Controller
BUTTONS ON REMOTE CONTROLLER INTRODUCTION FOR ICONS ON DISPLAY SCREEN © Copyright, GREE Canada, 2021... -
Page 9: Introduction For Buttons On Remote Controller
INTRODUCTION FOR BUTTONS ON REMOTE CONTROLLER © Copyright, GREE Canada, 2021... - Page 10 © Copyright, GREE Canada, 2021...
-
Page 11: Function Introduction For Combination Buttons
Under switch-on or switch-off state, you may hold "+"and " " buttons simultaneously for 3 seconds to set the lamp on or off and send the code. After being energized the lamp is defaulted on. REPLACEMENT OF BATTERIES IN REMOTE CONTROLLER © Copyright, GREE Canada, 2021... -
Page 12: Clean And Maintenance
• The filter should be cleaned about once every three months. If there's much dust in the operation environment, you can increase clean frequency. • Do not dry the filter with fire or hair drier. Otherwise, it may be deformed or catch fire. © Copyright, GREE Canada, 2021... - Page 13 • Many packing materials are recyclable materials. Please deal with them through local recycle bin. • If you want to throw away the air conditioner, please contact local division or consultant service center for the correct disposal method. © Copyright, GREE Canada, 2021...
-
Page 14: Malfunction Analysis
If the power is low, controller is not controller low? please replace the batteries. sensible. Move the remote controller close to air conditioner. Whether there’s fluorescence lamp in the room? Turn off the fluorescence lamp and try it again. © Copyright, GREE Canada, 2021... - Page 15 Heat expansion or shrinkage The device Whether the unit is turned on for the panel due to change makes a knock or turned off just now? of temperature, which cause sound friction sound. © Copyright, GREE Canada, 2021...
- Page 16 Abnormal sound during operation. Off-flavor. Water leakage • Do not repair or refit the air conditioner by yourself. • If operate the air conditioner under abnormal condition, it may cause malfunction, electric shock or fire hazard. © Copyright, GREE Canada, 2021...
-
Page 17: Installation Precaution
8. The yellow-green wire or green wire in air conditioner is grounding wire, which can't be used for other purposes. 9. The grounding resistance should comply with national electric safety regulations. 10. The appliance shall be installed in accordance with national wiring regulations. © Copyright, GREE Canada, 2021... -
Page 18: Preparation Before Installation
PREPARATION BEFORE INSTALLATION © Copyright, GREE Canada, 2021... -
Page 19: Installing Wire Hook
• Assemble the wire hook at the back of the unit with screws (the direction of wire hook is as shown in following fig). Direction of wire hook is upward Wire hook Screw Direction of wire hook is downward • Wind the power cord around the wire hook. © Copyright, GREE Canada, 2021... -
Page 20: Removing Collected Water
4. Put the rubber plug into the other side of drainage pipe, fix it with pipe hoop and then fix it in the drainage pipe clip. Rubber plug Pipe hoop Drainage pipe clip Drainage pipe Pipe hoop © Copyright, GREE Canada, 2021... - Page 21 • Put back the rubber plug onto drainage pipe after finishing discharging water and then fix the pipe on the clip; • After full water protection is eliminated and the compressor has been stopped for 3 minutes, the unit will resume operation. © Copyright, GREE Canada, 2021...
- Page 22 Empty water in the chassis if shut off occurs, then check portable location and hose for proper setup. © Copyright, GREE Canada, 2021...
-
Page 23: Installation In A Double-Hung Sash Window
Joint B+C Inner side 3. Fix the protective grille on joint B+C with 2 screws. Protective grille 4. Fix the support on the outer side of window frame with 2 nuts, spring washer, washer and bolt. © Copyright, GREE Canada, 2021... - Page 24 (2) Open the window sash and place the window panel on the window stool. (3) Secure the window panel to the window stool with 2 screws. Window panel assembled Window panel Adjustment panel <20.5" Window stool © Copyright, GREE Canada, 2021...
- Page 25 37.4” (950mm) 37.4” 37.4 56.7” (1440mm) 37.4” ~ 56.7” © Copyright, GREE Canada, 2021...
-
Page 26: Installation In A Sliding Sash Window
1. Install rear clip: Aim the rear clip (upper) at the rear clip (lower), fix them toge ther, firmly press the clasp into the groove. Rear connector (upper) Clasp Rear connector (lower) 2. Clamp joint B+C into the inner side of window frame along the direction of arrow. © Copyright, GREE Canada, 2021... - Page 27 5. Fix the support on the outer side of window frame with 2 nuts, spring washer, washer and bolt. Screws Rain shield Washer Spring washer NOTE: protective grille, support, rain shield, nut, bolt, spring washer and washer are optional accessories; some models are without these accessories. © Copyright, GREE Canada, 2021...
- Page 28 37.4 950 © Copyright, GREE Canada, 2021...
- Page 29 37.4 56.7 1440 37.4” ~ 56.7” © Copyright, GREE Canada, 2021...
- Page 30 11. Fix the inner window with window bracket and screw, so that it can not slide horizontally. Plastic window Window Window sash Outer window bracket Sponge A Wooden window © Copyright, GREE Canada, 2021...
-
Page 31: Installation Of Heat Discharge Pipe
Heat discharge pipe Join A 3. Insert joint A of heat Clasp discharge pipe (the The side with "TOP" is upwards side with "TOP" is upwards) into the groove until you hear a sound. Groove © Copyright, GREE Canada, 2021... - Page 32 • The length of the heat discharge pipe is less than 1m. It is recommended to use it with shortest length. • When installing, the heat discharge pipe should be as flat as possible. Don't extend the pipe or connect it with other heat discharge pipe. © Copyright, GREE Canada, 2021...
- Page 33 1. Remove joint A: 2. Remove heat discharge pipe Press the clasp and lift joint A from protective grille upwards to remove it. sub-assy. Clasp Upward Joint A Disassemble Heat discharge pipe Anticlockwise Joint A © Copyright, GREE Canada, 2021...
-
Page 34: Operation Test
• Press mode button to select auto, cooling, drying fan or heating function, and then check if the unit operates normally. • If ambient temperature is below 61°F(16°C), the unit can’t operate in cooling mode. © Copyright, GREE Canada, 2021... -
Page 35: Electric Schematic Diagram
ELECTRIC SCHEMATIC DIAGRAM © Copyright, GREE Canada, 2021... -
Page 36: Warranty
Note: The internal compressor is covered by a 5-year limited warranty. During the warranty period, if this Air Conditioner fails under normal use, GREE will, at its option, either repair the unit or replace it, free of charge, within a reasonable period of time after the Air Conditioner is returned.