Advertisement
Quick Links
Statement of Responsibilities
This document is for use by experienced and trained Qualified Cleveland Range, LLC Authorized Service
Representatives who are familiar with both the safety procedures, and equipment they service.
Cleveland Range, LLC assumes no liability for any death, injury, equipment damage, or property damage
resulting from use of, improper use of, or failure to use the information contained in this document.
Cleveland Range, LLC has made every effort to provide accurate information in this document, but
cannot guarantee that this document does not contain unintentional errors and omissions.
The information in this document may be subject to technical and technological changes, revisions, or
updates.
Cleveland Range, LLC assumes no liability or responsibility regarding errata, changes, revisions, or
updates.
Qualified Cleveland Range, LLC Authorized Service Representatives are obligated to follow industry
standard safety procedures, including, but not limited to, OSHA regulations, and disconnect / lock out /
tag out procedures for all utilities including steam, and disconnect / lock out / tag out procedures for gas,
electric, and steam powered equipment and / or appliances
All utilities (gas, electric, water and steam) should be turned OFF to the equipment and locked out of
operation according to OSHA approved practices during any servicing of Cleveland Range equipment
Qualified Cleveland Range, LLC Authorized Service Representatives are obligated to maintain up-to-date
knowledge, skills, materials and equipment.
Advertisement

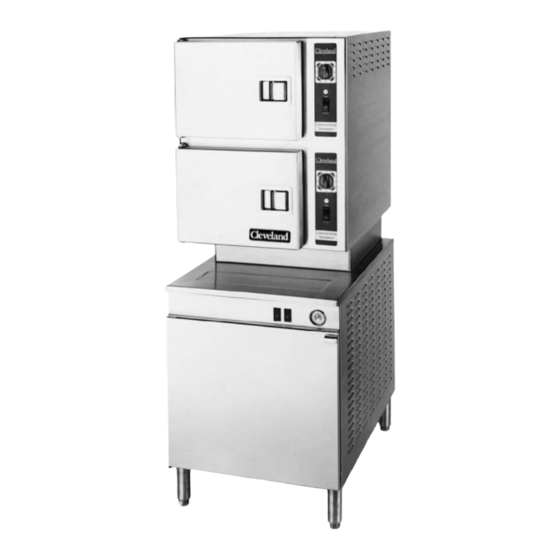
Related Manuals for Cleveland 24-CGM-200


Summary of Contents for Cleveland 24-CGM-200
- Page 1 Statement of Responsibilities This document is for use by experienced and trained Qualified Cleveland Range, LLC Authorized Service Representatives who are familiar with both the safety procedures, and equipment they service. Cleveland Range, LLC assumes no liability for any death, injury, equipment damage, or property damage resulting from use of, improper use of, or failure to use the information contained in this document.
-
Page 2: Electronic Timer
3. When the timer counts down in the timed position: • 115 VAC is removed from the condensate circuit. • 115 VAC is removed from the steam solenoid. 4. The unit is turned off by depressing the red rocker switch. CLEVELAND RANGE SEQUENCE OF OPERATIONS Convection Top Electronic Timer... -
Page 4: Mechanical Timer
• 115 VAC is sent to the 3-second timer • 115 VAC is sent from the 3-second timer to the buzzer for 3 seconds. 4. The unit is turned off by depressing the red rocker switch. CLEVELAND RANGE SEQUENCE OF OPERATIONS Convection Top... - Page 6 Cleveland Range, LLC 1333 East 179th St., Cleveland, Ohio, U.S.A. 44110 Ph: 1-216-481-4900 Fx: 1-216-481-3782 Visit our Web Site at www.clevelandrange.com...
- Page 7 The inital stage for L.P. boiler base is 2.5” W.C. A spark is generated at the igniter. The gas is ignited and the flame rectifies the AC current. The ignition module reads 1.5 micro amps DC current through the ground wire. CLEVELAND RANGE SEQUENCE OF OPERATIONS Gas Boiler Base...
- Page 8 If the module does not read 1.5 micro amps DC in 4 seconds it will lock out. When the ignition module locks out 24 VAC is sent to the buzzer from the alarm terminal on the module. The gas valve continues to open to 3.5” water column in 6-8 seconds for natural gas boiler base and 10”...
- Page 9 The R1B relay contacts close sending power through the normally closed operating pressure switch to the 24 VAC transformer. 24 VAC is sent to the ignition module. CLEVELAND RANGE SEQUENCE OF OPERATIONS Gas Boiler Base...
- Page 10 4. With 24 VAC to the ignition module, 24 VAC is sent to the gas valve. The gas valve is energized. The gas valve opens to the initial stage sending gas to the burner. The initial stage Natural gas pressure for the 200 BTU boiler base is 1.2” W.C. The initial stage Natural gas pressure for the 300 BTU boiler base is .75”W.C.
- Page 14 PROBLEM: Gas Boiler won't build pressure Steamer won't fill. Is the red "LOW Water" light on Replace the with a jumper from water board. terminals LOW and C on the water board? Repair or Replace the probe circuit. Replace the water board Is there 120 VAC between terminals...
- Page 15 PROBLEM: Gas boiler won't fill Replace the wiring to the fill solenoid. Replace the fill solenoid Does the steamer have Replace wiring the optional to drain intermittent solenoid. blowdown timer? Replace the there 120 VAC wiring to the between terminals intermittent 2&3 on the timer? blowdown...
- Page 16 PROBLEM: Gas boiler won't ignite Supply gas to Is there gas to the the Steamer. unit? Replace the gas valve. Replace the fill Boiler won't heat. start Is there 24 VAC to the ignition module? With spark and gas there should be fire.
- Page 17 PROBLEM: Gas Boiler Over Pressurizes (15# Safety Replace valve opens) operating pressure switch Replace the safety valve. PROBLEM: Gas Boiler Stops Producing Steam Boiler stops steaming ignition module Does the amber has gone into light in the reset lockout. See switch come on? Boiler won't ignite...
- Page 18 DESCALE PROCEDURE FOR TWO & THREE PROBE GENERATOR BASE STEAMERS STEP BY STEP PROCEDURE IMPORTANT WARNING: BEFORE REMOVING THE HAND HOLE PLATE TO DESCALE ANY STEAM GENERATOR, MAKE SURE THERE IS NO WATER OR PRESSURE BUILT UP IN THE GENERATOR. CHECK THE OUTER SURFACE OF THE GENERATOR TO MAKE SURE IT IS COLD.
- Page 19 descaling agent. REMEMBER TO MOVE THE YELLOW HANDLE ON THE WATER FILL VALVE TO ALIGN WITH THE VALVE BODY. Before applying the descaler, turn on the power switch to close the drain valve. This will also energize the fill valve. STEP #3 Using a funnel and tubing, pour the liquid descaler into the generator through the port the safety relief valve was removed from.
- Page 20 STEP #8 Bring the steamer up to pressure by pressing the red power switch to fill the generator and then the amber switch when the light comes on. After twenty (20) minutes the generator should have steam in it. Check for steam leaks around the hand hole.
- Page 21 1333 East 179 Street Cleveland, Ohio 44110 Phone: (216) 481- 4900 Fax: (216) 481- 3782...