Advertisement
Quick Links
Download this manual
See also:
Owner's Manual
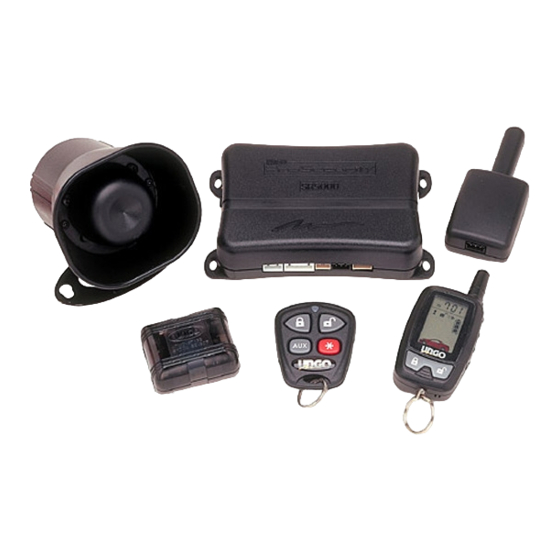
Model S660
installation guide
P P r r o o S S e e c c u u r r i i t t y y
NOTE:
This product is intended for installation by a professional installer only!
Any attempt to install this product by any person other than a trained professional
may result in severe damage to a vehicle's electrical system and components.
Advertisement

Related Manuals for Clarion ProSecurity S660


Summary of Contents for Clarion ProSecurity S660
- Page 1 Model S660 installation guide P P r r o o S S e e c c u u r r i i t t y y NOTE: This product is intended for installation by a professional installer only! Any attempt to install this product by any person other than a trained professional...
- Page 3 t t a a b b l l e e o o f f c c o o n n t t e e n n t t s s w w a a r r n n i i n n g g ! ! s s a a f f e e t t y y f f i i r r s s t t ..........4 4 i i n n s s t t a a l l l l a a t t i i o o n n p p o o i i n n t t s s t t o o r r e e m m e e m m b b e e r r .
- Page 4 w w a a r r n n i i n n g g ! ! s s a a f f e e t t y y f f i i r r s s t t The following safety warnings must be observed at all times: ■...
- Page 5 d d e e c c i i d d i i n n g g o o n n c c o o m m p p o o n n e e n n t t l l o o c c a a t t i i o o n n s s l l o o c c a a t t i i o o n n s s f f o o r r t t h h e e s s i i r r e e n n S S o o m m e e t t h h i i n n g g s s t t o o r r e e m m e e m m b b e e r r a a b b o o u u t t m m o o u u n n t t i i n n g g t t h h e e s s i i r r e e n n : : ■...
- Page 6 ■ The higher the control module is in the vehicle, the better the transmitter range will be. If you put the control module under a seat or inside a metal dashboard, range will diminish. Some good control module locations: above the glove box, inside the center console, above the under-dash fuse box, above the radio, etc.
- Page 7 l l o o c c a a t t i i o o n n s s f f o o r r v v a a l l e e t t / / p p r r o o g g r r a a m m s s w w i i t t c c h h I I M M P P O O R R T T A A N N T T ! ! When the vehicle is delivered, please show the user where this switch is located and how to disarm the system with it.
- Page 8 l l o o c c a a t t i i o o n n s s f f o o r r t t h h e e o o p p t t i i o o n n a a l l s s t t a a r r t t e e r r k k i i l l l l r r e e l l a a y y If optional starter kill relay or its connections are immediately visible upon removal of the under-dash panel, they can easily be bypassed.
- Page 9 f f i i n n d d i i n n g g t t h h e e 1 1 2 2 V V s s w w i i t t c c h h e e d d i i g g n n i i t t i i o o n n w w i i r r e e The ignition wire is powered when the key is in the run or start position.
- Page 10 f f i i n n d d i i n n g g a a ( ( + + ) ) p p a a r r k k i i n n g g l l i i g g h h t t w w i i r r e e The (+) parking light wire is often found near the switch.
- Page 11 f f i i n n d d i i n n g g t t h h e e d d o o o o r r p p i i n n s s w w i i t t c c h h c c i i r r c c u u i i t t T T h h e e b b e e s s t t p p l l a a c c e e s s t t o o f f i i n n d d t t h h e e d d o o o o r r s s w w i i t t c c h h w w i i r r e e a a r r e e : : ■...
- Page 12 m m a a k k i i n n g g y y o o u u r r w w i i r r i i n n g g c c o o n n n n e e c c t t i i o o n n s s Before making your connections, plan how your wires will be routed through the vehicle.
- Page 13 p p r r i i m m a a r r y y h h a a r r n n e e s s s s ( ( H H 1 1 ) ) , , 1 1 2 2 - - p p i i n n c c o o n n n n e e c c t t o o r r ______ O O R R A A N N G G E E H H 1 1 / / 1 1...
- Page 14 d d o o o o r r l l o o c c k k h h a a r r n n e e s s s s , , 3 3 - - p p i i n n c c o o n n n n e e c c t t o o r r ______ G G R R E E E E N N ______...
- Page 15 p p r r i i m m a a r r y y h h a a r r n n e e s s s s ( ( H H 1 1 ) ) w w i i r r e e c c o o n n n n e e c c t t i i o o n n g g u u i i d d e e H H 1 1 / / 1 1 O O R R A A N N G G E E ( ( - - ) ) g g r r o o u u n n d d - - w w h h e e n n - - a a r r m m e e d d o o u u t t p p u u t t This wire supplies a (-) ground as long as the system is armed.
- Page 16 H H 1 1 / / 2 2 W W H H I I T T E E ( ( + + / / - - ) ) s s e e l l e e c c t t a a b b l l e e l l i i g g h h t t f f l l a a s s h h o o u u t t p p u u t t As shipped, this wire should be connected to the (+) parking light wire.
- Page 17 H H 1 1 / / 4 4 B B L L A A C C K K / / W W H H I I T T E E ( ( - - ) ) 2 2 0 0 0 0 m m A A d d o o m m e e l l i i g g h h t t s s u u p p e e r r v v i i s s i i o o n n o o u u t t p p u u t t Connect this wire to the optional domelight supervision relay as shown below: I I M M P P O O R R T T A A N N T T ! ! This output is only intended to drive a relay.
- Page 18 H H 1 1 / / 7 7 V V I I O O L L E E T T ( ( + + ) ) d d o o o o r r t t r r i i g g g g e e r r i i n n p p u u t t , , z z o o n n e e 3 3 This wire is used in vehicles that have a positive (+) switched dome light circuit.
- Page 19 H H 1 1 / / 1 1 1 1 R R E E D D ( ( + + ) ) 1 1 2 2 V V c c o o n n s s t t a a n n t t p p o o w w e e r r i i n n p p u u t t Before connecting this wire, remove the supplied fuse.
- Page 20 s s e e c c o o n n d d a a r r y y h h a a r r n n e e s s s s ( ( H H 2 2 ) ) w w i i r r e e c c o o n n n n e e c c t t i i o o n n g g u u i i d d e e H H 2 2 / / 1 1 L L I I G G H H T T G G R R E E E E N N / / B B L L A A C C K K ( ( - - ) ) f f a a c c t t o o r r y y d d i i s s a a r r m m o o u u t t p p u u t t This wire sends a negative pulse every time the remote start is activated or the doors are unlocked.
- Page 21 H H 2 2 / / 5 5 W W H H I I T T E E / / B B L L A A C C K K ( ( - - ) ) d d i i e e s s e e l l w w a a i i t t - - t t o o - - s s t t a a r r t t b b u u l l b b i i n n p p u u t t Connect this wire to the wire in the vehicle that sends the signal to turn on the WAIT-TO-START bulb in the dash- board.
- Page 22 p p l l u u g g - - i i n n L L E E D D a a n n d d v v a a l l e e t t / / p p r r o o g g r r a a m m s s w w i i t t c c h h These plug into the module.
- Page 23 s s h h o o c c k k s s e e n n s s o o r r h h a a r r n n e e s s s s , , 4 4 - - p p i i n n c c o o n n n n e e c c t t o o r r G G R R E E E E N N ( ( - - ) ) m m u u l l t t i i p p l l e e x x i i n n p p u u t t , , z z o o n n e e 2 2 Inputs shorter than 0.8 seconds will trigger the Warn Away®...
- Page 24 p p r r o o g g r r a a m m m m i i n n g g j j u u m m p p e e r r s s l l i i g g h h t t f f l l a a s s h h ( ( + + ) ) / / ( ( - - ) ) This jumper is used to determine the light flash output.
- Page 25 The Valet/Program switch, plugged into the blue port, is used for programming. There is a basic sequence of steps to remember whenever programming this unit: Door, Key, Choose, Transmit and Release. O O p p e e n n a a d d o o o o r r . . (The GREEN wire, H1/5, or the VIOLET, H1/7 must be connected.) K K e e y y .
- Page 26 program Channel 2. Release the Valet/Program switch. Press it one time and release it to advance from Channel 1 to Channel 2. Now, press and H H O O L L D D the Valet/Program switch. The LED will flash two times and the horn will honk twice (if connected).
- Page 27 ...operate...Channel 5 L L C C D D 2 2 - - w w a a y y - - o o n n l l y y - - c c o o n n f f i i g g u u r r a a t t i i o o n n The standard configuration for both of the above transmitters also allow the user to utilize Multi-Level Security Arming (described in the following section).
- Page 28 m m u u l l t t i i - - l l e e v v e e l l s s e e c c u u r r i i t t y y a a r r m m i i n n g g Multi-Level Security Arming is a feature that allows the user to select which of the system's inputs or sensors will be active and which will be bypassed when the system is armed.
- Page 29 T T o o p p r r o o g g r r a a m m t t h h e e f f e e a a t t u u r r e e s s u u s s i i n n g g t t h h e e V V a a l l e e t t s s w w i i t t c c h h : : O O p p e e n n a a d d o o o o r r .
- Page 30 The learn routine will be exited if: ■ The door is closed. ■ The ignition is turned on. ■ The Valet/Program switch is pressed too many times. ■ More than 15 seconds elapses between programming steps. One siren wail sound indicates that the Learn Routine has been exited. f f e e a a t t u u r r e e m m e e n n u u s s The default settings are indicated in b b o o l l d d type.
- Page 31 m m e e n n u u # # 2 2 - - a a d d v v a a n n c c e e d d f f e e a a t t u u r r e e s s F F E E A A T T U U R R E E N N U U M M B B E E R R O O N N E E - - C C H H I I R R P P S S E E T T T T I I N N G G ( ( D D E E F F A A U U L L T T ) ) S S i i r r e e n n o o u u t t p p u u t t c c o o n n s s t t a a n n t t...
- Page 32 1 1 - - 4 4 I I G G N N I I T T I I O O N N C C O O N N T T R R O O L L L L E E D D U U N N L L O O C C K K : : When turned ON the doors will unlock when the ignition is turned OFF. 1 1 - - 5 5 A A C C T T I I V V E E / / P P A A S S S S I I V V E E L L O O C C K K I I N N G G : : If passive arming is selected in Feature 1-1, then the system can be programmed to either lock the doors when passive arming occurs, or only lock the doors when the system is armed via the transmitter.
- Page 33 m m e e n n u u # # 2 2 - - a a d d v v a a n n c c e e d d f f e e a a t t u u r r e e s s 2 2 - - 1 1 S S I I R R E E N N O O U U T T P P U U T T C C O O N N S S T T A A N N T T / / P P U U L L S S E E D D : : The system can be programmed to output pulses instead of a continuous output when the system is triggered.
- Page 34 2 2 - - 7 7 I I G G N N I I T T I I O O N N C C O O N N T T R R O O L L L L E E D D D D O O M M E E L L I I G G H H T T S S U U P P E E R R V V I I S S I I O O N N O O N N / / O O F F F F : : If turned on, the system will turn on the dome light for 60 seconds when the ignition is turned off.
- Page 35 n n u u i i s s a a n n c c e e p p r r e e v v e e n n t t i i o o n n c c i i r r c c u u i i t t r r y y NPC™...
- Page 36 t t a a b b l l e e o o f f z z o o n n e e s s When using the Diagnostic functions, use the Table of Zones to see which input has triggered the system. It is also helpful in deciding which input to use when connecting optional sensors and switches.
- Page 37 t t r r o o u u b b l l e e s s h h o o o o t t i i n n g g a a l l a a r r m m t t r r o o u u b b l l e e s s h h o o o o t t i i n n g g ■...
- Page 38 w w i i r r i i n n g g q q u u i i c c k k r r e e f f e e r r e e n n c c e e g g u u i i d d e e 3 3 8 8...
- Page 39 3 3 9 9...
- Page 40 Get Started Get Protected Ungo Pro Security 661 W. Redondo Beach Blvd. Gardena, Ca. 90247 800-GO-CLARION © 2005 Directed Electronics, Inc. - All rights reserved NS660 02-05...