Crestron 3 Series Quick Start Manual
Room media controller
Hide thumbs
Also See for 3 Series:
- Reference manual (68 pages) ,
- Operation manual (48 pages) ,
- Supplemental manual (22 pages)
Advertisement
Quick Links
RMC3
3-Series® Room Media Controller
The Crestron®
RMC3
is a compact, cost-effective 3-Series® control
system designed to provide control and monitoring for a single display
device, a small AV system, lighting and shading, climate control, security,
energy management, and many other specialized applications. Its small
form factor allows it to be placed just about anywhere with the option to
attach it to a flat surface or DIN rail.
In the Box
1
RMC3, 3-Series® Media Room Controller
Additional Items
1
Bracket, Mounting, Integrated DIN Rail Clip (4510935)
2
Screw, 6-32, 3/8 in., Phillips (2007225)
1
Adapter, USB to USB Mini (2037338)
2
Connector, 3-Pin (2003575)
2
Connector, 4-Pin (2003576)
1
Connector, 5-Pin (2003577)
Mount the Device
The RMC3 can be mounted onto a flat surface or a standard DIN rail
using the included mounting bracket.
CAUTION: To prevent overheating, do not operate the RMC3 in an area
that exceeds the environmental temperature range (32 to 104 °F or
0 to 40 °C) for this device.
Optional rack mount and pole mount kits (not included) are also available
for use with the extender. For more information, refer to the RMK-IFE-1U
Installation Guide (Doc. 7627) and the PLMK-IFE-101 Installation Guide
(Doc. 7615) at www.crestron.com/manuals.
Surface Mounting
1. Detach the RMC3 from the mounting bracket by pulling the left and
right flanges of the bracket outward to release the tabs that hold the
RMC3 in place.
2. Attach the mounting bracket to the surface by using four appropriate
mounting screws (not included) through the four mounting holes on
the bottom of the bracket.
3. Align the slots on the bottom of the RMC3 with the tabs on the
mounting bracket.
4. Press the RMC3 into the bracket until it snaps into place.
Quick Start
1
Advertisement

Related Manuals for Crestron 3 Series


Summary of Contents for Crestron 3 Series
- Page 1 Optional rack mount and pole mount kits (not included) are also available for use with the extender. For more information, refer to the RMK-IFE-1U RMC3, 3-Series® Media Room Controller Installation Guide (Doc. 7627) and the PLMK-IFE-101 Installation Guide (Doc. 7615) at www.crestron.com/manuals. Additional Items Surface Mounting Bracket, Mounting, Integrated DIN Rail Clip (4510935) Screw, 6-32, 3/8 in., Phillips (2007225)
-
Page 2: Din Rail Mounting
Quick Start RMC3 3-Series® Room Media Controller DIN Rail Mounting 5. (Optional) Secure the extender to the bracket using the two included 6-32 3/8 in. screws as shown in the following illustration. 1. Detach the RMC3 from the mounting bracket by pulling the left and right flanges of the bracket outward to release the tabs that hold the RMC3 in place. -
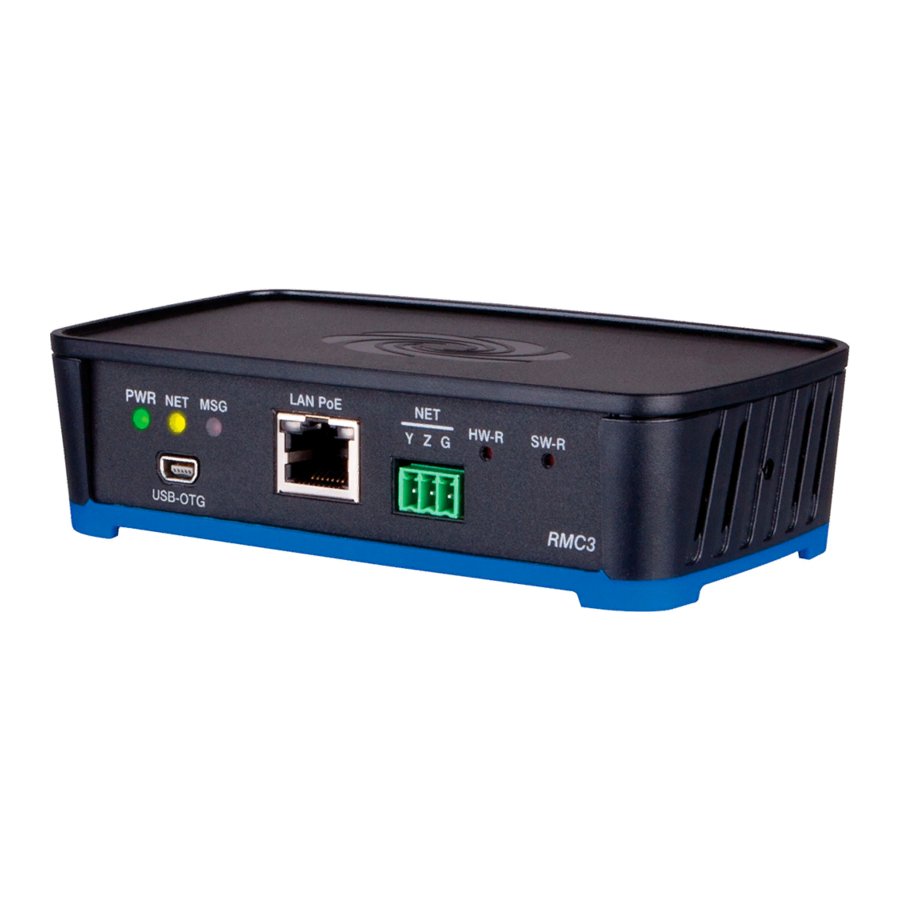
Page 3: Connect The Device
Front Panel Connections Observe the following when connecting the RMC3: Power is provided to the RMC3 by a single Ethernet cable. A Crestron PoE (Power over Ethernet) power supply, such as the PWE-4803RU, or a PoE-capable network switch is recommended (both not included). -
Page 4: Configure The Device
To configure the control system: 1. Use the Device Discovery tool in Crestron Toolbox to discover the RMC3 and its IP address on the network. 2. Use Crestron Toolbox to set the time zone. For more information,... - Page 5 Visit the Product Page Scan the QR code to visit the product page. RMC3 www.crestron.com/model/6505761 The Setup page displays the IP address, hostname, and MAC address of the RMC3. The Setup page also provides access to various setup and programming pages.
- Page 6 Development Tools License Agreement. Crestron product operating system software is licensed to Crestron dealers, CSPs, and end-users under a separate End-User License Agreement. Both of these Agreements can be found on the Crestron website at www.crestron.com/legal/software_license_agreement. The product warranty can be found at www.crestron.com/warranty.