Table of Contents
Advertisement
Quick Links
Advertisement
Table of Contents

Related Manuals for Alcatel OmniPCX Enterprise 4029


Summary of Contents for Alcatel OmniPCX Enterprise 4029
- Page 1 OmniPCX Enterprise Alcatel 4029 and 4039 Sets...
- Page 2 For the most current information, please contact your Alcatel representative or your Alcatel equipment provider. Copyright © 2005 Alcatel. All rights reserved for all countries. This document may not be reproduced in whole or in part without the express written permission of Alcatel.
-
Page 3: Table Of Contents
Chapter 2 Commissioning Overview ....................Commissionning the Alcatel 4029/4039 Set ......... Prerequisite ....................Connecting the Alcatel 4029/4039 Set ............Connecting Optional Equipment ..............Programming Personal F1/F2 and Perso Tab Keys ......... Before Mounting an Alcatel 4029/4039 Set on a Wall .... -
Page 5: Overview
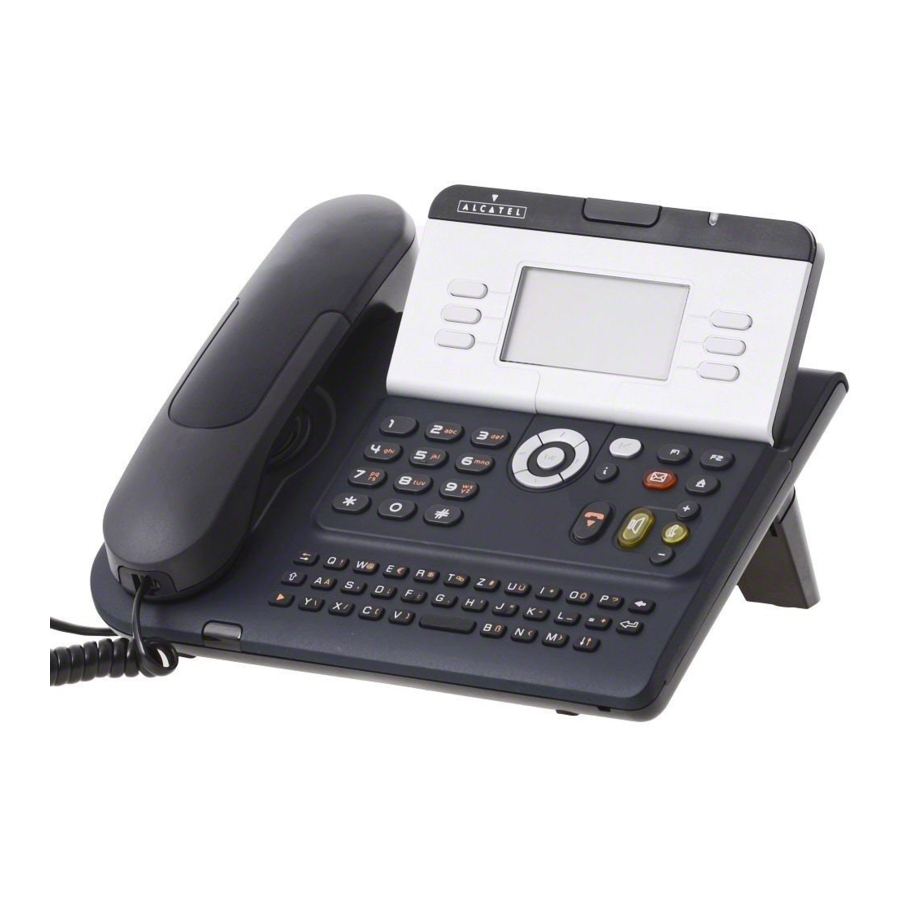
Overview The Alcatel 4029 and Alcatel 4039 sets are TDM sets, part of the Alcatel 9 telephone set series. They are implemented in OmniPCX Enterprise and are available as of R6.1. Note: Throughout this document the term Alcatel 4029/4039 refers to the two Alcatel 4029 and Alcatel 4039 sets. -
Page 6: Set Equipment
Set screens are adjustable. Push the button on the left of the Alarm LED to move the screen up or down. The Alcatel 4029 is a black and white screen. The Alcatel 4039 screen uses 4 levels of gray. The Alcatel 4029 screen is 70 mm wide and 38mm high, and displays 64x128 pixels. -
Page 7: Set Keys
The Menu tab gives access to some functions and applications accessible by users Figure 1.3: Alcatel 4029 Set Menu Tab Display Example The Perso tab includes up to 72 user programmable keys Figure 1.4: Alcatel 4039 Set Perso Tab Display Example The Info tab provides infomation on the set status Figure 1.5: Alcatel 4039 Set Info Tab Display Example... - Page 8 Fixed function keys A navigator consisting of 4 directional navigation keys Programmable keys (72 keys on the Perso tab and 2 personal keys) 1.2.3.1 Fixed Function Keys Figure 1.6: Alcatel 4029/4039 Fixed Keys Layout Action Navigator Keys Validates data entry Left...
- Page 9 Programmable Keys The programmable keys include: Up to 72 user programmable keys on the Perso tab of the Alcatel 4029/4039 set, i.e. 2x4 or 2x2 Perso tab keys per page on the set display. These programmable keys are activated from the Perso tab by pressing the desired soft key. Use the Navigator keys (when the desired soft key function is not shown on the set display) to scroll up and down the pages.
-
Page 10: Set Leds
• Access them rapidly 1.2.4 Set LEDs The Alcatel 4029/4039 set LEDs consist of: An alarm LED (see figure: Alcatel 4039 Set Layout figure: Alcatel 4029 Set Layout A message LED (located on the message key) A mute LED (located on the mute key) - Page 11 When the attribute value is: Then: Blinking, off When at least a message (alarm, voice, text, callback, unanswered call) has not been heard/viewed, the LED blinks red. After message consultation, the Message LED is off. Blinking When at least a message (alarm, voice, text, callback, unanswered call) has not been heard/viewed, the LED blinks red.
- Page 12 Chapter...
-
Page 13: Overview
The following figure illustrates Alcatel 4029/4039 connectors. Commissionning the Alcatel 4029/4039 Set 2.2.1 Prerequisite Before commissioning the Alcatel 4029/4039 set, you must check that the user is declared in the OmniPCX Enterprise. For more information, see: module Alcatel 9 Series Sets - Configuration procedure . 2.2.2... - Page 14 If this is the first set initialization or when there has been an upgrade of the OmniPCX software version, the Alcatel 4029/4039 set downloads binary and data files. Note: Both sets can be used prior to binary and data file download. As this download may take some...
-
Page 15: Connecting Optional Equipment
Customize your set to take the external station speaker into account: 1. From the Menu tab, select Settings 2. In the next screen, select My extension on an Alcatel 4039, My phone on an Alcatel 4029 3. In the next screen, select Jack plug... -
Page 16: Programming Personal F1/F2 And Perso Tab Keys
Use the same Key program menu to modify or delete the contents of a programmable key. Before Mounting an Alcatel 4029/4039 Set on a Wall The set must be prepared to ensure the handset does not fall off the set when fixed on a wall. - Page 17 4. Push the upside down dowel back into its slot. Once the Alcatel 4029/4039 set is fixed on the wall, the dowel hook will maintain the handset in place. To screw the set to the wall kit, proceed as described in the wall kit documentation.
- Page 18 Chapter...