Advertisement
Quick Links
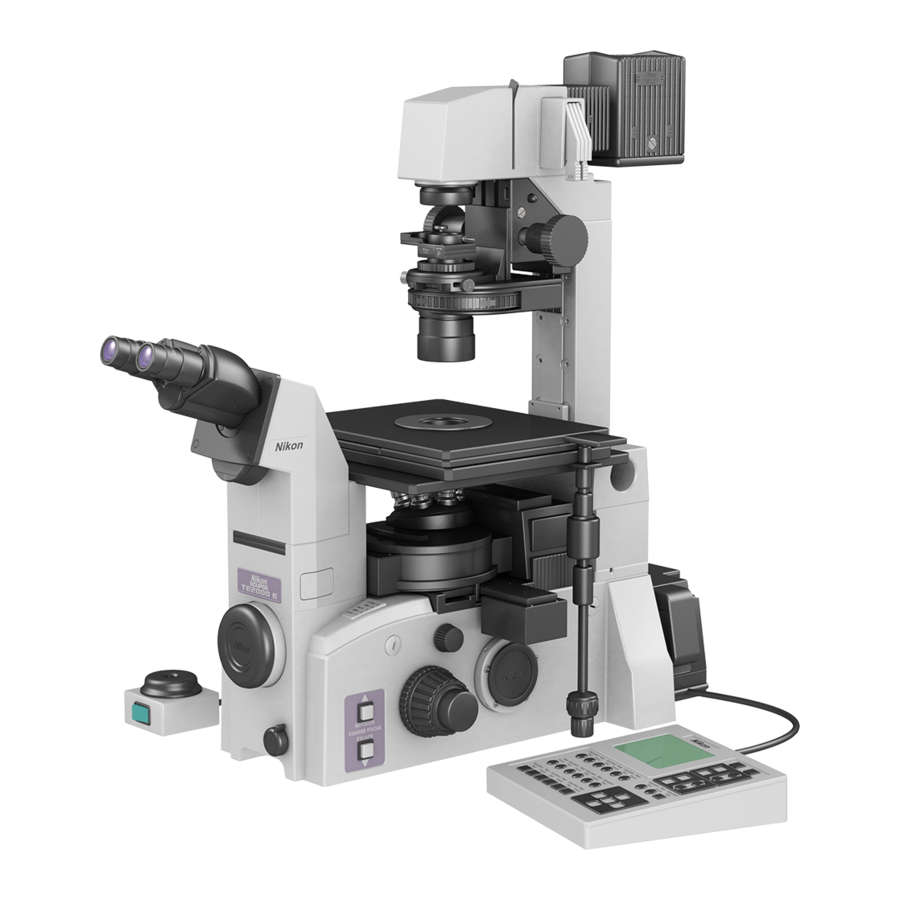
Nikon TE2000 fluorescent microscope
Turning on the system:
1) Turn on the main switch (A).
2) Turn on the computer (B).
3) If you need the mercury lamp,
turn on the switch (C) and then
press ignition (D).
4) Log onto the computer through
"MIC users" and start the
"NIS-Elements" software.
Turning off the system:
1) If you are the last user of the day, or if there is
more than 30 min interval before the next user is
booked, turn off the mercury lamp (C).
2) Close the software and "turn off" the computer
through the start menu.
3) Turn off the main switch (A).
4) Fill out the logbook.
A
B
D
C
Advertisement

Related Manuals for Nikon TE2000


Summary of Contents for Nikon TE2000
- Page 1 Nikon TE2000 fluorescent microscope Turning on the system: 1) Turn on the main switch (A). 2) Turn on the computer (B). 3) If you need the mercury lamp, turn on the switch (C) and then press ignition (D). 4) Log onto the computer through “MIC users”...
- Page 2 Control over the halogen light. Switching between (The main switch on the halogen power objectives. Choose the right Regulate the supply need to be on.) objective for your sample. intensity here. Shutter for the UV light Light path control. If you are Filter wheel with different looking at your sample (A), positions.
- Page 3 Which camera do I choose? Nikon DS-U1 (color) camera - or - MuTech MV 1500 (B/W) camera Turn on main switch before use.
-
Page 4: Adjusting The Köhler Illumination
Adjusting the Köhler illumination -this will increase image contrast- Decrease the size of the diaphragm (A) so that you can see the edges. Bring the edges of the field iris onto focus by raising or lowering the condensor focusing knob (B). Senter the image of the field iris by using the condensor sentering knobs (C). - Page 5 The difference between the objectives Possit Description WD (mm) Remarks CFI Plan Fluor 4X 0,13 17,1 CFI Plan Fluor 10X 0,30 16,0 Ph 1 ELWD 20X 0,40 CFI Plan Fluor ELWD 40X 0,60 3,7-2,7 HMC LWD 20X 0,40 MC 2 HMC LWD 40X 0,55 MC 3...
- Page 6 Adjusting the correction collar on the objective Indicates the NA. The higher the number the better the resolution. Indicates the phase-ring. Use ”Ph2” for this objective. Correction collar. You have to adjust the ring to the coverslip-petridish thickness. Turn until the image looks the sharpest.
- Page 7 1) Start the NIS-Elements software. 2) If the stage/joystick is not responding, make sure the stage is in “auto” position and connect the stage through the software. “Devices” – “manage devices”, scroll down to the “Märzhauser” and then click “connect”.
- Page 8 Setting up a multichannel acquisition 1) If you want to acquire images of multiple fluorochromes or combine fluorescence and DIC images – chose “capture multichannel image” – “multichannel setup”. 2) Tag off the settings you need and click ok. 3) You are now ready to start imaging.
- Page 9 Acquiring a large image with automated stage 1) Initiate stage and make sure nothing is interfering (objectives must be down) with the stage as it will move to the outer limits. 2) Go to “acquire-large scan” and define the image size you need. Make sure you are located at the upper left of your sample before you start scanning.
-
Page 10: Troubleshooting
Troubleshooting • The stage/joystick is not responding. The stage has not been initialized because it was on manual when the software was opened. Make sure the stage is in “auto” position and connect the stage through the software. “Devices” – “manage devices”, scroll down to the “Märzhauser” and then click “connect”. - Page 11 Troubleshooting • The camera setting is missing. The previous user has probably closed the window. Go to ”view – controls – camera settings”.
- Page 12 Troubleshooting • I can’t find REX in order to save my data. You need to connect to the server. When choosing REX, you will be asked for a password. The password is ”************”.