Table of Contents
Advertisement
Available languages
Available languages
TRANSDUCER Installation Guide
It is important to read the instructions in this transducer guide completely to understand the
mounting guidelines before starting the installation.
NOTE: Due to the wide variety of hulls, only general instructions are presented in this installation
guide. Each boat hull represents a unique set of requirements that should be evaluated prior to
installation. For detailed information about installing transducers on different hull types,
download the Transducer Installation Resource Guide from our Web site at humminbird.com.
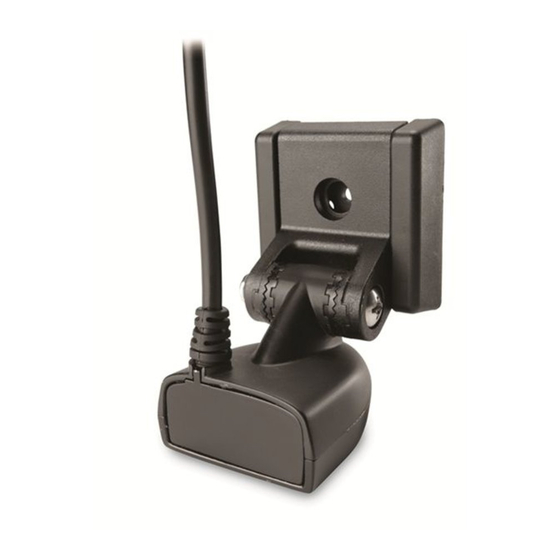
NOTE: Your transducer may not look exactly like the transducer shown in the illustrations, but it
will mount in exactly the same way.
Install the control head before you start the transducer installation. See the control head
installation guide.
Review your boat manufacturer's owner's manual for recommended transducer installation
locations and cable routing methods. You will also need your transom angle.
Read and understand your boat's warranty before starting this installation.
Visit our Web site at humminbird.com for additional information and resources for transducer
installations. Also, visit youtube.com/humminbirdtv for informational videos.
Confirm your boat is level for the installation.
Installation Options: If you cannot find a transom mount location that will work for your
high-speed application, you may consider an Inside the Hull installation. Visit our Web site at
humminbird.com to download instructions.
Supplies: In addition to the supplied hardware, you will need a powered hand drill and various drill
bits, various hand tools, including a ruler or straightedge, a level, a socket driver, marker or pencil,
safety glasses and dust mask, marine-grade silicone sealant, dielectric grease (optional), and a
12" (30.5 cm) plumb line (weighted string or monofilament line) (optional). You may also need
extension cables and hardware for routing the cable to the control head.
Turbulence-Free Mounting Guidelines
It is very important to locate the transducer in an area that is relatively free of turbulent water.
Consider the following to find the best location with the least amount of turbulence:
Installation Preparation
1
2
3
4
5 6
1
532310-3_A
Advertisement
Table of Contents

Related Manuals for Humminbird XNT 9 20


Summary of Contents for Humminbird XNT 9 20
- Page 1 You will also need your transom angle. Read and understand your boat’s warranty before starting this installation. Visit our Web site at humminbird.com for additional information and resources for transducer installations. Also, visit youtube.com/humminbirdtv for informational videos.
-
Page 2: Prepare The Mounting Location
TRANSDUCER Installation Guide 532310-3_A Avoid areas where there is turbulent water flow. Turbulent water is normally confined to areas immediately aft of ribs, strakes, or rivets on the bottom of the boat, and in the immediate area of the propeller(s). The best way to locate turbulence-free water is to view the transom while the boat is moving. - Page 3 1 for the ratchets. 1b. If you have a different transom angle or do not know your transom angle, refer to the Transducer Installation Resource Guide on our Web site at humminbird.com for detailed instructions. 2. Place the two ratchets, one on either side of the transducer knuckle, so that the beads on each ratchet line up with the desired position number on the knuckle (see Installing the Ratchets in Position 1).
- Page 4 TRANSDUCER Installation Guide 532310-3_A Adjusting the Initial Transducer Angle Adjusting the Horizontal Transducer Angle Leading edge (the edge closest to the transom of the boat). One click too high: the transducer is tilted out of the water and cannot maintain a sonar signal. Trailing edge (the edge farthest away from the boat).
-
Page 5: Connect The Cable
Route the cable as far as possible from any VHF radio antenna cables or tachometer cables to reduce the possibility of interference. If the cable is too short, extension cables are available to extend the transducer cable up to a total of 50'. For assistance, contact Humminbird® Technical Support. - Page 6 If a compatible accessory transducer is connected, you will need to set the transducer type on the control head. When you select the transducer type, the related views and menus will be added to the system. Δ For additional configuration information, download the control head operations manual from our Web site at humminbird.com.
-
Page 7: Maintenance
WARNING! The transducer must be fully submerged in water during operation because the sonar signal cannot pass through air. Air pinging can damage the transducer. NOTE: Download Humminbird installation guides and operations manuals from our Web site at humminbird.com. NOTE: Product specifications and features are subject to change without notice. -
Page 8: Préparation De L'installation
Options d'installation : Si vous n’arrivez pas à trouver un emplacement de montage approprié pour le fonctionnement à grande vitesse, vous pourriez envisager d’utiliser un transducteur pouvant être monté à l’intérieur de la coque. Visitez notre site Web à humminbird.com pour télécharger les instructions. - Page 9 Guide d'Installation DU TRANSDUCTEUR 532310-3_A Évitez les zones où il y a un écoulement d'eau turbulent. Eau turbulente se limitent normalement aux zones situées directement à l’arrière des membrures, virures ou rangées de rivets sous le bateau et dans la zone immédiate de l’hélice (des hélices). La meilleure façon de localiser un emplacement libre de turbulences est de regarder le tableau arrière lorsque le bateau se déplace.
- Page 10 1b. Si vous avez un angle de traverse différent ou ne connaissez pas votre angle de traverse,, reportez-vous au Guide de ressources d'installation du transducteur sur notre site Web à humminbird.com pour obtenir des instructions détaillées. 2. Placez les deux mécanismes à rochet de chaque côté du joint d’articulation du transducteur, de façon à...
- Page 11 Guide d'Installation DU TRANSDUCTEUR 532310-3_A 5. Alignez le support de montage du transducteur avec les trous percés dans le tableau arrière. À l’aide d’un tournevis à douille de 8 mm (5/16 po), montez l’ensemble au tableau arrière avec les deux longues vis n° 10 - 25,4 mm (1 po) (fournies). Serrez à la main seulement ! REMARQUE : Assurez-vous que les vis de montage maintiennent le support en place, mais ne les serrez pas à...
-
Page 12: Branchement Du Câble
Si le câble du transducteur est trop court, vous pouvez vous procurer des rallonges pour le prolonger jusqu’à une longueur totale de 15 m (50 pi). Pour obtenir de l’aide, communiquez avec le support technique Humminbird. MISE EN GARDE ! Ne montez PAS les câbles dans un endroit où les connecteurs pourraient être submergés. - Page 13 Guide d'Installation DU TRANSDUCTEUR 532310-3_A Connecteurs du transducteur vis écrou Connecteur Connecteur hexagonal rond | Essais et fin de l’installation Lorsque vous avez terminé l’installation de la tête de commande et du transducteur et que vous avez acheminé tous les câbles, vous devez effectuer des essais avant de bloquer le transducteur en position.
- Page 14 Lorsque vous sélectionnez le type de transducteur, les vues et menus associés sont ajoutés au système. Δ Pour plus d'informations sur la configuration, téléchargez le manuel d'utilisation de la tête de commande sur notre site Web humminbird.com.
-
Page 15: Entretien
Un cliquetis d'air peut endommager le transducteur. REMARQUE : Les guides d'utilisation et d'installation sont téléchargeables sur notre site Web à l'adresse humminbird.com. REMARQUE : Les caractéristiques et spécifications de ce produit peuvent être modifiées sans préavis.