Table of Contents
Advertisement
Quick Links
Advertisement
Table of Contents

Related Manuals for Grundig Sonoclock 895 WEB DAB+


Summary of Contents for Grundig Sonoclock 895 WEB DAB+
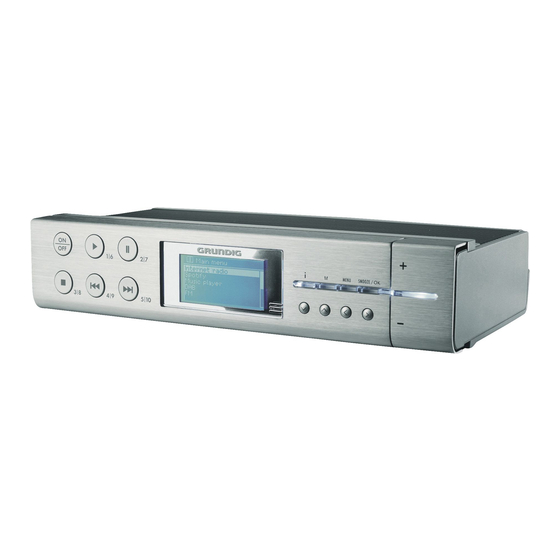
- Page 1 INTERNET KITCHEN RADIO Sonoclock 895 WEB DAB+...
-
Page 2: Table Of Contents
S electing Internet radio stations according to search criteria 5 SET-UPANDSAFETY Storing Internet radio stations on presets Opening preset Internet stations 6 OVERVIEW D isplaying information about Internet Controlls radio stations The remote control Listening to a Podcast The Multifunction display of the device 26 INTERNETRADIOTUNINGSERVICE 10 CONNECTIONANDPREPARATION Registering on the GRUNDIG homepage Connecting an external device Creating lists of favourites Connecting the headphones S earching for radio stations that are not C onnecting an MP3 player or a USB provided by V-Tuner memory stick LAN connection to the Internet 29 SHAREDMEDIAMODE WLAN connection to the Internet Shared media server (audio streaming) Connecting the power cord Selecting the shared media input source Inserting battery in the remote control Other playback functions Mounting the device... - Page 3 CONTENTS ---------------------------------------------------------------------------------------------------------------------------------- 43 SPECIALSETTINGS 35 FMMODE Displaying Software and ID information Selecting the FM input source Displaying information and network status Selecting stations – from presets 44 Installing an additional network Stereo and mono reception Setting the WLAN region Displaying RDS station information D eleting servers which cannot be ac- 36 SPOTIFYMODE cessed Selecting and playing back music tracks R egistering the device with the WLAN Additional functions router with individual network settings S etting the time, time zone and date 37 AUXMODE automatically Listening to an external source S etting the time, time zone and date manually 38 REMOTECONTROLUSINGUNDOK E nter the PIN code for the "remote con- Requirements: trol" Opening the application "Keeping" the connection to the router Selecting the input source...
-
Page 4: Sonoclock895Web
Remote control Just go to the App Store or Google play store 1 lithium battery 3 V, CR 2025 and download the application. Operating manual With the “UNDOK “ application, you can con- trol many functions of the device remotely using Device holder the smartphone and the tablet PC. Specialfeatures The functions are described on pages 38 and Your device provides access to numerous inter- net radio stations via a router. You can connect CEdeclaration the device to the internet using a LAN cable or WLAN. You can find the CE declaration for the Sono- clock 895 WEB in the form of a pdf file on the For Internet operation, a DSL connection and enclosed CD-ROM or on the Grundig Home- DSL flat rate are recommended. page www.grundig.com/download/doc. Music titles archived on a PC or hard drive (NAS - Network Attached Storage) can be played on the device using a UPnP server or enabled folders via LAN or WLAN (audio streaming). Your device supports the industry standard DLNA (Digital Living Network Alliance) 1.5 digital media renderer. This allows you to "Play To" other devices around your home and combine media stream- ing with controlling a connected media receiver while streaming content to it from another Win- dows 7/8 PC on a home network. As well as internet radio stations, the device can receive DAB and FM radio stations. Your device also has an input source for the music provider “Spotify”, that provides a large range of music tracks via the Internet. However,... -
Page 5: Set-Upandsafety
SET-UPANDSAFETY ----------------------------------------------------------------------------------------------- Please note the following instructions when set- If malfunctions occur due to static electricity ting up the system: charges or brief mains voltage surges, reset the device. To do this, pull out the power plug The device is designed for the playback of and connect it again after a few seconds. audio signals. Any other use is expressly pro- hibited. Do not expose the battery to extreme heat, such as for example sunlight, radiators, fire, If you want to set up the device on wall etc. shelves or in cupboards, please ensure that it is adequately ventilated. There must be at The remote control contains a button cell. least 10 cm of space at the side, above and Please always keep the remote control and behind the device. the button cell out of reach of children. Do not cover the device with newspapers, If the button cell is accidentally swallowed, table cloths, curtains, etc. it can lead to burns and even death within When setting up the device, remember that two hours. You should therefore see a doctor furniture is often coated with various types of immediately. varnish and plastic, which often contain chem- Keep new and used batteries out of reach of ical additives. These additives may cause cor- children. If the battery compartment cannot rosion to the feet of the unit. This may leave stains on the surface of the furniture which can be closed safely, do not continue to use the be difficult or impossible to remove. device and keep out of reach of children.. If the device is exposed to sudden changes CAUTION: Danger of explosion if battery is in temperature, for example when taken from incorrectly replaced. Replace only with the... -
Page 6: Overview
OVERVIEW - --------------------------------------------------------------------------------------------------------------------------------- 2 I 7II ON/OFF 1 I 6 3 I 8 4 I 9 5 I 10 MENU OK/SNOOZE Display +– VΛ AUXIN LAN/LED Antenna 230V ˜ 6 ENGLISH... -
Page 7: Controlls
OVERVIEW - --------------------------------------------------------------------------------------------------------------------------------- I n the menus: moves cursor down. Controlls I n radio mode: starts the FM See the figure on page 3. search. Thefrontofthedevice I n the menus: moves cursor up. Λ I n radio mode: starts the FM ON/OFF S witches the device in and out search. of standby mode. 1I6 S elects menu pages in reverse. In radio mode: station button 1/6. S elects menu pages forwards. I n music archive mode: + – A djust the volume. starts playback of a track. 2I7 In radio mode: station button Thebackofthedevice 2/7. H eadphone jack for connecting I n music archive mode: pauses a stereo headphone set with a... -
Page 8: The Remote Control
OVERVIEW - --------------------------------------------------------------------------------------------------------------------------------- Theremotecontrol D isplays information about the Internet, DAB and FM radio stations and Spotify. MENU S witches between the Internet radio, Spotify, music archive, DAB, FM and Aux input sourc- I n the menus: moves cursor up. Λ I n radio mode: starts the FM search. I n the menus: moves cursor down. I n radio mode: starts the FM search. S witches in the menu one step forwards. S witches in the menu one step backwards. I n the menus: confirms selected options. Interrupts the alarm signal. – A djusts the volume. ... -
Page 9: The Multifunction Display Of The Device
OVERVIEW - --------------------------------------------------------------------------------------------------------------------------------- TheMultifunctiondisplayofthedevice Main menu Internet radio Spotify Musik player The main menu shows the various input sources. Select the main menu with list using the »MENU« button. Then select the option »Main menu« by using » « and confirm by pressing »OK«. System settings Equaliser > Network > Time/Date > Brightness > Language > The menu for system settings: Contains all the necessary settings. You will find detailed information in the relevant section. 9 ENGLISH... -
Page 10: Connecting An External Device
CONNECTIONANDPREPARATION --------------------------------------- Connectinganexternaldevice ConnectinganMP3playerora USBmemorystick The device supports most MP3 Players or USB memory sticks. Note: Switch the device off before you connect external devices. 1 Use standard audio cables to connect the Important: audio outputs of the external device to the The device must be switched off while the »AUXIN« socket on the device. USB connection is being made. If it is not switched off, data can be lost. Connectingtheheadphones 1 Connect the USB interface of the MP3 player to the »USB« (type A) socket on the device using a standard USB cable; insert the USB plug of the USB memory stick in the USB socket »USB« (type A) on the device. Notes: 1 Insert the headphone plug (3.5 mm) into the T o remove the MP3 player or the USB » « socket on the device. memory stick, switch off the device and pull – T he loudspeaker of the device is switched out the cable for the data medium. off. T he USB socket on the device does not Important: support a connection for a USB extension cable and is not designed for directly con-... -
Page 11: Lan Connection To The Internet
CONNECTIONANDPREPARATION --------------------------------------- LANconnectiontotheInternet Telephone socket Splitter Modem/router Sonoclock 895 WEB Music archive on the computer Note: Switch the device off before you connect it to the internet. 1 Connect the Ethernet socket of the modem/ router to the »LAN« socket of the device using a standard network cable (Twistedpair, RJ45 plug). – T he data throughput level is 10/100 MBIT. Notes: The lines represent the function. Internet radio M edia servers (audio streaming) The data throughput level is 10/100 Mbit. 11 ENGLISH... -
Page 12: Wlan Connection To The Internet
CONNECTIONANDPREPARATION --------------------------------------- WLANconnectiontotheInternet Telephone socket Splitter Modem/router Laptop Sonoclock 895 WEB Music archive on hard drive (AS – Network Attached Storage) Notes: The quality of the radio signal depends on the distance between the device and your modem/router. The substance of the building at the instal- lation site can also affect this. The lines represent the function. Internet radio Music archive (audio streaming) WLAN 12 ENGLISH... -
Page 13: Connecting The Power Cord
CONNECTIONANDPREPARATION --------------------------------------- Connectingthepowercord Insertingbatteryintheremote control Note: Check that the mains voltage on the type plate (on the back of the device) corre- sponds to your local mains supply. If this is not the case, contact your specialist dealer. Before connecting the power plug to the wall socket, ensure that all other connec- tions have been made. • LOCK • OPEN • 1 Plug the power plug into the wall socket. Caution: The device is connected to the mains with 1 P ull off the film from the battery. the power cord. Pull out the power plug when you want to completely disconnect 2 Take off the battery compartment cover the device from the mains. (screw cap). 3 When inserting the battery (3 V, lithium, CR 2025), make sure the positive terminal (+) is facing upwards and the buttons on the remote control are facing downwards. 4 Replace the battery compartment cover (screw cap) and fasten it. -
Page 14: Mounting The Device Under A Kitchen Shelf
CONNECTIONANDPREPARATION --------------------------------------- Mountingthedevice Mountingthedeviceundera kitchenshelf The loudspeaker is located on the bottom of the device. The fastening screws are attached at the side of To obtain optimal sound, attach the device hold- the packaging. er on the bottom of the device before mounting. 1 Mark the position for the four fastening 1 Push the device holder into the recess on screws. the bottom of the device until it latches into 2 Attach the device holder with the four screws. place. 3 Insert the device into the holder. Note: To remove the device, press the catch on the back and pull out the device. 14 ENGLISH... -
Page 15: Menu Navigation
2 Select the push button »YES« with » « or » « If you wish to view the previous menu, press » «. and press »OK« to confirm. Menus and submenus you can close with – Display: »Language« menu opens. »MENU«. Time/Date Language FirstInstallationusingtheinstal- English lationassistant“Wizard” Français Deutsch When you connect the device to the mains at Italiano the first time, or after factory reset, the display Dansk will show the Grundig logo. The Wizard installation assistant then appears, 3 Select your preferred language by pressing which guides you through the installation step by step. » « or » « or by turning the Jog-Shuttle and confirm by pressing »OK«. Notes: – Display: »Date/Time« menu opens. For Wi-Fi connection, please make sure, that the Wi-Fi router is switched on. Date/Time The network name (SSID) must be visible and the MAC address of the device may 12/24 hour format be entered in the Wi-Fi router. Perform the registration process in the prox-... - Page 16 SETTINGS - -------------------------------------------------------------------------------------------------------------------------------------- 5 Select the input source from which the au- 8If the device is to be switched on via the net- tomatic time synchronisation should be per- work, select the »YES« button with » « or » formed. « and confirm with »OK«. Selection options: If the device is not to be switched on (low – »Update from DAB«; stand-by power), select the »NO« button with – »Update from FM«; » « or » « and confirm with »OK«. – »Update from Network« (Time synchronisa- – The menu »Wlan region« appears. tion from an Internet station), Wlan region – »No update« (no automatic time synchro- Most of Europa nisation). Select one of the options with » « or » « and press »OK« to confirm. – T he menu »Set timezone« appears (only if »Update from Network« was selected). Note: 9 Select one of the WLAN regions with » « or If »Update from FM« or »Update from »...
- Page 17 SETTINGS - -------------------------------------------------------------------------------------------------------------------------------------- If the network name (SSID) is suppressed Note: on the WLAN router for security reasons, If the network is encrypted, the network the network cannot be found. It must then key (security code WEP or WPA) must be be entered manually. Select the option entered. »[Manual config]« with » « or » « and 14 E nter your wireless security code: press »OK« to confirm. Continue with the S elect the first character (capital and small chapter “Special Settings” – “Registering letters, numbers, symbols) with » «, » «, the device ...”, on page 43. » « or » « and press »OK« to confirm. 10 S elect your wireless [WPS] network with Repeat the procedure for all characters. » « or » « and press »OK« to confirm. A fter you finish entering all characters, se- lect the push button »OK« with » «, » «, Note: »...
-
Page 18: Setting Dab Stations
SETTINGS - -------------------------------------------------------------------------------------------------------------------------------------- SettingDABstations 2 Select the option »Manual tune« with » « or » « and press »OK« to confirm. Your device has a DAB/ DAB+ (Digital Audio – Display: »5A 174.928MHz«. Broadcasting) receiver unit which enables crystal-clear radio reception in CD quality, i.e. 3 Select your frequency with » « or » « and without hissing or crackling. press »OK« to confirm. – D isplay: e.g. »5D 180.064MHz« and the DAB stations are combined into ensembles (multiplexes) at regional and national levels. An search scale. ensemble contains several stations broadcast on – New stations are added to the list. the same frequency. One individual station can Sortingchannels combine other secondary service components such as live broadcasts or foreign language You can sort the station list stored during the news. station search in three different ways. – » Alphanumeric«: all stations are sorted alpha- The device can receive DAB stations on Band III numerically (default setting). (174.928 – 239.200 MHz, 5A – 13F). – » Ensemble«: all stations are sorted by ensemble. Automaticstationsearch – »... -
Page 19: Setting Fm Stations
SETTINGS - -------------------------------------------------------------------------------------------------------------------------------------- SavingDABradiostationsonpresets 3 Select the option »Scan setting« with » « or » « and press »OK« to confirm. You can use the remote control to fill 10 presets – Display: »Strong stations only?«. with the DAB radio stations of your choice. If you assign the presets again, the previously 4 Select your setting (»YES« or »NO«) with » « saved stations are overwritten. or » « and press »OK« to confirm. 1 Search for the DAB station as described. 5Press »MENU« to end the setting. 2 To save stations, keep pressing the number Automaticstationsearch button »1...0« until »Preset stored« appears 1 Press and hold » « or » «. When you re- in the display. Λ lease the button, the automatic search stops at – The station stored with a preset number the next FM station. then appears in the display. – I f RDS information is transmitted by the 3 To store more stations, repeat steps 1 and 2 broadcaster, then the device saves the sta- as many times as necessary. tion name. If station and title information is SettingDynamicRangeControl transmitted, it will appear as ticker text after (DRC)forDABstations a short time. -
Page 20: Installing Spotify
SETTINGS - -------------------------------------------------------------------------------------------------------------------------------------- InstallingSpotify Settingthebrightnessofthedis- play If you wish to play back the wide selection of music available from “Spotify”, you need to 1 Press »MENU« to open the menu. load the application onto your mobile phone or 2 Select the option »System settings« with » « tablet PC, install it and purchase the premium or » « and press »OK« to confirm. version. The mobile phone/tablet PC must be registered Select the option »Brightness« with » « or in the same WLAN network as your Sonoclock. » « and press »OK« to confirm. 1Download the“Spotify” application to your System settings mobile phone/tablet PC and install it. Equaliser > 2Set up and account. Network > Time/Date > 3Select premium version. Brightness > Note: Language > The premium version of “Spotify” is a fee- charging service. -
Page 21: Switching On And Off
GENERALFUNCTIONS --------------------------------------------------------------------------------------- Switchingonandoff Adjustingthevolume 1 Switch on the device from standby mode by 1 Adjust the volume by pressing »– +« pressing » « on the remote control or »ON/ on the remote control or by pressing »–« or OFF« on the device. »+« on the device. – D isplay: The system switches to the last Listeningwithheadphonesor source selected. earphones 2 Switch the device to standby mode by press- 1 Insert the headphone plug (3.5 mm) into the ing » « on the remote control or »ON/OFF« » « socket on the back of the device. on the device. – T he loudspeaker of the device is switched – Display: The current time and date. off. Note: Important: The only way to disconnect the device from Prolonged listening with the head phones the mains supply is to pull out the plug from or ear phones at loud volumes can dam- the wall socket. age your hearing. Selectingtheinputsource Selectthesoundeffects 1 Press »M« repeatedly to select »Internet Ra- 1 Press »MENU« to open the menu. -
Page 22: Listening To An Internet Radio Station
INTERNETRADIOMODE - ------------------------------------------------------------------------------- ListeningtoanInternetradio SelectingInternetradiostations station accordingtosearchcriteria You can browse the catalogue of Internet radio SelectingtheInternetradiomenu stations and classify them by genre (style of 1 Press »MENU« to open the menu. music), by country or by popularity. 2 Select the option »Station list« with » « or The stations are organized in a hierarchical menu » « and press »OK« to confirm. in the same way files are organized in directo- ries on a computer. 3 Select the option »Stations« with » « or » « and press »OK« to confirm. After successfully connecting to the Internet, open the option »Station list« and then »Sta- v v Stations tions« via the »Internet radio« menu, and select Location > your preferred music style or a country from the Genre > list. Search stations > Note: Popular stations >... - Page 23 INTERNETRADIOMODE - ------------------------------------------------------------------------------- SearchingforInternetradiosta- Notes: tionsbyname The subdivision by search criteria can differ depending on country group. For example, 1 In the »Stations« menu, select »Search stations« for the country group North America, you option with » « or » « and press »OK« to can choose between Canada, Mexico and confirm. the United States, and afterwards the differ- Stations: Time/Date ent states can be selected. There are no further search criteria for the 0123456789_ABCD BKSP different states. EFGHIJKLMNOPQRS 5 Select the station with » « or » « and press TUVWXYZ »OK« to confirm. CANCEL – » Connecting…« and then »Loading« ap- pears in the display, after a short time the Notes: station is played. You can choose between numbers and up- SearchingforInternetradiosta- per case letters.
-
Page 24: Storing Internet Radio Stations On Presets
INTERNETRADIOMODE - ------------------------------------------------------------------------------- SelectingthemostpopularInternet StoringInternetradiostations radiostations onpresets You can use this function to select radio stations You can use the remote control to fill 10 presets that are most frequently listened to. with the Internet radio stations of your choice. If you assign the presets again, the previously 1 In the »Stations« menu, select the »Popular saved stations are overwritten. stations« option with » « or » « and press 1 Search for the Internet radio station as de- »OK« to confirm. scribed. – D isplay: The list of popular stations appears in the display. 2 To save stations, keep pressing the number button »1...0« until »Preset stored« appears 2 Select the radio station with » « or » « and in the display. press »OK« to confirm. – » Connecting…« and then »Loading« ap- Note: pears in the display, after a short time the Button »0« is used for preset 10. station is played. 3 To store more stations, repeat steps 1 and 2 SelectingInternetradiostations... -
Page 25: Listening To A Podcast
INTERNETRADIOMODE - ------------------------------------------------------------------------------- Openingthemostrecentlyselected ListeningtoaPodcast Internetstations Unlike a radio station that is broadcast live, a podcast can contain several programs which The device saves the 10 most recently selected are updated regularly and automatically. The radio stations in a folder which you can open at podcast and associated programs can be the same time as the station list. played at any time. 1 In the »Station list« menu, select the »Last These programs may date back several weeks listened« option with » « or » « and press or they may have just appeared. »OK« to confirm. 1 Press »MENU« to open the menu. 2 Select the radio station with » « or » « and press »OK« to confirm. 2 Select the »Main menu« with » « or » « – » Connecting…« and then »Loading« ap- and press »OK« to confirm. pears in the display, after a short time the 3 Select the input source »Internet radio« with station is played. » « or » « and press »OK« to confirm. – »... -
Page 26: Registering On The Grundig Homepage
1 Start the Internet browser on your PC. If you wish to create a favourites list for your favourite radio stations, then you also need to 2 Enter the address “www.grundig.radiosetup. register your e-mail address and the password com”. of your choice. This takes you to the members’ – The “GRUNDIG INTERNET RADIO TUN- area. ING SERVICE” page appears. 1 Start the internet browser on your PC. 3 Enter your e-mail address and password and 2 Enter the address “www.grundig.radiosetup. click the push button » «. If several devices are registered, click on the com”. desired MAC address. – T he “GRUNDIG INTERNET RADIO TUN- ING SERVICE” page appears. Notes: Radio stations can only be played back in MP3, WMA or Real Audio format. You have several options for searching for radio stations for a favourites group. In the “Search” search field you can search for radio stations by name or you can se- lect radio stations using search criteria such 3 Enter the twelve-digit MAC address of your as “Music, “Location” and “Language”. device and click on the push button » «. Selectingradiostationsusingthe Note: searchfunction The MAC address (Radio ID) can be ac- 1 In the “Search” field, enter the name of the cessed, see »Main menu« and then select... - Page 27 « to confirm. 3 Enter the name of a new favourites group in – T he radio station is stored in the favourites the entry field and press » « to confirm; group. 4 Close the “Favourite Stations” menu. open the name field, select a favourites group 5Repeat the procedure for additional stations. and press » « to confirm. Note: – T he radio station is stored in the favourites group. To check the radio stations, select the start page and click on the favourites group. 4 Close the “Favourite Stations” menu. You will see the new radio stations. 5 Repeat the procedure for additional stations. 6 Exit the “GRUNDIG INTERNET RADIO TUN- Note: ING SERVICE” Internet page using the »Log- To check the radio stations, select the start out« button. page and click on the favourites group. Note: You will see the new radio stations. Radio stations that are no longer required can be deleted from the favourites group. To do so, select the radio station and then –« button. click on the » ❤ 27 ENGLISH...
- Page 28 You can also add radio stations to your favour- ites list that are not provided by the V-Tuner Notes: Internet service. If details of the radio station need to be changed, click »Edit« and make the chang- You can find information about this on the Inter- es in the “My Added Stations” menu. net. In Windows Media Player, you can view the parameters for these (for example, the URL) To open these radio stations on the device, in the “Properties” submenu. go to the Internet menu and press »Station list«, »My Added Stations«. You can only conduct this process on a computer. You cannot play back every radio station on your device that you can listen to on your com- puter. These radio stations require a special media player that can only be installed on a PC. 1 Start the Internet browser on your PC. 2 Enter the address “www.grundig.radiosetup. com”. – T he “GRUNDIG INTERNET RADIO TUN- ING SERVICE” page appears. 3 Enter your e-mail address and password and confirm. 4 Click the “My Added Stations” line; if radio stations are already available, click the » « button after the line “Add Another Station”. – T he “My Added Stations” menu is dis- played. 5 Enter the station name, URL of the radio sta- 28 ENGLISH...
-
Page 29: Shared Media Server (Audio Streaming)
SHAREDMEDIAMODE - ------------------------------------------------------------------------------------- Sharedmediaserver(audio 4Select the option »Shared media« with » « or » « and press »OK« to confirm. streaming) – T he display shows the list of servers, media This function allows you to make a selection by and media titles. artist and track, as well as by album, genre, etc.; this selection depends on the structure of the 5 Select the required option with » « or » « music archive and on the UPnP server software and press »OK« to confirm. in use (e.g. Nero Media Home, Windows Me- – T he selection list appears in the display. dia Player 12). Access times may be prolonged 6 Select the required track with » « or » « depending on the size of the music archive, and and press »OK« to confirm. this make usage inconvenient. While the UPnP – I f a title is selected, playback of the track server is importing the complete music archive, only limited operation of the device is possible, starts. if at all. Otherplaybackfunctions... - Page 30 SHAREDMEDIAMODE - ------------------------------------------------------------------------------------- Playingplaylists Playbackofmediaand"remote control"ofSonoclockviathePC 1 Select the input source »Music player« by pressing »M«. With a PC running on Windows 7/8 operating system and the DLNA 1.5 industry standard 2 Select the option »My playlist« with » « or (Digital Living Network Alliance), you can play » « and press »OK« to confirm. back media stored on the PC using the Sono- – The selection list appears in the display. clock. Windows 7/8 provides the function "Play 3 Select a file/track with » « or » « and press to..." for this purpose. »OK« to confirm. At the same time, you can remotely control – When a track has been selected, playback several Sonoclock functions such as adjusting of the track begins automatically. the volume, pause, continue and stop playing, select the next or previous title, and use the Re- Deletingoneoralltracks/filesfrom peat function. theplaylist To enable this, the Sonoclock must be logged 1 Select the input source »Music player« by on to the same home network as the PC. pressing »M«. Only limited functions are currently possible on 2 Select the option »My playlist« with » « or the Sonoclock.
-
Page 31: Windows Media Player
SHAREDMEDIAMODE - ------------------------------------------------------------------------------------- Playusingthe"Playto..."func- Playusingthe"Playto..."func- tionintheWindowsMedia tionwithouttheWindowsMe- Player diaPlayer With the Windows Media Player, you can You can also play albums or songs from the PC manage your media data and quickly find the on the Sonoclock without using the Windows required album or song that you want to play. Media Player. 1 Start the »Windows Media Player« on the PC. 1 Click on the required album/song. Note: 2 Press the right mouse button and click on the "Play to..." menu option. If the Media Player is already open and – P laying starts. you are in Play mode, click on the "Media Library" button. 3 The following functions are available for oper- 2 If the playback list is closed or if the "Burn" or ating the Sonoclock: – Adjust volume; "Synchronize" function is active, click on the – P ause, continue, and stop playing; "Now playing" button. – S elect next or previous title; 3 Select the required album/song and drag to – Select the Repeat function. -
Page 32: Laying The Contents Of A Usb Memory Stick
USBMODE - --------------------------------------------------------------------------------------------------------------------------------- PlayingthecontentsofaUSB Viewinginformation memorystick 1 To display information on the current track, press »i« repeatedly. 1 Switch off the device from standby mode by – I nformation on the artist, track, album, etc. pressing » « on the remote control or is displayed. »ON/OFF« on the device. Pausingandresumingplayback 2 Connect the USB interface of the MP3 player to the »USB« socket on the device (on the 1 Press »II« during playback to pause. back side), using a standard USB cable; – D isplay: »II«, playing time stops, track or file information remains in the display. or 2 Continue playback by pressing » «. insert the USB plug of the USB memory stick in the »USB« socket (on the back side) on the Selectinganothertrack device. During playback 3 Switch on the device from standby mode by 1 During playback, press » « or » « pressing » « on the remote control or repeatedly until the desired track or file is »ON/OFF« on the device. - Page 33 USBMODE - --------------------------------------------------------------------------------------------------------------------------------- Repeatingafileoratrack NotestotheUSBmode The USB socket on the device does not 1 Open the »Music player« menu by pressing support a connection for a USB extension »M«. cable and is not designed for direct con- 2 Select the option »Repeat play:« with » « or nection to a computer. » «. The USB socket of this device is a standard socket. Due to rapid advances in technol- 3 Activate the function by pressing »OK«. ogy and new manufacturers appearing – Display:» « . every day, the compatibility of USB memo- – T he actual track or file is played back ry sticks can only be partially guaranteed. repeatedly. If USB operation is impaired or is not 4 To end the option, switch off »Repeat play:« possible, this does not indicate a device in the »Music player« menu by pressing malfunction. »OK«. Bi-directional data transfer as defined for ITE devices in EN 55022/EN 555024 is Playingtracksinrandomorder not possible.
-
Page 34: Selecting The Dab Input Source
DABMODE --------------------------------------------------------------------------------------------------------------------------------- SelectingtheDABinputsource SelectingaDABstation–from presets 1 Press »M« repeatedly until »DAB radio« ap- pears on the display; 1 Open a DAB station by pressing one of the preset buttons »1I6« til »5I10« on the device or (press once for the presets 1 – 5, twice for 1 Press »MENU« to open the menu. presets 6 – 10), or by pressing the number buttons »1...0« on the remote controll. 2 Select the »Main menu« with » « or » « and press »OK« to confirm. DisplayingDABstationinforma- 3 Select your the input source »DAB« with » « tion or » « and press »OK« to confirm. 1 To display information on the current DAB Main menu station, press »i« repeatedly. Internet radio – T he following displays appear in succes- Spotify sion: Music player The genre; the location and the frequency; r eference to signal interference, e.g. »Sig- nal error 10« (at optimum signal »Signal error 0«);... -
Page 35: Selecting The Fm Input Source
FMMODE -------------------------------------------------------------------------------------------------------------------------------------- SelectingtheFMinputsource Stereoandmonoreception The device has an auto mode, which switches 1 Press »M« repeatedly until »FM radio« ap- automatically between stereo and mono de- pears on the display; pending on the strength of the reception signal. or 1 Press »MENU« to open the menu. 1 Press »MENU« to open the menu. 2 Select the option »Audio setting« by pressing 2 Select the »Main menu« with » « or » « » « or » « and confirm by pressing »OK«. and press »OK« to confirm. 3 Switch to mono reception by selecting the 3 Select your the input source »FM« with » « »YES« button using » « or » « and confirm by or » « and press »OK« to confirm. pressing »OK«. Stereo reception is set using the »NO« button. Main menu Internet radio 4 Press »MENU« to end the setting. Spotify DisplayingRDSstationinforma- Music player tion If the device is receiving a RDS station, the sta- Aux In tion name and »R.D.S« appear in the display... -
Page 36: Selecting And Playing Back Music Tracks
SPOTIFYMODE ----------------------------------------------------------------------------------------------------------------- The Spotify software is subject to third party licenses found here: www.spotify.com/connect/ third-party-licenses Note: The mobile phone or tablet PC must be registered in the same WLAN network as your Sonoclock. Selectingandplayingbackmusic tracks 1 Switch on the device from stand-by with » « on the remote control or »ON/OFF« on the device. 2Start the“Spotify” application on the mobile phone or tablet PC. 3Log on to “Spotify”. 4Select the desired music track and start play- back. 5Click on the loudspeaker symbol. – T he available playback devices are dis- played. 6Select your Sonoclock. – T he music track is played back on the Sonoclock. Note: The “Spotify” input source is automatically selected on the Sonoclock. Additionalfunctions 1Pause playback with » II«, 2To resume playback, press » II« again. 3Select the previous track with » «, select the next track with »... -
Page 37: Listening To An External Source
AUXMODE -------------------------------------------------------------------------------------------------------------------------------- Listeningtoanexternalsource You can listen to the audio signal from the ex- ternal device connected through your system’s speakers. 1 Switch on the device from standby mode by pressing » « on the remote control or »ON/OFF« on the device. 2Use a standard audio cable (not supplied) to connect »AUXIN« on the back of the device to an AUDIO OUT socket on the external equipment. 3 Press »M« repeatedly until »Aux in« appears in the display. 4 Start playback on the external device. 37 ENGLISH... -
Page 38: Requirements
REMOTECONTROLUSINGUNDOK - ------------------------------------- Selectingtheinputsource 1 On the smartphone or tablet PC, tap the »Ξ« symbol. The UNDOK name and logo are trademarks of 2 Tap the »Mode« line. Frontier Silicon Limited. 3 T ap the required input source: Requirements: The device must be switched on. The “UNDOK” application is installed on a smartphone and tablet PC, and the device and the smartphone/tablet PC are logged into the same network. To switch the device on from stand-by mode, the »Keep network connected« function must be activated (»YES«) in the »System settings« – »Network« menu. This does, however, result in increased power consumption in stand-by mode. » Internet radio«; Openingtheapplication »Spotify«; »Music player«; 1 Open the “UNDOK” application on »DAB«; the smartphone or tablet PC. »FM«; 2 Select and activate the device on the smart- »Aux In«. phone or tablet PC. – T he input source selected is connected after –... -
Page 39: My Home
REMOTECONTROLUSINGUNDOK - ------------------------------------- MyHome Settings 1 Tapping the »My Home« line displays the de- 1 On the smartphone or tablet PC, tap the »Ξ« vice name and the MAC address. symbol. 2 Tap the »Settings« line. NowPlaying Sleep 1 Tapping the »Now Playing« line displays the current input source and the station. 1 Enter the preferred switch-off time. Equaliser 1 Select the preferred sound setting. Checkforupdates 1 When a new software version is available, this can be loaded. Note: The »Set up new audio system« line does not function on this device. Additionalfunctions Depending on the input source, additional func- tions may be available: » « – S earch when using DAB and Internet ra- dio. Browse » « – T une/search when using DAB, FM 1 Tapping the »Browse« line displays the sta- and Internet radio. tions available for the input sources »Internet radio«, »DAB« and »FM«. -
Page 40: Switch-On Timer
TIMERMODE -------------------------------------------------------------------------------------------------------------------------- Your device has 3 timer modes: Press » « or » « to set the alarm minute and – T he switch-on timer, which switches the press »OK« to confirm. device on at the set time and wakes you – Display: The previous menu reappears with the input source you selected. automatically. – T he sleep timer, which switches the device 8 To set the timer source, select the option off at a preset time. »Mode« with » « or » « and press »OK« to – T he reminder timer (NAP), reminding you confirm. by sounding the signal tone at a preset Press » « or » « to select the timer source time. from »Buzzer«, »Internet radio«, »DAB« or Switch-ontimer »FM« and press »OK« to confirm. – D isplay: The previous menu reappears Settingthetimer automatically. 1 Switch on the device from standby mode by Note: pressing »... -
Page 41: Sleep Timer
TIMERMODE -------------------------------------------------------------------------------------------------------------------------- Interruptingthealarm Sleeptimer 1 Press »S« while the alarm is sounding. Settingthesleeptimer – Display: » « flash. By using the button »S/N« – The alarm (signal tone or radio) stops. 1 Switch on the device by pressing » « on the Note: remote control or »ON/OFF« on the device- The alarm will sound again depending on and select the preferred sound source. how often a button has been pressed (1 2 Open the sleep menu with »S/N« on the time = after 5 minutes, 2 times = 10 min- remote control. utes, 3 times = 15 minutes, 4 times = 30 3 To set the switch-off time from »15« till »120«, minutes. The total alarm time in 90 minutes. press »S/N« on the remote control repeat- Cancellingalarmstand-by edly. 1 While the timer is sounding, press »ON/ – Display: » « and the switch-off time ap- OFF«. pears. – I f the timer is set to »Once«, the timer signal – A fter the selected time has elapsed stops and »... -
Page 42: Reminder Timer
TIMERMODE -------------------------------------------------------------------------------------------------------------------------- Remindertimer Settingtheremidertimer 1 Switch on the device from standby mode by pressing » « on the remote control or »ON/OFF« on the device. 2 Press »MENU« to open the menu. 3 Select the option »Main menu with » « or » « and press »OK« to confirm. 4Select the option »Nap« with » « or » « and press »OK« to confirm. 5Select a reminder time (settings from »15«, »Off« or »1« to »300« minutes in minute incre- ments) with » « or » « and press »OK« to confirm. – D isplay: the NAP symbol and the remaining reminder time alternately. – The device emits a reminder signal tone at the set time. Endingtheremidertimerprema- turely 1 Go to the »NAP« menu and use » « or » « to set the reminder time to »Off«. – D isplay: »NAP« disappears. 42 ENGLISH... -
Page 43: Displaying Software And Id Information
SPECIALSETTINGS ----------------------------------------------------------------------------------------------------- DisplayingSoftwareandIDin- Displayinginformationandnet- formation workstatus You can display information about your device 1 Press »MENU« to open the menu. and the network used. Settings cannot be made 2 Select the option »System settings« with » « in this menu. or » « and press »OK« to confirm. 1 Press »MENU« to open the menu. 3 Select the option »Info« with » « or » « and 2 Select the option »System settings« with » « press »OK« to confirm. or » « and press »OK« to confirm. Info 3 Select the option »Network« with » « or SW version » « and press »OK« to confirm. XXXXXXXXXXX XXXXXXXXXXX 4 Select the option »View settings« with » « or XXXXXXXXXXX » « and press »OK« to confirm. Spotify version 5 Select the required information with » « or »... -
Page 44: Installing An Additional Network
SPECIALSETTINGS ----------------------------------------------------------------------------------------------------- Installinganadditionalnetwork Notes: Numbers, capital and lower case letters as Use this function when you wish to operate your well as special characters are available for device at a different location using a different input. network. Scroll through the menu pages with » « or The first network (home network) is retained. » « in order to select other characters. 1 Press »MENU« to open the menu. If you make a mistake during entry, press 2 Select the option »System settings« with » « » «, » «, » « or » « to select the push or » « and press »OK« to confirm. button »BKSP« and press »OK« to confirm. The last character is deleted. 3 Select the option »Network« with » « or If you wish to exit the menu prematurely, » « and press »OK« to confirm. press » «, » «, » « or » « to select the 4 Select the option »Internet Wizard« (if a push button »CANCEL« and press »OK« standard router is used) or the option »PBC to confirm. The device switches back one Wlan setup« (if a router with WPS-PBC/Push-... -
Page 45: Setting The Wlan Region
SPECIALSETTINGS ----------------------------------------------------------------------------------------------------- SettingtheWLANregion Registeringthedevicewiththe WLANrouterwithindividual You must set the WLAN region in accordance networksettings with the location of the device. These settings require advanced knowledge of 1 Press »MENU« to open the menu. network configuration. 2 Select the option »System settings« with » « 1 Press »MENU« to open the menu. or » « and press »OK« to confirm. 2 Select the option »System settings« with » « 3 Select the option »Network« with » « or or » « and press »OK« to confirm. » « and press »OK« to confirm. 3 Select the option »Network« with » « or 4 Select the option »Wlan region« with » « or » « and press »OK« to confirm. » « and press »OK« to confirm. 4 Select the option »Manual settings« with » « 5 Select the appropriate WLAN region with or » « and press »OK« to confirm. » « or » « and press »OK« to confirm. 5 Select the option »Wired« or »Wireless« with 6 End the setting by pressing »MENU«. - Page 46 SPECIALSETTINGS ----------------------------------------------------------------------------------------------------- If you wish to exit the menu prematurely, Select the next digit position with » « (you press » «, » «, » « or » « to select the can switch back with » «). push button »CANCEL« and press »OK« Repeat the procedure for all characters. to confirm. The device switches back one Confirm the number by pressing »OK«. menu level. Note: Note: The primary and secondary DNS (Domain The encryption settings of the device must Name System) are the network address of match those of the router. the server allocated by the provider. 13 S elect the encryption level with » « or » « 10 E nter the Primary DNS. and press »OK« to confirm. S elect the first number with » « or » « and press »OK« to confirm. Note: S elect the next digit position with » « (you You can select different encryption levels: can switch back with »...
- Page 47 SPECIALSETTINGS ----------------------------------------------------------------------------------------------------- Settingthetime,timezoneand Settingthetime,timezoneand dateautomatically datemanually 1 Press »MENU« to open the menu. 1 Press »MENU« to open the menu. 2 Select the option »System settings« with » « 2 Select the option »System settings« with » « or » « and press »OK« to confirm. or » « and press »OK« to confirm. 3 Select the option »Time/Date« with » « or 3 Select the option »Time/Date« with » « or » « and press »OK« to confirm. » « and press »OK« to confirm. 4 Select the option »Auto update« with » « or 4 Select the option »Set format« with » « or » « and press »OK« to confirm. » « and press »OK« to confirm. Select »12« or »24 #« with » « or » « and 5 Select the required option (»Update from press »OK« to confirm. FM«, »Update from DAB«, »Update from – Display: The previous menu reappears Network«) with » « or » « and press »OK« automatically.
-
Page 48: Nter The Pin Code For The "Remote Con- Trol
SPECIALSETTINGS ----------------------------------------------------------------------------------------------------- EnterthePINcodeforthe "Keeping"theconnectiontothe "remotecontrol" router If you want to play media stored on a PC and If you want to switch on your device remotely, want to use your mobile/smartphone as a "re- the connection to the router must be "kept". If the mote control", you can secure this with a PIN device has been switched off, this is not the case. code. This depends on the application in use. You can activate this in the "Keep network con- nected" menu. 1 Press »MENU« to open the menu. 1 Press »MENU« to open the menu. 2 Select the option »System settings« with » « 2 Select the option »System settings« with » « or » « and press »OK« to confirm. or » « and press »OK« to confirm. 3 Select the option »Network« with » « or 3 Select the option »Network« with » « or » «and press »OK« to confirm. » « and press »OK« to confirm. 4 Select the option »NetRemote PIN Setup« 4 Select the option »Keep network connected« with » « or » « and press »OK« to confirm. with » « or » « and press »OK« to confirm. 5 Enter the NetRemote PIN code four-digit. -
Page 49: Updating The Device Software
SPECIALSETTINGS ----------------------------------------------------------------------------------------------------- Deletinganetworkwhichcan- Notes: notbeaccessed If »Auto-check setting« is selected, the device checks in one cycle whether new This function allows you to delete a network for software is available. which access data is still stored in the device, If »Check now« is selected, the device although they are no longer available. checks the software version. 1 Press »MENU« to open the menu. 4 If a new version is available, this can be 2 Select the option »System settings« with » « loaded by selecting the push button »YES«. or » « and press »OK« to confirm. Selecting the push button »NO« cancels the 3 Select the option »Network« with » « or update. » « and press »OK« to confirm. Changingthemenulanguage 4 Select the option »Network profile« with » « 1 Open the menu for the current input source by or » « and press »OK« to confirm. – T he existent networks appears. The „ac- pressing »MENU«. tive“ network is marked with a star. 2 Select the option »System settings« with » « 5 Select the network to be deleted with » « or or »... -
Page 50: Glossary
INFORMATION - ----------------------------------------------------------------------------------------------------------------- NAS(networkaccessstorage) Glossary The abbreviation NAS is used for devices that Bootloaderversion provide data from a hard drive to a network. Boot loader is a software application that is loaded by the device firmware from a boot- Networkname(SSID) capable medium and then executed. The boot The network name (SSID – service set identifier) loader then loads further parts of the operating is the term used for the identification of a wire- system. less network that is based on IEEE 802.11. Domainnamesystem Every wireless LAN has a configurable SSID, which uniquely identifies the wireless network. The domain name system (DNS) is one of the The character sequence of the network name most important services on the Internet. Its main can be up to 32 characters in length. It is config- function is to convert an Internet address into the ured in the base station (access point) of a wire- corresponding IP address. less LAN and set on all clients which access it. Firmwareversion Networkmask Firmware is the term used for software that is em- The network mask or net mask, sometimes also bedded in a programmed chip (microcontroller). referred to as a subnet mask, is a bit mask that It is mostly stored in a flash memory, an EPROM separates an IP address into a network part and or an EEPROM. a device/host part. It is used in IP networks to The firmware contains functions for controlling make routing decisions. - Page 51 INFORMATION - ----------------------------------------------------------------------------------------------------------------- Proxyserver Wi-Fi A proxy or proxy server is a service program The Wi-Fi Alliance is an organisation that has for computer networks that administers data taken on the task of certifying products from transfer. It makes data transfer faster, and can different manufacturers on the basis of the IEEE- also increase security by implementing access 802.11 standard, thereby ensuring that different control mechanisms. wireless devices can operate in parallel. The transfer is conducted between computers or On 31 October 2002, the consortium an- programs in computer networks. On the server nounced a new encryption technology – Wi-Fi side, the proxy acts as a client; on the client Protected Access (WPA) – a part of the (then) side, it acts as a server. forthcoming IEEE standard 802.11i which would replace the WEP encryption procedure, which Router was already regarded as insecure before the new standard came into force. After 802.11i A router is a network component that links sev- came into force, the Wi-Fi group coined the term eral computer networks. WPA2. The router analyses (on the basis of layer 3 IEEE 802.11e is an industrial standard issued information) the network packages of a protocol by the Institute of Electrical and Electronics En- it receives and forwards it to the intended desti- gineers (IEEE) and a supplement to the wireless nation network. LAN standard IEEE 802.11 for supporting the Conventional routers work on layer 3 of the quality of service.
-
Page 52: Licence Conditions
INFORMATION - ----------------------------------------------------------------------------------------------------------------- Licenceconditions c. Have to confirm that “this product is protected for Microsoft by intellectual property rights. This product is protected by the intellectual prop- The use or distribution of this technology out- erty rights of the Microsoft Corporation. The use side of this product is prohibited unless under or distribution of such technology outside of this licence from Microsoft or an authorised sub- product is prohibited unless under licence from sidiary”. Microsoft or an authorised subsidiary. Content providers use the digital rights manage- Venice6.5licenceconditionsfor ment technology for Windows Media contained endusers in this device (“WM-DRM”) to protect the integ- By using this product user agrees to the follow- rity of their content (“Secure Content”) so that ing End User License conditions: their intellectual property, including copyright, in such content is not misappropriated. This 1 R efrain from modifying, translating, reverse device uses WM-DRM software to play Secure engineering, decompiling, disassembling or Content (“WM-DRM Software”). If the security using other means to discover the Source of the WM-DRM Software in this device has Code or otherwise replicate the functionality been compromised, owners of Secure Content of the Client Code, except to the extent that (“Secure Content Owners”) may request that this restriction is expressly prohibited by ap- Microsoft revoke the WM-DRM Software’s right plicable law. - Page 53 INFORMATION - ----------------------------------------------------------------------------------------------------------------- USBwarefromJungoLtd. 2 R edistributions in binary form must reproduce the above copyright notice, this list of condi- Notice required: tions and the following disclaimer in the doc- “Copyright 1994-2005 The FreeBSD Project All umentation and/or other materials provided rights reserved. with the distribution. Redistribution and use in source and binary 3 N either the name(s) of the above-listed forms, with or without modification, are permit- copyright holder(s) nor the names of its con- ted provided that the following conditions are tributors may be used to endorse or promote met: products derived from this software without 1 R edistributions of source code must retain the specific prior written permission. above copyright notice, this list of conditions This software is provided by the copyright and the following disclaimer. holders and contributors "as is" and any 2 R edistributions in binary form must reproduce express or implied warranties, including, the above copyright notice, this list of condi- but not limited to, the implied warranties of...
- Page 54 INFORMATION - ----------------------------------------------------------------------------------------------------------------- 1 R edistributions of source code must retain the – N either the name of the Xiph.org Founda- above copyright notice, this list of conditions tion nor the names of its contributors may and the following disclaimer. be used to endorse or promote products derived from this software without specific 2 R edistributions in binary form must reproduce prior written permission. the above copyright notice, this list of condi- This software is provided by the copyright tions and the following disclaimer in the doc- holders and contributors ``as is'' and any umentation and/or other materials provided express or implied warranties, including, with the distribution. but not limited to, the implied warranties of 3 T he name of the author may not be used to merchantability and fitness for a particular endorse or promote products derived from purpose are disclaimed. In no event shall the this software without specific prior written foundation or contributors be liable for any permission. direct, indirect, incidental, special, exemplary, or consequential damages (including, but not This software is provided by the author "as is"...
- Page 55 INFORMATION - ----------------------------------------------------------------------------------------------------------------- 4 T he names "OpenSSL Toolkit" and "OpenSSL 2 R edistributions in binary form must reproduce Project" must not be used to endorse or the above copyright notice, this list of condi- promote products derived from this software tions and the following disclaimer in the doc- without prior written permission. For written umentation and/or other materials provided permission, please contact openssl-core@ with the distribution. openssl.org. 3 A ll advertising materials mentioning features 5 P roducts derived from this software may not or use of this software must display the fol- be called "OpenSSL" nor may "OpenSSL" lowing acknowledgement: "This product appear in their names without prior written includes cryptographic software written by permission of the OpenSSL Project. Eric Young (eay@cryptsoft.com)" The word 'cryptographic' can be left out if the rouines 6 R edistributions of any form whatsoever must from the library being used are not crypto- retain the following acknowledgment: "This graphic related.
-
Page 56: Cleaning The Device
INFORMATION - ----------------------------------------------------------------------------------------------------------------- Cleaningthedevice Powersupply Operating voltage: 230 V ~ , 50/60 Hz Pull out the power cord from the wall socket. Clean the device by using a soft cloth slightly Max. power consumption: 14 W moistened with a mild detergent solution. Do not Power consumption in standby: ≤ 1 W use a solution containing alcohol, spirits, ammo- nia or abrasives. AmplifierunitOutput Sine wave power: 1 x 0.5 W Environmentalnote Audio power: 1 x 0.8 W This product has been manu- factured with high quality parts Receiverunit and materials which can be FM: 87.5 ...108.0 MHz reused and are suitable for DAB: 1 74.928 – 239.200 recycling. MHz, 5A–13F Therefore, do not dispose the product with WLAN normal domestic waste at the end of its service life. Take it to a collection point for the recycling Network standard: IEEE 802.11 b, g, n of electrical and electronic equipment. This is IEEE 802.11 b, g, n indicated by this symbol on the product, in the... -
Page 57: Troubleshooting
Cables that have accidentally been disconnected and flat batteries for the remote control will impair functioning. If the following measures do not resolve the problem satisfactorily, please visit www.grundig.com, product range:audio, internet radios or contact your specialist dealer. GeneralFaults Problem Possiblecause/remedy No sound. - Page 58 INFORMATION - ----------------------------------------------------------------------------------------------------------------- Messagesfromthedevice Message Possiblecause/remedy Connection failed – WLAN network is deactivated; switch on the WLAN network – R ange Problem: move the device closer to the router or install an external repeater. – O ther networks are transmitting on the same channel; change channel settings on the router, then repeat the registration procedure Please wait – I ndicates a search in the netwotk for the selected radio station. When this is displayed, navigation in the menu is not possible. Network error – T he selected radio station is currently not available. The broadcaster has ceased operation or only broadcasts at certain times or the maximum permitted numer of users has been reached. – T he selected file is currently not avaiable. The file has been deleted, moved ore renamed on the storage medium. Insufficient power to USB – T he connected USB device is not supplied with sufficient power. Switch off the Sonoclock, remove the USB device and charge. Streamingproblems Problem Possiblecause/remedy No UPnP server is dis- – S witch on the PC or external hard drive (NAS).
- Page 59 Grundig Intermedia GmbH Beuthener Strasse 41 D–90471 Nürnberg www.grundig.com 72011 412 6600 15/20...