Crestron DigitalMedia 3-Series Quick Start Manual
Hide thumbs
Also See for DigitalMedia 3-Series:
- Operation manual (62 pages) ,
- Supplemental manual (20 pages) ,
- Quick start manual (7 pages)
Advertisement
Quick Links
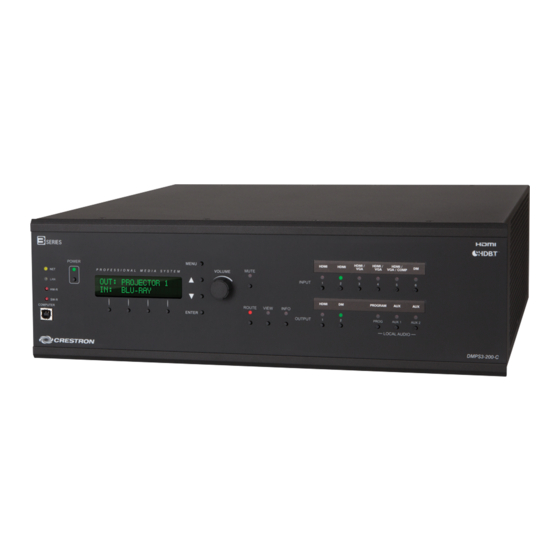
DMPS3-200-C, DMPS3-300-C, & DMPS3-300-C-AEC
3-Series® DigitalMedia™ Presentation Systems
The Crestron® DMPS3-200-C, DMPS3-300-C, and
provide complete presentation control and signal routing solutions for
boardrooms and classrooms. Each integrates the control system,
multiformat matrix switcher, mic mixer, audio DSP, amplifier, and
DigitalMedia distribution center all into a single 3-space rack-mountable
package. Built-in .AV Framework™ enables simplified configuration and
control without programming.
In the Box
1
DMPS3-200-C, DMPS3-300-C, or DMPS3-300-C-AEC,
3-Series DigitalMedia Presentation System
Additional Items
2
Bracket, Rack Ear, 3U (2033588)
3
Connector, 2-Pin (2012361)
1
Connector, 3-Pin (2003575)
4
Connector, 4-Pin (2003576)
2
Connector, 8-Pin (2003580)
4
Foot, 0.5 in. x 0.5 in. x 0.23 in., Adhesive (2002389)
1
Cable, Power, 6 ft 7 in. (2 m) (2001134)
6
Screw, 6-32 x 5/16 in., Undercut, Phillips (2007223)
DMPS3-200-C Only
13
Connector, 5-Pin (2003577)
DMPS3-300-C and DMPS3-300-C-AEC Only
15
Connector, 5-Pin (2003577)
DMPS3-300-C-AEC
The DMPS3-200-C, DMPS3-300-C, & DMPS3-300-C-AEC can be
mounting into a rack or placed on a flat surface.
Mount into a Rack
The presentation system occupies 3U of rack space. Use the three screws
from the front part of each side panel, and a #1 or #2 Phillips screwdriver
to attach the two included rack ears to the device, as shown in the
following illustration. Then mount the device into the rack using four
mounting screws (not included).
Rack Mounting Safety Precautions
Elevated Operating Ambient Temperature: If installed in a closed or
multi-unit rack assembly, the operating ambient temperature of the rack
environment may be greater than room ambient temperature. Therefore,
consideration should be given to installing the equipment in an
environment compatible with the maximum ambient temperature (Tma)
specified by the manufacturer.
Install the Device
Quick Start
1
Advertisement

Related Manuals for Crestron DigitalMedia 3-Series


Summary of Contents for Crestron DigitalMedia 3-Series
- Page 1 Quick Start DMPS3-200-C, DMPS3-300-C, & DMPS3-300-C-AEC 3-Series® DigitalMedia™ Presentation Systems The Crestron® DMPS3-200-C, DMPS3-300-C, and DMPS3-300-C-AEC provide complete presentation control and signal routing solutions for Install the Device boardrooms and classrooms. Each integrates the control system, multiformat matrix switcher, mic mixer, audio DSP, amplifier, and The DMPS3-200-C, DMPS3-300-C, &...
- Page 2 Quick Start DMPS3-200-C, DMPS3-300-C, & DMPS3-300-C-AEC 3-Series® DigitalMedia™ Presentation Systems Place on a Flat Surface Reduced Airflow: Installation of the equipment in a rack should be such that the amount of airflow required for safe operation of the equipment Attach the included feet near the corners on the underside of the control is not compromised.
-
Page 3: Connect The Device
Quick Start DMPS3-200-C, DMPS3-300-C, & DMPS3-300-C-AEC 3-Series® DigitalMedia™ Presentation Systems Connect the Device Connect the device as required for the application. DPMS3-200-C Rear Panel Connections... - Page 4 Quick Start DMPS3-200-C, DMPS3-300-C, & DMPS3-300-C-AEC 3-Series® DigitalMedia™ Presentation Systems DMPS3-300-C and DMPS3-300-C-AEC Rear Panel Connections...
- Page 5 DHCP is enabled. To set a static IP address, use any of the following: Norway: “Apparatet må tilkoples jordet stikkontakt.” Crestron Toolbox™ software on a PC that is connect to the device via Sweden: “Apparaten skall anslutas till jordat uttag.”...
-
Page 6: Configure The Device
For new accounts, register for a Crestron XiO Cloud service account at www.crestron.com/xiocloud. 4. Claim the device to the service as described in the Crestron XiO Cloud User Guide (Doc. 8214) at www.crestron.com/manuals. 5. Select the device from the cloud interface to view its settings. - Page 7 To route the inputs using the front panel controls: 1. Press the ROUTE button. 2. Press the INPUT button that corresponds to the input to be routed. www.crestron.com/model/6506614 3. Press the OUTPUT button(s) that correspond(s) to the desired output(s). DMPS3-300-C 4.
- Page 8 Crestron disclaims any proprietary interest in the marks and names of others. Crestron is not responsible for errors in typography or photography.