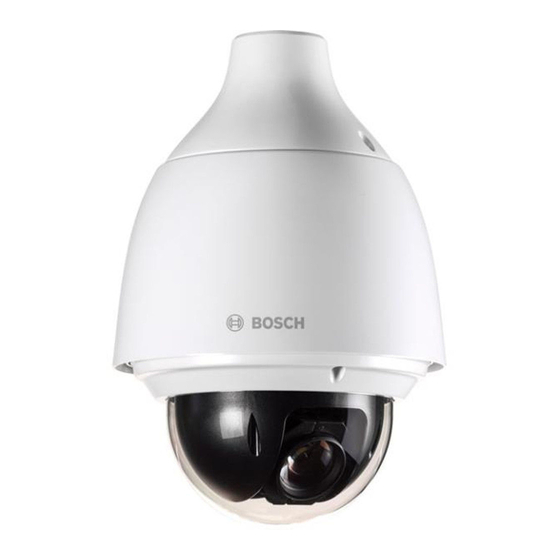
Bosch AUTODOME IP starlight 5000i Installation Manual
Pendant
Hide thumbs
Also See for AUTODOME IP starlight 5000i:
- Installation manual (40 pages) ,
- User manual (80 pages) ,
- User manual (65 pages)
Table of Contents
Advertisement
Advertisement
Table of Contents

Related Manuals for Bosch AUTODOME IP starlight 5000i


Summary of Contents for Bosch AUTODOME IP starlight 5000i
- Page 1 AUTODOME IP starlight 5000i (pendant) NDP‑5512‑Z30 Installation Manual...
-
Page 3: Table Of Contents
AUTODOME IP starlight 5000i (pendant) Table of contents | en Table of contents Safety About this manual Legal information Safety precautions Important safety instructions Connection in applications Important notices Customer support and service Introduction Establishing the connection Configuration with Project Assistant app... -
Page 4: Safety
Legal information Copyright This manual is the intellectual property of Bosch Security Systems, and is protected by copyright. All rights reserved. Trademarks All hardware and software product names used in this document are likely to be registered trademarks and must be treated accordingly. -
Page 5: Important Safety Instructions
® Electrical Code (NEC)), Canadian Electrical Code, Part I (also called CE Code or CSA C22.1), and all applicable local codes. Bosch Security Systems accepts no liability for any damages or losses caused by incorrect or improper installation. Warning! Bosch’s version of High PoE: If supplying power to the camera by HPoE or a midspan device, you must install additional surge protection. -
Page 6: Connection In Applications
Video loss - Video loss is inherent to digital video recording; therefore, Bosch Security Systems cannot be held liable for any damage that results from missing video information. -
Page 7: Important Notices
AUTODOME IP starlight 5000i (pendant) Safety | en Important notices Notice! This is a class B product. In a domestic environment, this product may cause radio interference, in which case the user may be required to take adequate measures. This device complies with Part 15 of the FCC Rules. Operation is subject to the following two conditions: –... -
Page 8: Customer Support And Service
| Safety AUTODOME IP starlight 5000i (pendant) Customer support and service If this unit needs service, contact the nearest Bosch Security Systems Service Center for authorization to return and shipping instructions. USA and Canada Telephone: 800-289-0096, option 5 Fax: 800-366-1329 Email: repair@us.bosch.com... -
Page 9: Introduction
You can also use the Project Assistant app to complete the initial configuration of the camera. In order to use this device with the Project Assistant app by Bosch, you must download the app from the Bosch Download Store, from Google Play, or from the Apple Store. -
Page 10: Product Description
Specially designed and tuned for applications requiring surveillance in scenes with varying light levels, the AUTODOME IP starlight 5000i camera has an integrated 30X optical zoom to identify people at a maximum distance of 183 m (600 ft) with minimal loss of detail. -
Page 11: Preparing Wiring
AUTODOME IP starlight 5000i (pendant) Preparing Wiring | en Preparing Wiring Prepare and install all wiring for 24 VAC, PoE+ (Cat5e/Cat6), alarms, and audio as necessary. For 24 VAC, follow the recommendations for maximum cable distance and wire gage. Maximum cable distance in meters (feet) per minimum cable diameter The following table identifies the recommended transmission distance (maximum) in meters (feet), based on the specified wattage, per the minimum cable diameter (in mm²), when the... -
Page 12: Preparing The Camera
| Preparing the Camera AUTODOME IP starlight 5000i (pendant) Preparing the Camera Note: For pendant models, use T15. For in-ceiling models, use T10. Loosen the three (3) Hex screws in the trim ring / bubble enclosure with the appropriate Torx screwdriver. -
Page 13: Installing A Microsd Card (Optional)
AUTODOME IP starlight 5000i (pendant) Installing a microSD card (optional) | en Installing a microSD card (optional) Push the camera block until you see the card slot (item 1 in the following figure). Insert the card into the slot (item 2 in the following figure). - Page 14 | Installing a microSD card (optional) AUTODOME IP starlight 5000i (pendant) 3× Proceed with installation. 2021-01 | 1.3 | Bosch Security Systems Installation Manual...
-
Page 15: Installing A Camera Directly To An Indoor Wall
AUTODOME IP starlight 5000i (pendant) Installing a Camera Directly to an Indoor Wall | en Installing a Camera Directly to an Indoor Wall Installation Requirements – The wall is thick enough to install the mounting screws. – The wall can sustain at least eight (8) times the weight of the camera (1.88 kg (4.14 lb)): >... - Page 16 | Installing a Camera Directly to an Indoor Wall AUTODOME IP starlight 5000i (pendant) Thread all connection cables through the mounting cap. Attach the hook at the end of the Safety Tether to the loop attached to the top of the camera.
- Page 17 AUTODOME IP starlight 5000i (pendant) Installing a Camera Directly to an Indoor Wall | en Place the top of the camera inside the mounting cap. Rotate the camera approximately 15 degrees in a clockwise direction to lock firmly into place.
-
Page 18: Installing A Surveillance Cabinet And Camera
| Installing a Surveillance Cabinet and Camera AUTODOME IP starlight 5000i (pendant) Installing a Surveillance Cabinet and Camera The surveillance cabinet can attach directly to a wall, to a corner mount, or to a pole mount. To install the cabinet (power supply box), follow the instructions in the Surveillance Cabinet Installation Manual. - Page 19 AUTODOME IP starlight 5000i (pendant) Installing a Surveillance Cabinet and Camera | en Place the top of the camera inside the mounting cap. Rotate the camera approximately 15 degrees in a clockwise direction to lock firmly into place. Secure the safety locking screw with the T15 Torx screwdriver.
- Page 20 | Installing a Surveillance Cabinet and Camera AUTODOME IP starlight 5000i (pendant) 2021-01 | 1.3 | Bosch Security Systems Installation Manual...
-
Page 21: Installing A Pipe Mount And Camera
AUTODOME IP starlight 5000i (pendant) Installing a Pipe Mount and Camera | en Installing a Pipe Mount and Camera Notice! Indoor use only! This mount shall only be installed indoors. No outdoors installation is permitted. Tools Required – Appropriate tool for cutting a hole in drywall –... -
Page 22: Attaching The Mounting Cap And The Camera
| Installing a Pipe Mount and Camera AUTODOME IP starlight 5000i (pendant) Connect the mating connectors from the user-supplied cables from the pipe to the matching connectors from the camera. Refer to the chapter Connection for more information. Place the top of the camera inside the mounting cap. - Page 23 AUTODOME IP starlight 5000i (pendant) Installing a Pipe Mount and Camera | en Place the top of the camera inside the mounting cap. Rotate the camera approximately 15 degrees in a clockwise direction to lock firmly into place. Secure the safety locking screw with the T15 Torx screwdriver.
- Page 24 | Installing a Pipe Mount and Camera AUTODOME IP starlight 5000i (pendant) 2021-01 | 1.3 | Bosch Security Systems Installation Manual...
-
Page 25: Installing A Roof Mount And Camera
AUTODOME IP starlight 5000i (pendant) Installing a Roof Mount and Camera | en Installing a Roof Mount and Camera 10.1 Installing the Roof Mount Determine the wall location on the roof for the camera and use the Parapet wall mount bracket as a template to mark the hole locations. -
Page 26: Attaching The Mounting Cap And The Camera
| Installing a Roof Mount and Camera AUTODOME IP starlight 5000i (pendant) Attach the Parapet Wall Bracket using at least six (6) stainless steel fasteners, three (3) on each side. (The bracket has eight (8) holes.) Be careful not to overtighten the fasteners because it may strip the threads. - Page 27 AUTODOME IP starlight 5000i (pendant) Installing a Roof Mount and Camera | en Thread all connection cables through the mounting cap. Attach the hook at the end of the Safety Tether to the loop attached to the top of the camera.
- Page 28 | Installing a Roof Mount and Camera AUTODOME IP starlight 5000i (pendant) Place the top of the camera inside the mounting cap. Rotate the camera approximately 15 degrees in a clockwise direction to lock firmly into place. Secure the safety locking screw with the T15 Torx screwdriver.
-
Page 29: Connection
AUTODOME IP starlight 5000i (pendant) Connection | en Connection Warning! Bosch’s version of High PoE: If supplying power to the camera by HPoE or a midspan device, you must install additional surge protection. Caution! Compliance with EN50130-4 Alarm Standard – CCTV for Security Applications To meet the requirements of the EN50130-4 Alarm Standard, an ancillary uninterruptable power (UPS) supply is necessary. - Page 30 | Connection AUTODOME IP starlight 5000i (pendant) Label ID Description Cable Wire Color ALARM_COM Alarm Communications Red ALARM_OUT Alarm Out Brown ALARM_IN1 Alarm In 1 White ALARM_IN2 Alarm In 2 Blue AUDIO OUT Audio Out Grey Ground Black AUDIO GND...
-
Page 31: Technical Data
AUTODOME IP starlight 5000i (pendant) Technical data | en Technical data For product specifications, see the datasheet for your camera, available on the appropriate product pages of the Online Product Catalog at www.boschsecurity.com. Bosch Security Systems 2021-01 | 1.3 |... -
Page 32: Support
– Troubleshooting – Repair & Exchange – Product Security Bosch Building Technologies Academy Visit the Bosch Building Technologies Academy website and have access to training courses, video tutorials and documents: www.boschsecurity.com/xc/en/support/training/ 2021-01 | 1.3 | Bosch Security Systems Installation Manual... - Page 33 AUTODOME IP starlight 5000i (pendant) Support | Bosch Security Systems 2021-01 | 1.3 | Installation Manual...
- Page 34 | Support AUTODOME IP starlight 5000i (pendant) 2021-01 | 1.3 | Bosch Security Systems Installation Manual...
- Page 36 Bosch Security Systems B.V. Torenallee 49 5617 BA Eindhoven Netherlands www.boschsecurity.com © Bosch Security Systems B.V., 2021 202101132134...