
Related Manuals for Midea MFA-18HRDN1-Q


Summary of Contents for Midea MFA-18HRDN1-Q
- Page 1 INSTALLATION OWNER’S MANUAL REMOTE CONTROLLER Floor-Standing Type Thank you very much for purchasing our air conditioner, Before using your air conditioner , please read this manual carefully and keep it for future reference.
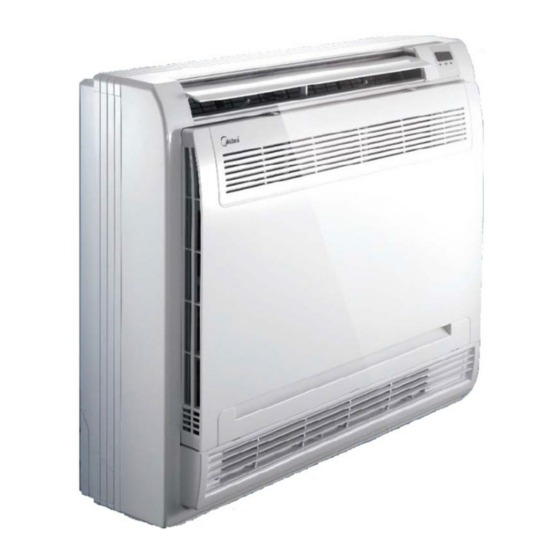
- Page 2 INDOOR UNIT OUTDOOR UNIT Fig.1 INDOOR UNIT OUTDOOR UNIT Air flow louver (at air outlet) Connecting pipe Air inlet Air inlet (with air filter in it) Air outlet Installation part Remote controller Display panel Drain pipe NOTE All the pictures in this manual are for explanation purpose only. They may be slightly different from the air conditioner you purchased(depend on model).The actual shape shall prevail.
-
Page 3: Table Of Contents
CONTENTS PAGE The safty precautions listed here are divided into two categories. In either case, important safty information is listed which must be read INSTALLATION MANUAL carefully. PRECAUTIONS..................1 WARNING INSTALLATION INFORMATION............... 2 Failure to observe a warning may result in death. ACCESSORIES..................3 CAUTION INSPECTING AND HANDLING THE UNIT..........4... -
Page 4: Installation Information
Wiring routing must be properly arranged so that control The appliance is not intended for use by young children board cover is fixed properly. or infirm persons without supervision. If control board cover is not fixed perfectly, it will cause heat-up at connection point of terminal, fire or electrical Don't install the air conditioner in the following locations: shock. -
Page 5: Accessories
3. ACCESSORIES Please check whether the following fittings are of full scope. If there are some spare fittings , please restore them carefully. Table 3-1 NAME SHAPE QUANTITY Installation fittings 1.Hook 2. Remote controller 3. Frame Remote controller & Its Frame 4. -
Page 6: Inspecting And Handling The Unit
4. INSPECTING AND HANDLING THE UNIT At delivery, the package should be checked and any damage should be reported immediately to the service agent. 700mm 210mm When handling the unit, take into account the following: Fragile, handle the unit with care. Keep the unit upright in order to avoid compressor damage. -
Page 7: Outdoor Unit Installation
6. OUTDOOR UNIT INSTALLATION 6.1 Installation Place The outdoor unit should be installed invvv the location that meets the following requiements: There is enough room for installation and maintenance. The air outlet and the air inlet are not impeded, and can not be reached by strong wind. -
Page 8: Refrigerant Piping Connection
7. REFRIGERANT PIPING CONNECTION Side air outlet outdoor unit (Wall or obstacle) CAUTION Air inlet For your safety, always wear safety eye wear and work gloves when connecting the pipes. >30cm Remove the water tray before performing Air inlet Maintain channel the connection. -
Page 9: Connect The Drain Pipe
Step 1: Ensure that the handle on the male coupling is in a 1.5m~2m reclined position away from the mating male coupling. Step 2: Retract the“Release Sleeve”on female coupling, insert the male coupling located on the indoor unit into the Insulating Downward declivity female coupling. -
Page 10: Wiring
9. WIRING CAUTION Make sure the power supply has been cut off when inserting or pulling out the plug connecters. NOTE If there is serious safety problem about the power supply, the technicians should refuse to install the air conditioner and explain to the client until the problem is solved. -
Page 11: Owner's Manual
OWNER’S MANUAL Do not dispose this product as unsorted municipal waste.Collection of such waste separately for special treatment is necessar Do not dispose of electrical appliances as unsorted municipal waste, use separate collection facilities. 1. IMPORTANT SAFETY INFORMATION Contact you local government for information regarding the connection systems available. -
Page 12: Parts Names
Arrange the drain hose to ensure smooth drainage. AUTO Incomplete drainage may cause wetting of the building, The OPERATION lamp is lit, and the air conditioner will run furniture etc. under AUTO mode. The remote controller operation is enabled to operate according to the received signal. Never touch the internal parts of the controller. -
Page 13: Hints For Economical Operation
Power failure Power failure during operation will stop the unit completely. The OPERATION lamp on the indoor unit will start flashing when power is restored To restart operation, push the ON/OFF button on the remote controller. Lightning or a car wireless telephone operating nearby may cause the unit to malfunction. -
Page 14: Air Flow Selection
6. AIR FLOW SELECTION 7. MAINTENANCE Open the front panel. How to open the front panel: (Refer to Fig.7-1) . CAUTION Before you clean the air conditioner, be sure the power Before you clean the air conditioner, be sure the power CAUTION supply is off. - Page 15 Open the front panel. (Refer to Fig.7-1) Fig.7-4 Fig.7-1 Remove the air filter. Air Outlet Selection Switch Fig.7-5 Set the air filter and the especial function filter as they were and close the front panel. CAUTION Do not dry out the air filter under direct sunshine or with fire. Fig.7-2 Take off the especial function filter especial function filter...
-
Page 16: Following Symptoms Are Not Air Conditioner Troubles
8. FOLLOWING SYMPTOMS ARE NOT AIR Symptom 4.2: Indoor unit, outdoor unit CONDITIONER TROUBLES A continuous low hissing sound is heard when the system is in operation. Symptom 1: The system does not operate This is the sound of refrigerant gas flowing through both indoor and outdoor units. - Page 17 Table 9-1 running lamp timer lamp defrosting lamp Malfunction for unuit of 12000Btu/h Malfunction for unuit of 18000Btu/h Room temperature sensor Room temperature sensor × × checking channel is abnormal checking channel is abnormal Evaporator sensor checking × × Mode impact channel is abnormal Condenser sensor checking channel is abnormal...
- Page 18 9.3 Troubles and causes of remote controller Before asking for serving or repairing , check the following points. (Refer to Table 9-3) Table 9-3 Symptoms Causes Solution Check whether the MODE When the automatic mode is indicated on the display is selected, the air conditioner will "AUTO"...
-
Page 19: Remote Controller Manual
REMOTE CONTROLLER MANUAL FAN SPEED Button: This button is used for setting Fan Speed in the sequence that goes from AUTO LOW MED to HIGH, then back to Auto. TIMER ON Button: Press this button to preset the time 1. Remote Controller Specifications ON(start to operate). -
Page 20: Operating The Remote Controller
NOTE NOTE All signs shown in the Fig.2 is for the purpose of clear The FAN ONLY mode can not be used to control the presentation. But during the actual operation only the temperature. While in this mode, only steps 1,3 and 4 relative functional items are shown on the display panel. -
Page 21: Warning
Set the starting & stopping time Push the TIMER ON button, the remote controller will show TIMER ON, the last set time for START operation and the signal "h" will be shown on the DIGITAL display area. You are now ready to readjust the TIMER ON to start the operation. - Page 22 QSZIU-001AEN 202000100543...