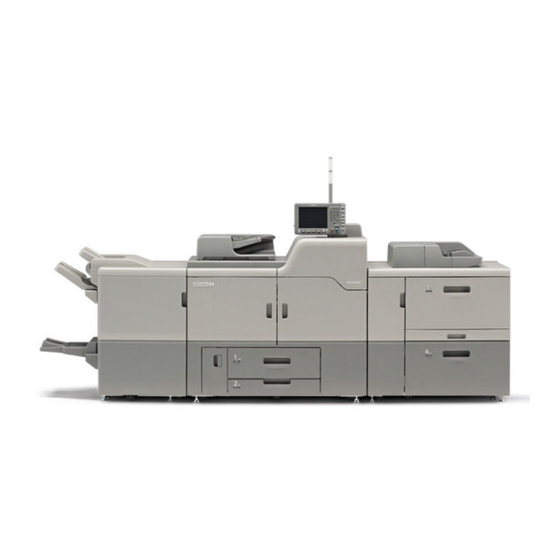
Ricoh Pro C7100 Operating Instructions Manual
Hide thumbs
Also See for Pro C7100:
- User manual (140 pages) ,
- Starter manual (40 pages) ,
- Operating instructions manual (130 pages)

Related Manuals for Ricoh Pro C7100


Summary of Contents for Ricoh Pro C7100
- Page 1 Operating Instructions About This Machine For safe and correct use, be sure to read the Safety Information in Read This First before using the machine.
-
Page 3: Table Of Contents
TABLE OF CONTENTS 1. Easy Search Searching by What You Want to Do........................7 I Want to Reduce my Costs........................... 7 I Want to Operate the Machine More Effectively..................8 What You Can Do with This Machine.......................9 You Can Customize the [Home] Screen.......................9 You Can Print Data Using Various Functions..................... - Page 4 How to Use the [Printer] Screen........................41 How to Use the [Information] Screen......................42 Switching Screen Patterns........................... 44 Changing the Display Language........................45 Logging In the Machine...........................46 When the Authentication Screen Is Displayed..................46 User Code Authentication Using the Control Panel.................. 46 User Code Authentication Using a Printer Driver..................
- Page 5 Energy Saving Functions..........................73 User Information on Electrical and Electronic Equipment (mainly Europe)......75 Note for the Battery and/or Accumulator Symbol (For EU Countries Only) (mainly Europe)................................. 76 Environmental Advice for Users (mainly Europe)..............76 Notes to Users in the State of California (Notes to Users in USA) (mainly North America)...
- Page 6 Adding Icons to the [Home] Screen......................140 Changing the Order of Icons on the [Home] Screen................143 Deleting an Icon on the [Home] Screen....................144 Displaying an Image on the [Home] Screen...................145 Restoring the [Home] Screen Default.......................147 Checking Machine Status and Settings....................... 149 Managing Jobs..............................
- Page 7 Specifications..............................179 Specifications for the Main Unit....................... 179 Specifications for Printer........................... 182 Specifications for Finisher SR5050......................183 Specifications for Booklet Finisher SR5060.................... 187 Specifications for Punch Unit........................191 Specifications for Interposer........................192 Specifications for Multi-Folding Unit......................193 Specifications for Three-Tray Wide Large Capacity Tray..............194 Specifications for Two-Tray Wide Large Capacity Tray................195 Specifications for Multi Bypass Tray (Tray A)..................
-
Page 9: Easy Search
1. Easy Search You can search for a description by what you want to do. Also, this machine's distinctive functions are explained. Searching by What You Want to Do You can search for a procedure by what you want to do. I Want to Reduce my Costs BRL059S Checking how much paper is saved ([Information] screen) -
Page 10: I Want To Operate The Machine More Effectively
1. Easy Search I Want to Operate the Machine More Effectively BQX139S Registering frequently-used printing settings to the printer driver See Print for details. Changing the initial settings of the printer driver to frequently-used printing settings See Print for details. Adding the function and shortcut icons page 140 "Adding Icons to the [Home] Screen"... -
Page 11: What You Can Do With This Machine
What You Can Do with This Machine What You Can Do with This Machine This section describes the features of this machine. You Can Customize the [Home] Screen The icons of each function are displayed on the [Home] screen. The contents displayed on the following screens differ depending on the machine. DER151 •... -
Page 12: You Can Print Data Using Various Functions
1. Easy Search You Can Print Data Using Various Functions CWW103 • This machine supports network and local connections. • You can print or delete print jobs stored on the machine's hard disk, which have been previously sent from computers using the printer driver. The following types of print jobs can be selected: Sample Print, Locked Print, Hold Print, and Stored Print. -
Page 13: You Can Prevent Information Leakage (Security Functions)
What You Can Do with This Machine You Can Prevent Information Leakage (Security Functions) CWW108 • You can protect documents from unauthorized access and stop them from being copied without permission. • You can control the use of the machine, as well as prevent machine settings from being changed without authorization. -
Page 14: You Can Prevent Unauthorized Copying
1. Easy Search You can check which tray is running out of paper, register information in the Address Book, specify the network settings, configure and change the system settings, manage jobs, print the job history, and configure the authentication settings. •... -
Page 15: Getting Started
2. Getting Started This chapter describes preparations for using the machine, operating instructions, and character input methods. Overview of This Machine Names of Major Features In this manual, major features of the machine are referred to as follows: • Auto Document Feeder •... -
Page 16: Functions Requiring Optional Configurations
2. Getting Started DER002 The following information is region-specific. Read the information under the symbol that corresponds to the region of your machine. (mainly Europe and Asia) If the label contains the following, your machine is a Region A model: •... - Page 17 Overview of This Machine Function Option Printing from the multi bypass tray (Tray A) One of the following combinations of options is required: • Multi bypass tray (Tray A) and three-tray wide LCT • Multi bypass tray (Tray A) and two-tray wide LCT •...
- Page 18 2. Getting Started Function Option • PostScript 3 PostScript 3 unit • Preventing unauthorized copies • Data security for copying function • Others Function Option NetWare functions SD card for NetWare printing...
-
Page 19: Guide To Names And Functions Of Components
Guide to Names and Functions of Components Guide to Names and Functions of Components • Do not obstruct the machine's vents. Doing so risks fire caused by overheated internal components. Front and left view DER006 1. Main power switch To operate the machine, the main power switch must be on. If it is off, open the main power switch's cover and turn the switch on. - Page 20 2. Getting Started 5. Front right cover Open to remove paper jams. 6. Paper trays (Trays 1–2) Load paper here. Tray 1 is a tandem tray where paper on the left side automatically moves to the right when paper there has run out. An indicator on the front left side of the tray lights while paper is feeding.
- Page 21 Guide to Names and Functions of Components Rear and right view DER008 1. Vents Prevent overheating. 2. Earth leakage breaker Protects users from electric shock. For details about checking the earth leakage breaker, see page 173 "Checking the Earth Leakage Breakers". •...
-
Page 22: Guide To Functions Of The Attention Light
2. Getting Started Guide to Functions of the Attention Light • Do not push or pull the attention light when installed to the machine. Doing so may result in damage or malfunction of the attention light or the machine. CUV121 The attention light notifies the user by light when there is a paper jam or no paper is left. - Page 23 Guide to Names and Functions of Components Lamp Status The top lamp flashes yellow. Warning (Example) • Toner has nearly run out. • Waste toner bottle is nearly full. Read the message on the display panel, and then take appropriate action. For details, see "When Messages Appear", Troubleshooting.
-
Page 24: Guide To Functions Of The Machine's Options
2. Getting Started Guide to Functions of the Machine's Options Guide to Functions of the Machine's External Options DER010 1. Booklet Finisher SR5060 Sorts, stacks, and staples multiple sheets of paper. The saddle stitch function can staple multiple sheets of paper in the center and fold them into booklets. - Page 25 Guide to Functions of the Machine's Options 5. Multi-folding unit Applies the following folds: Half Fold, Letter Fold-out, Letter Fold-in, Double Parallel Fold, Gate Fold, and Z- fold. 6. Interposer Inserts cover or slip sheets into printed paper. 7. Buffer pass unit Cools printed paper.
- Page 26 2. Getting Started • You cannot install the three-tray wide LCT and the two-tray wide LCT simultaneously. • If you have connected two high capacity stackers, you cannot install the multi-folding unit, the ring binder, or the perfect binder. • You can install the multi-folding unit only if either Finisher SR5050 or Booklet Finisher SR5060 is installed.
- Page 27 Guide to Functions of the Machine's Options Remove the stack of paper from the finisher shift tray. DER121 Press the [Suspend / Resume] key to restart the print. • You can suspend printing only when the finisher shift tray is selected as the output tray. When using the Z-fold function To use the Z-fold function, you must attach the Z-fold support tray.
- Page 28 2. Getting Started CWR002 When you have finished using the Z-fold support tray for multi-folding unit, lift it up and slide the tray to the left, and then lower it. CWR003 When using the Letter Fold-out function To use the Letter Fold-out function and the Multi-sheet Fold function at the same time, install the Z-fold support tray for multi-folding unit and the output holding unit for letter fold-out.
-
Page 29: Guide To Functions Of The Machine's Internal Options/Option Controller
Guide to Functions of the Machine's Options CWR002 2. Pull out the output holding unit for letter fold-out. CWR008 When you have finished using the Z-fold support tray for multi-folding unit and the output holding unit for letter fold-out, return each to their previous positions. CWR009 Guide to Functions of the Machine's Internal Options/Option Controller •... - Page 30 2. Getting Started • SD card for NetWare printing This card is needed when using a NetWare server.
-
Page 31: Guide To The Names And Functions Of The Machine's Control Panel
Guide to the Names and Functions of the Machine's Control Panel Guide to the Names and Functions of the Machine's Control Panel DER011 1. Display panel Displays keys for each function, operation status, or messages. See page 41 "How to Use the Screens on the Control Panel". - Page 32 2. Getting Started 3. Main power indicator The main power indicator goes on when you turn on the main power switch. 4. [Energy Saver] key Press to switch to and from Low Power mode or Sleep mode. See page 54 "Saving Energy". When the machine is in Low Power mode, the [Energy Saver] key is lit.
-
Page 33: Adjusting The Angle Of The Control Panel
Guide to the Names and Functions of the Machine's Control Panel 18. [Home] key Press to display the [Home] screen. For details, see page 35 " How to Use the [Top] Screen and the [Home] Screen". 19. Screen brightness slider Adjusts display panel brightness. -
Page 34: Inserting/Removing A Memory Storage Device
2. Getting Started Inserting/Removing a Memory Storage Device • Keep SD cards or USB flash memory devices out of reach of children. If a child accidentally swallows an SD card or USB flash memory device, consult a doctor immediately. • Do not turn off the main power switch while the machine is saving data to a memory storage device. -
Page 35: Inserting A Usb Flash Memory Device
Inserting/Removing a Memory Storage Device Align the SD card in the correct direction, and then push it straight into the media slot until it clicks. DER016 When it is inserted correctly, the media access lamp beside the media slot lights. •... -
Page 36: Removing An Sd Card
2. Getting Started When it is inserted correctly, the media access lamp beside the media slot lights. • The media access lamp lights up and remains lit as long as a USB flash memory device is inserted. Removing an SD Card Make sure the media access lamp is not flashing. -
Page 37: Changing Modes
Changing Modes Changing Modes • You cannot switch modes when accessing User Tools / Inquiry. • The [Printer] screen is set as the default screen when the machine is turned on. You can change this default setting under Function Priority. See "System Settings", Connecting the Machine/ System Settings. - Page 38 2. Getting Started [Top] screen DER023 [Home] screen DER024 1. Operational status and messages Displays operational status and messages. 2. [Job List] Press to display the [Job List] tab on the [Printer] screen. 3. Estimated time Indicated by the time estimated to complete the job at the top of the currently displayed job list.
-
Page 39: Changing Modes By Pressing The Function Keys
Changing Modes 4. [Maintenance Info] Press to display the [Maintnc./Inquiry/Mach. Info] tab on the [Check Status] screen. 5. Switch screens Press to switch between the [Home] screen and the [Top] screen. 6. [Supplies Info] Displays the information about supplies, such as the remaining amount of toner. 7. - Page 40 2. Getting Started No functions are registered to the function keys as a factory default. You can register often used functions. For details, see page 38 "Configuring function keys". The illustration below is an example of the function that can be registered. Printer DER027 •...
-
Page 41: System Reset
Changing Modes 1. Function Key 1 2. Function Key 2 Functions that can be assigned to function keys: • Printer • Embedded software applications • Color controller Press the [User Tools] key. DER029 Press [System Settings]. Make sure the [General Features] tab is selected. Press [Function Key Allocation]. - Page 42 2. Getting Started To change the length of time that the machine waits before restoring its settings to their default values, use the System Auto Reset Timer setting. See "System Settings", Connecting the Machine/ System Settings.
-
Page 43: How To Use The Screens On The Control Panel
How to Use the Screens on the Control Panel How to Use the Screens on the Control Panel The display panel shows the operation status, messages, and function menus. The function items displayed serve as selector keys. You can select or specify an item by lightly pressing them. -
Page 44: How To Use The [Information] Screen
2. Getting Started 2. Paper tray status indicators Diplays paper tray settings. 3. [Print from Memory Storage Device] Press to display the screen for printing files stored on memory storage devices directly. 4. [Job Reset] Press to cancel the current print job. If you press it when the Hex Dump is selected, Hex Dump is canceled. - Page 45 How to Use the Screens on the Control Panel DER044 1. Message A message from the administrator is displayed. 2. Total Print Pages Total number of pages printed in the current count period and the previous count period are displayed. 3.
-
Page 46: Switching Screen Patterns
2. Getting Started • You can also use Web Image Monitor to check the usage status. For details about how to check them, see Web Image Monitor Help. • Under [Eco-friendly Counter Period / Administrator Message] in [System Settings], you can check "Count Period", "Administrator Message", "Display Information Screen", and "Display Time". -
Page 47: Changing The Display Language
How to Use the Screens on the Control Panel Changing the Display Language You can change the language used on the display. English is set as default. Press the [Language] key until the language you want to display appears. DER048 •... -
Page 48: Logging In The Machine
2. Getting Started Logging In the Machine When the Authentication Screen Is Displayed If Basic Authentication, Windows Authentication, or LDAP Authentication is active, the authentication screen appears on the display. The machine only becomes operable after entering your own Login User Name and Login Password. -
Page 49: Logging In Using The Control Panel
Logging In the Machine Logging In Using the Control Panel This section explains the procedure for logging in to the machine when Basic Authentication, Windows Authentication, or LDAP Authentication is set. Press [Login]. Enter a Login User Name, and then press [OK]. Enter a Login Password, and then press [OK]. -
Page 50: Auto Logout Function
2. Getting Started Press the [Login/Logout] key. DER049 Press [Yes]. Auto Logout Function This machine has an auto logout function. If the machine is idle for a specified period, the user is automatically logged out. Logging In Using a Printer Driver Enter your login user name and password as registered in the machine. -
Page 51: Logging In Using Web Image Monitor
Logging In the Machine Enter a login user name and login password already set on the machine or the server for user authentication. Be sure to enter the same login user name and login password that is registered on the machine or the server. -
Page 52: User Lockout Function
2. Getting Started User Lockout Function This machine has a User Lockout function. If an incorrect password is entered the number of times specified by the administrator, the User Lockout function prevents further login attempts under the same user name. Even if the locked out user enters the correct password later, authentication will fail and it will not be possible to use the machine. - Page 53 Logging In the Machine Changing the login password using the control panel Press the [User Tools] key. DER029 Press [Login] twice. Enter a Login User Name, and then press [OK]. Enter a Login Password, and then press [OK]. Press [Address Book Mangmnt]. Select the user.
- Page 54 2. Getting Started Enter the new password in the [Confirm Password] box. Click [OK]. Click [Logout]. Changing the login password for the printer driver From the [Print] window, open the printing preferences dialog box. Specify the user authentication setting. If you are using the PCL 5c printer driver, click the [Valid Access] tab, and then click [Authentications...].
-
Page 55: Turning On/Off The Power
Turning On/Off the Power Turning On/Off the Power Turning On/Off the Power • Do not push the main power switch repeatedly. • When you push the main power switch, wait at least 10 seconds after it is confirmed that the main power indicator has lit up or gone out. -
Page 56: Saving Energy
2. Getting Started • After you switch the main power on, a screen may appear to indicate that the machine is initializing. Do not switch the power off during this process. Initialization takes about 13 minutes. However, the time for initialization may differ depending on which options are installed on the machine. - Page 57 Turning On/Off the Power The time required to return from Fusing Unit Off mode and resume printing is as long as the time required for warm-up time. For details about the warm-up time, see page 179 "Specifications for the Main Unit". Low Power mode If you do not use the machine for a certain period after an operation, the display will turn off and the machine goes into Low Power mode.
-
Page 58: Anti-Humidity Heater Switch
2. Getting Started • The machine does not enter Low Power mode or Sleep mode in the following cases: • During communication with external equipment • When the hard disk is active • When the service call message appears • When the machine's cover is opened •... -
Page 59: Entering Text
Entering Text Entering Text This section describes how to enter characters. Character Entry Display This section explains the entry screen and the keys displayed on it. You can change the entry screen using the keys below. (mainly Europe and Asia) DER103 (mainly North America) - Page 60 2. Getting Started DER104 • When entering uppercase or lowercase letters continuously, use [Shift Lock] to lock the case. Keyboard layout Generally, the QWERTY keyboard appears. QWERTY keyboard • (mainly Europe and Asia)
- Page 61 Entering Text • (mainly North America) The layout of the keyboard varies depending on the set display language. To use the QWERTY keyboard, press the key displayed on the bottom of the screen, and change the layout of the keyboard. For details about the display language, see page 45 "Changing the Display Language".
-
Page 62: Available Characters
2. Getting Started Keyboard for German Keyboard for Russian Keyboard for Greek Available Characters You can enter the following characters: • Alphabetic characters • (mainly Europe and Asia) -
Page 63: Entering Text
Entering Text Symbols • Numerals 0123456789 Entering Text When you enter a character, it appears at the position of the cursor. If there is a character already at the cursor position, the entered character appears before that. Entering letters Press [Shift] to switch between uppercase and lowercase. Press the letters you want to enter. - Page 64 2. Getting Started Press the symbols you want to enter. • Depending on the machine type, this function may not be available. Entering user text You can select and use a User Text that is registered in [Program / Change / Delete User Text]. For the registration procedure under [Program / Change / Delete User Text], see Connecting the Machine/ System Settings for details.
- Page 65 Entering Text (mainly North America) Select the User Text you want to use. Press [OK]. Deleting characters Press [Backspace] or [Delete All] to delete characters.
-
Page 66: Software That You Can Download
2. Getting Started Software that You Can Download Device Manager NX Device Manager NX is an application that monitors network printers. It can monitor multiple network printers using IP address. We recommend that network administrators use this application. Device Manager NX Lite is available as a free download. For Device Manager NX Accounting, contact your local dealer for information on downloading the software. -
Page 67: Using The Ring Binder And The High Capacity Stacker
Using the Ring Binder and the High Capacity Stacker Using the Ring Binder and the High Capacity Stacker Using the Ring Binder Removing bound booklets from the ring binder tray • Keep your hands clear of the inside of the ring binder and the space under the ring binder tray. You can trap your fingers if you do not. - Page 68 2. Getting Started CET031 1. Ring stand 2. Ring opener Punch holes into the pages that you want to insert into the ring bound booklet. With the ring bound booklet closed, place the ring comb on the ring stand so that each of the rings is in a groove on the stand.
- Page 69 Using the Ring Binder and the High Capacity Stacker Open the bound booklet to where you want to insert the new pages, and then place one of your hands on the ring stand. CET034 Insert the sharp end of the ring opener into one end of the ring comb, and then push it all the way through the ring comb.
-
Page 70: Using The High Capacity Stacker
2. Getting Started CET036 The rings of the comb will close as you press down with the ring opener. Remove the ring comb from the ring stand. • When using the ring opener, take care to avoid injuring self or others and damaging nearby equipment. - Page 71 Using the Ring Binder and the High Capacity Stacker 3. Paper Jam Button This is lit red when a paper jam occurs. Pressing this button lowers the stacker tray into the paper removal position. 4. Cover of the Stacker Control Panel 5.
- Page 72 2. Getting Started Open the stacker front cover. DER105 Carefully pull out the stacker cart. DER106 Take care not to let the paper stack topple. Rest the paper press on top of the paper stack. CET022...
- Page 73 Using the Ring Binder and the High Capacity Stacker Pull the lever on the paper press toward you. CET023 Transport the paper to where it is required, and then unload the stacker cart. Return the paper press to its original position. CET024 Put the stacker cart back inside the high capacity stacker.
- Page 74 2. Getting Started DER108 Close the stacker front cover. The stacker tray begins elevating automatically and the tray moving indicator begins flashing. When the tray moving indicator stops flashing, the tray is fully elevated. • Before moving the high capacity stacker, be sure to take the stacker cart out of the high capacity stacker.
-
Page 75: Information For This Machine
3. Information for This Machine This chapter describes environmental precautions and regulations. Information on Environmental Regulations ENERGY STAR Program ® ENERGY STAR Program Requirements for Imaging Equipment ® This company is a participant in the ENERGY STAR Program. This machine is compliant with the regulations specified by the ®... - Page 76 3. Information for This Machine • The default period the machine waits before entering Low Power mode is 15 minutes. This default time can be changed. Sleep mode • If this machine remains idle for a specified period or when the [Energy Saver] key is pressed, it enters Sleep mode to further reduce its electrical consumption.
-
Page 77: User Information On Electrical And Electronic Equipment (Mainly Europe)
Information on Environmental Regulations *2 Achieves ENERGY STAR energy savings; product fully qualifies when packaged with (or used with) a duplex tray and the duplex function is enabled as an option. • Specifications can vary depending on which options are installed on the machine. •... -
Page 78: Environmental Advice For Users (Mainly Europe)
3. Information for This Machine For Turkey only Note for the Battery and/or Accumulator Symbol (For EU Countries Only) (mainly Europe) In accordance with the Battery Directive 2006/66/EC Article 20 Information for end-users Annex II, the above symbol is printed on batteries and accumulators. This symbol means that in the European Union, used batteries and accumulators should be disposed of separately from your household waste. - Page 79 For details about the return program, please refer to the Web page below or consult your service person. https://www.ricoh-return.com/ Energy efficiency The amount of electricity a machine consumes depends as much on its specifications as it does on the way you use it.
- Page 80 3. Information for This Machine...
-
Page 81: Paper Specifications And Adding Paper
4. Paper Specifications and Adding Paper Describes how to load sheets and about their specifications. Loading Paper Precautions for Loading Paper • When loading paper, take care not to trap or injure your fingers. • Do not stack paper over the limit mark. Jams and misfeeds can occur when printing on thick glossy sheets. - Page 82 4. Paper Specifications and Adding Paper • To prevent multiple sheets from being fed at once, fan the paper before loading it. • If you load paper when only a few sheets of paper remain in the tray, multiple sheet feeding may occur.
-
Page 83: Loading Paper Into Tray 1
Loading Paper Holding its shorter ends, flex the stack back and forth to create space between the sheets. Repeat this several times. CVA069 CVA070 Make sure there is space between the sheets. CVA071 Loading Paper into Tray 1 (mainly Europe and Asia) Tray 1 can hold A4 paper only. - Page 84 4. Paper Specifications and Adding Paper Tray 1 can hold 8 × 11 paper only. If you want to print on A4 from Tray 1, contact your service representative. • When paper loaded in the right side of Tray 1 runs out, paper on the left is automatically shifted to the right.
-
Page 85: Loading Paper Into The A3/11 × 17 Tray Unit
Loading Paper DER057 Carefully push the paper tray fully in. • You can load paper even if Tray 1 is in use. It is okay to pull out the left half of the tray while Tray 1 is in use. Loading Paper into the A3/11 ×... -
Page 86: Loading Paper Into Tray 2
4. Paper Specifications and Adding Paper Square the paper and load it print side down. Do not stack paper over the limit mark. DER059 Carefully push the paper tray fully in. Loading Paper into Tray 2 • Check the paper edges are aligned at the right side. •... - Page 87 Loading Paper DER061 Carefully push the paper tray fully in. • Various sizes of paper can be loaded in Tray 2 by adjusting the positions of side fences and end fence. For details, see page 96 "Changing the Paper Size in Tray 2". Loading tab stock into Tray 2 •...
-
Page 88: Loading Paper Into The Multi Bypass Tray (Tray A)
4. Paper Specifications and Adding Paper DER068 Loading Paper into the Multi Bypass Tray (Tray A) Use the multi bypass tray (Tray A) to use transparencies, translucent paper, and paper that cannot be loaded in the paper trays. • The maximum number of sheets you can load at the same time depends on paper type. Do not stack paper over the limit mark. - Page 89 Loading Paper Set the end fence. DER070 1. End fence 2. Extender To remove the end fence, slide it to the right by pressing the stopper down. CWW312 Press the elevator switch on the multi bypass tray (Tray A). DER072 1.
-
Page 90: Loading Paper Into The Three-Tray Wide Large Capacity Tray
4. Paper Specifications and Adding Paper • Pull the extender out when loading A4 , 8 × 11 or larger sheets in the multi bypass tray (Tray A). • Letterhead paper must be loaded in a specific orientation. For details, see page 94 "Loading Orientation-fixed Paper or Two-sided Paper". -
Page 91: Loading Paper Into The Two-Tray Wide Large Capacity Tray
Loading Paper Check that paper in the paper tray is not being used, and then pull the tray carefully out until it stops. DER074 Load paper into the paper tray with print side up. Do not stack paper over the limit mark. DER075 Carefully push the paper tray fully in. - Page 92 4. Paper Specifications and Adding Paper • Check the paper edges are aligned at the left side. Check that paper in the paper tray is not being used, and then pull the tray carefully out until it stops. DER088 Load paper into the paper tray with print side up. Do not stack paper over the limit mark.
-
Page 93: Loading Paper Into The Interposer
Loading Paper Loading Paper into the Interposer • Do not place anything on top of or leave documents on the sensor. This may lead to the paper size not being correctly scanned or paper jams. While pressing the release lever, align the side fences with the paper size to be loaded. DER099 Load paper orderly. -
Page 94: Loading Cover Sheets Into The Interposer Of The Perfect Binder
4. Paper Specifications and Adding Paper Loading Cover Sheets into the Interposer of the Perfect Binder • The length/size of cover sheets depends on the thickness of the spine. • Load paper in the orientation. • Do not place anything on top of or leave documents on the sensor. This may lead to the paper size not being correctly detected or paper jams. - Page 95 Loading Paper 3. Length of cover sheet While lightly pinching the side fence, align it with the paper size to be loaded. CWW323 Load paper face up and neatly stacked. Do not stack paper over the limit mark. CWW324 • You cannot perfect bind a booklet if the thickness of the book block's spine exceeds 23 mm (0.9 inches).
-
Page 96: Loading Orientation-Fixed Paper Or Two-Sided Paper
4. Paper Specifications and Adding Paper Loading Orientation-fixed Paper or Two-sided Paper Orientation-fixed (top to bottom) or two-sided paper (for example, letterhead paper, punched paper, or copied paper) might not be printed correctly, depending on how the paper is placed. Specify [Auto Detect] or [On (Always)] for [Letterhead Setting] in [System] under the Printer Features menu, and then place the paper as shown below. - Page 97 Loading Paper facing the same direction, specify different input trays for one-sided and two-sided printing. Note also that two-sided printing must be disabled for the tray specified for one-sided printing. • For details about how to make two-sided prints, see "Printing on Both Sides of Sheets", Print.
-
Page 98: Changing The Paper Size
4. Paper Specifications and Adding Paper Changing the Paper Size Precautions for Changing the Paper Size • When loading paper, take care not to trap or injure your fingers. • Do not stack paper over the limit mark. • Do not change the size of the paper for the specified printing tray while documents are being scanned or printed. - Page 99 Changing the Paper Size • If a paper tray is pushed vigorously when putting it back into place, the position of the tray's side fences may slip out of place. • When loading a low number of sheets, be sure not to squeeze the side fences in too tightly. If the side fences are squeezed too tightly against the paper, the edges may crease, the paper may misfeed, or if it weighs between 52.3–63.0g/m (14.0–16.9 lb.
- Page 100 4. Paper Specifications and Adding Paper While pressing down the release lever, slide the side fences until they are aligned with the paper size you want to load. DER063 While pressing down on both sides of the end fence, slide it until it is aligned with the size of paper to you want to load.
-
Page 101: Changing The Paper Size In The Three-Tray Wide Large Capacity Tray
Changing the Paper Size DER066 Carefully slide the paper tray fully in. • After sliding the paper tray in, make sure that the paper size is changed correctly on the printer's initial screen. To display the printer's initial screen, display the [Home] screen and press the [Printer] icon. - Page 102 4. Paper Specifications and Adding Paper Release the end fence. DER076 Loosen the screws holding the side fences in position. DER077 Load paper by aligning the paper with the left side of the paper tray. Place paper with print side up. Load a stack of paper about 5–10 mm (0.2–0.4 inches) high.
- Page 103 Changing the Paper Size Take the grip of the side fences with your fingers, and adjust the side fences to the paper size. Set the paper flush against the protrusions in the bottom of the inner side fence. Check that the scale numbers on the top of the side fences are roughly the same. DER079 Hold the grip of the side fence at the back of the paper tray, then turn the screws slowly to fasten it in place.
- Page 104 4. Paper Specifications and Adding Paper Tightly fit the end fence to the loaded paper, and then re-lock the end fence again. Make sure there are no gaps between the paper and end fence. DER082 Carefully slide the paper tray fully in. •...
- Page 105 Changing the Paper Size Check that paper in the paper tray is not being used, and then pull the tray carefully out until it stops. DER074 Set the side fences to the size of the tab stock to be loaded, and then load it. Attach the tab fence, and then align the end fence gently against the paper you loaded while pressing the release button of the end fence.
- Page 106 4. Paper Specifications and Adding Paper Open the front cover of the three-tray wide LCT, and then pull the postcard side fences and screws out. DER085 Close the front cover. Check that paper in the paper tray is not being used, and then pull the tray carefully out until it stops.
-
Page 107: Changing The Paper Size In The Two-Tray Wide Large Capacity Tray
Changing the Paper Size Fasten the postcard side fences with the screws. CWW347 Align the end fence and side fences with the paper size to be loaded, and then load the paper. Carefully slide the paper tray fully in. • Replace the postcard side fences after use. Changing the Paper Size in the Two-tray Wide Large Capacity Tray •... - Page 108 4. Paper Specifications and Adding Paper Release the end fence. DER090 Release the side fence. DER091 Load paper by aligning the paper with the left side of the paper tray. Place paper with print side up. Load a stack of paper about 5–10 mm (0.2–0.4 inches) high. Make sure the paper rest on top of the supporting plates on both sides.
- Page 109 Changing the Paper Size DER094 1. Supporting plates Take the grip of the side fences with your fingers, and adjust the side fences to the paper size. Set the paper flush against the protrusions in the bottom of the inner side fence. Check that the scale numbers on the top of the side fences are roughly the same.
- Page 110 4. Paper Specifications and Adding Paper DER096 Carefully slide the paper tray fully in. • After sliding the paper tray in, make sure that the paper size is changed correctly on the printer's initial screen. To display the printer's initial screen, display the [Home] screen and press the [Printer] icon.
- Page 111 Changing the Paper Size Check that paper in the paper tray is not being used, and then pull the tray carefully out until it stops. DER088 Take out the tab fence from the pocket on the right-hand side of the paper tray. DER097 Set the side fences to the size of the tab stock to be loaded, and then load it.
-
Page 112: Changing To A Size That Is Not Automatically Detected
4. Paper Specifications and Adding Paper Changing to a Size That Is Not Automatically Detected If you load a paper size that is not selected automatically, specify the paper size using the control panel. Press the [Paper Setting] key. DER122 Select the tray for which you want to change the paper size. -
Page 113: Changing To A Custom Paper Size
Changing the Paper Size Changing to a Custom Paper Size When the custom size paper is loaded, the user must specify the paper size using the control panel. Press the [Paper Setting] key. DER122 Select the tray for which you want to change the paper size. Press [Manual Paper Settings]. -
Page 114: Recommended Paper
4. Paper Specifications and Adding Paper Recommended Paper Recommended Paper Sizes and Types This section describes recommended paper sizes and types. • If you use paper that curls, either because it is too dry or too damp, a staple clogging or paper jam may occur. - Page 115 Recommended Paper Paper type and weight Paper size Paper capacity 52.3–300.0g/m (14.0 lb. 1,000 sheets Bond–165.0 lb. Index) Paper Weight 1–Paper , B4 JIS , 11 × 17 , Weight 7 × 14 , 8 × 11 A3 , A4 , B4 JIS , 8 ×...
- Page 116 4. Paper Specifications and Adding Paper Paper type and weight Paper size Paper capacity 52.3–256.0g/m (14.0 lb. Select the paper size using the Tray 500 sheets Bond–141.0 lb. Index) Paper Settings menu: Paper Weight 1–Paper × 14 , 8 × 10 , 11 × 15 Weight 6 , 11 ×...
- Page 117 Recommended Paper Multi bypass tray (Tray A) Paper type and weight Paper size Paper capacity 52.3–216.0 g/m (14.0 lb. Paper sizes that can be detected 500 sheets Bond–79.9 lb. Cover) automatically: Paper Weight 1–Paper Weight 5 A3 , A4 , A5 , A6 , B4 JIS , B5 JIS , 11 ×...
- Page 118 4. Paper Specifications and Adding Paper Paper type and weight Paper size Paper capacity 52.3–216.0 g/m (14.0 lb. 500 sheets Bond–79.9 lb. Cover) Paper Weight 1–Paper B5 JIS , B6 JIS , 8 × 14 , Weight 5 × 13 , 8 ×...
- Page 119 Recommended Paper Paper type and weight Paper size Paper capacity Translucent paper A3 , A4 , B5 JIS 52.3–63.0 g/m (14.0–16.9 lb. Bond) Paper Weight 1 Transparencies × 11 163.1–216.0 g/m (60.1– 79.9 lb. Cover) Paper Weight 5 Tab stock A4 , 8 ×...
- Page 120 4. Paper Specifications and Adding Paper Three-tray wide LCT (Trays 3 and 5) Paper type and weight Paper size Paper capacity 52.3–256.0 g/m (14.0 lb. Paper sizes that can be detected 1,000 sheets Bond–141.0 lb. Index) automatically: Paper Weight 1–Paper Weight 6 A3 , A4 , A5...
- Page 121 Recommended Paper Paper type and weight Paper size Paper capacity 52.3–256.0 g/m (14.0 lb. Select the paper size using the 1,000 sheets Bond–141.0 lb. Index) Tray Paper Settings menu: Paper Weight 1–Paper Weight 6 , B5 JIS , B6 JIS ×...
- Page 122 4. Paper Specifications and Adding Paper Paper type and weight Paper size Paper capacity Coated: Glossy Paper sizes that can be detected – automatically: Coated: Matte 63.1–256.0 g/m (17.0 lb. Bond –141.0 lb. Index) A3 , A4 , A5 , B4 JIS , B5 JIS , 11 ×...
- Page 123 Recommended Paper Paper type and weight Paper size Paper capacity Coated: Glossy Custom size: – Coated: Matte 63.1–256.0 g/m (17.0 lb. Vertical: 139.7–330.2 mm Bond –141.0 lb. Index) Horizontal: 139.7–487.7 mm Paper Weight 2–Paper Weight 6 Vertical: 5.50–13.00 inches Horizontal: 5.50–19.20 inches Translucent paper A3 , A4 , B5 JIS...
- Page 124 4. Paper Specifications and Adding Paper *6 Sizes do not include flap sizes. Three-tray wide LCT (Tray 4) Paper type and weight Paper size Paper capacity 52.3–360.0 g/m (14.0 lb. Paper sizes that can be detected 2,000 sheets Bond–198.0 lb. Index) automatically: Paper Weight 1–Paper Weight 8...
- Page 125 Recommended Paper Paper type and weight Paper size Paper capacity 52.3–360.0 g/m (14.0 lb. Select the paper size using the 2,000 sheets Bond–198.0 lb. Index) Tray Paper Settings menu: Paper Weight 1–Paper Weight 8 , B5 JIS , B6 JIS ×...
- Page 126 4. Paper Specifications and Adding Paper Paper type and weight Paper size Paper capacity Coated: Glossy Paper sizes that can be detected – automatically: Coated: Matte 63.1–360.0 g/m (17.0 lb. Bond –198.0 lb. Index) A3 , A4 , A5 , B4 JIS , B5 JIS , 11 ×...
- Page 127 Recommended Paper Paper type and weight Paper size Paper capacity Coated: Glossy Custom size: – Coated: Matte 63.1–360.0 g/m (17.0 lb. Vertical: 139.7–330.2 mm Bond –198.0 lb. Index) Horizontal: 139.7–487.7 mm Paper Weight 2–Paper Weight 8 Vertical: 5.50–13.00 inches Horizontal: 5.50–19.20 inches Translucent paper A3 , A4 , B5 JIS...
- Page 128 4. Paper Specifications and Adding Paper *1 The postcard side fences are required to load paper that is between 100.0 and 139.2 mm (3.94 and 5.49 inches). *2 The maximum number of sheets you can set at once depends on the paper's thickness and condition. *3 The tab fence is required.
- Page 129 Recommended Paper Paper type and weight Paper size Paper capacity 52.3–360.0 g/m (14.0 lb. Select the paper size using the 2,400 sheets Bond–198.0 lb. Index) Tray Paper Settings menu: Paper Weight 1–Paper Weight 8 A6 , B5 JIS , B6 JIS , 8 ×...
- Page 130 4. Paper Specifications and Adding Paper Paper type and weight Paper size Paper capacity Coated: Glossy Paper sizes that can be detected – automatically: Coated: Matte 63.1–360.0 g/m (17.0 lb. Bond –198.0 lb. Index) A3 , A4 , A5 , B4 JIS , B5 JIS , 11 ×...
- Page 131 Recommended Paper Paper type and weight Paper size Paper capacity Coated: Glossy Custom size: – Coated: Matte 63.1–360.0 g/m (17.0 lb. Vertical: 139.7–330.2 mm Bond –198.0 lb. Index) Horizontal: 139.7–487.7 mm Paper Weight 2–Paper Weight 8 Vertical: 5.50–13.00 inches Horizontal: 5.50–19.20 inches Translucent paper A3 , A4 , B5 JIS...
- Page 132 4. Paper Specifications and Adding Paper *2 When paper whose horizontal length is 487.8 mm (19.20 inches) or more is specified, the maximum paper weight of the tray is Paper Weight 7. *3 When the banner sheet tray is installed, paper sizes are not detected automatically. *4 When the banner sheet tray is installed, you cannot select paper sizes.
- Page 133 Recommended Paper Paper type and weight Paper size Paper capacity 64.0–216.0 g/m (17.1 lb. Select the paper size using the 200 sheets × 2 Bond–79.9 lb. Cover) Tray Paper Settings menu: Paper Weight 2–Paper Weight 5 B5 JIS , 8 ×...
- Page 134 4. Paper Specifications and Adding Paper Interposer of the perfect binder Paper type and weight Paper size Paper capacity 90.0–300.0 g/m (24.1 lb. Paper sizes that can be 200 sheets (or up to 24 mm in Bond–165.0 lb. Index) detected automatically: height) ×...
- Page 135 Recommended Paper Paper thickness Paper Metric Bond paper Cover paper Index paper thickness Paper Weight 52.3–63.0 14.0–16.9 lb. 19.0–23.0 lb. 29.0–34.9 lb. Bond Cover Index 63.1–80.0 17.0–21.0 lb. 23.1–29.9 lb. 35.0–44.0 lb. Paper Weight 2 Bond Cover Index 80.1–105.0 21.1–28.0 lb. 30.0–38.9 lb.
- Page 136 4. Paper Specifications and Adding Paper of the paper, the machine may not detect a multi-sheet feed correctly. For details about Adjustment Settings for Operators, see "Adjustment Settings for Operators", Paper Settings. • Flatten out curled sheets before loading them. •...
- Page 137 Recommended Paper For details about the settings for using coated paper with custom paper, see "Registering a Custom Paper", Paper Settings. • When loading coated paper or glossy paper, always fan the paper before using it. • If a paper jam occurs or if the machine makes a strange noise when feeding stacks of coated paper, feed the coated paper one sheet at a time.
- Page 138 4. Paper Specifications and Adding Paper CDL081 Recommended envelopes For information about recommended envelopes, contact your local dealer. Storage of envelopes Keep envelopes stored in sealed plastic bags and remove only the quantity needed. Do not add envelopes during printing, as this might cause misfeeds. •...
-
Page 139: Unusable Paper
Recommended Paper Unusable Paper • Do not attempt to print on stapled sheets, aluminum foil, carbon paper, or any kind of conductive paper. Doing so risks fire. • To prevent faults, do not use any of the following kinds of treated paper: •... -
Page 140: Paper Storage
4. Paper Specifications and Adding Paper • Paper with penciled characters or images • Folded paper • Even supported types of paper may cause paper jams or malfunctions if the paper is not in good condition. • If you print onto rough grain paper, the output image might be blurred. •... -
Page 141: Convenient Functions
5. Convenient Functions This chapter describes how to customize the Home Screen. It also describes how to manage a job. Customizing the [Home] Screen You can add function and shortcut icons to the [Home] screen. Tap an icon to use the function allocated to it. -
Page 142: Adding Icons To The [Home] Screen
5. Convenient Functions You can add function and shortcut icons to the [Home] screen. The icons you add appear on the [Home] screen. Tap an icon to use the function allocated to it. For details, see page 140 "Adding Icons to the [Home] Screen". •... - Page 143 Customizing the [Home] Screen To add icons to the default [Home] screen, point to [Device Management], and then click [Device Home Management]. To add icons to a user's [Home] screen, point to [Customize Screen per User]. Click [Edit Icons]. Point to [ Icon can be added.] of the position that you want to add, and then click [ Add].
- Page 144 5. Convenient Functions Press [Add Icon]. Press the [Application] tab. Select the application you want to add. Specify the position where [Blank] is displayed.
-
Page 145: Changing The Order Of Icons On The [Home] Screen
Customizing the [Home] Screen Press [OK]. Press the [User Tools] key. • Press on the upper-right corner of the screen to check the position on the simple screen. Changing the Order of Icons on the [Home] Screen You can change the order of the function and shortcut icons on the [Home] screen to make them more accessible. -
Page 146: Deleting An Icon On The [Home] Screen
5. Convenient Functions Drag the icon that you want to move, and then drop it to the new position. Click [OK] three times. • To move the icon to another page, drag it to the destination page on the thumbnail displayed on the right of the screen. -
Page 147: Displaying An Image On The [Home] Screen
Customizing the [Home] Screen Deleting an icon on the [Home] screen using Web Image Monitor Start Web Image Monitor. For details, see "Using Web Image Monitor", Connecting the Machine/ System Settings. Log in to Web Image Monitor. To delete an icon on the default [Home] screen, point to [Device Management], and click [Device Home Management]. - Page 148 5. Convenient Functions File format: PNG (recommended) or JPEG *1 For a JPEG image, reduce the horizontal size of the image to 94% of the original before using it. Number of pixels: 324 × 66 pixels Maximum file size: 45 KB •...
-
Page 149: Restoring The [Home] Screen Default
Customizing the [Home] Screen File path: (root):\custom_ui\image File name: insert Insert an SD card into the media slot. For details about the procedure for inserting an SD card, see page 32 "Inserting an SD Card". Press the [User Tools] key. DER029 Press [Edit Home]. - Page 150 5. Convenient Functions Restoring the [Home] screen default using Web Image Monitor Start Web Image Monitor. For details, see "Using Web Image Monitor", Connecting the Machine/ System Settings. Log in to Web Image Monitor as an administrator. For details, see Security Guide. Point to [Device Management], and then click [Device Home Management].
-
Page 151: Checking Machine Status And Settings
Checking Machine Status and Settings Checking Machine Status and Settings Paper Displays the paper type, size, and weight loaded into the paper trays. Toner/Maintenance Info • Remaining Toner Displays the approximate amount of toner remaining. • No Staples Allows the user to check whether or not there are staples remaining. •... - Page 152 5. Convenient Functions • Print Job(s) Displays the number of jobs for [Hold Print Job(s):], [Stored Print Job(s):], [Locked Print Job(s):], and [Sample Print Job(s):]. • Memory Erase Status Displays the state of the memory data. Machine Address Info • Machine IPv4 Address Displays the machine's IPv4 address.
- Page 153 Checking Machine Status and Settings Press each key, and then check the contents. After checking the information, press [Exit]. • Only [Remaining Toner] and [Binding Ring Comb Type] appear on the [Toner/Maintenance Info] screen if there is no error. • Depending on the security settings, [Machine Address Info] might not be displayed. •...
-
Page 154: Managing Jobs
5. Convenient Functions Managing Jobs You can manage jobs stored on the machine. Types of Screens to Manage Jobs When you print jobs, the data is temporarily stored on the machine, and then the jobs are printed in the order they are received. You can manage these jobs on the [Check Status] screen. For example, you can cancel incorrect job settings or print an urgent document. -
Page 155: Checking Jobs In The Job List
Managing Jobs 5. [Change Order] Press to change the order of jobs. 6. [Delete Reservation] Press to cancel jobs you select. 7. Job list Displays the job list. If the job you want to select is not displayed in the list, press [ Previous] or [ Next] to scroll the screen. -
Page 156: Changing The Order Of Jobs
5. Convenient Functions Changing the Order of Jobs In the following procedure, the [Check Status] screen is used to change the order of jobs. Press the [Check Status] key. DER119 Press the [Current Job] tab. Select [Printer] or [Others]. Select the job whose order you want to change. Press [Change Order]. -
Page 157: Checking The Job History
Managing Jobs Press the [Check Status] key. DER119 Press the [Current Job] tab. Select [Printer] or [Others]. Select the job you want to delete. To delete two or more print jobs, select them. Press [Delete Reservation]. Press [OK]. Press [Exit]. Checking the Job History You can view the history and contents of completed print jobs. - Page 158 5. Convenient Functions Press [Exit] twice. • The most recent 100 job histories are displayed for each function. Jobs are displayed in the order of the time when the logs are created, not in the order of the time when the job ended.
-
Page 159: Maintenance And Specifications
6. Maintenance and Specifications This chapter describes how to replace supplies and how to install and clean this machine. It also describes the specifications of the main unit and options. General Requirements This section explains the items that should be followed during use of this machine. Dos and Don'ts •... - Page 160 6. Maintenance and Specifications • Depending on the ambient temperature and humidity, steam may come from the vents at the rear right side of the machine during printing. This is water vapor from the paper, not a sign of malfunction. •...
-
Page 161: Saving Printouts
General Requirements Saving Printouts • Prints will fade if exposed to strong light or dampness and humidity for lengthy periods. Preserve the quality of your copies by storing them in a binder in a dark, dry place. • Toner may melt if a print and a half-dried print are put on top of each other. •... -
Page 162: Replenishing And Replacing Consumables
6. Maintenance and Specifications Replenishing and Replacing Consumables This section explains precautions for adding toner or staples. Adding Toner This section explains precautions when adding toner and how to dispose of used toner. • Do not incinerate toner (new or used) or toner containers. Doing so risks burns. Toner will ignite on contact with naked flame. - Page 163 Replenishing and Replacing Consumables • If toner or used toner is swallowed, dilute by drinking a large amount of water. Consult a doctor if necessary. • When removing jammed paper or replacing toner, avoid getting toner (new or used) on your clothing.
-
Page 164: Replacing The Waste Toner Bottle
6. Maintenance and Specifications Disposing of used toner This section describes what to do with used toner. Toner cannot be re-used. Pack used toner containers in the container's box or a bag to prevent the toner from leaking out of the container when you dispose of it. - Page 165 Replenishing and Replacing Consumables • Store toner (new or used), toner containers, and components that have been in contact with toner out of reach of children. • If toner or used toner is inhaled, gargle with plenty of water and move into a fresh air environment.
-
Page 166: Adding Staples
6. Maintenance and Specifications • Replace the waste toner bottle if "Waste Toner Bottle is full. Replace Waste Toner Bottle." appears on the display. • When the "Replacement of Waste Toner Bottle will soon be necessary." appears on the display, the waste toner bottle should be replaced soon. - Page 167 Replenishing and Replacing Consumables • We recommend that you prepare separate ring comb cartridges for each type and color of ring comb. • Store ring combs in their original packaging and stand them upright. Changing the type of ring combs Pull the ring comb cartridge out of the machine.
-
Page 168: Filling The Glue Container
6. Maintenance and Specifications Insert the ring combs you want to use into the cartridge. Put the cartridge back into the machine. Filling the Glue Container • Store binding glue in a dark room whose ambient temperature is -20 to 40°C (-4 to 104°F), away from moisture, extremely high temperatures, direct sunlight, and open flames. -
Page 169: Where To Put Your Machine
Where to Put Your Machine Where to Put Your Machine This section describes precautions for installation and movement. Moving the Machine This section describes precautions when moving the machine. Choose your machine's location carefully. Environmental conditions greatly affect its performance. •... - Page 170 6. Maintenance and Specifications • Make sure the room where you are using the machine is well ventilated and spacious. Good ventilation is especially important when the machine is used heavily. • Keep the machine away from salt-bearing air and corrosive gases. Also, do not install the machine in places where chemical reactions are likely (laboratories, etc.), as doing so will cause the machine to malfunction.
- Page 171 Where to Put Your Machine DER110 1. Rear: 80 cm (31.5 inches) or more 2. Right: 100 cm (39.4 inches) or more 3. Front: 100 cm (39.4 inches) or more 4. Left: 100 cm (39.4 inches) or more • For the required space when options are installed, contact your service representative. Power connection •...
- Page 172 6. Maintenance and Specifications • It is dangerous to handle the power cord plug with wet hands. Doing so could result in electric shock. • If the power cord is damaged and its inner wires are exposed or broken, contact your service representative for a replacement.
- Page 173 Where to Put Your Machine • When performing maintenance on the machine, always disconnect the power cord from the wall outlet. • Power Source • (mainly Europe and Asia) 220–240 V, 16 A, 50/60 Hz • (mainly North America) 208–240 V, 16 A, 50/60 Hz Please be sure to connect the power cord to a power source as above.
-
Page 174: Maintaining Your Machine
6. Maintenance and Specifications Maintaining Your Machine How to Clean the Machine • When performing maintenance on the machine, always disconnect the power cord from the wall outlet. • If the machine's interior is not cleaned regularly, dust will accumulate. Fire and breakdown can result from heavy accumulation of dust inside this machine. -
Page 175: Checking The Earth Leakage Breakers
Maintaining Your Machine • Be sure to disconnect the power cord from the wall outlet at least once a year and check for the following: • The power cord's inner wires are exposed, broken, etc. • The power cord's coating has a crack or dent. •... - Page 176 6. Maintenance and Specifications Turn off the main power. Make sure that the main power indicator goes out. Open the front left cover, and then turn off the AC power switch. Using a ballpoint pen or similar pointed object, press in the earth leakage breaker's test button.
- Page 177 Maintaining Your Machine Trimmer CWW509 Return the earth leakage breaker to the On position. Main unit DER117 Trimmer CWW510 Turn on the AC power switch, and then close the front left cover. Push the main power switch to turn on the main power. •...
-
Page 178: Useful Information
6. Maintenance and Specifications Useful Information This section describes how to check the counter value, telephone number for repairs, or ordering consumables such as toner. Counter The counter displays the total number of pages used by each of the functions. You can also print out the counter information. - Page 179 Useful Information • Black Binding Combs (50 sheets) • White Binding Combs (50 sheets) • Black Binding Combs (100 sheets) • White Binding Combs (100 sheets) Machine Maintenance/Repair • Telephone No. • Serial No. of Machine Sales Representative • Telephone No. Supply Order •...
- Page 180 6. Maintenance and Specifications Displays the name of toner, staples, etc., used on the machine. Press the [Check Status] key. DER119 Press the [Maintnc./Inquiry/Mach. Info] tab. Press [Inquiry]. After checking the information, press [Exit].
-
Page 181: Specifications
Specifications Specifications • We have obtained each author's permission for the use of applications including open-source software applications. For details about the copyright information for these software applications, see "OSS.pdf" on the CD-ROM supplied with the machine. Specifications for the Main Unit Configuration: Console Hard disk:... - Page 182 6. Maintenance and Specifications Vertical: 139.7–330.2 mm (5.50–13.00 inches) Horizontal: 210.0–457.2 mm (8.27–18.00 inches) Paper weight: • Trays 1–2: For details, see page 112 "Recommended Paper Sizes and Types". • Duplex: 52.3–300.0 g/m (14.0 lb. Bond–165.0 lb. Index) First print time (Full Color/B&W): 8.7 seconds (A4 , 8 ×...
- Page 183 Specifications Type 1 Type 2 Type 3 Type 4 5,000 W or 5,000 W or 5,000 W or 5,000 W or Maximum less less less less The power level when the main switch is turned off and the power cord is plugged into an outlet: 1 W or less •...
-
Page 184: Specifications For Printer
6. Maintenance and Specifications Type 1 Type 2 Type 3 Type 4 Printing 68 dB (A) 68 dB (A) 68 dB (A) 68 dB (A) • Sound pressure level is measured from the position of the bystander. Weight: • Type 1 and 3: Approx. -
Page 185: Specifications For Finisher Sr5050
Specifications Fonts: • PCL 5c/6: 45 fonts, 13 International fonts • PDF: 136 fonts • PostScript 3: 136 fonts Memory: • 2 GB USB interface (standard) : Supported operating system: • Windows Vista/7/8/8.1, Windows Server 2003/2003 R2/2008/2008 R2/2012/2012 R2, Mac OS X 10.7 or later Transmission spec: •... - Page 186 6. Maintenance and Specifications 64.0–105.0 g/m (17.1–28.0 lb. Bond) Stack capacity for the finisher upper tray (80 g/m , 20 lb. Bond): • Without Z-fold: • 250 sheets: A4, 8 × 11 or smaller • 50 sheets: B4 JIS, 8 ×...
- Page 187 Specifications • 1,500 sheets: A3 , A4 , B4 JIS , B5 JIS , 11 × 17 , 8 × 14 , 8 × 11 , SRA4 • 1,000 sheets: 12 × 18 , 13 × 19 , SRA3 , 13 × 18 , 12 ×...
- Page 188 6. Maintenance and Specifications 10 Z-folded sheets, 9 Z-folded sheets and 0 to 10 unfolded sheets, 8 Z-folded sheets and 0 to 20 unfolded sheets, 7 Z-folded sheets and 0 to 30 unfolded sheets, 6 Z-folded sheets and 0 to 40 unfolded sheets, 5 Z-folded sheets and 0 to 50 unfolded sheets, 4 Z-folded sheets and 0 to 60 unfolded sheets, 3 Z-folded sheets and 0 to 70 unfolded sheets, 2 Z-folded sheets and 0 to 80 unfolded sheets, 1 Z-folded sheet and 1 to 90 unfolded sheets Stack capacity after stapling (80 g/m...
-
Page 189: Specifications For Booklet Finisher Sr5060
Specifications • For paper between 80.1 g/m (21.1 lb. Bond) and 100.0 g/m (26.7 lb. Bond), the staple capacity is a half that of 80.0 g/m (20.0 lb. Bond) paper. • For paper between 100.1 g/m (26.8 lb. Bond) and 200.0 g/m (110.7 lb. - Page 190 6. Maintenance and Specifications 11 × 14 , 10 × 15 , 10 × 14 , 13 × 19 , 13 × 19 , 12 × 19 , 12 × , 13 × 18 , SRA3 , SRA4 , custom size •...
- Page 191 Specifications • With Z-fold and Mixed Sizes: • A3 /A4 • B4 JIS /B5 JIS • 11 × 17 /8 × 11 • 8K /16K Staple paper weight: • Without Z-fold: 63.1–200.0 g/m (17.0 lb. Bond–110.7 lb. Cover) • With Z-fold: 64.0–105.0 g/m (17.1–28.0 lb.
- Page 192 6. Maintenance and Specifications 1–10 sheets: 30–3 sets (A3 Z-folded paper with A4, B4 JIS Z-folded paper with B5 JIS, 11 × 17 Z-folded paper with 8 × 11, 8K Z-folded paper with 16K) • With Mixed Sizes: 2–50 sheets: 30 sets (A3 /A4 , B4 JIS /B5 JIS , 11 × 17 /8 ×...
-
Page 193: Specifications For Punch Unit
Specifications Custom size • Vertical: 182.0–330.2 mm (7.17–13.00 inches) • Horizontal: 257.0–487.7 mm (10.12–19.20 inches) Half fold paper weight: 64.0–90.0 g/m (17.1–24.0 lb. Bond) Folding capacity of half folding function: 6 sheets Power requirements: • (mainly Europe and Asia) 220–240 V, 1.2 A, 50/60Hz •... -
Page 194: Specifications For Interposer
6. Maintenance and Specifications Punch unit type Paper size : A4, A5, B5 JIS, 8 × 11, 7 × 10 × 8 , 16K, 2 & 4 holes type: 2 holes custom size 2 & 4 holes type: 4 holes : A3, B4 JIS, 11 ×... -
Page 195: Specifications For Multi-Folding Unit
Specifications Power consumption: 84 W or less (Power is supplied from the main unit.) Dimensions (W × D × H): 540 × 730 × 1,290 mm (21.3 × 28.8 × 50.8 inches) (Except protruding parts) Weight: 45 kg (99.3 lb.) or less Specifications for Multi-Folding Unit Types of folds: Half Fold, Letter Fold-out, Letter Fold-in, Double Parallel Fold, Gate Fold, and Z-fold... -
Page 196: Specifications For Three-Tray Wide Large Capacity Tray
6. Maintenance and Specifications 64.0–80.0 g/m (17.1–21.0 lb. Bond) Folding capacity of multi-sheet folding function: 3 sheets Power requirements: • (mainly Europe and Asia) 220–240 V, 1.2 A, 50/60 Hz • (mainly North America) 120 V, 2.0 A, 50/60 Hz Power consumption: 240 W or less (A separate power source is required.) Dimensions (W ×... -
Page 197: Specifications For Two-Tray Wide Large Capacity Tray
Specifications Specifications for Two-Tray Wide Large Capacity Tray Paper size: For details, see page 112 "Recommended Paper Sizes and Types". Paper weight: For details, see page 112 "Recommended Paper Sizes and Types". Paper capacity (80 g/m , 20 lb. Bond): For details, see page 112 "Recommended Paper Sizes and Types". -
Page 198: Specifications For Decurl Unit
6. Maintenance and Specifications Paper weight: For details, see page 112 "Recommended Paper Sizes and Types". Paper capacity (80 g/m , 20 lb. Bond): For details, see page 112 "Recommended Paper Sizes and Types". Power consumption: 70 W or less (Power is supplied from the main unit.) Dimensions (W ×... -
Page 199: Specifications For Trimmer
Specifications Specifications for Trimmer Paper size: A3 , A4 , B4 JIS , B5 JIS , 11 × 17 , 8 × 14 , 8 × 13 , 8 × 11 , 8 × 14 , 8 × 13 , 8 × 13 , 7 ×... -
Page 200: Specifications For Perfect Binder
6. Maintenance and Specifications × 11 Paper weight (ring binding/comb binding punching): 64.0–216.0 g/m (17.1 lb. Bond–79.9 lb. Cover) Ring binding capacity: 2–100 sheets Capacity of the ring comb cartridge: 80 ring combs Ring comb type: 50-sheet type (white, black), 100-sheet type (white, black) Comb binding punch holes: •... - Page 201 Specifications Paper size (book block): A4 , B5 JIS , 8 × 11 , 7 × 10 , 16K , SRA4 Custom size: • Vertical: 257.0–320.0 mm (10.12–12.59 inches) • Horizontal: 182.0–228.6 mm (7.17–9.00 inches) Paper weight: • Cover: For details, see page 112 "Recommended Paper Sizes and Types". •...
-
Page 202: Specifications For Buffer Pass Unit
6. Maintenance and Specifications Dimensions (W × D × H): 1,090 × 791× 1,387 mm (43.0 × 31.2 × 54.7 inches) Weight: 350 kg (771.7 lb.) or less Specifications for Buffer Pass Unit Paper size: A3 , A4 , A5 , A6 , B4 JIS , B5 JIS , B6 JIS , 11 ×... -
Page 203: Specifications For High Capacity Stacker
Specifications Specifications for High Capacity Stacker Paper size for the stacker upper tray: A3 , A4 , A5 , A6 ,B4 JIS , B5 JIS , B6 JIS , 11 × 17 , 8 × 14 , 8 × 13 , 8 ×... - Page 204 6. Maintenance and Specifications 91.6 W • (mainly North America) 105 W (A separate power source is required. However, a voltage of 5 V or 24 V supplied from the main unit is required.) Dimensions (W × D × H): 900 ×...
-
Page 205: Appendix
7. Appendix This section describes the trademarks. Trademarks Adobe, Acrobat, PageMaker, PostScript, PostScript 3, and Reader are either registered trademarks or trademarks of Adobe Systems Incorporated in the United States and/or other countries. Firefox is a registered trademark of the Mozilla Foundation. ®... - Page 206 7. Appendix ® • Internet Explorer The proper names of the Windows operating systems are as follows: • The product names of Windows Vista are as follows: ® ® Microsoft Windows Vista Ultimate ® ® Microsoft Windows Vista Business ® ®...
- Page 207 Trademarks • The product names of Windows Server 2012 are as follows: ® ® Microsoft Windows Server 2012 Foundation ® ® Microsoft Windows Server 2012 Essentials ® ® Microsoft Windows Server 2012 Standard • The product names of Windows Server 2012 R2 are as follows: ®...
- Page 208 MEMO...
- Page 209 MEMO...
- Page 210 MEMO M196-7521...
- Page 212 M196-7521 © 2014...