Extron electronics DXP 42 HD 4K PLUS Setup Manual
Hide thumbs
Also See for DXP 42 HD 4K PLUS:
- User manual (119 pages) ,
- Setup manual (17 pages) ,
- User manual (54 pages)
Table of Contents
Advertisement
Quick Links
DXP 42 HD 4K PLUS • Setup Guide
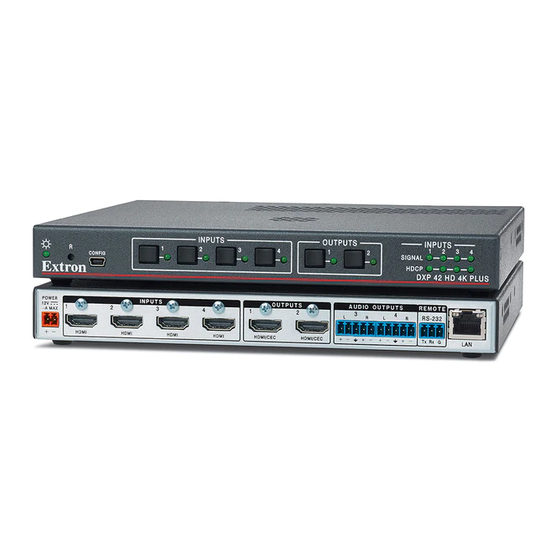
The DXP 42 HD 4K PLUS is a four input, two output HDMI matrix switcher that routes HDMI signals from multiple sources to
HDMI-equipped display devices. It supports computer and video resolutions up to 4K @ 60 Hz. It also supports HDMI 1.n and
2.0b specifications, including data rates up to 18.2 Gbps, HDR Deep Color up to 12-bit, 3D, and HD lossless audio formats. The
switcher is HDCP 2.2 and 1.4 compliant, and incorporates Extron technologies including SpeedSwitch
Minder
. Digital audio can be de-embedded from any input and assigned to independent analog stereo outputs.
®
This setup guide enables you to quickly set up and configure your DXP 42 matrix switcher. Step-by-step instructions show
you how to connect the hardware and to perform basic operations using both the front panel controls and selected Simple
Instruction Set (SIS) commands. The guide also shows you how to connect to the built-in web page and load and start up the
Product Configuration Software (PCS), which you can also use to configure and operate the switcher. For additional information
and specifications, see the DXP HD 4K PLUS product page at www.extron.com.
The terms "DXP," "DXP 42", "matrix," "switcher," and "DXP 42 matrix switcher" are used interchangeably in this guide to refer to
the DXP 42 HD 4K PLUS.
Ethernet
Wireless Access Point
Smartphone
Tablet
Laptop
INPUT
OUTPUT
HDMI
DECODER
1
SIGNAL
HD WIN
HD PASS
CONFIG
STANDBY
HDMI
HDMI
HDCP
SCREEN
DECODER
WINDOW
PASS-THROUGH
Extron
ShareLink Pro 1000
Wireless and Wired
Collaboration Gateway
Logitech
Rally Camera
USB
Videoconferencing PC
Figure 1.
Typical Application of the DXP 42 HD 4K PLUS
Setup Steps
Follow these steps to set up and start operating the DXP 42 matrix switcher:
1.
Turn off power to the input and output devices that will be connected.
2.
Connect HDMI input devices to the rear panel input connectors (see
3.
Connect HDMI audio and video output devices to the rear panel output connectors: video (
4.
Connect control devices as desired:
Connect a computer or control system to the Remote RS-232 (
•
on page 4).
Connect a computer, control system, or network switch to the RJ-45 LAN (Ethernet) port (see
•
5.
Connect the provided 12 V, 1.5 A power supply between the DXP switcher and a 100-240 VAC, 50-60 Hz power source, and
connect power to the input and output devices.
6.
Download the PCS program from
LAN
Laptop
Ethernet
HDMI
USB
HDMI
2
ShareLink Pro 1000
POWER
INPUTS
12V
1
2
3
1.5A MAX
HDMI
HDMI
Logitech
HDMI
Rally Mic Pod
USB
HDMI
USB
Capture
www.extron.com
4K Display
Laptop
HDMI
HDMI
Extron
OUTPUTS
AUDIO OUTPUTS
REMOTE
4
1
2
3
4
L
R
L
R
RS-232
DXP 42 HD 4K PLUS
HDMI
HDMI
HDMI/CEC
HDMI/CEC
Tx
Rx G
LAN
4K/60 HDMI Matrix
Switcher with Audio
Ethernet
De-Embedding
LAN
HDMI
Ethernet
figure
2,
D
) or the front panel USB Config port (see
(see
Downloading the Software
, EDID Minder
®
MODEL 80
FLAT PANEL
Extron
SB 33 A
Sound Bar
Audio
Audio
RS-232
COM 1
COM 2
DIGITAL I/O
IPCP PRO 250
Tx Rx
G
RTS CTS
Tx Rx
G
1
2
3
4
G
POWER
VOL
RELAYS
eBUS
IR/S
12V
1A MAX
V C G
1
2
C
+V +S -S G
Ethernet
PWR OUT = 6W
S
G
LAN
Extron
IPCP Pro 250
IP Link Pro
Control Processor
Extron
TLP Pro 1025T
10" Tabletop TouchLink
Pro Touchpanel
A
, on the next page).
B
), audio (
C
), or both.
figure 2,
on page 10).
, and Key
®
figure 5,
C
,
E
).
1
Advertisement
Table of Contents

Related Manuals for Extron electronics DXP 42 HD 4K PLUS


Summary of Contents for Extron electronics DXP 42 HD 4K PLUS
- Page 1 DXP 42 HD 4K PLUS • Setup Guide The DXP 42 HD 4K PLUS is a four input, two output HDMI matrix switcher that routes HDMI signals from multiple sources to HDMI-equipped display devices. It supports computer and video resolutions up to 4K @ 60 Hz. It also supports HDMI 1.n and 2.0b specifications, including data rates up to 18.2 Gbps, HDR Deep Color up to 12-bit, 3D, and HD lossless audio formats.
-
Page 2: Rear Panel Connections
HDMI connectors for video input. LockIt™ cable lacing brackets, one for each HDMI input and output connector, are provided with the DXP 42 HD 4K PLUS. These brackets can be used to secure the HDMI cables to the DXP connectors to reduce stress on the HDMI connectors... - Page 3 Remote RS-232 connector — Connect an RS-232 capable host Tx Rx G DXP 42 HD 4K PLUS Rear Panel device such as a computer or a touch panel control to this 3.5 mm RS-232 Port 3-pole captive screw connector to configure and control the Tx Rx G switcher via SIS commands.
-
Page 4: Front Panel Features
DXP 42 HD 4K PLUS Series • Setup Guide (Continued) Securing HDMI Cables with the LockIt HDMI Cable Lacing Bracket Use a LockIt HDMI Cable Lacing Bracket to securely fasten each HDMI cable to the switcher: Plug the HDMI cable into the panel connection (see the illustration at right,... -
Page 5: Operation
Config port — This USB mini-B port serves a similar communications function to the rear panel Remote RS-232 port, but is easier to access than the rear port after the matrix switcher has been installed and cabled. Use a USB type A to mini B cable to connect this port to a USB connector on the computer to enable SIS commands to be sent from the computer, connection to the PCS configuration software, and uploading firmware. -
Page 6: Remote Configuration And Control
NOTE: The factory default IP address is 192.168.254.254. You can change this address using SIS commands, the PCS configuration software, or the internal web page (see the DXP 42 HD 4K PLUS User Guide, available at www.extron.com, for instructions). The switcher responds with a message consisting of the copyright date, the name of the product, firmware version, part number, and the current date and time. -
Page 7: Host-To-Switcher Instructions
Host-to-switcher instructions The switcher accepts SIS commands through the LAN port, the Remote (RS-232) port, or the front panel USB Config port. SIS commands consist of one or more characters per command field. They do not require any special characters to begin or end the command character sequence. -
Page 8: Command And Response Table For Sis Commands
DXP 42 HD 4K PLUS Series • Setup Guide (Continued) Command and Response Table for SIS Commands ASCII Command Response Command Function Additional Description (Host to Switcher) (Switcher to Host) Output Switching (Ties) Tie HDMI input to HDMI output (video •In... - Page 9 ASCII Command Response Command Function Additional Description (Host to Switcher) (Switcher to Host) Information Requests (continued) Query firmware version X2%] View the unit firmware version to the second decimal place. In verbose modes 2 and 3: Ver01* X2^] Query firmware and build version View unit firmware version and build number In verbose modes 2 and 3:...
-
Page 10: Downloading The Software
Extron folder in your Program Files x86 folder, the installation program creates it. Starting the configuration program Connect the DXP 42 HD 4K PLUS to your computer via USB (front panel Config port) or TCP/IP (rear panel LAN port). -
Page 11: Accessing The Web Page
Click the Connect button at the bottom of the screen. The DXP 42 HD 4K PLUS device tab and main screen is displayed in the PCS window. When the screen opens, it displays the EDID Minder screen. To display other screens, click the icons on the toolbar. - Page 12 DXP 42 HD 4K PLUS Series • Setup Guide (Continued) If the unit is not password protected, the web page opens. If the Authentication Required dialog box opens, enter the user name (admin, by default) in the User Name field and the password in the Password field. Click Log In. The DXP 42 HD 4K PLUS web page contains the following panels: Device Info —...