Table of Contents
Advertisement
ACX710 Universal Metro Router Quick Start Guide
IN THIS GUIDE
Safety Warnings | 16
ACX710 Description
This Quick Start Guide contains information that you need to install and configure an ACX710 router quickly. For complete
installation instructions, see the ACX710 Universal Metro Router Hardware Guide at https://www.juniper.net/documentation/.
The ACX710 router provides an aggregation solution that is cost-effective and compact, and that supports emerging
deployments such as segment routing and Ethernet VPN (EVPN). The ACX710 includes support for numerous features
such as modern network management using NETCONF and YANG, and precise synchronization that helps address the
increasing demands of high-speed networks.
The ACX710 router is a 1-U compact and fixed-configuration model with high-density 1GbE, 10GbE, and 100GbE ports.
ACX710 routers provide full-duplex throughput of 320 Gbps and 24 Gbit DRAM packet buffer.
We ship these routers with a DC power supply module that has dual power feeds and a fan tray with five high-performance
fans that can effectively cool the chassis.
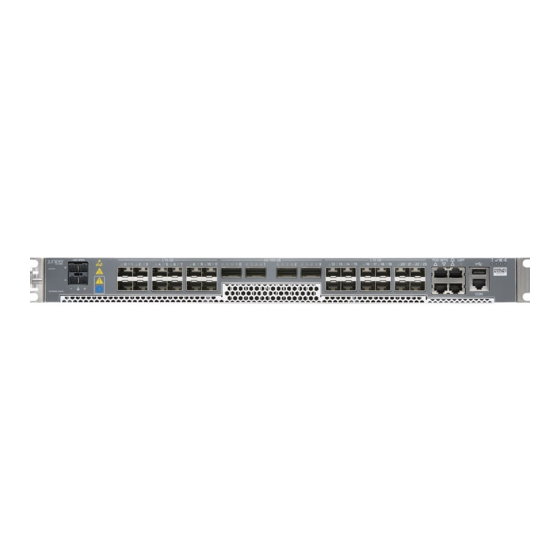
The port panel of the ACX710 router has the following port configurations:
Twenty-four 10GbE or 1GbE ports (ports 0 through 23) that operate at 10-Gbps speed when you use small form-factor
pluggable plus (SFP+) transceivers or at 1-Gbps speed when you use small form-factor pluggable (SFP) optics. Ports 0
Advertisement
Table of Contents

Related Manuals for Juniper ACX710


Summary of Contents for Juniper ACX710
-
Page 1: Table Of Contents
Contacting Customer Support | 19 ACX710 Description This Quick Start Guide contains information that you need to install and configure an ACX710 router quickly. For complete installation instructions, see the ACX710 Universal Metro Router Hardware Guide at https://www.juniper.net/documentation/. The ACX710 router provides an aggregation solution that is cost-effective and compact, and that supports emerging deployments such as segment routing and Ethernet VPN (EVPN). -
Page 2: Step 1: Prepare The Site For Acx710 Installation
Step 1: Prepare the Site for ACX710 Installation IN THIS SECTION Rack Requirements for ACX710 Routers | 3 Router Clearance Requirements | 4 Router Cooling and Airflow Requirements | 4 Tools and Parts Required to Prepare the ACX710 Router for Installation | 5... - Page 3 Rack Requirements for ACX710 Routers The ACX710 routers are designed to be installed on four-post racks. Table 1 provides the rack requirements and specifications for ACX710 routers. Table 1: Rack Requirements for ACX710 Routers Rack Requirement Guidelines Rack type Use a four-post rack that provides bracket holes or hole patterns spaced at 1-U increments (1.75 in.
- Page 4 12.4 in. 31.5 cm Router Cooling and Airflow Requirements In ACX710 routers, cool air is pulled through the front of the chassis towards the rear fan tray, and hot air is exhausted out of the chassis through the rear. Figure 4 shows the airflow through the ACX710 router.
-
Page 5: Step 2: Install The Acx710 Chassis In The Rack
Figure 4: Airflow Through the ACX710 Chassis Front Rear Tools and Parts Required to Prepare the ACX710 Router for Installation 19-in. four-post rack with fasteners (provided) ESD grounding strap (not provided). One pair of front-mounting rails (provided) Screws to secure the chassis to the rack (not provided). - Page 6 Figure 5: Install the Mounting Rails on an ACX710 Router 4. Using a Phillips (+) number 2 screwdriver, secure the mounting rails to the chassis using the mounting screws. 5. With one person on each side, hold on to the bottom of the chassis, and carefully lift the chassis so that the mounting rails are aligned with the rack rails.
-
Page 7: Step 3: Connect The Grounding Cable
Figure 8: ACX710 Router Installed in a Four-Post Rack Step 3: Connect the Grounding Cable To meet safety and electromagnetic interference (EMI) requirements and to ensure proper operation, the router must be adequately grounded before power is connected. -
Page 8: Step 4: Connect To Power
The ACX710 router supports a dual feed DC power supply module. Table 2 describes the DC power specifications for ACX710 routers. For the 2-pole DC circuit breaker, the recommended maximum value is 32 A and the minimum value is 8 A. Table 2: DC Power Specifications for ACX710 Routers... - Page 9 4. Insert the power cord firmly into the inlet. Figure 10: Connect a DC Power Cord to an ACX710 Router 5. Route the power cord appropriately. Verify that the power cord does not block the air exhaust or access to router components, or drape where people could trip over it.
-
Page 10: Step 5: Connect External Devices And Cables
Connect an ACX710 Router to a Network for Out-of-Band Management You can monitor and manage an ACX710 router by using a dedicated management channel. Use the management port (LMT) to connect the ACX710 router to a network for out-of-band management. - Page 11 If your laptop or PC does not have a DB-9 male connector pin and you want to connect your laptop or PC directly to the ACX710 router, use a combination of the RJ-45 cable and RJ-45 to DB-9 adapter and a USB to DB-9 male adapter.
-
Page 12: Step 6: Perform Initial Software Configuration
Figure 14: Connect an ACX710 Router to a Management Console Through a Console Server To Console Port Console Server Figure 15: Connect an ACX710 Router Directly to a Management Console Laptop CPU To Console Port Step 6: Perform Initial Software Configuration... - Page 13 3. Start the CLI. root# cli root@host> 4. Enter configuration mode. root@host> configure [edit] root@host# Configure User Accounts and Passwords For information about using an encrypted password or an SSH public key string (DSA or RSA), see Configuring the Root Password and user.
- Page 14 [edit] root@host# set system host-name host-name 2. Configure the domain name of the router. [edit] root@host# set system domain-name domain-name 3. Configure the IP address and prefix length for the router’s management interface. [edit] root@host# set interfaces em0 unit 0 family inet address address/prefix-length 4.
- Page 15 root@host# commit 9. When you have finished configuring the router, exit configuration mode. [edit] root@host# exit root@host> Commit the Configuration 1. (Optional) Display the configuration to verify that it is correct. [edit] root@host# show system { host-name host-name; domain-name domain-name; backup-router address;...
-
Page 16: Safety Warnings
Only trained and qualified personnel must install or replace the router. Perform only the procedures described in this quick start or the ACX710 Universal Metro Router Hardware Guide at https://www.juniper.net/documentation/. Other services should be performed by authorized service personnel only. - Page 17 Manually installing the router requires two people to lift an empty chassis and three people to lift a fully configured router. Before lifting the chassis with only two people, remove the components as described in the ACX710 Universal Metro Router Hardware Guide at https://www.juniper.net/documentation/. To prevent injury, keep your back straight and lift with your legs, not your back.
-
Page 18: Compliance Statements For Emc Requirements
Compliance Statements for EMC Requirements IN THIS SECTION Canada | 18 European Community | 18 Israel | 18 Japan | 19 United States | 19 Canada CAN ICES-3 (A)/NMB-3(A) European Community This is a Class A product. In a domestic environment, this product might cause radio interference in which case the user might be required to take adequate measures. -
Page 19: Contacting Customer Support
Contacting Customer Support You can contact Juniper Networks Technical Assistance Center (JTAC) 24 hours a day, 7 days a week in one of the following ways: On the Web, using the Service Request Manager link at: https://support.juniper.net/support/... - Page 20 The support representative validates your request and issues an RMA number for return of the component. Juniper Networks, the Juniper Networks logo, Juniper, and Junos are registered trademarks of Juniper Networks, Inc. in the United States and other countries. All other trademarks, service marks, registered marks, or registered service marks are the property of their respective owners.