Table of Contents
Advertisement
Quick Links
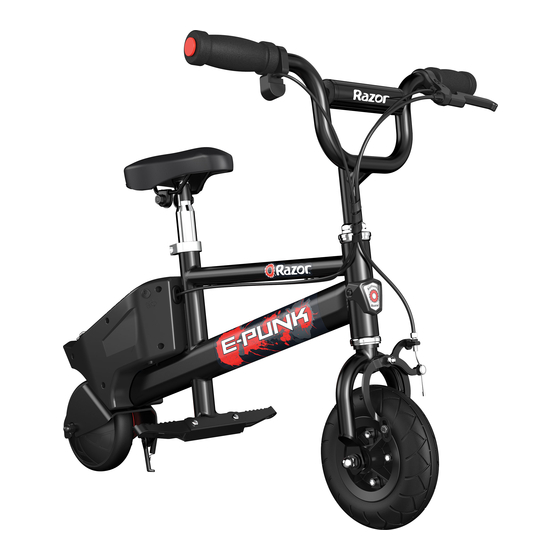
ELECTRIC MICRO BIKE
OWNER'S MANUAL
Read and understand this entire manual before
using this product! For assistance contact Razor.
DO NOT RETURN TO STORE.
NOTE: Manual illustrations are for demonstration purposes only.
Illustrations may not reflect exact appearance of actual product.
Specifications subject to change without notice.
Please have your product along with the 19 character product I.D. code with you
before contacting Razor for warranty assistance and/or replacement parts.
Product I.D. Code: _____________ - ____________ - ____________
Advertisement
Table of Contents

Related Manuals for Razor E-PUNK


Summary of Contents for Razor E-PUNK
- Page 1 Illustrations may not reflect exact appearance of actual product. Specifications subject to change without notice. Please have your product along with the 19 character product I.D. code with you before contacting Razor for warranty assistance and/or replacement parts. Product I.D. Code: _____________ - ____________ - ____________...
-
Page 3: Table Of Contents
Never use headphones or a cell phone to talk or text when riding. Need Help? Visit our website for product support, a list of authorized service centers in the US and customer service contact information at www.razor.com. Please have the product I.D. code (located on the white label of your product) available for better assistance. Additional Customer Service contact information is... -
Page 4: Safety Warnings
SAFETY WARNINGS Never hitch a ride with a vehicle. Do not ride your product in wet or icy weather and never immerse the E-Punk in water, as the electrical and drive components could be damaged by water or create other possibly unsafe conditions. Never risk damaging surfaces, such as carpet or flooring, by use of an electric E-Punk indoors. -
Page 5: Before You Begin
(Included) Need Help? Visit our website for product support, a list of authorized service centers in the US and customer service contact information at www.razor.com. Please have the product I.D. code (located on the white label of your product) available for better assistance. Additional Customer Service contact information is... -
Page 6: Assembly And Set-Up
Need Help? Visit our website for product support, a list of authorized service centers in the US and customer service contact information at www.razor.com. Please have the product I.D. code (located on the white label of your product) available for better assistance. Additional Customer Service contact information is... -
Page 7: Charging The Battery
ASSEMBLY AND SET-UP Inflating the Tire WARNING: Do not use The front tire is inflated when shipped, but it invariably may lose some pressure between the point of manufacturing the electric product for the first and your purchase. Always inflate tire to the correct PSI before first time use. time until you have inflated the tire to the correct PSI. -
Page 8: Pre-Ride Checklist And Usage
Razor recommends that you practice applying the brake at various speeds and in an open area free from Note: Practice riding only in wide To start the unit, turn the power switch “ON”. -
Page 9: Repair And Maintenance
8-1 M10 Locknut Need Help? Visit our website for product support, a list of authorized service centers in the US and customer service contact information at www.razor.com. Please have the product I.D. code (located on the white label of your product) available for better assistance. Additional Customer Service contact information is... - Page 10 3-6. Need Help? Visit our website for product support, a list of authorized service centers in the US and customer service contact information at www.razor.com. Please have the product I.D. code (located on the white label of your product) available for better assistance. Additional Customer Service contact information is...
- Page 11 REPAIR AND MAINTENANCE Hub Motor/Battery Replacement Cont’d Note: When re-inserting the motor wires into the connector, make sure Tools Required: Phillips Screwdriver and Two (2) 13 mm Wrenches, awl for opening wire prongs. the red wire connects to the yellow wire and the black wire connects to the blue wire.
- Page 12 For more information regarding recycling of rechargeable batteries, Disposal: Your Razor product uses a sealed lead-acid battery which must be recycled or disposed of in an call toll free environmentally safe manner. Do not dispose of a lead-acid battery in a fire. The battery may explode or leak. Do 1-800-822-8837, or visit not dispose of a lead-acid battery in your regular household trash.
-
Page 13: Troubleshooting Guide
+1 866-467-2967 to speak to a live Customer Service Representative. Need Help? Visit our website for product support, a list of authorized service centers in the US and customer service contact information at www.razor.com. -
Page 14: E-Punk Parts
E-PUNK ELECTRIC MICRO BIKE PARTS Keep your electric product running for years with genuine Razor parts. Visit our website or e-mail us for more information on spare part availability. (Specifications subject to change without notice.) 1. Handlebar Grips with End Caps (Right/Left) 8. - Page 15 NOTICE: INSURANCE YOUR INSURANCE POLICIES MAY NOT PROVIDE COVERAGE FOR ACCIDENTS INVOLVING THE USE OF THIS SCOOTER/ELECTRIC RIDE-ON PRODUCT. TO DETERMINE IF COVERAGE IS PROVIDED, YOU SHOULD CONTACT YOUR INSURANCE COMPANY OR AGENT.
-
Page 16: Warranty And Contact Information
Printed in China for Razor USA LLC. Copyright © 2003-2020 Razor USA, LLC. All rights reserved. Razor and the Razor logo design are among the registered trademarks of Razor USA LLC in the United States and/or select foreign countries. E-Punk and the E-Punk ®...