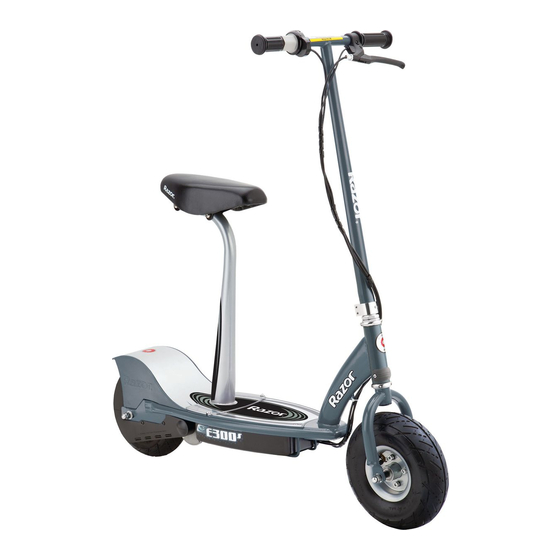
Razor e300 Owner's Manual
Hide thumbs
Also See for e300:
- Owner's manual (16 pages) ,
- Instructions (2 pages) ,
- Quick start manual (2 pages)
Table of Contents
Advertisement
Available languages
Available languages
Owner's Manual
Read and understand this entire manual before riding!
NOTE: Manual illustrations are for demonstration purposes only.
Illustrations may not reflect exact appearance of actual product.
Specifications subject to change without notice.
Français .................. Page 13
Español ................... Página 22
DO NOT RETURN TO STORE!
Item Number:
E300
13113640
E300S
13116240
Sweet Pea
13116261
Advertisement
Table of Contents

Related Manuals for Razor e300


Summary of Contents for Razor e300
- Page 1 DO NOT RETURN TO STORE! NOTE: Manual illustrations are for demonstration purposes only. Illustrations may not reflect exact appearance of actual product. Specifications subject to change without notice. Item Number: Français ....Page 13 E300 13113640 Español ....Página 22 E300S 13116240 Sweet Pea...
-
Page 2: Table Of Contents
PROPER RIDING ATTIRE riders are able to safely and responsibly use this product. Razor recommends Always wear proper protective equipment such as an approved safety helmet that you periodically review and reinforce the information in this manual (with chin strap securely buckled). -
Page 3: Before You Begin
2.5mm/5mm key wrenches (Not included) (Not Included) Need Help? Visit our web site for replacement parts, product support and a list of authorized service centers at www.razor.com or call toll-free at 866-467-2967 Monday - Friday 8:00AM - 5:00PM Pacific Time. -
Page 4: Assembly And Set-Up
ASSEMBLy AND SET-UP q Attaching the Handlebars Note: Make sure the cables/ wires are out of the way before inserting the stem into the fork. Depress the push button Open the quick release. Adjust the tension of the located on the front fork and quick release to where you can insert the handlebar stem until close the lever all the way to... - Page 5 Need Help? Visit our web site for replacement parts, product support and a list of authorized service centers at www.razor.com or call toll-free at 866-467-2967 Monday - Friday 8:00AM - 5:00PM Pacific Time.
-
Page 6: Hardware Maintenance
CONNECTORS/HARDWARE MAINTENANCE Brake Safety Gear Check the brakes for proper function. When you squeeze the lever, Always wear proper protective gear such as an approved safety the brake should provide positive braking action. When you apply helmet. Elbow pads and kneepads are recommended. Always the brake with the speed control on, the brake cut-off switch wear athletic shoes (lace-up shoes with rubber soles), never ride should stop the motor. - Page 7 Need Help? Visit our web site for replacement parts, product support and a list of authorized service centers at www.razor.com or call toll-free at 866-467-2967 Monday - Friday 8:00AM - 5:00PM Pacific Time.
- Page 8 REPAIR AND MAINTENANCE Install the axle adjusters Tighten both axle adjusters Tighten the brake housing and axle nuts. Tighten until they the same number of turns to fine- anchor securely. Test ride. just barely hold the hardware tune the tension on the chain and Readjust as needed.
-
Page 9: Adjusting The Chain
Refer to the Disposal: Your Razor product uses sealed lead-acid batteries which must be recycled or disposed of in disposal instructions at left. If an environmentally sound manner. Do not dispose of a lead-acid battery in a fire. The battery may explode acid comes into contact with or leak. -
Page 10: Troubleshooting Guide
Motor or electrical switch damage Contact your local Razor authorized service center for diagnosis and repair. Chain is too dry Apply a lubricant such as 3 in 1 or Tri-Flow to the chain. - Page 11 E300 / E300S SCOOTER PARTS Keep your scooter running for years with genuine Razor parts. Visit our web site or e-mail us for more information on spare part availability. (Specifications subject to change without notice.) Battery (2-12V/7Ah) Front fork Handlebar grips (right/left)
- Page 12 SB 1918 (CALIFORNIA) DECLARATION YOUR INSURANCE POLICIES MAY NOT PROVIDE COVERAGE FOR ACCIDENTS INVOLVING THE USE OF THIS SCOOTER/ELECTRIC VEHICLE. TO DETERMINE IF COVERAGE IS PROVIDED, YOU SHOULD CONTACT YOUR INSURANCE COMPANY OR AGENT.
-
Page 13: Warranty
Razor USA LLC PO Box 3610 Cerritos, CA 90703 Copyright © 2003-2009 Razor USA LLC. All rights reserved. RAZOR and the Razor Logo Design are among the registered trademarks of Razor USA LLC in the United States and/or select foreign countries. 11/2008... - Page 14 Lisez et assimilez l’intégralité de ce manuel avant d’utiliser la trottinette ! NE RETOURNEZ PAS AU MAGASIN ! NOTE : Les illustrations sont fournies comme démonstration uniquement. Spécifications susceptibles de changer sans préavis. Numéro d’article : E300 13113640 E300S 13116240 Sweet Pea 13116261...
- Page 15 Avec de jeunes usagers, Razor recommande de à d’éventuels accidents. Ne pratiquez pas la trottinette électrique dans la reprendre régulièrement les informations contenues dans ce manuel et d’en...
- Page 16 ASSUREZ-VOUS QUE L’INTERRUPTEUR EST PLACÉ SUR « OFF » AVANT D’EFFECTUER PRODUITS RAZOR AVEC TOUTE OPÉRATION D’ASSEMBLAGE OU DE MAINTENANCE. VOTRE TROTTINETTE ÉLECTRIQUE RAZOR. Razor recommande que l’assemblage soit effectué par un adulte. Chargeur Poignée de frein Extendeur de valve (intérieur de la poignée) Poignée d’accélérateur...
- Page 17 ASSEMBLAGE ET RÉGLAGE q Fixer le guidon Note: Assurez-vous que les câbles / fils sont à distance avant d’insérer la tige dans la fourche. Ajuster la tension du desserrage rapide jusqu’à ce que vous puissiez fermer le levier tout en bloquant le pied. q Gonfler les pneus AVERTISSEMENT : Si vous ne retirez pas...
- Page 18 ASSEMBLAGE ET RÉGLAGE q Fixer le siège (si applicable) Fixer le siège sur la tige. Dévissez quatre vis au milieu Placez la tige sur le plateau du plateau. et bloquez. q Charger la batterie Chargez la batterie avant l’utilisation. AVERTISSEMENT : • Temps de charge initial : 18 heures • D urée de fonctionnement : jusqu’à 40 minutes de temps Déconnectez toujours la...
- Page 19 MAINTENANCE DES CONNECTEURS / DU MATÉRIEL Frein Équipement de sécurité Contrôlez le bon fonctionnement des freins. Lorsque vous appuyez Portez toujours un équipement de protection adapté, tel qu’un sur la poignée, le frein doit entraîner une action de freinage casque de sécurité homologué. Il est recommandé de porter des positive. Lorsque vous freinez alors que le contrôle de la vitesse coudières et des genouillères.
- Page 20 RÉPARATIONS ET MAINTENANCE q Remplacement de la chaîne et du pneu arrière Desserrer les vis et retirer le Desserrer la fixation du câble Desserrer la fixation du garde-chaîne. de frein et déconnecter le câble. boîtier de frein et déconnecter. Conserver l’entretoise et les boulons ensemble.
- Page 21 RÉPARATIONS ET MAINTENANCE Remplacer le garde-chaîne. q Remplacement du pneu avant Droite (accélérateur) 9-3 - Entretoise 9-2 - Rondelles 9-1 - Contre-écrou M10 Milieu 9-6 - Boulon de l’axe avant Gauche (Frein) Desserrer les boulons de Retirer la roue et installer la 9-5 - Entretoise l’axe avant en tournant la roue de remplacement.
- Page 22 Copyright © 2003-2009 Razor USA LLC. Tous droits réservés. RAZOR et le logo Razor font partie des marques déposées de Razor USA LLC aux États-Unis et/ou dans une sélection de pays étrangers.
- Page 23 ¡Lea todo el contenido de este manual y familiarícese con él, antes de circular con el producto! ¡NO DEVOLVER A LA TIENDA! NOTA: Las ilustraciones sólo tienen fines demostrativos. Especificaciones sujetas a cambio sin previo aviso. Número de artículo: E300 13113640 E300S 13116240 Sweet Pea 13116261...
- Page 24 No arriesgarse a dañar sean capaces de usar este producto de forma segura y responsable. Razor le superficies como alfombras o pisos, usando el escúter eléctrico en interiores.
- Page 25 ASEGÚRESE DE QUE EL INTERRUPTOR DE ENCENDIDO ESTÉ EN “OFF”, ANTES DE RAZOR PARA EL ESCÚTER EFECTUAR CUALQUIER TAREA DE MONTAJE O MANTENIMIENTO. ELÉCTRICO RAZOR. Razor recomienda que un adulto realice el montaje. Cargador Maneta de freno Extensor de válvula (en la empuñadura)
- Page 26 MONTAJE y PREPARACIÓN q Colocación del manillar Nota: Asegurarse de que los cables/hilos estén alejados, antes de introducir la tija en la horquilla. Ajustar la tensión del cierre rápido, hasta poder cerrar la palanca completamente, para asegurar la tija. q Inflado de los neumáticos ADVERTENCIA: Neumático trasero Si no se retira el adaptador...
- Page 27 MONTAJE y PREPARACIÓN q Colocación del sillín (si correspondiera) Desenroscar los cuatro Colocar el sillín en la tija del Poner la tija del sillín en la sillín. tornillos en el medio de la plataforma y sujetarla. plataforma. q Carga de la batería Cargar la batería antes de usar.
- Page 28 MANTENIMIENTO DE LOS CONECTORES/LAS PIEZAS Freno Equipo de seguridad Controlar el correcto funcionamiento de los frenos. Al presionar la Llevar siempre equipo de protección apropiado, como un casco maneta, el freno debe proporcionar una acción de frenado segura. de seguridad aprobado. Se recomienda usar coderas y rodilleras. Al accionar el freno con el control de velocidad conectado, el Llevar siempre zapatos deportivos (zapatos con cordones y interruptor de corte del freno debe detener el motor.
- Page 29 REPARACIÓN y MANTENIMIENTO q Sustitución del neumático trasero y la cadena Aflojar los tornillos y retirar Aflojar la fijación del cable de Aflojar la fijación de la el cubrecadena. freno y desconectar el cable. caja de freno y desconectar. Mantener el separador y los pernos juntos.
- Page 30 REPARACIÓN y MANTENIMIENTO Volver a colocar el cubrecadena. q Sustitución del neumático delantero Derecha (acelerador) 9-3 - Separador 9-2 - Arandelas 9-1 - Contratuerca M10 Centro 9-6 - Perno de eje delantero Izquierda (freno) Aflojar los pernos de eje Retirar la rueda y colocar la 9-5 - Separador delantero, girando la llave de rueda de recambio.
- Page 31 Copyright © 2003-2009 Razor USA LLC. Todos los derechos reservados. RAZOR y el diseño del logotipo de Razor son marcas registradas de Razor USA LLC en EE.UU. y/o en determinados países.