Advertisement
Quick Links
Advertisement

Related Manuals for Diamondback 1280ef


Summary of Contents for Diamondback 1280ef
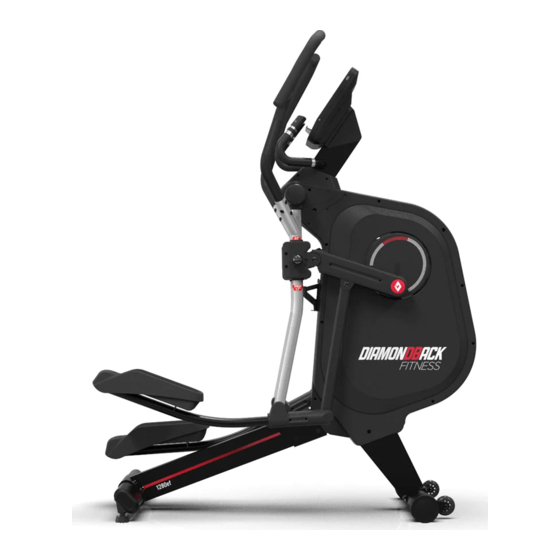
- Page 1 1280ef Changeable Stride Elliptical Owners Manual...
- Page 2 Warning: Unpacking Caution: Lay the box down flat so that the lid is able to be lifted. Unpack the handle bars, front stabilizer , rear stabilizer, central supporting tube, console, hardware bag, and owners manual. Remove the top polyfoam pieces #1 & #2 and #3 & #4, leaving the main frame(A) and bottom polyfoam pieces #5 &...
- Page 3 Front stabilizer Main frame Console supporting tube Console supporting tube cover (L&R) Rear stabilizer R(A9) L(A8) Adaptor Console (G1) Front pedal supporting &Console cover (G2) tube cover (A66) (A67) E2 Handle bar (R) E1 Handle bar (L) Central supporting tube Pedal supporting tube cover (L1&L2),(R1&R2) L2(A73)
- Page 4 TOOL M6x2 (F4) Screw M8 (F2) Screw M8x65 (A107) Bolt Ø15x50.5 (F3) Washer M8 (A62) Spring washer M8 (A61) Washer M8 (A78) Screw M3x20 (A63) Screw M8x20...
- Page 5 FRONT STABILIZER (B) ASSEMBLY Step 1. Remove the four preassembled screws (B3), spring washer (B4) and washer (B5) from the front stabilizer (B). Step 2. Attach the front stabilizer (B) on to main frame (A) with screws (B3), spring washer (B4) and washer (B5). USE TOOL:6m/m CONSOLE SUPPORTING TUBE (D) ASSEMBLY Step 1.
- Page 6 CENTRAL SUPPORTING TUBE (F) ASSEMBLY Step 1. Attach the central supporting tube (F) onto main frame (A) with four screws (F4). Tighten the screws (F4) on the central supporting tube when the unit is lifted. USE TOOL:6m/m REAR STABILIZER (C) ASSEMBLY Step 1.
- Page 7 CONSOLE & CONSOLE COVER ASSEMBLY Step 1. Remove four screws (G3) from the console (G). Step 2. Connect all wires. Step 3. Fit the console (G) to console supporting tube (D). Step 4. Slide the console cover (G2) on console supporting tube (D). Step 5.
- Page 8 FRONT CONNECTING SHAFT (A53) & FRONT PEDAL SUPPORTING TUBE-L&R (A64&A65) ASSEMBLY Step 1. Attach front connecting shaft (A53) and front pedal supporting tube-L (A64) using bolt (A107), screw (A63) spring washer (A62) and washer (A61). ** Repeat same step to finish right side assembly. A107 USE TOOL:6m/m PEDAL TUBE COVER-(L&R) ASSEMBLY...
-
Page 9: Adapter Assembly
HANDLE BAR & FRONT PEDAL SUPPORTING TUBE COVER ASSEMBLY Step 1. Remove the six preassembled screws (E4&E5) from the handle bar (E1). Step 2. Remove the two preassembled screws (A108) from the main frame (A). Step 3. Mount the handle bar (E1) onto the main frame (A) with screws (E4&E5). -
Page 10: How To Transport The Machine
HOW TO TRANSPORT THE MACHINE If the machine needs to be transported to a different location, lift up the rear stabilizer until the front transportation wheels en age the ground. You may now move the machine to the desired location. After the move, gently set the machine down at its new location and adjust the levelers on the bottom rear stabilizer to level the machine if needed. - Page 11 HOW TO ADJUST THE STRIDE Step 1. There are 2 different stride choices on the 1280ef. They are 17” and 22”. (When you choose 17”, you will see the orange sticker on front pedal supporting tube, when you choices 22”, you will see the white sticker on front pedal supporting tube.) Step 2.
-
Page 12: Console Display
CONSOLE DISPLAY Step-by-Step Instructions Power-up Press the Quick Start Button to turn on the console. Fig 1. TURN-ON DISPLAY Once warmed up, the display will turn on the Home Screen. Please check Figure 2. Fig 2. Home Screen *** Notice that if the console has already been started, it will turn from a black screen into the Home screen directly after you press the Quick Start Button. - Page 13 How to Set-up Your Console? Time Setting QUICK START function Setting Mode COMMUNITY CENTER TARGET H.RATE MAUNAL WATT CONSTANT PROGRAM Fig. 3 Functions on the Home Screen Time Setting 1. Press Time Setting to set-up the time and date of the console. 2.
- Page 14 SETTING MODE Press the icon on the upper left corner of the home screen. (Fig.3) You can enter the SETTING MODE. Please check Figure 6. exit WIFI select WIFI ON / OFF updates image 4 volume LANGUAGE screen brightness metric switching Fig.6 SETTING MODE WIFI CONNECTION 1.
- Page 15 LANGUAGE 1. Press the (Fig.6 & Fig.9a) Fig.9 Language Selection (a) Fig.9 Language Selection (b) 2. Press the recent language and then choose the language you want. 3. Press Confirm to change the language of the console. (Fig. 9b) UNIT SWITCH Choose the unit, KM or ML, you want to display.
- Page 16 If you would like to directly start your training without any training schedule (Fig.11), please follow these two instructions Press the Quick Start Button on the Home Screen (Fig.3) Press Quick Start Button on the console (Fig.12) when the display is at Home Screen. Fig.12 Quick Start Button on the Console 2.
- Page 17 MANUAL 1. How to start Manual? Press Manual on the Home screen (Fig. 3) to start exercising with several training goals like Time, Distance and Calories. Please check Figure 15. Fig. 15 Manual Mode Set-up Users’ Information There are five users that can be chosen, From U0~U4. Here we take U0 as an example of set-up.
- Page 18 PROGRAM 1. How to start Program? Press Program on the Home screen (Fig. 3) to start training with 12 different programs so that the load will be changed automatically along with time. Please check Figure 16. Fig. 16 Program Mode Set-up Users’...
-
Page 19: Watt Constant
WATT CONSTANT 1. How to start WATT CONSTANT Press WATT CONSTANT on the Home screen (Fig. 3) to start training with targeted Watt. Please check Figure 17. Fig. 17 Program Mode Set-up Users’ Information There are five users can be chosen, From U0~U4. Here we take U0 as an example of set-up. - Page 20 Press to pause the training. PAUSE Fig.19 Paused Training Press to continue (Fig.19) CONTINUE Press to stop the training and go back to the Home Screen HOME 3. After using WATT CONSTANT Before going back the Home Screen, it will show out the Workout Data if your training time is over 30 Seconds.
- Page 21 2. While using TARGET H. RATE After setting up the information, press to start the training. START Fig. 22 TARGET H.RATE TRAINING During the training, it will show the SPEED, RPM, TIME, DISTANCE, CALORIES and Watts on the right side of the screen. Please check Figure 21 The Target H.
- Page 22 3. After using TARGET H. RATE Before going back to the Home Screen, it will show the Workout Data if your training time was over 30 Seconds. Please check Figure 25 Fig. 25 Workout Data Display (III) Recovery Function There is function button on every kind of training modes when you are RECOVERY excercising.
- Page 23 How to Enjoy the Community Center? Press the Community Center button on Fig.3 to enter. Fig. 27 Community Center Six Apps Press the icon of the Apps then Enjoying the Apps. Youtube Spotify Chrome iRoute Kinomap Update of the Apps These apps will sometimes automatically notify you that they need to be updated.
- Page 24 Entertainment Apps with Training There are two ways that can let you enjoy Youtube, Net ix, Spotify and Chrome (Entertainment Apps). How can we start training directly when using entertainment Apps? 1. Press the icon on the left border of the screen. Please check Figure 30. Fig.
- Page 25 3. Press to continue CONTINUE 4. After entering the App, please follow the instructions in the section of “Entertainment Apps with Training”—“How can we start training directly when using entertainment Apps?.” Then, you can keep training. Before using Program and Manual Take Manual Mode for example.
- Page 26 Press Download. Please check Figure 34. Fig. 34 Update Process 1 Press Install. Please check Figure 35. Fig. 35 Update Process 2 Press Done. Please check Figure 36. Fig. 36 Update Process 3 Update is finished.