Table of Contents
Advertisement
Advertisement
Table of Contents

Related Manuals for TP-Link TL-WA801N


Summary of Contents for TP-Link TL-WA801N
- Page 1 User Guide 300Mbps Wireless N Access Point TL-WA801N REV6.0.0 1910012715...
-
Page 2: Table Of Contents
Contents About This Guide ......................1 Chapter 1. Get to Know About Your Access Point ..... 2 1. 1. Product Overview............3 1. - Page 3 4. 1. Set Up System Time ............26 4.
-
Page 4: About This Guide
The Quick Installation Guide can be found where you find this guide or inside the package of the access point. Specifications can be found on the product page at https://www.tp-link.com. A community is provided for you to discuss our products at https://community.tp-link. -
Page 5: Chapter 1. Get To Know About Your Access Point
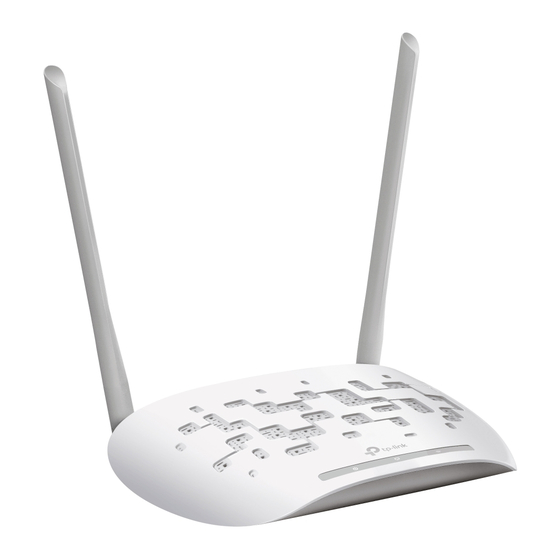
Chapter Get to Know About Your Access Point This chapter introduces what the access point can do and shows its appearance. It contains the following sections: • Product Overview • Appearance... -
Page 6: Product Overview
1. 1. Product Overview The TP-Link Wireless N Access Point, with multiple operation modes, is designed to establish or expand a scalable high-speed wireless N network or to connect multiple Ethernet enabled devices to a wireless network, such as game consoles, digital media adapters, printers, or network attached storage devices. -
Page 7: The Back Panel
Chapter 1 Get to Know About Your Access Point Name Status Indication The ETHERNET port is connected to a powered-on device. (Ethernet) The ETHERNET port is not connected to a powered-on device. The wireless function is enabled. (Wireless) The wireless function is disabled. 1. -
Page 8: Chapter 2. Set Up Internet Connection Via Quick Setup Wizard
Chapter Set Up Internet Connection Via Quick Setup Wizard This chapter introduces how to quickly set up the access point. It contains the following sections: • Position Your Access Point • Set Up Your Access Point... -
Page 9: Position Your Access Point
This mode is suitable for dorm rooms or homes where there’s already a wired router but you need a wireless network. Internet TL-WA801N’s SSID Existing Router 1. Connect the access point according to Step A to D in the diagram. -
Page 10: Range Extender Mode
Chapter 2 Set Up Internet Connection Via Quick Setup Wizard 4. Launch a web browser, and visit http://tplinkap.net. Create a password to log in. Note: If the login window does not appear, please refer to the Section. 5. Go to Quick Setup and click Next... - Page 11 Chapter 2 Set Up Internet Connection Via Quick Setup Wizard Internet Host AP’s SSID TL-WA801N’s SSID Other Wired Devices 1. Connect the access point according to Step A and B in the diagram. 2. Power on the access point, and wait until the Power (...
-
Page 12: Client Mode
Chapter 2 Set Up Internet Connection Via Quick Setup Wizard 7. Follow the step-by-step instructions to complete the configuration. 8. Relocate the access point about halfway between your host router and the Wi-Fi dead zone. Tip: To maximize the signal strength, refer to the section. -
Page 13: Multi-Ssid Mode
Chapter 2 Set Up Internet Connection Via Quick Setup Wizard 5. Go to Quick Setup and click Next to start. 6. Select Client mode and click Next. 7. Follow the step-by-step instructions to complete the configuration. 8. Now, connect your wired devices to the access point via an Ethernet cable, and enjoy the internet! 2. - Page 14 Chapter 2 Set Up Internet Connection Via Quick Setup Wizard VLAN 1 SSID 1 for VLAN 1 Internet VLAN 2 SSID 2 for VLAN 2 SSID 3 for VLAN 3 Existing Router SSID 4 for VLAN 4 VLAN 3 VLAN 4 1.
- Page 15 Chapter 2 Set Up Internet Connection Via Quick Setup Wizard 7. Follow the step-by-step instructions to complete the configuration. 8. Now, connect your wireless devices to the Wi-Fi networks isolated by VLANs, and enjoy the internet!
-
Page 16: Chapter 3. Customize Your Network
Chapter Customize Your Network This chapter introduces how to customize your network. It contains the following sections: • View Network Status • Change the LAN Settings • Customize Wireless Settings • Use WPS for Wireless Connection (Access Point mode) • Wireless MAC Filtering •... -
Page 17: View Network Status
Chapter 3 Customize Your Network 3. 1. View Network Status 1. Visit http://tplinkap.net, and log in with the password you set for the access point. 2. Go to Status. Click Refresh to get the latest network information of the access point. 3. -
Page 18: Customize Wireless Settings
Chapter 3 Customize Your Network Note: • After you have changed the IP address, you must use the new IP address to log in. • If you select Smart IP (DHCP), the DHCP server settings of the access point will be disabled. •... -
Page 19: Customize Wireless Security (Access Point/Multi-Ssid Mode)
Chapter 3 Customize Your Network 3. 3. 2. Customize Wireless Security (Access Point/Multi-SSID mode) 1. Visit http://tplinkap.net, and log in with the password you set for the access point. 2. Go to Wireless > Wireless Security. 3. Customize the wireless security according to your needs. 4. -
Page 20: Customize The Extended Network (Range Extender Mode)
Chapter 3 Customize Your Network 3. Enter the SSID and the password of a host network which the extender will be connected to or click Scan and select a Wi-Fi network. 4. Click Save and the modified configuration will be synchronized to the extended network settings. - Page 21 Chapter 3 Customize Your Network 1. Visit http://tplinkap.net, and log in with the password you set for the access point. 2. Go to Wireless > WPS. 3. Follow one of the following three methods to connect your WPS-enabled client to the access point’s Wi-Fi network.
-
Page 22: Wireless Mac Filtering
Chapter 3 Customize Your Network Method 3: Enter the Client’s PIN 1. Keep the WPS Status as Enabled and click device. 2. Select Enter new device PIN, and then enter your client device’s current PIN in the filed and click Connect. A success message will appear on the WPS page if the client device has been successfully added to the access point’s network. - Page 23 Chapter 3 Customize Your Network 3. Click Enable to enable the Wireless MAC Filtering function. 4. Select Allow the stations specified by any enabled entries in the list to access as the filtering rule. 5. Delete all or disable all entries if there are any entries already. 6.
-
Page 24: Wireless Advanced
Chapter 3 Customize Your Network 3. 6. Wireless Advanced You can view or change advanced wireless settings if necessary. It is recommended to keep them as default. Note: When working in Client mode, Wireless Advanced is not available. 1. Visit http://tplinkap.net, and log in with the password you set for the access point. 2. -
Page 25: Dhcp
Chapter 3 Customize Your Network 3. 8. Throughput Monitor (Access Point mode) The throughput chart displays the current data traffic of the network. The curves indifferent colors represent the received and transmitted rates of the 2.4GHz frequencies. Note: When working in Range Extender, Client and Multi-SSID mode, Throughput Monitor is not available. 1. -
Page 26: Dhcp Clients List
Chapter 3 Customize Your Network • When you choose Smart IP (DHCP) Network > LAN, the DHCP Server settings will be disabled. 1. Visit http://tplinkap.net, and log in with the password you set for the access point. 2. Go to DHCP >... - Page 27 Chapter 3 Customize Your Network 3. Enter the MAC address (in XX-XX-XX-XX-XX-XX format.) of the client for which you want to reserve an IP address. 4. Enter the IP address to reserve for the client. 5. Leave the Status as Enabled. 6.
-
Page 28: Chapter 4. Manage Your Access Point
Chapter Manage Your Access Point This chapter presents how to configure and manage your access point. It contains the following sections: • Set Up System Time • Diagnostic • SNMP Settings • Ping Watch Dog • Firmware Upgrade • Factory Defaults •... -
Page 29: Set Up System Time
Chapter 4 Manage Your Access Point 4. 1. Set Up System Time System time is the time displayed while the access point is running. The system time you configure here will be used for other time-based functions like Reboot Schedule. You can choose the way to obtain the system time as needed. -
Page 30: Diagnostic
Domain Name System (DNS) queries. 2 ) Enter the destination IP address (such as 192.168.0.254) or Domain name (such as www.tp-link.com) in the IP address/Domain name field. -
Page 31: Snmp Settings
Chapter 4 Manage Your Access Point 3 ) (Optional) Enter the Ping Court/Ping Packet Size/Ping Timeout/Traceroute Max TTL as needed. It’s recommended to keep the default value. 4. Click Start to check the connectivity of the Internet. The Diagnostic results will display as below. -
Page 32: Ping Watch Dog
4. 5. Firmware Upgrade TP-Link is dedicated to improving and richening the product features, giving users a better network experience. We will release the latest firmware at TP-Link official website. You can download the latest firmware file from the Support page of our website www.tp-link.com... -
Page 33: Factory Defaults
• Do NOT power off the access point during the firmware upgrade. 1. Download the latest firmware file for the access point from our website www.tp-link. com. 2. Visit http://tplinkap.net, and log in with the password you set for the access point. -
Page 34: Reboot
Chapter 4 Manage Your Access Point • To back up configuration settings: Click Backup to save a copy of the current settings in your local computer. A “.bin“ file of the current settings will be stored in your computer. • To restore configuration settings: 1 ) Click Choose File to locate the backup configuration file stored in your computer,... -
Page 35: 4. 10. System Log
Chapter 4 Manage Your Access Point 4. Click Save. 4. 10. System Log 1. Visit http://tplinkap.net, and log in with the password you set for the access point. 2. Go to System Tools > System Log, and you can view the logs of the access point. 4. -
Page 36: Faq
Q1. How do I restore the access point to its factory default settings? With the access point powered on, use a pin to press and hold the Reset button until all the LEDs turn on momentarily, then release the button. Note: Upon resetting, all previous configurations will be cleared, and the access point will reset to the default Access Point Mode. - Page 37 Q5. What should I do to maximize my signal strength in Repeater/Bridge mode? When choosing an ideal location to optimize wireless signal in Repeater/Bridge mode, please refer to the following recommendations. • The Best Way is Halfway Generally, the ideal location for the repeater is about halfway between your wireless router and your wireless clients and make sure that the location you choose is within the range of the host router.
- Page 38 Specifications are subject to change without notice. is a registered trademark of TP-Link Technologies Co., Ltd. Other brands and product names are trademarks or registered trademarks of their respective holders. No part of the specifications may be reproduced in any form or by any means or used to make any derivative such as translation, transformation, or adaptation without permission from TP-Link Technologies Co., Ltd.
- Page 39 Component Name Model I.T.E. Power Supply T090060-2B1 Responsible party: TP-Link USA Corporation, d/b/a TP-Link North America, Inc. Address: 145 South State College Blvd. Suite 400, Brea, CA 92821 Website: http://www.tp-link.com/us/ Tel: +1 626 333 0234 Fax: +1 909 527 6803 E-mail: sales.usa@tp-link.com...
- Page 40 20 cm from all persons and must not be co- located or operating in conjunction with any other antenna or transmitter.” We, TP-Link USA Corporation, has determined that the equipment shown as above has been shown to comply with the applicable technical standards, FCC part 15. There is no unauthorized change is made in the equipment and the equipment is properly maintained and operated.
- Page 41 Any changes or modifications not expressly approved by the party responsible for compliance could void the user’s authority to operate the equipment. We, TP-Link USA Corporation, has determined that the equipment shown as above has been shown to comply with the applicable technical standards, FCC part 15. There is no unauthorized change is made in the equipment and the equipment is properly maintained and operated.
- Page 42 OPERATING FREQUENCY(the maximum transmitted power) 2400 MHz -2483.5 MHz (20dBm) EU declaration of conformity TP-Link hereby declares that the device is in compliance with the essential requirements and other relevant provisions of directives 2014/53/EU, 2009/125/EC, 2011/65/EU and (EU)2015/863. The original EU declaration of conformity may be found at https://www.tp-link.com/en/ce...
- Page 43 Déclaration d’exposition aux radiations: Cet équipement est conforme aux limites d’exposition aux rayonnements IC établies pour un environnement non contrôlé. Cet équipement doit être installé et utilisé avec un minimum de 20 cm de distance entre la source de rayonnement et votre corps. Industry Canada Statement CAN ICES-3 (B)/NMB-3(B) Korea Warning Statements:...
- Page 44 備考1. 超出0.1 wt %” 及 “超出0.01 wt %” 系指限用物質之百分比含量超出百分 比含量基準值。 備考2.“○”系指該項限用物質之百分比含量未超出百分比含量基準值。 備考3.“ − “ 系指該項限用物質為排除項目。 Продукт сертифіковано згідно с правилами системи УкрСЕПРО на відповідність вимогам нормативних документів та вимогам, що передбачені чинними законодавчими актами України. Safety Information • Keep the device away from water, fire, humidity or hot environments. •...