Table of Contents
Advertisement
FOREWORD
This motorcycle has been designed and pro-
duced utilizing Suzuki's most modern tech-
nology. The finest product, however, cannot
perform properly unless it is correctly
assembled and serviced. This set-up man-
ual has been produced to aid you in properly
assembling and servicing this motorcycle.
Please review this set-up manual carefully
before performing any work. Take special
care to properly perform the required
assembly and servicing marked by either a
Warning or a Caution. Failure to follow the
directions in either of these two (2) catego-
ries
could
lead
to
serious
and
denoted to emphasize certain areas and
carry the following meanings:
Indicates a potential hazard that could
result in death or injury.
Indicates a potential hazard that could
result in motorcycle damage.
This set-up manual is based on a motorcy-
cle of standard specification. Some minor
differences from this manual may be found
in other specifications.
K3
AVANT-PROPOS
Cette moto a été conçue et produite en utili-
sant la technologie la plus récente de
Suzuki. Le meilleur produit, cependant, ne
peut pas fonctionner de manière satisfai-
sante à moins qu'il ne soit correctement
assemblé et entretenu. Ce manuel d'assem-
blage a été rédigé pour vous aider à effec-
teur correctement l'assemblage et l'entretien
de cette moto.
Prière de se familiariser avec ce manuel
d'assemblage avant de commencer les tra-
vaux. Faire particulièrement attention à
effectuer correctement les travaux d'assem-
problems.
blage et d'entretien indiqués sous les titres
areas are
Avertissement et Attention. Ne pas suivre les
directives de ces deux (2) catégories pourrait
causer de sérieux problèmes. Les titres
pour but d'insister sur certains points et ils
ont les significations suivantes:
Indique un danger qui pourrait provoquer
la mort ou une blessure.
Indique un danger qui pourrait provoquer
un endommagement du véhicule.
Ce manuel d'assemblage est basé sur la
moto aux caractéristiques standard. Dans
certains cas, certains différences mineures
peuvent apparaître par rapport à ce manuel.
Dieses Motorrad wurde mit Hilfe der fort-
schrittlichsten Technologie von Suzuki ent-
wickelt und gebaut. Die beste Maschine
kann jedoch nur dann einwandfrei funktionie-
ren, wenn sie richtig zusammengebaut und
gewartet
wurde zusammengestellt, um Ihnen das
richtige Zusammenbauen und Warten des
Motorrades zu erleichtern.
Lesen Sie bitte diese Anleitung aufmerksam
durch, bevor Sie irgendwelche Arbeiten aus-
führen. Achten Sie besonders auf vor-
schriftsmäßigen
Wartung der durch "WARNUNG" oder "ACH-
TUNG" gekennzeichneten Teile, weil bei
Nichtbeachtung der entsprechenden Hin-
weise ernsthafte Probleme auftreten kön-
et
ont
nen. Die Hinweise
beachtende
haben die folgenden Bedeutungen:
Weist darauf hin, daß bei Nichtbeachtung
der
Anweisungen
sogar Lebensgefahr besteht.
Weist darauf hin, daß bei Nichtbeachtung
der Anweisungen andere Fahrzeugteile
beschädigt werden können.
Diese Montageanleitung gilt für Motorräder
mit Serienausstattung. Geringfügige Abwei-
chungen von dieser Anleitung können in
anderen Spezifikationen auftreten.
VORWORT
wird.
Diese
Montageanleitung
Zusammenbau
und
und
, durch die besonders zu
Teile
gekennzeichnet
sind,
Verletzungs-
oder
99505-01193-011
January '03 Printed in Japan (TK) 02
Advertisement
Table of Contents

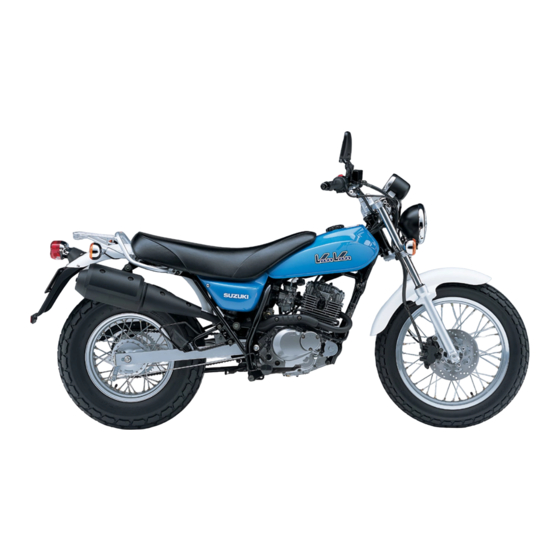
Related Manuals for Suzuki RV125K3


Summary of Contents for Suzuki RV125K3
- Page 1 This motorcycle has been designed and pro- Cette moto a été conçue et produite en utili- Dieses Motorrad wurde mit Hilfe der fort- duced utilizing Suzuki’s most modern tech- sant la technologie la plus récente de schrittlichsten Technologie von Suzuki ent- nology.
-
Page 2: Location Of Parts
LOCATION OF EMPLACEMENT LAGE DER TEILE PARTS DES PIECES Die um das Motorrad verpackten verschiedenen Bauteile sorgfältig Carefully remove the various com- Soigneusement retirer les pièces entfernen. Überprüfen, ob alle auf ponent parts packaged around the emballées autour de la moto. dem Foto gezeigten Teile vorhan- motorcycle. - Page 3 Item Part Name Q’ty Remarks Item Part Name Q’ty Remarks Handlebars assembly Front brake hose guide Clamp Speedometer cable guide Flange bolt 8 × 40 mm Front wheel assembly Burring washer OD:13.0 ID:8.5 Front wheel spacer Strap L:140 6 × 9 mm Stepped screw For rear turn signal Clutch lever cover...
- Page 4 Arti- Arti- Désignation Q’te Remarque Désignation Q’te Remarque Ensemble du guidon Guide de tuyau de frein avant Demi-palier Guide de câble de Boulon à collerette 8 × 40 mm compteur de vitesse Rondelle de évantail DE:13,0 DI:8,5 Ensemble de roue avant Collier L:140 Entretoise de roue avant...
- Page 5 Gegen- Gegen- Bezeichnung Bemerkungen Bezeichnung Bemerkungen Menge Menge stand stand Lenkereinheit VorderradbremsSchrauchf ührung Klemme Tachometerwellenführung Flanschschraube 8 × 40 mm Vorderradeinheit Kragenbeilagscheibe AD:13,0 ID:8,5 Vorderraddistanzhülse Band L:140 6 × 9 mm Abdeckung des Ansatzschraube Für Hinterrad Blinker Kupplungshebel Hintere Linker Schalter-Haltersatz Auspufftopf-Abdeckung 5 ×...
-
Page 6: Removing The Bracket
Before assembling the motorcycle, thoroughly understand the “Safety Check Out” described on page 52. After completion of assembly, carefully check the motorcycle referring to the “Safety Check Out”, then deliver the motorcycle to the customer. ASSEMBLY REMOVING THE BRACKET Loosen the front brake master cylinder bolts and remove the master cylinder from the bracket. -
Page 7: Montage
Avant d’effectuer l’assemblage de la moto, bien Vor dem Zusammenbau des Motorrads sollten Sie se familiariser avec la “Vérifications de sécurité” sich mit der auf Seite 54 beschriebenen “Sicher- décrites à la page 53. Après avoir effectué heitsprüfliste” vertraut machen. Nach l’assemblage, soigneusement vérifier la moto en Zusammenbau das Motorrad sorgfältig anhand... - Page 8 Install the handlebars assembly using the two clamps, four bolts and washers. NOTE: Install the burring washer in the direction as shown in the illustration. The punch mark on the clamps shows front side. Align the dot mark on the handlebars with the mating sur- face of the front side of left clamp.
- Page 9 Installer le guidon avec deux demi-paliers, quatre Die Lenkereinheit mit Hilfe der beiden Klemmen, der boulons et rondelles évantail. vier Schrauben anbringen. NOTE: HINWEIS: Die Kragenbeilagscheibe in der Mettre la rondelle éventail en place comme Richtung einbauen, die in der Abbildung illustré.
-
Page 10: Front Brake Master Cylinder
THROTTLE Insert the boss of the throttle upper housing into the hole on the handlebars. Tighten the throttle assembly with two screws. Check to ensure that the throttle operates freely and closes automatically. A: Boss B: Hole C: 5 × 50 mm screw D: 5 ×... - Page 11 COMMANDE DES GAZ GASDREHGRIFF Monter le logement de commande des gaz sur le gui- Das Gehäuse des Gasdrehgriff an dem Lenkerrohr don en insérant le bossage de cette moitié dans l’évi- anbringen, wobe die Nabe an dem Gehäuse in die dement prévu à...
-
Page 12: Left Switch
Connect the front brake light switch lead wires cou- pler to the brake light switch. A: Front brake light switch B: Lead wire coupler LEFT SWITCH Install the guide to the left switch holder. A: Left switch holder B: Guide Insert the boss of the left switch holder into the hole on the handlebars. -
Page 13: Commutateur Gauche
Connecter le coupleur de fils de contacteur de frein Die Vorderrad-Bremslichtschalter-Kabelstecker an avant au contacteur de frein. den Bremslichtschalter anschließen. A: Contacteur de frein avant A: Vorderradbremsschalter B: Coupler B: Anschluß COMMUTATEUR GAUCHE LINKER SCHALTER Installer le guide au support de commutateur gauche. Die Führung am linken Schalter-Halter anbringen. -
Page 14: Clutch Cable
Connect the clutch lever position switch lead wire coupler to the switch. A: Clutch lever position switch B: Lead wire coupler CLUTCH CABLE Pass the clutch cable through the lever cover. A: Cable B: Lever cover Turn the clutch cable adjuster and lock nut in as far as possible and align the slots. - Page 15 Connecter coupler contacteur Die Kupplungshebelpositions-Schalterkabel an den d’embrayage au contacteur d’embrayage. Kupplungshebelpositions-Schalter anschließen. A: Contacteur d’embrayage A: Kupplungshebelpositions-Schalter B: Coupler B: Anschluß CABLE D’EMBRAYAGE KUPPLUNGSSEILZUG Passer le câble d’embrayage à travers le cache de Den Kupplungseilzug durch die Hebelabdeckung ein- levier.
- Page 16 With the screw not tightened, insert the balancer sub-assembly into the handlebar end all the way, then tighten the screw securely. Check to ensure that the throttle operates freely and closes automatically. A: Balancer assembly RIGHT/DROIT/RECHTS CLAMP Clamp the right switch wiring harness and handlebar with strap as shown in the photograph.
- Page 17 La vis n’étant pas serrés, insérer au maximum le Ausgleichsgewicht mit loser Schraube ganz in den sous ensemble équilibreur dans l’extrémité du guidon Lenker schieben und Schraube fest anziehen. puis bien serrer la vis. Überprüfen und sichergehen, daß sich der S’assurer que la commande des gaz fonc- Gasdrehgriff frei drehen läßt und automatisch tionne correctement et qu’elle se ferme auto-...
-
Page 18: Front Fender
FRONT FENDER FRONT FRONT Set the front fender in the direction as shown in the AVANT AVANT photograph. VORNE VORNE A: Front fender B: Mark (FRONT) Install the front fender to the front fork legs with four bolts. NOTE: Install the speedometer cable guide between the front fenfer and left fork leg. - Page 19 GARDE-BOUE AVANT VORDERRAD-KOTFLÜGEL Monter le garde-boue avant dans la direction indi- Das vordere Schutzbleck in der Richtung anbringen, quée sur la photo. wie auf dem Foto gezeigt. A: Garde-boue avant A: Vorderrad-kotflügel B: Repère (AVANT) B: Markierung (VORNE) Installer le garde-boue avant sur les pattes de Das Vorderradschutzldech an den Gabelholmen wie fourche avant à...
-
Page 20: Front Wheel
Remove the crate axle bracket from the crate base. NOTE: The bracket and bolt are no longer needed and may be discarded. A: Crate axle bracket B: Bolt 1. Lift the front of motorcycle by using a hoist. 2. Raise the rear of motorcycle. 3. -
Page 21: Roue Avant
Retirer le support de l’axe d’emballage de la base de Die Verschlagsachsenhalterung vom Verschlagboden la caisse. entfernen. NOTE: HINWEIS: Le support et le boulon sont désormais inuti- Die Halterung und Schraube werden nicht les et peuvent être mis au rébus. mehr benötigt und können weggeworfen wer- den. - Page 22 Mount the front wheel assembly properly. A: Right fork leg B: Left fork leg C: Speedometer drive gearbox D: Front wheel spacer E: Front axle Remove the supporter from the brake pad of the front brake caliper. Insert tabs of the speedometer drive gearbox into front wheel hub grooves.
- Page 23 Monter correctement l’ensemble de roue avant. Die Vorderradeinheit richtig anbringen. A: Patte de fourche droite A: Rechtes Gabelbein B: Patte de fourche gauche B: Linkes Gabelbein C: Boîte d’engrenage de compteur de vitesse C: Tachometerantriebsgehäuse D: Entretoise de roue avant D: Vorderraddistanzhülse E: Axe avant E: Vorderachse...
- Page 24 Before tightening the front axle, turn the speedometer drive gearbox until the stopper on the speedometer gearbox and the lug on the left fork leg come in contact as shown. A: Stopper (Speedometer drive gearbox) B: Stopper (Left fork leg) Tighten the front axle to the specified torque.
- Page 25 Avant de serrer l’axe avant, tourner la boîte Vor dem Festziehen der Vorderachse das d’engrenage du compteur de vitesse jusqu’à Tachometergehäuse drehen, bis der Anschlag ce que la butée se trouvant sur la boîte am Tachometergehäuse und der Vorsprung am d’engrenage vienne en contact avec l’ergot de linkem Gabelholm aneinander anliegen.
-
Page 26: Rear Turn Signal Light
REAR TURN SIGNAL LIGHT Install the rear turn signal light at correct direction, and tighten the screw securely. A: Rear turn signal light B: 6 × 9 mm stepped screw REAR MUFFLER COVER Install the rear muffler cover. A: Rear muffler B: Rear muffler cover C: 6 ×... - Page 27 CLIGNOTANT ARRIERE HINTERRAD BLINKER Installer correctement le clignotant arrière et bien ser- Die hinterrad Blinker korrekt positionieren, dann die rer la vis. Schraube gut festziehen. A: Clignotant arrière A: Hinterrad Blinker B: Vis à épaulement de 6 × 9 mm B: 6 ×...
-
Page 28: Warning Label
Push down the knob and pull the cap to remove the tool box cap. Store the owner’s manual in place as shown. Reinstall the tool box cap. Reinstall the right frame cover. A: Tool box cap B: Knob C: Hook D: Owner’s manual WARNING LABEL (FOR CC AND CD SELECTION) - Page 29 Appuyer sur le bouton et tirer sur le couvercle pour Den Knopf nach unten drücken und den Werkzeug- enlever celui-ci de la boîte à outils. kastendeckel abziehen. Garder le manuel du propriétaire en place comme Das Fahrerhandbuch wie gezeigt verstauen. montré.
- Page 30 SERVICING BATTERY The battery is located under the seat. Remove the bolts and remove the seat. A: Seat assembly B: Bolt (with washer, with lock washer) Remove the rubber band. Remove the battery from the motorcycle. A: Rubber band Filling electrolyte Remove the aluminium tape sealing the battery elec- trolyte filler holes.
-
Page 31: Entretien
ENTRETIEN WARTUNG BATTERIE BATTERIE La batterie se trouve sous la selle. Die Batterie befindet sich unter dem Sitz. Retirer les boulons et déposer la selle. Die Schrauben herausdrehen, und den Sitz abneh- men. A: Ensemble selle B: Boulon (avec rondell, avec rondelle-frein) A: Sitzeinheit B: Schraube (mit Unterlagscheibe, mit Sicherungsscheibe) Enlever la bande en caoutchouc. - Page 32 With just enough force to break the nozzle seal of electrolyte container, push each nozzle of the electro- lyte container into the battery’s electrolyte filler ports and hold the container firmly so that it does not fall. Take precaution not to allow any of the fluid to spill. A: Electrolyte containers Make sure air bubbles are coming up in each electro- lyte container, and leave in this position for about 20...
- Page 33 Exercer une force suffisante pour briser les joints des Jede Düse des Elektrolytbehälters gerade so stark in cols du récipient d’électrolyte et insérer ces cols dans die Batterie-Elektrolyt-Einfüllöffnungen drücken, daß les orifices de remplissage de la batterie. Maintenir die Düsendichtungen aufgebrochen werden, und den fermement le récipient pour l’empêcher de tomber.
- Page 34 Charge the battery with a battery charger. For charging the battery, make sure to use the charger specially designed for MF battery. Otherwise, the battery may be overcharged resulting in shortned service life. Do not remove the cap during charging. Position the battery with the cap facing upward during charging.
- Page 35 Charger la batterie en se servant d’un chargeur de Die Batterie mit einem Batterieladegerät laden. batterie. Zum Laden der Batterie unbedingt ein speziell Pour charger la batterie, sans faute utiliser le für MF-Batterien entwickeltes Ladegerät ver- chargeur désigné spécialement pour la batte- wenden.
-
Page 36: Brake Fluid
To install the seat, insert the seat hook into the seat hook retainer. A: Seat assembly B: Seat hook C: Seat hook retainer D: Fastener Tighten the bolts and push the front of seat down firmly to fit the fastner. A: Seat assembly B: Bolt (with washer, with lock washer) BRAKE FLUID... - Page 37 Pour reposer la selle, introduire le crochet de selle Um die Sitzbank anzubringen, den Sitzhaken in die dans la retenue de crochet. Sitzhakenhalterung einhängen. A: Ensemble selle A: Sitzeinheit B: Crochet B: Sitzhaken C: Retenue de crochet C: Sitzhakenhalterung D: Attache D: Befestigungsteil Serrer les boulons et appuyer fermement sur la selle Die Schrauben anziehen, und den Sitz zum Schlie-...
-
Page 38: Throttle Cable
BRAKE AIR BLEEDING Any air which may have been trapped in the brake fluid circuit must be bled completely. If the brake lever feels spongy or weak, then most likely there is air in the hydraulic circuit. To bleed the air from the front brake, use the following procedure. - Page 39 PURGE DU CIRCUIT DE FREIN BREMSENTLÜFTUNG Il faut complètement purger tout l’air qui peut se trou- Falls Luft im Bremsleitungssystem eingeschlossen ver dans le circuit de liquide de frein. Si le levier de ist, muß das System vollständig entlüftet werden. frein semble mou ou faible, il est fort probable qu’il y a Wenn der Bremshebel einen schwammigen oder de l’air dans le circuit hydraulique.
-
Page 40: Drive Chain
CLUTCH CABLE Check the clutch lever play at the clutch lever end when the lever is lightly pulled in towards the grip. Clutch lever play: 10–15 mm (0.4–0.6 in) If adjustment is necessary, carry out the procedure below: 1. Turn the lock nut D of the clutch lever adjuster and turn in the adjuster C as far as possible. - Page 41 CABLE D’EMBRAYAGE KUPPLUNGSSEILZUG Contrôler le jeu du levier d’embrayage à l’extrémité Das Kupplungshebelspiel am Kupplungshebel über- du levier d’embrayage quand on tire légèrement ce prüfen, und auch wenn der Hebel leicht zum Griff hin levier vers la poignée. angezogen wird. Jeu de levier d’embrayage: 10–15 mm Kupplungshebelspiel: 10–15 mm Si le réglage est nécessaire, procéder comme décrit...
-
Page 42: Rear Brake Pedal
Verify that the master link clip is installed properly. The opening of the master link clip faces away from the direction of travel. A: Direction of travel B: Master link clip REAR BRAKE PEDAL Check the rear brake pedal height. Rear brake pedal height: 5–15 mm (0.2–0.6 in) If the rear brake pedal height is not correct, adjust in the following manner:... - Page 43 Vérifier que l’attache rapide est bien installée. Sicherstellen, daß die Kettenschloßklemme richtig L’ouverture de l’attache rapide devrait être orientée installiert. Die Öffnung der Kettenschloßklemme muß dans le sens inverse du sens de déplacement de la der Fahrtrichtung entgegengesetzt angeordnet sein. chaîne.
-
Page 44: Headlight Beam Adjustment
HEADLIGHT BEAM ADJUSTMENT The headlight beam can be adjusted both horizontally and vertically if necessary. To adjust the beam horizontally: Turn the adjuster A clockwise or counterclockwise. To adjust the beam vertically: Turn the adjuster B clockwise or counterclockwise. ENGINE OIL This motorcycle is shipped from factory with the engine filled with engine oil. -
Page 45: Huile Moteur
REGLAGE DU PHARE SCHEINWERFEREINSTELLUNG Il est possible de régler horizontalement et verticale- Die Scheinwerfer können bei Bedarf sowohl horizon- ment le faisceau du phare. tal als auch vertikal eingestellt werden. Réglage horizontal du faisceau: Horizontale Einstellung: Tourner la vis de réglage A vers la droite ou la gau- Die Einstellschraube A im Uhrzeigersinn oder gegen che. -
Page 46: Idle Speed Adjustment
IDLE SPEED ADJUSTMENT After completing all of the servicing procedures and the test ride, adjust the engine idle speed by turning the throttle stop screw. NOTE: The engine idle should be adjusted with engine warmed up. Engine idle speed: 1 400–1 600 r/min A: Throttle stop screw... - Page 47 REGLAGE DU REGIME DE RALENTI EINSTELLUNG DER LEERLAUFDREHZAHL Après avoir terminé tous les travaux d’entretien et Nachdem alle Wartungsschritte und die Probefahrt effectué la conduite d’essai, régler le régime de durchgeführt wurden, muß die Leerlaufdrehzahl ralenti du moteur en tournant la vis de butée du durch Drehen der Drosselklappen-Anschlagschraube papillon.
-
Page 48: Tightening Torque
TIGHTENING TORQUE Item Part Name N·m kgf-m Item Part Name N·m kgf-m FRONT FORK AXLE Steering stem head nut Front axle Front fork upper bracket bolt Rear axle nut Handlebar clamp bolt ABSORBER Front fork lower bracket bolt Rear shock absorber bolt (Upper) Front axle clamp bolt Rear shock absorber nut (Lower) BRAKE... -
Page 49: Couple De Serrage
COUPLE DE SERRAGE Article Désignation N·m kgf-m Article Désignation N·m kgf-m FOURCHE AVANT Ecrou de la colonne de direction Axe avant Boulon de la direction supérieur de la Ecrou d’axe arrière fourche avant AMORTISSEUR Boulon de bridage du guidon Boulon d’amortisseur arrière (Supérieur) Boulon de la direction inférieur de la Ecrou d’amortisseur arrière (Inférieur) fourche avant... - Page 50 ANZUGSDREHMOMENT Gegen- Gegen- Bezeichnung N·m kgf-m Bezeichnung N·m kgf-m stand stand TELESKOPGABEL ACHSEN Lenksäulenkopfmutter Vorderradachswelle Obere Teleskopgabelbrückenschraube Hinterradachsmutter Lenkerklemmschraube STOSSDÄMPFER Unter Teleskopgabelbrückenschraube Schraube des hinteren Stoßdämpfers (Oben) Vorderradachsklemmschraube Hinterradstoßdämpfermutter (Unten) BREMSEN SONSTIGE TEILE Vorderradbremszylinder-Befestigungs- schraube HinterradschwingenDrehzapfenmutter Vorderradbremssattel Schraube für vordere Fußraste Befestigungsschraube Bremssattelentlüftungs- 0,75...
- Page 51 CABLE ROUTING ACHEMINEMENT DES CABLES SEILZUFGÜHRUNG...
- Page 52 HARNESS ROUTING ACHEMINEMENT DE FAISCEAU DE CABLES KABELBAUMFÜHRUNG...
-
Page 53: Safety Check-Out
SAFETY CHECK OUT COLD TIRE INFLATION PRESSURE SOLO RIDING DUAL RIDING After completion of the setting-up the motor- 125 kPa 125 kPa cycle all the following items should be dou- FRONT 1.25 kg/cm 1.25 kg/cm ble-checked to confirm that the operation and 18 psi 18 psi function of the motorcycle are satisfactory. - Page 54 VERIFICATIONS DE SECURITE PRESSIONS DE GONFLAGE À FROID Après le montage de la motocyclette, effectu- CONDUITE AVEC CONDUITE SEUL PASSAGER rer un contrôle supplémentaire pour s’assurer 125 kPa 125 kPa que celle-ci est montée correctement et fonc- AVANT 1,25 kg/cm 1,25 kg/cm tionne de façon satisfaisante.
- Page 55 SICHERHEITSPRÜFLISTE REIFENDRÜCKE IN KALTEM ZUSTAND SOLO MIT SOZIUS Nach Abschluß der Vorauslieferungsarbeiten 125 kPa 125 kPa müssen die folgenden Punkte noch einmal VORNE 1,25 kg/cm 1,25 kg/cm überprüft werden, um sich vergewissern, daß 18 psi 18 psi sich das Motorrad in einwandfreiem, fahrferti- 125 kPa 125 kPa gem Zustand befindet.