Table of Contents
Advertisement
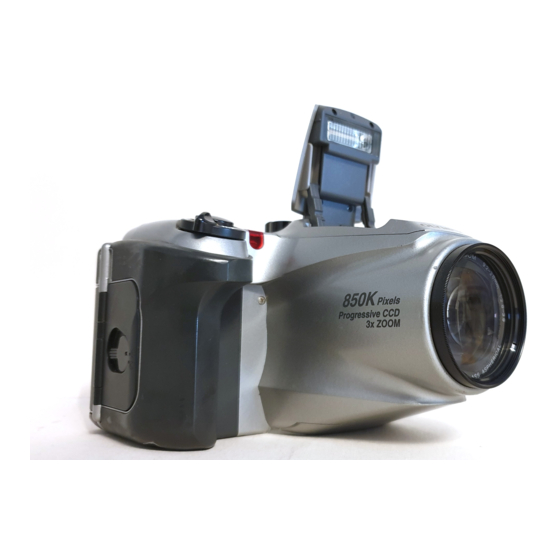
C-1400L
C-1000L
ENGLISH
Digital Camera Instructions
Before using your camera, read this manual carefully
to ensure correct use.
We recommend that you take test shots to get
accustomed to your camera before taking important
photographs.
FRANÇAIS
Mode d'emploi pour appareil photo
numérique
Avant d'utiliser votre appareil photo, nous vous prions
de lire attentivement ce mode d'emploi, de manière à
obtenir les meilleurs résultats possibles.
Avant d'effectuer des prises de vues importantes,
nous vous conseillons par ailleurs de faire quelques
essais afin de vous familiariser avec le maniement de
l'appareil photo.
DEUTSCH
Digital-Kamera Bedienungsanleitung
Bitte lesen Sie diese Bedienungsanleitung vor
Gebrauch der Kamera sorgfältig durch, um optimale
Ergebnisse zu erzielen.
Wir empfehlen, vor wichtigen Aufnahmen Probeauf-
nahmen durchzuführen, um sich mit der Bedienung
und den Funktionen der Kamera vertraut zu machen.
Advertisement
Table of Contents

Related Manuals for Olympus CAMEDIA C-1400L


Summary of Contents for Olympus CAMEDIA C-1400L
- Page 1 ENGLISH Digital Camera Instructions Before using your camera, read this manual carefully to ensure correct use. We recommend that you take test shots to get accustomed to your camera before taking important photographs. FRANÇAIS Mode d’emploi pour appareil photo numérique Avant d’utiliser votre appareil photo, nous vous prions de lire attentivement ce mode d’emploi, de manière à...
-
Page 2: Important Notice
IMPORTANT NOTICE Disclaimer of Warranty Olympus makes no representations or warranties, either REMARQUE IMPORTANTE expressed or implied, by or concerning any content of these written materials or software, and in no event shall be liable... - Page 3 Warenzeicheninhaber. Refus de responsabilité relatif à la garantie Garantieausschluß La firme Olympus décline toutes autres représentations ou Olympus gibt keinerlei Versicherung oder Garantie ab, weder garanties, expresses ou implicites, pour ou relatives au ausdrücklich noch einbegriffen, mit dem oder unter Bezug auf contenu de la documentation écrite ou du logiciel et ne pourra...
- Page 4 Olympus. No liability is assumed with respect to the use of the information contained in these written materials or software, or for damages resulting from the use of the information contained in these written materials or of the software.
- Page 5 écrite et préalable von Informationsspeicherung und -abruf. Olympus übernimmt de la firme Olympus. Aucune responsabilité ne sera assumée keinerlei Verantwortung für den Gebrauch dieser schriftlichen quant à l’utilisation des renseignements contenus dans la Informationen und Software-Inhalte oder für Schäden, die aus...
- Page 6 PRECAUTIONS This camera is not recommended for commercial use or for use under severe conditions. This camera is a precision PRECAUTIONS instrument. Use caution when handling the unit. Do not apply strong vibration or pressure to the camera or lens, as this may VORSICHTSMASSREGELN cause damage to the finely tuned internal parts.
- Page 7 Il n’est pas conseillé de faire un usage commercial de cet Diese Kamera wird nicht für den kommerziellen Einsatz oder appareil photo ni de l’utiliser dans des conditions difficiles. Cet Einsatz unter erschwerten Bedingungen empfohlen. Diese appareil photo est un instrument de précision. S’en servir Kamera ist ein Präzisionsinstrument und erfordert daher eine délicatement.
- Page 8 Protect from high temperatures ● Do not leave the camera in a closed car, etc., in the sun, as the temperature may rise and cause damage. Cleaning ● Before servicing or cleaning the unit, be sure to disconnect the AC adaptor. ●...
- Page 9 Protéger des températures élevées Vor hohen Temperaturen schützen ● Ne jamais laisser votre appareil dans une voiture fermée en ● Die Kamera niemals an Orten aufbewahren, die einer plein soleil car la température risque d’augmenter starken Erhitzung und/oder direkter Sonneneinstrahlung considérablement et causer des dommages.
- Page 10 Be careful when handling the unit ● Do not use in an unstable position. If you lose your balance, you might get hurt. ● Use with care, so that no foreign substance (dirt, rain, sand) can enter the unit, in particular when the battery cover or the lens barrier is removed, as that may cause damage.
- Page 11 Manipuler l’appareil délicatement Vorsichtsmaßregeln beim Fotografieren ● Ne pas utiliser l’appareil en prenant une posture instable. ● Beim Fotografieren Körperhaltung und Ort so wählen, daß Si vous perdez l’équilibre, vous risquez de vous blesser. Sie nicht aus dem Gleichgewicht geraten. Andernfalls ●...
- Page 12 Usage environment ● Do not use where there may be a large concentration of flammable or explosive gases, as this may cause a fire or an explosion. ● To avoid damage or mis-operation of the camera, use it only if the temperature is 0 ~ 40°C and the humidity 30 ~ 90%.
- Page 13 Environnement d’utilisation Umgebungsbedingungen für den Gebrausch ● Ne pas utiliser l’appareil en présence d’une forte ● Die Kamera niemals in der Nähe von entflammbaren concentration de gaz inflammables ou explosifs, ce qui Dämpfen oder Gasen verwenden. Andernfalls besteht pourrait provoquer un incendie ou une explosion. Explosionsgefahr.
- Page 14 ● To prevent electric shock and damage, do not plug, connect or handle the AC adaptor with wet hands. ● Do not modify, bend forcibly, pull strongly, scratch, etc., or otherwise alter the AC adaptor power cord. And do not put heavy objects on the power cord, or place it close to a heat source as this may cause a fire, or electric shocks.
- Page 15 ● Pour éviter tout risque de décharge électrique ou ● Aus Sicherheitsgründen das Netzteil niemals mit nassen d’endommagement, ne pas débrancher, brancher ni Händen bedieren. ● Niemals das Netzteil-Netzkabel knicken, dehnen, verdrehen manipuler l’adaptateur d’alimentation secteur les mains mouillées. oder anderweitigen mechanischen Belastungen sowie ●...
- Page 16 ● To prevent leakage, fire, or damage, please read the PRECAUTIONS WHEN HANDLING THE instructions carefully and observe the following points. BATTERIES ● Do not heat or throw the batteries into the fire. ● Do not disassemble, modify or solder. PRECAUTIONS A PRENDRE PENDANT ●...
- Page 17 ● Pour éviter tout risque de fuite, incendie ou ● Die folgenden Angaben sorgfältig beachten, um ein endommagement, veuillez lire attentivement les indications Auslaufen, Feuergefahr oder sonstige Schäden zu et respecter les points suivants. vermeiden. ● Batterien niemals erhitzen oder verbrennen. ●...
- Page 18 When the batteries are dead, take them out of the camera ● If old batteries are left inside the camera they may leak. If stored for a long period of time or if you intend not to use the camera for a long period of time, please remove the batteries.
- Page 19 Retirer les piles de l’appareil quand elles sont usées Leere Batterien aus der Kamera herausnehmen ● Si des piles usées restent dans l’appareil, elle risquent de ● Alte bzw. verbrauchte Batterien, die in der Kamera fuir. Retirer les piles de l’appareil si celui-ci est rangé verbleiben, können auslaufen.
-
Page 20: Check The Contents
CHECK THE CONTENTS RS-232C PC serial cable Camera Câble de connexion série RS-232C Appareil photo pour PC (IBM) Kamera Serielles Anschlußkabel für PC (IBM) RS-232C Conversion connector for Macintosh Strap Câble de connexion pour ordinateurs Macintosh Bandoulière Anschlußkabel für Macintosh Computer Trageriemen Lens cap holder Support de bouchon d’objectif... - Page 21 VERIFIER LES ELEMENTS CONSTITUTIFS UBERPRUFEN DES INHALTES Instructions/Warranty card/ Registration card SmartMedia Static-free case Instructions (SSFDC) Étui antistatique Mode d’emploi Mode d’emploi/Carte de garantie/ Carte Antistatische Hülle Bedienungsan- d’enregistrement leitung Bedienungsanleitung/Garantiekarte/ Registrierungskarte Two software CD’s (containing Write-protect adhesive seals (4 utility software/user’s license) pieces) Index labels...
-
Page 22: Main Features
MAIN FEATURES The C-1400L CCD delivers 1,410,000 pixels. The C- 1000L CCD delivers 850,000 pixels. 3.3 V SmartMedia removable memory cards are used for extended flexibility. With them, the recorded images can be easily transferred to a personal computer using the optional PC card adaptor. -
Page 23: Besondere Merkmale
BESONDERE MERKMALE CARACTERISTIQUES PRINCIPALES Der CCD-Chip der C-1400L llefert 1.410.000, der der C-1000L Le capteur CCD du C-1400L possède 1.410.000 pixels, celui mit 850.000 Blldpunkten (Pixel). du C-1000L 850.000 pixels. Les cartes mémoires amovibles SmartMedia de 3,3 V Auswechselbare 3,3V-SmartMedia-Speicherkarten werden zur Steigerung der Flexibilität eingesetzt. -
Page 24: Table Of Contents
CONTENTS PREPARATION Names and functions of parts ........30 Using the strap/lens cap holder........38 Loading the batteries..........40 Loading the lithium battery ........42 Using the AC adaptor (optional).......44 TAKING PICTURES Inserting SmartMedia/Turning on the power ....48 Checking the batteries ..........50 Checking the number of remaining pictures.....54 Error code ..............58 Points to remember..........62 Taking pictures............66... - Page 25 INHALT TABLE DES MATIÈRES AVANT DE PHOTOGRAPHIER VORBEREITUNGEN ZUM FOTOGRAFIEREN Description des éléments de commande ....32 Beschreibung der Bedienungselemente ....34 Utilisation de la bandoulière/Support de capot Anbringen des Trageriemens/Objektivdeckelhalters d’objectif ..............39 .................39 Mise en place des piles..........41 Einlegen der Batterien..........41 Mise en place de la pile au lithium ......43 Einlegen der Lithium-Batterie........43 Utilisation de l’adaptateur secteur (option)....45...
- Page 26 DISPLAYING PICTURES ON THE LCD MONITOR Turning on the LCD monitor........96 Displaying pictures ...........98 Slide-Show mode ...........100 Index-Display mode ..........102 One-Frame erase...........104 MAKING ADJUSTMENTS MENU..............106 SHQ/HQ/SQ (Resolution) ........108 AE +/– (Exposure compensation) ......110 ERASE ALL............112 FORMAT CARD.............114 DATE..............116 BRIGHTNESS............118 PRINTING PICTURES How to connect to the printer .........120 PRINT MENU............122 SINGLE PRINT ............126...
- Page 27 BILDWIEDERGABE AUF DEM LCD- AFFICHAGE DES VUES SUR L’ÉCRAN ACL MONITOR Mise en marche de l’écran ACL .......97 Affichage des vues...........99 Einschalten des LCD-Monitors.........97 Mode diaporama ............101 Bildwiedergabe............99 Affichage de l’index des images en mémoire..103 Diashow-Wiedergabe..........101 Effacement d’une vue ..........105 Indexbildwiedergabe ..........103 Löschen Einzelner Aufnahmen ......105 FAIRE LES RÉGLAGES...
- Page 28 TRANSFERRING IMAGES TO A PERSONAL COMPUTER Personal computer environment ......134 Installing provided software........138 Connecting to a personal computer .......140 System chart ............144 MISCELLANEOUS Questions and answers..........146 Troubleshooting .............150 Notes on display and backlight ......160 Specifications ............162...
- Page 29 DATENÜBERTRAGUNG AUF EINEN TRANSFERT DES IMAGES DANS UN PERSONAL COMPUTER MICRO-ORDINATEUR Erforderliche Hardware und Software ....135 Matériels et logiciels requis ........135 Installation du logiciel fourni ........139 Installieren der mitgelieferten Software....139 Anschluß an einen Personal-Computer ....141 Raccordement à un micro-ordinateur.....141 Systemübersicht.............145 Tableau synoptique du système ......145 DIVERS VERSCHIEDENES...
- Page 30 PREPARATION NAMES AND FUNCTIONS OF PARTS Selftimer button (P. 78) Macro mode button (P. 82) Flash mode button (P. 86) Spot metering mode button (P. 76) Record/Play switch Index-Display mode (P. 48/96) button (P. 102) Control panel (P. 36) Slide-Show mode button (P. 100) Print button (P.
- Page 31 Menu button (P. 106) + button (P. 98)/2.5m Quick focus button (P. 72) – button (P. 98))/40cm Quick focus button (P. 72) OK button (P. 104) Viewfinder (P. 36) Card access lamp (P. 48) Battery compartment open / close lever (P. 40) Card compartment cover LCD monitor (P.
-
Page 32: Description Des Éléments De Commande
PREPARATIFS DESCRIPTION DES ÉLÉMENTS DE COMMANDES Touche de retardateur (P. 79) Touche de mode gros plans (P. 83) Touche de sélection de mode de flash (P. 87) Touche de mode spot (P. 77) Commutateur Touche de mode Enregistrement/Affichage d’affichage indexé (P. 103) (P. - Page 33 Touche de menu (P. 107) Touche d’avance (+) (P. 99)/mise au point rapide à 2,5m (P. 73) Touche de retour en arrière (–) (P. 99)/mise au point rapide à 40cm (P. 73) Touche de confirmation (OK) (P. 105) Viseur (P. 37) Voyant d’accès de carte (P.
-
Page 34: Vorbereitungen Zum Fotografieren
VORBEREITUNGEN ZUM FOTOGRAFIEREN BESCHREIBUNG DER BEDIENUNGSELEMENTE Selbstauslösertaste (S. 79) Nahaufnahmetaste (S. 83) Blitzprogrammtaste (S. 87) Spotmesstaste (S. 77) Aufnahme/Wiedergabe- Indexbild-Wiedergabe Schalter (S. 49/97) Taste (S. 103) LCD-Feld (S. 37) Diashow-Wiedergabe-Taste (S. 101) Ausdrucktaste (S. 123) Auslöser (S. 65) Löschtaste (S. 105) Zoom hebel (S. - Page 35 Menütaste (S. 107) Plustaste (+) (S. 99)/2,5-m-Schnellfocus-Taste (S. 73) Minustaste (–) (S. 99)/40-cm-Schnellfocus-Taste (S. 73) OK-Taste (S. 105) Sucher (S. 37) Schreibanzeige-LED (S. 49) Batteriefachentriegelumg (S. 41) Karten fachabdeckung (S. 49) LCD-Monitor (S. 97) Lithiumbatteriefach (Unterseite) (S. 43) Stativgewinde (Unterseite)
- Page 36 Viewfinder Display Orange lamp (flash) Green lamp (focus) Autofocus mark (p. 70) Control Panel Resolution Flash mode Macro Selftimer Spot mode Exposure compensa- tion Number of remaining pictures / Card error Battery check Frame number / Error code LCD Monitor Frame number Date 9 7 .
-
Page 37: Lcd-Feld (S
Affichage de viseur Sucheranzeigen Orangene Voyant orange LED (Blitz) (flash) Grüne LED Voyant vert (Scharfstellung) (mise au point) Autofocus-Meßfeld (S. 71) Repère d’autofocus (p. 71) LCD-Feld Écran de commande Auflösung Résolution Blitzpro- Nahaufnah- Mode flash gramm Gros plans Retardateur Selbst- Mode Spot Spotmes- auslöser... -
Page 38: Using The Strap/Lens Cap Holder
◆ Attach the strap correctly as shown on the left so that the camera does not fall off. If the strap is attached incorrectly and the camera comes loose and falls off, Olympus will not be responsible for any damage. -
Page 39: Utilisation De La Bandoulière/Support De Capot D'objectif
Si la bandoulière n’est pas parfaitement die Kamera nicht hinunterfallen kann. Für den fixée et se desserre en entraînant la chute de Verlust der Kamera infolge eines nicht l’appareil, Olympus décline toute responsabilité einwandfrei angebrachten Trageriemens kann pour les dommages occasionnés. Olympus keinerlei Verantwortung übernehmen. -
Page 40: Loading The Batteries
LOADING THE BATTERIES Use four AA alkaline batteries, AA nickel metal hydride batteries or AA NiCd batteries. Do not use manganese batteries or lithium batteries; they may overheat and destroy the camera. ● Read “PRECAUTIONS WHEN HANDLING THE BATTERIES” on page 16. Set the battery compartment open/close lever to open the cover. -
Page 41: Mise En Place Des Piles
MISE EN PLACE DES PILES EINLEGEN DER BATTERIEN Utiliser quatre piles AA (R6) (alcalines, hydrure-nickel ou Vier AA (Mignon)-Batterien (Alkali-, Nickel-Metallhydrid- oder NiCd). Ne pas utiliser de piles au manganèse ou au lithium Nickel-Cadmium-Batterien) einlegen. Mangan-Batterien qui risquent de chauffer et d’endommager l’appareil. dürfen nicht verwendet werden, da diese leicht überhitzen ●... -
Page 42: Loading The Lithium Battery
LOADING THE LITHIUM BATTERY Use a pointed instrument such as a ballpoint pen to open the lithium battery compartment cover. Load the lithium battery as shown, then close the cover until you hear it click into place. Use only C2025 lithium battery. Turn the cover up side down to show the side with... -
Page 43: Mise En Place De La Pile Au Lithium
MISE EN PLACE DE LA PILE AU EINLEGEN DER LITHIUM-BATTERIE LITHIUM Den Lithiumbatteriefachdeckel mit einem spitzen Gegenstand (Kugelschreibermine etc.) öffnen. Die Lithiumbatterie wie Utiliser un instrument pointu tel qu’un stylo à bille pour ouvrir dargestellt einlegen. Hierauf den Deckel schließen, bis dieser le couvercle du compartiment de la pile au lithium. -
Page 44: Using The Ac Adaptor (Optional)
USING THE AC ADAPTOR (Optional) AC adaptor An optional Olympus AC adaptor allows you to power your Adaptateur secteur digital camera from a common AC wall outlet. Netzteil AC wall outlet Prise secteur Note: Netzsteckdose ◆ When in use for long periods, the AC adaptor will get warm. -
Page 45: Utilisation De L'adaptateur Secteur (Option)
(Sonderzubehör) Die Digitalkamera kann auch durch das als Sonderzubehör Cet appareil photo numérique peut être également raccordé à erhältliche Olympus-Netzteil direkt von einer normalen une prise de courant par l’intermédiaire de l’adaptateur Netzsteckdose mit Strom versorgt werden. secteur Olympus optionnel. - Page 46 Contact your nearest Olympus dealer or Olympus service center. ◆ Use only the exclusive AC adaptor (optional). Olympus will not be responsible for damage caused by the use of any AC adaptor other than the one exclusively designed for this camera.
- Page 47 Rauch riechen oder Rauch abgeben, sofort fumée, débrancher immédiatement l’adaptateur den Netzstecker ziehen. Anschließend den secteur et demander conseil à votre revendeur Olympus-Service zu Rate ziehen. ou au centre de dépannage Olympus le plus ◆ Ausschließlich spezielle Netzteil proche.
-
Page 48: Inserting Smartmedia/Turning On The Power
Green lamp blink. Pictures cannot be taken when this happens. (See page 58 for Card error codes. See page 114 for performing a Card format.) ◆ Some functions of Olympus SmartMedia cannot be used with the C-1400L/C-1000L. -
Page 49: Prise De Vues
59 pour les codes d’erreur de carte. Voir page 59. Zur Kartenformatierung siehe Seite 115.) 115 pour formater une carte.) ◆ Einige Funktionen der Olympus SmartMedia-Karte ◆ Certaines fonctions de la SmartMedia Olympus ne sind in Verbindung mit C-1400L/C-1000L nicht verfügbar. peuvent pas être utilîsées avec le C-1400L/C-1000L. -
Page 50: Checking The Batteries
◆ The power shuts off if the Card compartment cover is opened when the power is on. The selected settings may be cancelled when this happens. CHECKING THE BATTERIES When the Record mode is turned on, the remaining battery power and the number of remaining pictures appear on the control panel. -
Page 51: Vérification De L'état Des Piles
◆ L’alimentation se coupe si le couvercle du logement ◆ Wird die Kartenabdeckung bei eingeschalteter de carte est ouvert lorsque l’appareil est en marche. Spannungsversorgung geöffnet, erfolgt Les réglages sélectionnés peuvent être annulés si Ausschaltung. In diesem Fall können die gewählten cela arrive. - Page 52 Note: ◆ Set the date before taking pictures (p. 116). ◆ When taking pictures on a special occasion, on a trip, or in cold temperatures, keep spare batteries handy. <Make sure> ➧ When the camera is not operated for more than 3 minutes, the power save function activates to put it into the Stand-by mode.
- Page 53 Remarque: Hinweis: ◆ Vor der Herstellung von Aufnahmen das Datum ◆ Régler la date avant de prendre des photos (p. einstellen (S. 117 ). 117). ◆ Pour les voyages d’une certaine durée ou la ◆ Für längere Reisen oder Aufnahmen bei prise de vues par temps froid, prévoir des piles niedrigen Temperaturen...
-
Page 54: Checking The Number Of Remaining Pictures
CHECKING THE NUMBER OF REMAINING PICTURES When the Record mode is turned on, the number of remaining (storable) pictures will appear on the control panel. ● When the count reaches 0, the Card error mark/Error code on the control panel and the Green lamp blink. Pictures cannot be taken when this happens. -
Page 55: Vérification Du Nombre De Vues Restantes
UBERPRUFEN DER VERFUGBAREN VÉRIFICATION DU NOMBRE DE VUES RESTANTES AUFNAHMEN Beim Umschalten auf Aufnahme-Betriebsart wird die Anzahl Lorsque le mode d’enregistrement est en marche, le nombre der verfügbaren Aufnahmen (Restaufnahmen) auf dem LCD- de vues restantes (enregistrables) apparaît sur l’écran de Feld angezeigt. - Page 56 The Minimum Number of Storable Pictures Resolution C-1400L C-1000L (When the provided (When the provided 4MB card is used.) 2MB card is used.) ● SHQ, HQ and SQ are levels of resolution. (p. 108) Note: ◆ The number of remaining pictures may not be reduced every time a picture is taken, or increased when a picture is erased.
- Page 57 Nombre minimum de vues restantes Mindestanzahl der verbleibenden Aufnahmen (enregistrables) Auflösung C-1400L (Bei C-1000L (Bei Résolution C-1400L C-1000L Verwendung der Verwendung der (Lorsque la carte 4 Mo (Lorsque la carte 2 Mo 4MB-Karte.) 2MB-Karte.) fournie est utilisée.) fournie est utilisée.) ●...
-
Page 58: Error Code
ERROR CODE Control panel LCD monitor Error The camera cannot enter Record, Play or Erase mode. If cleaning the connector does not CARD ERROR help or if card format mode cannot be entered, this card cannot be used. There is no card in the NO CARD camera. -
Page 59: Erreur De Carte
KARTENFEHLER ERREUR DE CARTE Écran de Écran ACL Erreur LCD-Feld LCD-Monitor Fehler commande Kamera kann nicht auf L’appareil ne peut pas Aufnahme, Wiedergabe- entrer en mode oder Löschen geschaltet d’enregistrement, werden. Sollte weder die d’affichage ou Reinigung der Kontakte d’effacement. Si nettoyer CARD ERROR wirken noch die CARD ERROR... - Page 60 Control panel LCD monitor Error There is no picture in the NO PICTURE card. Display is not possible. No more photograph can be taken because the number of remaining pictures is 0. Replace (no indication) the SmartMedia, erase unwanted pictures, or transfer the data to a PC and erase all the data in the SmartMedia.
- Page 61 Écran de Écran ACL Erreur LCD-Feld LCD-Monitor Fehler commande Karte enthält keine Il n’y a pas d’image sur Aufnahmedaten. NO PICTURE NO PICTURE la carte. L’affichage n’est Wiedergabe ist nicht pas possible. möglich. L’enregistrement ne peut Der Kartenspeicher ist voll pas être effectué...
-
Page 62: Points To Remember
POINTS TO REMEMBER Hold the camera firmly with both hands while keeping your elbows at your sides to prevent the camera from shaking. Correct. Correct. Incorrect. Note: ◆ Keep your fingers and the strap away from the lens and flash. -
Page 63: Généralités
ALLGEMEINE HINWEISE GÉNÉRALITÉS Tenir l’appareil photo à deux mains et appuyer les coudes le Die Kamera mit beiden Händen festhalten und zur long du corps pour éviter de bouger. Vermeidung von Verwackelungen die Ellbogen an den Körper stützen. Manière correcte de tenir l’appareil pour la prise de Korrekte Kamerahaltung für Querformat-Aufnahmen vues en format horizontal Korrekte Kamerahaltung für Hochformat-Aufnahmen... - Page 64 Proper Shutter Release Depress the Shutter release button halfway. ● The Green lamp next to the viewfinder lights. ● The exposure will be locked. ● The focus will be adjusted. Depress the Shutter release button fully to release the shutter and take the picture. ●...
- Page 65 Déclenchement correct Richtiges Auslösen Enfoncer le déclencheur jusqu’à mi-course. Den Auslöser halb hinunterdrücken. ● Le voyant vert situé près du viseur s’allume. ● Die grüne LED neben dem Sucher leuchtet auf. ● L’exposition est mémorisée. ● Die Belichtungswerte werden gespeichert. ●...
-
Page 66: Taking Pictures
TAKING PICTURES Dioptre adjustment dial Molette de réglage dioptrique Dioptrienausgleichsregler Compose the picture. ● Turn the Dioptre adjustment dial to see the Autofocus mark Autofocus mark clearly. Repère d’autofocus Autofocus-Meßfeld Press the Shutter release button halfway to lock the focus. The Green lamp lights. -
Page 67: Prise De Vues
FOTOGRAFIEREN PRISE DE VUES Composer la photo. Die Kamera auf das Motiv ausrichten. ● Den Dioptrienausgleichsregler drehen, bis das Autofocus- ● Tourner la molette de réglage dioptrique pour voir distinctement le repère de mise au point automatique. Meßfeld klar erkennbar ist. Appuyer sur le déclencheur jusqu’à... - Page 68 Press the Power button to turn it off. ● The picture data remains in the SmartMedia card even after the power is turned off or the batteries are replaced. Do not open the Card compartment cover, remove the batteries or unplug the AC adaptor while the Card access lamp is blinking.
- Page 69 Mit dem Haupschalter ausschalten. Appuyer sur la touche d’alimentation pour la couper. ● Die Aufnahmedaten werden auch bei ausgeschalteter ● Les données d’image restent même après coupure de Kamera oder bei Batteriewechsel beibehalten. Bei l’alimentation. Ne pas ouvrir le volet de carte, retirer les blinkender Schreibanzeige-LED niemals...
-
Page 70: Using The Focus Lock
USING THE FOCUS LOCK If your main subject is not within the autofocus mark, use the procedure below to obtain focus. This is called focus lock. Position your subject within the autofocus mark and press the Shutter release button halfway. ●... -
Page 71: Mémorisation De La Mise Au Point
SCHARFESPEICHER MÉMORISATION DE LA MISE AU POINT Wenn sich das bildwichtige Motiv nicht in der Bildmitte Si le sujet principal ne se trouve pas dans le repère de mise befindet, sollte man wie unten beschrieben (Schärfespeicher) au point automatique, suivre la procédure ci-dessous pour verfahren. -
Page 72: Quick Focus
QUICK FOCUS 2.5m Quick focus button With Quick Focus, you can select a pre-adjusted focal length Mise au point rapide à 2,5m of 2.5m or 40cm. It is especially useful when quick shooting is 2,5-m-Schnellfocus-Taste required. Press the Shutter release button halfway while pressing 40cm Quick focus button either the 2.5m or 40cm Quick focus button depending on Mise au point rapide à... -
Page 73: Mise Au Point Rapide
SCHNELLFOCUS MISE AU POINT RAPIDE Mit der Schnellfocus-Funktion kann eine voreingestellte Avec la mise au point rapide, vous pouvez sélectionner une Brennweite von 2,5 m oder 40 cm gewählt werden. Dies ist longueur focale préréglée de 2,5 m ou de 40 cm. C’est insbesondere bei Schnappschüssen nützlich. -
Page 74: Autofocus
AUTOFOCUS Although the autofocus can lock on virtually any subject, there are certain conditions where it may not work properly. In conditions below, the subject may not be focused. When this happens, the Green lamp will blink, disabling the Shutter release button. In conditions , the autofocus may not lock on the right subject even though the Green lamp is on, and the resulting picture may be out of focus. -
Page 75: Autofocus
AUTOFOCUS AUTOFOCUS Obgleich durch die automatische Scharfstellung auf praktisch alle Bien que la mise au point automatique puisse être mémorisée sur Gegenstände scharfgestellt werden kann, gibt es bestimmte pratiquement n’importe quel sujet, il y a certaines conditions où elle Situationen wie die Beispiele 1 bis 3, in denen möglicherweise peut ne pas fonctionner correctement. -
Page 76: Spot Metering Mode
SPOT METERING MODE Spot metering mode is used to obtain the right exposure regardless of the backlight. Place the subject in the center of the autofocus mark. Press the Spot metering mode button. ● The Spot mode indicator appears on the control panel. Position your subject within the autofocus mark and press the Shutter release button halfway. -
Page 77: Mode Spot
MODE SPOT (MESURE SPOTMESSUNG PONCTUELLE) Wenn sich das zu messende bildwichtige Motiv nicht in der Bildmitte befindet, wie folgt vorgehen: Das bildwichtige Motiv Le mode de mesure ponctuelle est utilisé pour obtenir la mit der Autofocus-Meßfeldmitte anvisieren. bonne exposition quel que soit l’éclairage à contre-jour. Placer le sujet dans le centre du repère de mise au point Die Spotmesstaste drücken. -
Page 78: Selftimer
SELFTIMER Press the Selftimer button. The Selftimer indicator on the control panel appears. Selftimer Ten seconds after pressing the Shutter release button, the signal Selftimer signal starts blinking. The shutter is released Voyant de after another two seconds. retardateur ● The focus and the exposure are locked when the Shutter Selbstauslö... -
Page 79: Retardateur
RETARDATEUR SELBSTAUSLÖSER Appuyer sur la touche de retardateur. L’indicateur de Die Selbstauslöser-Taste drücken. Die Selbstauslöser- retardateur apparaît sur l’écran de commande. LED leuchtet und auf dem LCD-Feld erscheint die Selbstauslöseranzeige. Dix secondes après avoir appuyé sur le déclencheur, le voyant de retardateur commence à clignoter. L’obturateur 10 Sekunden nach Drücken des Auslösers beginnt die est déclenché... -
Page 80: Zoom
ZOOM Wide-angle Grande-angle You can select telephoto or wide-angle with the 3X zoom Weitwinkelzoom lever. Set the lever to T in the Record mode to choose telephoto shooting. Set the lever to W in the Record mode to choose wide-angle shooting. Telephoto Téléobjectif Telezoom... -
Page 81: Zoom
ZOOM ZOOM Vous pouvez sélectionner téléobjectif ou grand-angle Mit dem 3fach-Zoomregler kann zwischen Weitwinkel- avec le levier de zoom 3X. und Telezoombereich umgeschaltet werden. Régler le levier sur T dans le mode d’enregistrement pour In der Aufnahmeeinstellung auf T stellen, um mit Telezoom zu choisir la prise de vues téléobjectif. -
Page 82: Macro Mode
MACRO MODE Use the Macro mode to take pictures of small subjects, such as flowers, at a very close distance. A subject as small as 9 x 11 cm (6 x 8 cm with C-1000L) can be taken fully within the frame. ●... -
Page 83: Gros Plans
GROS PLANS (PROXIPHOTOGRAPHIE) NAHAUFNAHMEN La fonction prise de vues en gros plan permet de Die Nahaufnahmefunktion ermöglicht Aufnahmen von photographier de très près de petits objets (fleurs, etc.). kleinen Objekten aus sehr geringer Entfernung (z.B. La fonction gros plan permet de cadrer un sujet au maximum Blumen). -
Page 84: Using The Flash Modes
USING THE FLASH MODES Orange lamp How to use the flash: Voyant orange When the flash is necessary, the Orange lamp blinks. Orangene Push the Flash pop-up lever to set the flash before using the flash or when selecting flash modes. When the Orange lamp stays lit after pressing the Shutter release button halfway, the flash is charged and ready to be used. -
Page 85: Photographie Au Flash
PHOTOGRAPHIE AU FLASH FOTOGRAFIEREN MIT BLITZ Utilisation du flash: Verwendung der Blitzfunktion: Lorsque le flash est nécessaire, le voyant orange clignote. Wenn der Blitz zugeschaltet werden sollte, blinkt die orangene LED. Pousser sur le levier de sortie de flash pour régler le flash avant de l’utiliser ou pour sélectionner les modes de flash. - Page 86 How to select the flash mode: This camera has three flash modes. Select the mode according to the shooting condition. As you press the Flash mode button, the mode switches as shown below. ➟ (No icon) AUTO-FLASH mode Automatically fires in low-light and backlight conditions.
- Page 87 Sélection du mode de flash: Einstellen eines Blitzprogramms: Cet appareil a trois modes de flash. Sélectionner le mode en Diese Kamera ist mit drei Blitzprogrammen ausgestattet. Das fonction des conditions de prise de vues. Lorsque vous für die Aufnahmesituation geeignete Blitzprogramm wählen. appuyez sur la touche de sélection de mode flash, le mode Die Blitzprogramme können nacheinander mit der Blitztaste in change selon la chronologie indiquée ci-dessous.
-
Page 88: Auto-Flash
AUTO-FLASH In the Auto-Flash mode, the flash will fire automatically in low- light and backlight conditions. When you take a picture that is backlit, position the subject within the Autofocus mark to fire the flash. Autofocus mark Repère d’autofocus Autofocus-Meßfeld... -
Page 89: Mode Flash Automatique
AUTOMATISCHE BLITZZUSCHALTUNG MODE FLASH AUTOMATIQUE In diesem Blitzprogramm wird der Blitz bei geringer Helligkeit En mode flash automatique, le flash se déclenche und bei Gegenlicht automatisch zugeschaltet. automatiquement dans des conditions de faible éclairage et de contre-jour. Zur Auslösung des Blitzes bei Gegenlicht das Autofocus- Meßfeld auf das bildwichtige Motiv ausrichten. -
Page 90: Red-Eye Reducing Flash
RED-EYE REDUCING FLASH Significantly reduces the phenomenon of “red-eye” (when a subject’s eyes appear red in flash photography). In the Red-Eye Reducing Flash mode, the camera will emit a series of low-power pre-flashes before the regular flash. This makes the subject’s pupils contract, significantly reducing red- eye. -
Page 91: Flash Atténuant L'effet "Yeux Rouges
BLITZPROGRAMM ZUR REDUKTION MODE FLASH ATTÉNUANT L’EFFET DES “ROTE-AUGEN-EFFEKTS” “YEUX ROUGES” Der bei Blitzaufnahmen störende “Rote-Augen-Effekt” Atténue sensiblement l’effet “yeux rouges” (lorsque les kann weitgehend verringert werden. yeux du sujet photographié au flash apparaissent en Bei diesem Blitzprogramm wird vor dem Hauptblitz eine Serie rouge sur la photo). -
Page 92: Fill-In Flash (Forced Activation)
FILL-IN FLASH (FORCED ACTIVATION) When you want the flash to fire all the time In the Fill-In Flash mode, the flash fires regardless of available light. For example, this mode can be used to brighten up the subject’s shaded face. Another use of this mode is to correct the colour shift produced by artificial lights (eg. -
Page 93: Flash D'appoint
AUFHELLBLITZ MODE FLASH D’APPOINT (DECLENCHEMENT FORCE) Wenn der Blitz bei jeder Aufnahme zugeschaltet werden soll. Quand vous voulez déclencher le flash à chaque Bei diesem Blitzprogramm arbeitet der Blitz unabhängig von prise de vues. den Lichtverhältnissen. So kann z.B. bei starkem Gegenlicht En mode flash d’appoint, le flash se déclenche quelles que ein verschattetes Gesicht o.ä. -
Page 94: Off (Flash Override)
OFF (FLASH OVERRIDE) When you do not want the flash to fire even in the dark or when you want to shoot subjects such as fireworks In the Off mode, the flash does not fire even in low-light conditions. Use this mode in situations where flash photography is not desired or is prohibited, or in twilight/night scenes. -
Page 95: Flash Débrayé
MODE FLASH DÉBRAYÉ OHNE BLITZ Für Aufnahmesituationen – auch im Dunkeln – in Quand vous ne voulez pas que le flash se denen kein Blitz gezündet werden soll, oder für déclenche, même dans l’obscurité, ou lorsque Aufnahmen von Feuerwerk. vous désirez photographier par exemple un feu In dieser Einstellung wird der Blitz –... -
Page 96: Displaying Pictures On The Lcd Monitor
DISPLAYING PICTURES ON THE LCD MONITOR TURNING ON THE LCD MONITOR Turn on the Play mode. Set the Record/Play switch to Play, then turn on the power. When the Play mode is turned on, the last picture taken, the date, and the frame number appear on the LCD 9 7 . -
Page 97: Affichage Des Vues Sur L'écran Acl Mise En Marche De L'écran Acl
AFFICHAGE DES VUES SUR BILDWIEDERGABE AUF DEM L’ECRAN ACL LCD-MONITOR MISE EN MARCHE DE L’ECRAN ACL EINSCHALTEN DES LCD-MONITORS Auf Wiedergabe stellen Passer en mode d’affichage 1 Den Aufnahme-Wiedergabe-Hebel auf Wiedergabe stellen, Régler le levier d’enregistrement/affichage sur la position dann den Hauptschalter einschalten. Affichage, puis appuyer sur la touche d’alimentation. -
Page 98: Displaying Pictures
DISPLAYING PICTURES You can display the pictures you have taken on the LCD monitor. Display a picture. Press the Previous (–) button to see the previous picture. 9 7 . 2 3 : 3 4 : 5 3 Each time you press the Previous (–) button, the preceding picture will appear. -
Page 99: Affichage Des Vues
BILDWIEDERGABE AFFICHAGE DES VUES Die gerade aufgenommenen Bilder können Vous pouvez visionner immédiatement sur unmittelbar nach der Aufnahme auf dem LCD- l’écran ACL les vues que vous venez de Monitor betrachtet werden. prendre. Bildwiedergabe. Affichage d’une vue. Zur Wiedergabe der vorhergehenden Aufnahme die Appuyer sur la touche de retour en arrière (–) pour voir la Rückwärtstaste (–) drücken. -
Page 100: Slide-Show Mode
SLIDE-SHOW MODE You can run through all the pictures automatically. Display the picture. 9 7 . 2 3 : 3 4 : 5 3 Press the Slide-Show mode button to start the Slide- Show. (Each picture is displayed for approx. 5 sec.) Press the Slide-Show mode button again to stop at the currently displayed picture. -
Page 101: Mode Diaporama
MODE DIAPORAMA DIASHOW-WIEDERGABE Les vues peuvent défiler automatiquement les Die Aufnahmen können automatisch unes après les autres, selon le principe du nacheinander wiedergegeben werden – wie bei diaporama. einer Diashow. Affichage d’une vue. Bildwiedergabe. Appuyer sur la touche de sélection de mode diaporama Zum Starten der Diashow die Diashow-Wiedergabe-Taste pour déclencher le défilement automatique des vues. -
Page 102: Index-Display Mode
INDEX-DISPLAY MODE Nine frames are shown on the LCD monitor simultaneously. Display a picture. Press the Index-Display mode button to select the Index display. Up to nine frames are displayed with the currently selected picture displayed in the center. ● Frames after the last one appear in black. Press the Previous (–) button to select the preceding group of frames. -
Page 103: Affichage De L'index Des Images En Mémoire
AFFICHAGE DE L’INDEX DES INDEXBILDWIEDERGABE IMAGES EN MÉMOIRE Auf dem LCD-Monitor werden neun Aufnahmen gleichzeitig wiedergegeben. L’écran ACL affiche simultanément neuf prises de vues. Bildwiedergabe. Zum Einschalten der Indexbildwiedergabe die Indextaste Affichage d’une image. drücken. Es werden bis zu neun Aufnahmen gleichzeitig Pour sélectionner l’affichage de l’index des images en dargestellt –... -
Page 104: One-Frame Erase
ONE-FRAME ERASE You can delete pictures you do not want. Display the picture you want to delete. In the Index-Play mode, place the indicator (the red frame number) on the picture you want to delete. Press the Erase button. The display above appears. Press the OK button to erase the selected picture. -
Page 105: Effacement D'une Vue
LOSCHUNG EINZELNER AUFNAHMEN EFFACEMENT D’UNE VUE Vous pouvez effacer toutes les vues que vous ne Nicht gewünschte Aufnahmen können wieder gelöscht werden. désirez pas conserver. Die zu löschende Aufnahme wiedergeben. In der Afficher la vue que vous voulez effacer. Dans le mode Indexwiedergabe die Marke (rote Aufnahmenummer) auf die d’affichage indexé, placer l’indicateur (le numéro de vue rouge) zu löschende Aufnahme setzen. -
Page 106: Making Adjustments Menu
MAKING ADJUSTMENTS MENU M E N U 1 / 2 Turn on the power and press the Menu button to show the S H Q / H Q / S Q Menu on the LCD monitor. + / – E R A S E A L L ●... -
Page 107: Faire Les Réglages Menu
FAIRE LES RÉGLAGES EINSTELLUNGEN MENU MENÜ Mettre en marche l’alimentation et appuyer sur la touche Einschalten und die Menütaste drücken. Das Menü wird auf Menu pour montrer le Menu sur l’écran ACL. dem LCD-Monitor gezeigt. ● C’est possible aussi bien du mode d’enregistrement que du ●... -
Page 108: Shq/Hq/Sq (Resolution)
SHQ/HQ/SQ (Resolution) M E N U 1 / 2 S H Q / H Q / S Q When SHQ/HQ/SQ is selected from the menu, the screen : S H Q / H Q / S Q + / – on the left appears on the LCD monitor. -
Page 109: Shq/Hq/Sq (Résolution)
SHQ/HQ/SQ (Résolution) SHQ/HQ/SQ (Auflösung) Lorsque SHQ/HQ/SQ est sélectionné du menu, l’image Sobald die Zeile SHQ/HQ/SQ in der Menü-Übersicht indiquée apparaît sur l’écran ACL. Les résolutions SQ ausgewählt wurde, ercheint das dargestellte Einstellmenü (qualité standard), HQ (haute qualité) et SHQ (super auf dem LCD-Monitor. -
Page 110: Ae +/- (Exposure Compensation)
AE +/– (Exposure compensation) When AE +/– is selected from the menu, the screen on the M E N U 1 / 2 : A E + / – left appears on the LCD monitor. The current exposure S H Q / H Q / S Q + / –... -
Page 111: Ae +/- (Commande D'exposition)
AE +/– (Commande d’exposition) AE +/– (Belichtungskorrektur) Lorsque AE +/– est sélectionné du menu, l’écran ci-contre Wurde Position AE +/– angewählt, erscheint das apparaît sur l’écran ACL. L’exposition courante apparaît dargestellte Einstellmenü auf dem LCD-Monitor. Die en rouge. aktuell eingestellte Belichtungskorrektur erscheint in Rot. Déplacer la flèche avec les touches +/–. -
Page 112: Erase All
ERASE ALL M E N U 1 / 2 When ERASE ALL is selected from the menu, the screen S H Q / H Q / S Q : E R A S E A L L + / – on the left appears on the LCD monitor. -
Page 113: Tout Effacer
TOUT EFFACER LÖSCHUNG ALLER AUFNAHMEN Lorsque ERASE ALL est sélectionné du menu, l’écran ci-contre Sobald die Zele ERASE ALL in der Menü-Überslcht apparaît sur l’écran ACL. ausgewählt wurde, erscheint das dargestellte Einstellmenü auf Déplacer la flèche sur OK avec les touches +/–. Appuyer sur la dem LCD-Monitor. -
Page 114: Format Card
FORMAT CARD M E N U 1 / 2 When FORMAT CARD is selected from the menu, the S H Q / H Q / S Q : F O R M A T C A R D + / – screen on the left appears on the LCD monitor. -
Page 115: Formater La Carte
FORMATER LA CARTE FORMATIERUNG DER KARTE Lorsque FORMAT CARD est sélectionné du menu, l’écran Sobald die Zeile FORMAT CARD in der Menü-Übersicht ci-contre apparaît sur l’écran ACL. ausgewählt wurde, erscheint das dargestellte Einstellmenü auf dem LCD-Monitor. Déplacer la flèche sur OK avec les touches +/–. Appuyer sur la touche OK pour commencer le formatage. -
Page 116: Date
DATE M E N U 1 / 2 When DATE is selected from the menu, the screen on the S H Q / H Q / S Q M E N U 2 / 2 + / – left appears on the LCD monitor. YEAR, MONTH, DAY, E R A S E A L L D A T E... -
Page 117: Date
DATE EINSTELLUNG DES DATUMS Lorsque DATE est sélectionné du menu, l’écran ci-contre Sobald die Zeile DATE in der Menü-Übersicht ausgewählt wurde, erschelnt das dargestellte Einstellmenü auf dem LCD- apparaît sur l’écran ACL. YEAR, MONTH, DAY, HOUR, Monitor. Die Eingaben/Einstellungen sind für die folgenden MINUTE, FORMAT, TIME et PRINT peuvent être Einstellbereiche möglich: Jahr (YEAR), Monat (MONTH), Tag entrés/réglés. -
Page 118: Brightness
BRIGHTNESS is adjustable only from the Play mode. BRIGHTNESS When BRIGHTNESS is selected from the menu, the screen on the left appears on the LCD monitor. The current brightness is at the I mark on the scale. The I mark moves to the right when the + button is M E N U 1 / 2 pressed and to the left when the –... -
Page 119: Luminosité
BRIGHTNESS est ajustable uniquement à partir du mode Diese Einstellung ist nur in der Wiedergabe möglich. d’affichage. EINSTELLUNG DER LCD-MONITOR- LUMINOSITE HELLIGKEIT Lorsque BRIGHTNESS est sélectionné du menu, l’écran ci-contre apparaît sur l’écran ACL. La luminosité courante Sobald die Zeile BRIGHTNESS in der Menü-Übersicht est au repère I sur l’échelle. -
Page 120: Printing Pictures
PRINTING PICTURES HOW TO CONNECT TO THE PRINTER Make sure that the power of the P-300E printer and the camera are off before connecting. Parallel port Connect the exclusive (parallel) cable (provided with the Port P-300E) to the Parallel port of the printer. parallèle Parallel-Port Open the connector cover of the camera. -
Page 121: Impression Des Images
IMPRESSIONS DES AUSDRUCK VON IMAGES AUFNAHMEN RACCORDEMENT DE L’IMPRIMANTE ANSCHLIEßEN DES DRUCKERS S’assurer que l’alimentation de l’imprimante P-300E et de Sicherstellen, daß vor dem Anschließen der Drucker P-300E l’appareil photo est coupée avant de faire des raccordements. und die Kamera ausgeschaltet sind. Raccorder le câble exclusif (parallèle) (fourni avec la P- Das spezielle (parallele) Kabel (im Lieferumfang des P- 300E) au port parallèle de l’imprimante. -
Page 122: Print Menu
PRINT MENU Turn on the power in the Play mode, then press the Print button to show the Print menu on the LCD monitor. The item with the arrow in the Print menu is currently selected. You can move it with the +/– buttons. ●... -
Page 123: Menu D'impression
MENU D’IMPRESSION PRINT-MENÜ Mettre en marche dans le mode d’affichage, puis appuyer sur Einschalten und in der Wiedergabe die Ausdrucktaste la touche Print pour montrer le menu d’impression sur l’écran drücken. Das Print-Menü wird auf dem LCD-Monitor ACL. angezeigt. Die aktuell ausgewählte Druckelnstellung ist durch die L’item avec la flèche dans le menu d’impression est Pfeilmarkierung gekennzeichnet. - Page 124 [To stop printing] Press the Power button for more than two seconds to stop printing immediately. [Print error] ● When the printer is not connected or the printer’s power is off, “PRINTER OFFLINE” blinks in red on the LCD monitor. Prints cannot be made.
- Page 125 [Pour arrêter l’impression] [Ausschalten des Druckbetriebs] Appuyer sur la touche d’alimentation pendant plus de deux Zum sofortigen Abbruch des Druckvorganges den secondes pour arrêter immédiatement l’impression. Hauptschalter länger als 2 Sekunden gedrückt halten. [Erreur d’impression] [Druckstörung] ● Lorsque l’imprimante n’est pas branchée ou si ●...
-
Page 126: Single Print
SINGLE PRINT P R I N T 1 / 2 S I N G L E P R I N T When SINGLE PRINT is selected from the Print menu, the : S I N G L E P R I N T I N D E X P R I N T M U L T I P L E... -
Page 127: Impression Simple
IMPRESSION SIMPLE EINZELAUSDRUCK Lorsque SINGLE PRINT est sélectionné du menu Sobald die Zeile SINGLE PRINT in der Menü-Übersicht d’impression, l’écran ci-contre apparaît sur l’écran ACL. ausgewählt wurde, erscheint das links dargestellte Einstellmenü auf dem LCD-Monitor. Appuyer sur la touche + pour voir l’image suivante. Appuyer sur la touche –... -
Page 128: Multi Print
MULTI PRINT P R I N T 1 / 2 S I N G L E P R I N T When MULTIPLE PRINT is selected from the Print menu, : M U L T I P L E P R I N T I N D E X P R I N T the screen on the left appears on the LCD monitor. -
Page 129: Impression En Série
IMPRESSION EN SERIE AUSDRUCK VON MINIBILDERN Lorsque MULTIPLE PRINT est sélectionné du menu Sobald die Zeile MULTIPLE PRINT in der Menü-Übersicht d’impression, l’écran ci-contre apparaît sur l’écran ACL. ausgewählt wurde, erscheint das links dargestellte Einstellmenü auf dem LCD-Monitor. Appuyer sur la touche + pour voir l’image suivante. Appuyer sur la touche –... -
Page 130: Print All
PRINT ALL P R I N T 2 / 2 P R I N T A L L : P R I N T A L L S E L E C T I M A G E When PRINT ALL is selected from the Print menu, the S E L E C T P R I N T screen on the left appears on the LCD monitor. -
Page 131: Tout Imprimer
TOUT IMPRIMER AUSDRUCK ALLER AUFNAHMEN Lorsque PRINT ALL est sélectionné du menu Sobald die Zeile PRINT ALL in der Menü-Übersicht d’impression, l’écran ci-contre apparaît sur l’écran ACL. ausgewählt wurde, erscheint das links dargestellte Einstellmenü auf dem LCD-Monitor. Appuyer sur la touche OK pour imprimer toutes les images sur la carte. -
Page 132: Random Print
RANDOM PRINT P R I N T 2 / 2 Print the pictures you selected in SELECT IMAGE. P R I N T A L L : S E L E C T P R I N T S E L E C T I M A G E When SELECT PRINT is selected from the Print menu, S E L E C T... -
Page 133: Présélection D'impression
PRESELECTION D’IMPRESSION VORAUSWAHL ZUM DRUCKEN Pour imprimer les images que vous avez sélectionnées dans Dieses Print-Menü zum Ausdruck der in der AUFNAHME- SELECT IMAGE. VORWAHL gewählten Aufnahmen verwenden. Lorsque SELECT PRINT est sélectionné du menu Sobald die Zeile SELECT PRINT in der Menü-Überslcht d’impression, l’écran ci-contre apparaît sur l’écran ACL. -
Page 134: Transferring Images Toa Personal Computer
TRANSFERRING IMAGES TO A PERSONAL COMPUTER PERSONAL COMPUTER ENVIRONMENT When using the provided utility software: Personal computers used with this camera must conform to the following minimum standards. ● IBM PC/AT compatible : 386 or later (utility software) 486 or later (Adobe PhotoDeluxe) Operating System : Windows 95,Windows NT 4.0 or Windows 3.1... -
Page 135: Transfert Des Images Dans Un Micro-Ordinateur Matériels Et Logiciels Requis
TRANSFERT DES IMAGES DATENÜBERTRAGUNG AUF DANS UN MICRO-ORDINATEUR EINEN PERSONAL COMPUTER ERFORDERLICHE HARDWARE UND SOFTWARE MATERIELS ET LOGICIELS REQUIS Le micro-ordinateur utilisé en liaison avec cet appareil Bei Verwendung der mitgelieferten PC-Software muß der photo devra répondre aux exigences suivantes : Personal-Computer in Verbindung mit dieser Kamera den folgenden Mindestanforderungen genügen: ●... - Page 136 ● Apple Macintosh and compatible : 68030 or later (utility software) 68040 or later (Adobe PhotoDeluxe) Operating System : System 7.X or later CD-ROM drive Hard Disk Free Space : More than 45 MB Minimum RAM Mac™ OS 7.X C-1400L : 24 MB –...
- Page 137 ● Apple Macintosh et compatibles ● Apple Macintosh und kompatible Geräte Unité centrale : 68030 ou plus récent (logiciel de Prozessor : 68030 oder höher (Utility-Software) service) 68040 und höher (Adobe 68040 ou plus récent (Adobe PhotoDeluxe) PhotoDeluxe) Betriebssystem : 7.X oder höher Système d’exploitation CD ROM-Laufwerk : 7.X ou plus récent...
-
Page 138: Installing Provided Software
The following five functions are available with the provided Olympus utility software. For installation and operation, refer to the software’s online manual. Download image data. Connect your camera to your computer via the RS-232C cable and you can download picture data files and thumbnails into your computer. -
Page 139: Installation Du Logiciel Fourni
INSTALLIEREN DER MITGELIEFERTEN SOFTWARE INSTALLATION DU LOGICIEL FOURNI Die Installation der mitgelieferten Software eröffnet vielseitige Pour pouvoir exploiter un vaste éventail de fonctions : affichage, Möglichkeiten der Bildwiedergabe, -bearbeitung und -speicherung. traitement et stockage des images, installer sur l’ordinateur le Dazu müssen lediglich die Bilddateien von der Kamera auf den logiciel d’application fourni sur disquette et télécharger les images Computer übertragen werden. -
Page 140: Connecting To A Personal Computer
Note: ◆ Features supported are slightly different for Macintosh and Windows. For details, refer to the software’s online manual. CONNECTING TO A PERSONAL COMPUTER Use the appropriate connector according to your computer’s platform. ● IBM PC/AT compatible RS-232C PC serial cable Câble de connexion série Connect the provided communication cable to the D-SUB 9- RS-232C pour PC (IBM) -
Page 141: Raccordement À Un Micro-Ordinateur
Hinweis: Remarque: ◆ Die Bedienungsfunktionen für Macintosh und MS ◆ Les fonctions exploitables sont légèrement Windows weichen leicht voneinander ab. Weitere différentes selon qu’il s’agit de Macintosh ou de Angaben hierzu siehe zugehörige Windows. Pour plus de détails, se reporter ici au Softwareanleitung. - Page 142 Make sure that the power of the PC and the camera are OFF and the utility software is installed on the computer before connecting. (Refer to the software’s online manual for the installation.) Connect the communication cable to the computer’s serial port.
- Page 143 S’assurer que l’alimentation du PC et de l’appareil est Vor der Herstellung des Anschlusses sicherstellen, daß coupée et que le logiciel de commande est installé sur der PC und die Kamera ausgeschaltet sind und daß die l’ordinateur avant de faire les raccordements. (Se référer Anwender-Software im PC installiert ist.
-
Page 144: System Chart
SYSTEM CHART The following capabilities are available when connected to optional equipment. ● Direct printing via the exclusive printer. Personal computer Personal computer Micro-ordinateur Flash Path Micro-ordinateur Personal-Computer Personal-Computer SmartMedia Modem PC card adaptor Adaptateur de carte PC PC-Kartenadapter Camera Appareil photo AC adaptor Printer (P-300E) -
Page 145: Tableau Synoptique Du Système
TABLEAU SYNOPTIQUE DU SYSTÈME SYSTEMUBERSICHT Beim Anschluß an die externen Komponenten Les fonctions suivantes sont disponibles dans unterstützt die Kamera folgende Funktionen: la mesure où l’appareil est raccordé à l’équipement proposé en option: ● Direkter Ausdruck nur mit dem speziellen Drucker. ●... -
Page 146: Miscellaneous
Four new AA alkaline batteries may last for as many as 100 frames when the flash is used on half of all the shots (determined under Olympus test conditions). But this is just an estimate — in actual use, battery life is affected by many... -
Page 147: Questions Et Réponses
Referenzwerte. Die Anzahl der mit einem Satz neuer mémoriser a été déterminé sur la base des essais effectués Batterien herstellbaren Aufnahmen kann schwanken. par Olympus avec les piles employées. Le nombre réel de vues que les piles peuvent assurer est susceptible de varier. kann Kamera für... - Page 148 How should I store the camera? Cameras are susceptible to damage caused by dust, moisture, and salt. Wipe and dry the camera thoroughly before storing it. After using it at the beach, wipe it with a cloth that has been moistened with fresh water and then wrung out.
- Page 149 Wie sollte die Kamera aufbewahrt werden? Où ranger l’appareil ? Staub, Feuchtigkeit und salzhaltige Luft können Schäden La poussière, l’humidité et l’air marin peuvent an der Kamera verursachen. Die Kamera vor der endommager l’appareil photo. Essuyer et sécher Lagerung sorgfältig säubern und trockenwischen. Bei soigneusement l’appareil avant de le ranger.
-
Page 150: Troubleshooting
TROUBLESHOOTING Operating Problems The camera does not work. 1 The power is OFF. [ Push the power button to turn it on. (P. 48) 2 The batteries are loaded incorrectly. [ Reload the batteries correctly. (P. 40) 3 The batteries are dead. [ Replace the batteries with new ones. -
Page 151: En Cas De Difficultés
EN CAS DE DIFFICULTÉS FEHLERSUCHE Betriebsstörungen Problèmes de fonctionnement L’appareil photo ne fonctionne pas Die Kamera funktioniert nicht. 1 L’appareil n’est pas sous tension. 1 Die Kamera ist ausgeschaltet. [ Appuyer sur la touche d’alimentation pour le mettre en [ Mit dem Hauptschalter einschalten. (S. 49) marche. - Page 152 4 The subject is not within the working range of the camera or is difficult for the autofocus to lock on. [ See the working ranges of the Standard mode and Macro mode, or refer to the Autofocus section. The flash does not fire. 1 The flash is not set.
- Page 153 Blitzfehlfunktion [ Le faire réparer. vor. [ Wenden Sie sich an Ihren Olympus Service. Il est impossible d’afficher les photos prises sur l’écran ACL. 1 L’alimentation est coupée ou l’appareil est en mode Schon aufgezeichnete Aufnahmen können nicht auf dem LCD- d’enregistrement.
- Page 154 When the camera is connected to a computer, an error message appears while data is being transferred to the computer. 1 The cable is not plugged in correctly. [ Connect the cable correctly. (P. 140) 2 The power is OFF. [ Press the power button to turn it ON.
- Page 155 L’appareil étant raccordé à un micro-ordinateur, un Im Dialog mit dem Computer erscheint eine message d’erreur apparaît lors du transfert des données Fehlermeldung bei der Datenübertragung. 1 Der Kabelanschluß ist nicht einwandfrei. dans l’ordinateur. 1 Le branchement du câble de connexion est incorrect. [ Kabelanschluß...
- Page 156 Problems with Images The picture is out of focus 1 The camera moved when the Shutter release button was pressed. [ Hold the camera correctly, and press the Shutter release button. (P. 64) 2 The viewfinder’s autofocus mark was not positioned on the subject.
- Page 157 Aufnahmebeeinträchtigungen Problèmes liés à l’image L’image obtenue n’est pas nette Unscharfes Bild 1 L’appareil photo a bougé au moment du déclenchement. 1 Die Kamera wurde beim Auslösen bewegt. [ Tenir l’appareil sans bouger et appuyer sur le [ Die Kamera ruhig halten und den Auslöser déclencheur d’un mouvement continu.
- Page 158 The picture is too dark. 1 The flash was not used. [ Push the Flash pop-up lever to set the flash. (P. 84) 2 The shutter was pressed before the flash was charged. [ Wait until the Orange lamp stops blinking. (P. 84) 3 The flash was blocked by a finger.
- Page 159 Sous-exposition Unterbelichtung 1 Le flash n’a pas été utilisé. 1 Es wurde ohne Blitz aufgenommen. [ Pousser le levier de sortie de flash pour régler le flash. [ Den Blitz aufklappen. (S. 85) (P. 85) 2 Der Auslöser wurde vor der vollständigen Blitzaufladung 2 Le déclencheur a été...
-
Page 160: Notes On Display And Backlight
The fluorescent lamps used in the Control Panel and LCD monitor have a limited service life. If they begin to darken or flicker, contact your nearest Olympus service center. (There is a service fee if out of warranty.) In cold conditions, the display backlight may be slow to come on or may change colour suddenly. -
Page 161: Remarques Sur Le Rétroéclairage De L'écran Acl
HINWEISE ZUM LCD-FELD/ REMARQUES SUR LE RETROECLAIRAGE DE L’ECRAN ACL LCD-MONITOR Der für das LCD-Feld und den LCD-Monitor eingesetzte Les lampes fluorescentes utilisées dans l’écran de Display hat eine begrenzte Lebensdauer. Beim Auftreten commande et dans l’écran ACL ont une durée de vie von Abdunkelungen oder -Flackereffekten am LCD-Monitor limitée. -
Page 162: Specifications
640 x 480 pixels (SQ mode) Auto white balance : Full auto TTL Lens : Olympus lens 9.2 ~ 28 mm, F2.8 ~ 3.9, 7 elements in 7 groups Equivalent to 36 ~ 110 mm (C- 1400L)/50 ~ 150 mm (C-1000L) lens... -
Page 163: Fiche Technique
TTL. Objektiv : Olympus-Objektiv 2,8/9,2 mm, 3,9/28 Objectif : Objectif Olympus 9,2 à 28 mm, F2.8 à mm Olympus objektiv, 7 Elemente in 3.9, 7 éléments en 7 groupes. 7 Gruppen. Entspricht einem 36 – Equivalent à un objectif de 36 ~ 110 mm (C-1400L)/50 ~ 150 mm (C-1000L) 110 mm (C-1400L)/50 –... - Page 164 Aperture : W : F2.8, F5.6 T : F3.9, F7.8 Photometric system : TTL Center weighted average metering system, Spot metering system Exposure control : Program auto exposure, 7-step exposure compensation Working range (from lens) : 0.3 m ~ 0.6 m (Macro mode) ∞...
- Page 165 Ouverture : W : F2.8, F5.6 Blende : W : F2,8, F5,6 T : F3.9, F7.8 T : F3,9, F7,8 Posemètre : Système intégral de mesure moyenne Belichtungsmessung pondérée au centre à travers l’objectif : Mittenbetonte TTL-Integralmessung, (TTL), Système de mesure ponctuelle Spotmessung Commande d’exposition Belichtungssteuerung...
- Page 166 Flash working range (from lens) C-1400L : W : 0.3 m ~ 3.6 m : T : 0.3 m ~ 2.5 m C-1000L : W : 0.3 m ~ 4.8 m : T : 0.3 m ~ 3.4 m Flash modes : Auto-Flash (automatic flash activation in low light and backlight), Red-Eye Reducing Flash, Fill-In...
- Page 167 Blitzreichweite (ab Objektiv) Portée du flash (de l’objectif) C-1400L : W : 0,3 m ~ 3,6 m C-1400L : W : 0,3 m ~ 3,6 m : T : 0,3 m ~ 2,5 m : T : 0,3 m ~ 2,5 m C-1000L : W : 0,3 m ~ 4,8 m C-1000L...
- Page 168 Power supply for automatic calendar system : 3V lithium battery (CR2025) x 1 Direct print (Direct print possible with the exclusive printer.) : Single print, Index print, Random print, Multi print, Mirror print, All print Operating environment temperature : 0 ~ 40°C (operation) –20 ~ 60°C (storage) humidity : 30 ~ 90 % (operation)
- Page 169 Alimentation pour système de calendrier automatique Spannungsversorgung für das automatische : pile au lithium (CR2025) x 1 Kalendersystem : 3 V-Lithium-Batterie (CR2025) x 1 Impression directe (impression directe via l’imprimante à Direktausdruck (Direkter Ausdruck möglich mit dem usage exclusif) : Impression simple, Impression exklusiven Drucker) d’index, Présélection d’impression, : Printfunktionen: Einzelausdruck,...
- Page 170 MEMO...
- Page 171 MEMO...
- Page 172 San-Ei Building, 22-2, Nishi Shinjuku 1-chome, Shinjuku-ku, Tokyo, Japan. Tel. 03-3340-2026 OLYMPUS AMERICA INC. Two Corporate Center Drive, Melville, NY 11747-3157, U.S.A. Tel. 516-844-5000 OLYMPUS OPTICAL CO. (EUROPA) GMBH. (Premises/Goods delivery) Wendenstraße 14-16, 20097 Hamburg, Germany. Tel. 040-237730 (Letters) Postfach 10 49 08, 20034 Hamburg, Germany.