Olympus CAMEDIA C-1 Zoom Reference Manual
Olympus camedia c-1 zoom: reference manual
Hide thumbs
Also See for CAMEDIA C-1 Zoom:
- Specifications (10 pages) ,
- Basic manual (148 pages) ,
- Reference manual (104 pages)
Table of Contents
Advertisement
Quick Links
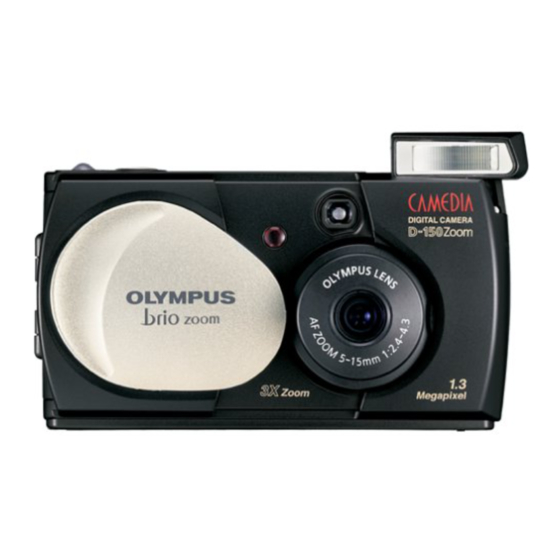
D - 150 Zoom
D - 150
Reference Manual
Thank you for purchasing this Olympus digital camera.
Before using your new digital camera, please carefully read this Reference
Manual and separately provided "Safety Precautions" and "Battery Handling
Precautions".
We recommend that you take test shots to make sure that the camera functions
properly before taking important photographs.
C - 1 Zoom
C - 1
Advertisement
Table of Contents

Related Manuals for Olympus CAMEDIA C-1 Zoom


Summary of Contents for Olympus CAMEDIA C-1 Zoom
- Page 1 C - 1 D - 150 Zoom D - 150 Reference Manual Thank you for purchasing this Olympus digital camera. Before using your new digital camera, please carefully read this Reference Manual and separately provided “Safety Precautions” and “Battery Handling Precautions”.
-
Page 2: Read The Following Before Use
Olympus will not assume any liability for damages, loss of profit or claim from a third party due to improper use of this product. Olympus will not assume any liability for damages and loss of profit due to loss of image data resulting from servicing by a third party who is not designated by Olympus or from other causes. - Page 3 Declaration of Conformity Model Number: D-150Zoom Trade Name: OLYMPUS Responsible Party: Olympus America Inc. Address: 2 Corporate Center Drive, Melville, New York 11747-3157 USA Telephone Number: 631-844-5000 Tested To Comply With FCC Standards FOR HOME OR OFFICE USE This device complies with Part 15 of the FCC rules. Operation is subject to the...
-
Page 4: How To Read This Booklet
How to Read This Booklet BASIC SHOOTING OPERATIONS Shooting Using the Viewfinder How to Press the Shutter Button and Focus on the Subject (Half-Press/Full-Press) Operating Procedure Viewfinder eyepiece Green lamp AF target mark Half-press Viewfinder eyepiece Green lamp lights AF target mark [Tip]···Information on convenient capabilities or recommended techniques. -
Page 5: Table Of Contents
Contents Read the Following Before Use ...2 How to Read This Booklet...4 Contents ...5 Index of Available Operations...8 Making the Most of Your Digital Camera ...10 Operations Available with This Camera...12 PREPARATION Names of Parts...16 Attaching the Provided Strap ...18 Loading the Battery...19... - Page 6 CONTENTS VIEWING OR ERASING IMMEDIATELY AFTER SHOOTING Viewing Pictures ...42 Image Playback Operations...44 Erasing Pictures (One-Frame Erase) ...46 Erasing All Pictures (All-Frame Erase) ...47 Viewing Multiple Images Automatically in Sequence (Slide Show) ...48 Preventing Accidental Erasure (Protection) ...50 Adjusting the Monitor Brightness...52 ADVANCED SHOOTING FEATURES Selecting the Image Quality (Record Mode) ...54 Using the Flash ...56...
- Page 7 VIEWING OPTIONS Using the AC Adapter (Optional)...72 Viewing Images on a TV Screen ...73 Printing Images in a Lab or on a Printer ...74 Making a Print Reservation on SmartMedia Card...76 Operations Available with Your PC ...78 Finding the Best Way to Download Image Data to Your PC...79 Downloading Image Data to Your PC ...84 TROUBLESHOOTING...
-
Page 8: Index Of Available Operations
Index of Available Operations This manual is organized by operating procedures, beginning with basic operations and moving forward to more advanced procedures. If there is any particular operation you want to perform, you can use this index to find the page reference for that operation. Shooting Images Ordinary shooting ...P.32 Shooting with zoom...P.59... -
Page 9: Additional Information
Manipulating images on a PC ...P.78 Placing images in a document ...P.78 Processing images ...P.78 Printing images ...P.74-75 Additional Information Number of images you can shoot ...P.23 Usable batteries ...P.20 Color tone ...P.67 Brightness ...P.65 Unsatisfactory image quality ...P.97 Setting correct date and time ...P.26... -
Page 10: Making The Most Of Your Digital Camera
Making the Most of Your Digital Camera Video cable Card (SmartMedia) C-1Zoom/D-150Zoom USB cable AC adapter... -
Page 11: Viewing Images
(This can be read in a PC card slot.) USB SmartMedia reader/writer (This can be used when it is connected to the camera’s USB port.) Note: Some photo studios and labs do not handle images shot with a digital camera. Viewing images on TV screen Page 73) Printing... -
Page 12: Operations Available With This Camera
Viewing options Images can be displayed on a TV screen using the video cable. Images can be printed on photographic paper using the optional Olympus P-400/P-200/ P-330N(E) printers. Images can also be printed on ink-jet or laser type printers. Images saved on a SmartMedia card can be printed out at a photo lab*... - Page 13 Taking advantage of PC features Images can be downloaded and stored on a PC via the provided USB cable (when the PC is equipped with a USB terminal). Images can be stored on a PC hard disk or on a floppy disk, CD-R or MO disk. Images can be processed by a PC in many ways, including text superimposition (comments) or trimming (magnifying or cutting images)* Images can easily be attached to e-mail messages sent from the PC*...
-
Page 15: Preparation
PREPARATION This chapter describes what you need to do and what you need to know before using the camera. Be sure to make the appropriate preparations to assure safe, enjoyable shooting. Names of Parts Attaching the Provided Strap Loading the Battery Selecting the Appropriate Batteries Inserting the Memory Card Selecting the Appropriate Card... -
Page 16: Names Of Parts
PREPARATION Names of Parts Card cover (For insertion and removal of the SmartMedia card) Card cover Strap eyelet Zoom lever Shutter button Lens barrier (Open this to turn the camera on in the Shooting mode) USB connector (Connect to a PC with a USB cable) Video output jack (Connect to a TV with a video cable) DC IN jack... -
Page 17: Af Target Mark
Viewfinder eyepiece Monitor button (Switches the monitor display and the Playback mode ON/OFF) Self-timer lamp (Indicates activation of the self-timer) Flash (Pops up automatically when you open the lens barrier. Push it down after you close the lens barrier) Viewfinder Lens (Comes out automatically when you open the lens barrier) -
Page 18: Attaching The Provided Strap
PREPARATION Attaching the Provided Strap Attach the strap correctly as instructed above. Olympus cannot warrant or assume any liability for damage resulting from the camera being accidentally dropped because the strap has not been attached correctly. Strap eyelet Attach the strap as shown. -
Page 19: Loading The Battery
Loading the Battery Check that the lens barrier is closed and nothing is displayed on the monitor. Slide the battery compartment cover in the direction of the arrow Lift the battery compartment cover in the direction of the arrow Insert the battery in the direction shown in the figure. -
Page 20: Selecting The Appropriate Batteries
Insert the battery pack correctly. The lithium battery pack is not rechargeable. Rechargeable batteries The NiMH batteries from Olympus (including battery charger) are rechargeable and economical. You can recharge them quickly. Insert the batteries in the correct directions shown below. - Page 21 CR-V3 lithium battery packs cannot be charged. Alkaline batteries have a lot of variation in their performance and deteriorate particularly at low temperatures. It is recommended that lithium battery packs or NiMH batteries be used. Zinc-carbon (manganese) batteries and R6/AA lithium batteries cannot be used. Please read the separately provided “Battery Handling Precautions”.
-
Page 22: Inserting The Memory Card (Smartmedia)
PREPARATION Inserting the Memory Card Card insertion direction marking To remove the card: Press the card gently. When the card ejects slightly, pull out the card straight out as shown in the direction of A. (SmartMedia) Check that the lens barrier is closed and nothing is displayed on the monitor. -
Page 23: Selecting The Appropriate Card
This camera may not be able to recognize a card that is not manufactured by Olympus or Lexar or a card which has been formatted on another device such as a PC. To avoid problems, you should format each card before using it on this camera. -
Page 24: Using A New Card (Formatting)
PREPARATION Using a New Card Before using a non-Olympus card or a card which has been formatted or used with devices other than this camera (such as a PC), be sure to format the card on this camera. 1 /3... - Page 25 When formatting ends, the indicator “NO PICTURE” is displayed. If you are using an optional Olympus card, you can use it without formatting. If the display shown on the left appears on the monitor, the card needs to be formatted.
-
Page 26: Setting The Date And Time
PREPARATION Setting the Date and Time 1 /3 SELECT Playback mode menu 1/3 screen 3 /3 SELECT Playback mode menu 3/3 screen SELECT SELECT Date/time setup screen Operating Procedure Check that the camera is set to the Arrow pad Playback mode (Page 42) by holding down the Press the [The Playback mode menu 1/3 is... - Page 27 . 1. 1 SELECT Date/time setup screen SELECT Date/time setup screen 2 .14 SELECT Date/time setup screen When the batteries are removed or battery power is exhausted, a screen prompting you to set the date and time will appear on the monitor. In this case, set the date and time before shooting.
-
Page 28: Holding The Camera
PREPARATION Holding the Camera Horizontally The right way to hold your camera: Hold the camera with both hands and keep your elbows tight to your body. Pay attention to the following when holding your camera: Make sure you don’t block the lens or the flash with your finger or the camera strap. -
Page 29: Basic Shooting Operations
BASIC SHOOTING OPERATIONS This chapter describes the basic shooting operations you need to remember when using the camera. Although the information given in this chapter is enough to get you started, we encourage you to read the chapter entitled “ADVANCED SHOOTING FEATURES”... -
Page 30: Shooting Pictures
BASIC SHOOTING OPERATIONS Shooting Pictures Lens barrier When starting shooting When ending shooting Images stored on the card are saved even after the camera turns off or the batteries are replaced. Try to minimize power consumption as much as possible if you don’t expect to use the camera for a while. - Page 31 Never attempt to open the card cover or take out the card or battery while the camera power is on. Otherwise, the image data on the card may be destroyed. To view a recorded image immediately after it has been shot while the lens barrier is open (Quick-View Playback): Double clicking BASIC SHOOTING OPERATIONS...
-
Page 32: Shooting Using The Viewfinder
BASIC SHOOTING OPERATIONS Shooting Using the Viewfinder How to Press the Shutter Button and Focus on the Subject (Half-Press/Full-Press) Viewfinder eyepiece Half-press Viewfinder eyepiece Operating Procedure Check that the lens barrier is open. Determine the image composition by positioning the AF target mark ( over the subject in the viewfinder. - Page 33 Full-press Always press the shutter button gently. If you press too hard, the camera may move and the image will be blurred. If you take another shoot, wait for a few seconds until the orange lamp goes out before retrying shooting. The blinking orange lamp indicates that the image you just shot is being processed.
-
Page 34: Shooting Using The Monitor
BASIC SHOOTING OPERATIONS Shooting Using the Monitor Monitor Monitor button Oblique lines on the subject may appear as zigzag lines on the monitor, but this is not malfunction. Vertical stripes may appear in the monitor image if it is shot under bright conditions (such as a sunny sky). -
Page 35: Deciding Whether To Use The Viewfinder Or Monitor According To Working Distance
Deciding Whether to Use the Viewfinder or Monitor According to Working Distance Snapshot, landscape, etc. (approx. 1.5 m/4.9 ft. to infinity) Use the viewfinder Close-up of a person (approx. 0.5 m to 1.5 m/1.6 ft. to 4.9 ft.) Use either the viewfinder or monitor Very short distance (0.2 m to 0.5 m/8 in. - Page 36 BASIC SHOOTING OPERATIONS Features of the viewfinder and monitor Camera can be held more steadily and the subject can be seen clearly even in bright surroundings. Also, less battery power is required. The image area in the viewfinder may be different than that of the actual picture when the distance from the subject is short.
-
Page 37: Checking The Camera Status Indication Next To The Viewfinder Or On The Monitor (In Shooting Mode)
Checking the Camera Status Indication Next to the Viewfinder or on the Monitor Orange lamp Green lamp Viewfinder 1 Indication lamps on the right of the viewfinder Lamp Status When the green Autofocus is locked. lamp is lit • The camera cannot focus on the When the green subject. - Page 38 BASIC SHOOTING OPERATIONS 2 Monitor No. of images that can be shot Battery status Record mode Auto Flash mode (No display) Drive mode When the monitor is turned on by pressing the monitor button, the information displays on the left are shown on the monitor.
- Page 39 Exposure compensation Macro mode Digital zoom Auto White balance (No display) When you change the setting, it remains effective after the camera is turned off. When you change the setting, it returns to the factory setting when the camera is turned off. When the monitor is off, it will turn on if you press the button (in Shooting mode only).
-
Page 40: If Correct Focus Cannot Be Obtained (Focus Lock)
BASIC SHOOTING OPERATIONS If Correct Focus Cannot Be Obtained When the camera is pointed at the subjects as shown in the illustrations below, it may be difficult to focus on them with the autofocus function. The green lamp on the right of the viewfinder blinks. -
Page 41: Viewing Or Erasing Immediately After Shooting
VIEWING OR ERASING IMMEDIATELY AFTER SHOOTING This chapter describes how to view your saved images on the camera’s monitor. For viewing on a TV or PC screen, or to print images, see the chapter entitled “VIEWING OPTIONS”. Viewing Pictures Image Playback Operations Erasing Pictures (One-Frame Erase) Erasing All Pictures... -
Page 42: Viewing Pictures
VIEWING OR ERASING IMMEDIATELY AFTER SHOOTING Viewing Pictures Monitor Monitor button Protection indicator Printing indicator Remaining battery power File No. Date/time Monitor information When the camera is powered by batteries, it turns off automatically when no operation has been performed for one minute. If the camera has turned off, press the Operating Procedure Check that the card is set and... - Page 43 VIEWING OR ERASING IMMEDIATELY AFTER SHOOTING Lens barrier When the camera turns on, the monitor may light for an instant and show an image for a short time. This is not a malfunction. Vertical stripes may appear on the image if it is shot under bright conditions (such as a sunny sky).
-
Page 44: Image Playback Operations
VIEWING OR ERASING IMMEDIATELY AFTER SHOOTING Image Playback Operations .12.23 23 45 Frame operations of arrow pad keys Frame Frame reverse advance 12.23 23 4 3 45 <Start> Slide zoom lever lide the zoom lever for zooming and index display Operating Procedure Check that the lens barrier is closed and the last image you shot is displayed by holding... - Page 45 < . continued> Pressing the arrow pad key while 4 (or 9) images are displayed advances the selected image (with the green frame) to the next image. When the last displayed image in the index is selected, pressing the Similarly, pressing the Pressing when the first image in the index is selected brings up the previous index.
-
Page 46: Erasing Pictures (One-Frame Erase)
VIEWING OR ERASING IMMEDIATELY AFTER SHOOTING Erasing Pictures You can increase the number of images that can be stored on the card by erasing unnecessary images. Monitor button 1 /3 SELECT Playback mode menu 1/3 screen Once erased, images cannot be restored. -
Page 47: Erasing All Pictures (All-Frame Erase)
Erasing All Pictures The following operation clears the card of all stored image data. 1 / 3 SELECT Playback mode menu 1/3 screen SELECT Card setup screen Check the following before erasing images Erasure is not possible if the image to be erased is protected or a write protect seal is attached to the card ( Pages 50, 51). -
Page 48: Viewing Multiple Images Automatically In Sequence (Slide Show)
VIEWING OR ERASING IMMEDIATELY AFTER SHOOTING Viewing Multiple Images Automatically in Sequence Images in the card can be viewed on the monitor automatically in their stored order. This function is useful for presentation purposes at a meeting etc. because the images can be displayed on a large television screen, as well as for checking all the images stored in the card. - Page 49 VIEWING OR ERASING IMMEDIATELY AFTER SHOOTING Arrow pad OK/menu button When you select “YES” for slide show restarts from the image where the slide show is interrupted. To cancel Slide Show: Press the OK/menu button. [The slide show is interrupted, and the monitor shows the Playback mode menu 1/3 with “NO”...
-
Page 50: Preventing Accidental Erasure (Protection)
VIEWING OR ERASING IMMEDIATELY AFTER SHOOTING Preventing Accidental Erasure It is recommended that you protect important images to avoid accidentally erasing them. When an image is protected, it cannot be erased unless the card is formatted. 1 /3 SELECT Playback mode menu 1/3 screen Monitor button 1 /3 SELECT... -
Page 51: Unprotecting An Image
VIEWING OR ERASING IMMEDIATELY AFTER SHOOTING Protect indicator 1.12.23 23 45 1 / 3 SELECT Playback mode menu 1/3 screen When the card is formatted, protected images are erased. Images on a card with a write protect seal attached to it cannot be protected. For details, refer to the instructions included with the provided SmartMedia. -
Page 52: Adjusting The Monitor Brightness
VIEWING OR ERASING IMMEDIATELY AFTER SHOOTING Adjusting the Monitor Brightness You can adjust the brightness of the monitor to make it easier to see when shooting under daylight or in the dark, as well as when viewing images on the monitor. 1 /3 SELECT Playback mode menu 1/3 screen... -
Page 53: Advanced Shooting Features
ADVANCED SHOOTING FEATURES This chapter introduces various shooting features that give you the shooting flexibility you need for a wide range of situations, including the use of spare cards, flash operation, sequential shooting, close-up shooting and exposure compensation. Once you master the operations in this chapter, you will be able to capture images exactly the way you want them. -
Page 54: Selecting The Image Quality (Record Mode)
ADVANCED SHOOTING FEATURES Selecting the Image Quality The Record modes allow you to shoot images with higher quality (SHQ) or larger number of images per card (SQ). The default setting of the Record mode is HQ. Using the Three Record Modes (Standard Quality) (High Quality) (Super-High Quality) - Page 55 2 / 3 AUTO SELECT Shooting mode menu 2/3 screen AUTO Record mode Number of shootable images Cautions when shooting in the High-Quality (SHQ) mode The higher the image quality, the fewer images you can shoot. The higher the image quality, the longer the waiting time immediately after shooting (the period in which the orange lamp blinks).
-
Page 56: Using The Flash
ADVANCED SHOOTING FEATURES Using the Flash The flash has been designed to fire automatically when shooting under low light or against strong back light. You can select one of the 5 flash modes according to different shooting situations. 1 /3 AUTO DIGITAL ZOOM SELECT... -
Page 57: Using The Flash Modes
Using the Flash Modes Auto-Flash The flash fires automatically in low light or back light conditions. To shoot a subject with back light, position the AF target mark ( viewfinder. Red-Eye Reduction Flash The light from the flash may make the subject’s eyes appear red in pictures. -
Page 58: Night Scene
ADVANCED SHOOTING FEATURES Night Scene Use this mode when shooting a subject against a night background. In this mode, the flash fires at the beginning of the shot to brighten the subject and the shutter speed is reduced to shoot the background out of reach of the flash. -
Page 59: Magnifying The Subject (Zooming)
Magnifying the Subject The optical zoom allows you to shoot an image magnified up to 3X. The digital zoom is also available to magnify an image up to 2X. If you use both the functions, you can shoot an image zoomed by up to 6X. To use the digital zoom, you need to set the Digital Zoom to “ON”... - Page 60 ADVANCED SHOOTING FEATURES To use the digital zoom 1 / 3 AUTO DIGITAL ZOOM SELECT Shooting mode menu 1/3 screen 1 / 3 DIGITAL ZOOM SELECT Shooting mode menu 1/3 screen Digital Zoom Appears only when using digital zooming (and does not appear when using only optical zooming.) The zoom bar slides toward T when zooming- in, and toward W when zooming-out.
-
Page 61: Shooting A Close Subject (Macro Shooting)
Shooting a Close Subject It is recommended to use the Macro mode when shooting a subject at a distance of less than 0.5 m/1.6 ft. 1 / 3 AUTO DIGITAL ZOOM SELECT Shooting mode menu 1/3 screen 1 / 3 AUTO DIGITAL ZOOM SELECT... -
Page 62: Using The Self-Timer
ADVANCED SHOOTING FEATURES Using the Self-Timer You can shoot images with self-timer operation. This is useful for taking pictures with yourself included in the image. Fix the camera securely on a tripod, etc., before self-timer shooting. 1 / 3 AUTO DIGITAL ZOOM SELECT Shooting mode menu 1/3 screen... -
Page 63: Shooting Images Sequentially (Sequential Shooting)
Shooting Images Sequentially The Sequential Shooting mode allows you to take a rapid succession of still images by pressing and holding the shutter button. You can choose the best image from a series of sequential shots. When you have found your best shot, you can also erase the rest of the images ( 1 / 3 AUTO... - Page 64 ADVANCED SHOOTING FEATURES The monitor turns off during sequential shooting. This is not a malfunctioning. Flash is not available in the Sequential Shooting mode. Even when the Flash mode is set to Auto, it is switched to Flash Off. To prevent camera shake, the maximum shutter speed is limited to 1/30 second.
-
Page 65: Varying The Image Brightness (Exposure Compensation)
Varying the Image Brightness Although the camera’s exposure is set automatically, you can vary it to change the image brightness in the range of ±2 stops in 0.5-stop steps. Use this function to obtain correct brightness (exposure) when there is significant contrast (difference in brightness) in the image. - Page 66 ADVANCED SHOOTING FEATURES 2 / 3 SELECT Shooting mode menu 2/3 screen Corrected exposure value When the exposure is corrected, the brightness of the image displayed on the monitor also changes. However, the variation may be less noticeable when the subject is dark.
-
Page 67: Varying The Image Color Tone (White Balance Control)
Varying the Image Color Tone This camera incorporates electronic circuitry to automatically adjust color hues so that they look natural (auto white balance control circuit). If auto white balance control does not produce accurate results due to weather or illumination, you can control the white balance manually. -
Page 68: White Balance Settings
ADVANCED SHOOTING FEATURES White Balance Settings [AUTO: This is the default setting, which is not displayed on the White balance setting If you want an image color tone that resembles what you see under incandescent lighting, set the White Balance Control mode to This will produce colors like those seen under an incandescent lamp. -
Page 69: Muting The Beep Tones
Muting the Beep Tones The beep tones generated by the camera may be annoying when shooting images at a wedding, theater or when photographing animals. You can mute the beep tones in such cases. 1 /3 AUTO DIGITAL ZOOM SELECT Shooting mode menu 1/3 screen 2 / 3 AUTO... -
Page 71: Viewing Options
VIEWING OPTIONS Pictures taken with this camera can be displayed in many ways, offering a wide range of entertainment possibilities. This chapter describes various ways to view images including image printing and downloading image data to a PC. When the camera is connected to a TV, PC or printer, it is recommended to power the camera from the dedicated AC adapter. -
Page 72: Using The Ac Adapter (Optional)
Observe the following points to prevent a fire hazard, electric shock or burns. Use an AC adapter that matches your local voltage. For more information, contact your dealer or authorized Olympus service center. Do not use the camera if the AC adapter is not plugged in completely. -
Page 73: Viewing Images On A Tv Screen
Viewing Images on a TV Screen Video output jack (yellow) Monitor button The camera’s monitor turns off when the camera is connected to a TV. The displayed image may deviate from the center of the screen. This is due to the adjustment of the TV and is not a malfunction. -
Page 74: Printing Images In A Lab Or On A Printer
VIEWING OPTIONS Printing Images in a Lab or on a Printer About DPOF DPOF (Digital Print Order Format) is a format used to record automatic print information from cameras. By specifying which images are to be printed, the images can be printed easily by DPOF-compatible printing service labs or a household-type DPOF-compatible printer. - Page 75 P-400/P-200/P-330N(E) It is not possible to print images saved on the card by connecting a printer directly to the USB connector of the camera. If images are printed by connecting the P-330N(E) printer directly to the Video output jack of the camera, you will not be able to take advantage of the printer’s full performance.
-
Page 76: Making A Print Reservation On Smartmedia Card
VIEWING OPTIONS Making a Print Reservation on SmartMedia Card By specifying the desired number of prints for each of the images saved on a card, you can print out multiple copies of each image with a DPOF-compatible printer or at a photo lab. 1 / 3 SELECT Playback mode menu 1/3... - Page 77 Single-frame reservation: Selects and reserves the frame you want to print. All-frame reservation: Reserves all the frames in the card. Number of prints .12.23 23 45 FRAME PRINT ORDERED ( 28 ) CANCEL SELECT Card print reservation confirmation screen ( 28 ) SAVE The reservation data on the card is held in memory even when the camera is turned off.
-
Page 78: Operations Available With Your Pc
VIEWING OPTIONS Operations Available with Your PC You can download images from the camera to a PC and take advantage of PC-based image processing and other features provided with commercially available application software. Processing images using CAMEDIA Master What you can do with your PC depends on the software running on your PC and on its operating environment. -
Page 79: Finding The Best Way To Download Image Data To Your Pc
Does your PC have a built-in floppy disk drive? Does your PC have a built-in PC card slot? Consult your nearest Olympus representative. See the list on the back cover of this manual. USB cable SmartMedia reader/writer FlashPath floppy disk adapter... - Page 80 VIEWING OPTIONS Connecting the Camera to Your PC through the Dedicated USB Cable You can use the dedicated USB cable to download images shot with this camera to your PC. If your PC does not have a USB interface, refer to Page 79 to find the best way to download image data to your PC.
-
Page 81: Connecting The Ac Adapter
When using the AC adapter with the batteries loaded It is recommended that you connect the optional AC adapter to the camera and remove the batteries from the camera before connecting the camera to PC. (When you don’t plan to use the AC adapter, make sure that the batteries are loaded in the camera.) If battery power runs out while the PC is accessing the card in the camera, the camera turns off in the middle of operation and this could destroy image files... -
Page 82: Pc Card Adapter
PC. (Note that you will need an appropriate application to open the image.) For the latest information regarding each equipment, consult authorized Olympus service center. USB SmartMedia reader/writer PC card adapter... - Page 83 (directory), it may not be possible to play back the image on the camera’s built-in monitor. It may not be possible to play back image files on the camera’s monitor if the files were saved using an application other than Olympus CAMEDIA Master. VIEWING OPTIONS...
-
Page 84: Downloading Image Data To Your Pc
Display button When using a Macintosh with OS 9* Page 85 * For details on operating procedure with Mac OS 8.6, consult authorized Olympus service center. Page 81). Page 72). to the USB port on your to the USB connector on... - Page 85 If the window is not displayed, go to step on Page 87. Select “Search for the best driver for your device” in the window shown on the left, and then click “Next”. Insert the provided Olympus CD-ROM into the PC.
- Page 86 VIEWING OPTIONS Check Click F:\USB\WIN98 Browse button If the window shown on the left is displayed automatically, press “close” to close it. After selecting “Specify a location” in the window shown on the left, specify the “Win 98” folder in the CD-ROM and click “Next”.
- Page 87 VIEWING OPTIONS Open “My Computer” on the desktop of the PC. Open “Removable Disk (E:)”. The figure shown on the left is displayed as is when the removable disk is set as the E drive. The camera may be assigned a different drive letter depending on what types of devices (MO disk drive, USB card reader/writer, etc.) are connected to your PC.
- Page 88 VIEWING OPTIONS When using a Macintosh with OS 9 Make sure the camera is properly connected to your PC. The desktop of the PC shows an “untitled” icon. Open “untitled”. Open the “DCIM” folder. Open the “100OLYMP” folder. Now you can view images (JPEG files).
- Page 89 Internet browsers such as Netscape Communicator and Microsoft Internet Explorer. For details, refer to your software user’s manual. For the latest optional equipment, visit the Olympus website or see the latest brochures. Some application programs (including OS accessory program and separately purchased software) write information such as rotation etc.
-
Page 91: Troubleshooting
Many problems with this camera can be solved easily without the help of Olympus service representatives. Simplified Operation Chart If an Alarm Message Is Displayed... -
Page 92: Simplified Operation Chart
TROUBLESHOOTING Simplified Operation Chart Refer to this chart whenever you’re not sure what the correct operation sequence is. For detailed descriptions of each operation, page references are provided in this chart. <Shooting mode> Open the lens barrier Close the lens barrier <Playback mode>... -
Page 93: If An Alarm Message Is Displayed
If an Alarm Message Is Displayed Warning Monitor Display Card absence NO CARD Card full CARD FULL Write protect CARD PROTECTED Card error CARD ERROR Playback error CAN NOT OPEN FILE No image NO PICTURE Card cover CARD-COVER OPEN Error Meaning Insert a card or, if it is already Card is not inserted or inserted, remove and insert it in the... -
Page 94: If An Operation Does Not Work
TROUBLESHOOTING If an Operation Does Not Work When the camera does not work properly Cause The camera power is off. Batteries are inserted the wrong way. The battery power is running out. Battery performance has dropped temporarily due to cold. The camera turned off automatically. - Page 95 When pressing the shutter button, the camera does not take a picture Cause The flash is not fully recharged or you pressed the shutter button while the camera is still processing the last shot. There is a problem with the card. The card is full.
- Page 96 The camera is in the Shooting mode. No image has been saved on the card in use. The digital camera is connected to a There is a problem with the card. When image protection, single-frame erasure, all-frame erasure or formatting is impossible...
-
Page 97: If Image Quality Is Poor
If Image Quality Is Poor When the image is too bright Cause The Flash mode is set to the Fill-in Flash mode. The subject was too brightly illuminated. When the image is too dark Cause You blocked the flash with your finger, etc. - Page 98 TROUBLESHOOTING When part of image is cut off Cause The lens was blocked by your finger or the strap. The subject shooting distance was too close. When the image is out of focus Cause The camera moved at the moment you pressed the shutter button (camera shake).
-
Page 99: Frequently Asked Questions
Frequently Asked Questions How can I maximize the battery life? Actual battery life is variable depending on the operating hours of the monitor, operating frequency of the flash, type of battery and temperature of the operating environment. As battery power consumption is particularly high when the monitor is on, it is recommended to turn the monitor off whenever possible. - Page 100 TROUBLESHOOTING How should the camera be stored? Keep the camera away from dust, moisture and salt. Wipe the camera well and dry it spontaneously before storage. When the camera has been used at a beach, moisten a cloth in fresh water, ring the cloth well and wipe the camera with it. Do not use moth repellent when storing the camera.
-
Page 101: Specifications/Glossary Of Terms
SPECIFICATIONS GLOSSARY OF TERMS Specifications Glossary of Terms... -
Page 102: Specifications
: Full-auto TTL, presets (Clear Sky, Cloudy Sky, Incandescent Lamp and Fluorescent Lamp) : Olympus lens, 5 mm to 15 mm, F2.4 (W)/4.3(T), 8 elements in 7 groups (equivalent to 38 mm to 114 mm lens with 35 mm camera) : Digital ESP metering using image pickup device : F2.4/F5, F4.3/F9... - Page 103 Flash modes : Auto-Flash (automatic flash activation in low light and back light), Red-Eye Reduction Flash, Flash-Off, Fill-In Flash and Night Scene Autofocus : TTL system autofocus, contrast detection/focusing range from 0.2 m/8 in. to ∞ Self-timer : Operating time approx. 12 sec. External connectors : DC-IN connector, data input/output connector (USB), video output jack (NTSC mainly for North America or PAL mainly...
-
Page 104: Glossary Of Terms
Digital ESP Digital zoom DPOF Used to power the digital camera from a household AC power. The use of this product is especially recommended when the camera is to be used for an extended period of time such as when it is connected to a PC. - Page 105 Error message Displayed when there is an error in operation. Exposure compensation This feature makes it possible to brighten or darken the images by varying the camera’s exposure. Fill-In Flash In this Flash mode, the flash fires every time an image is shot regardless of available light.
- Page 106 SPECIFICATIONS/GLOSSARY OF TERMS Macro mode Monitor Monitor adjustment Night Scene Number of shootable images Optical zoom Playback mode menu Protection This mode is useful when shooting subjects at close distances. When you shoot at a distance of 0.5 m/1.6 ft. or less, use the Macro mode.
- Page 107 This function displays multiple images one after another in sequence when in the Playback mode. SmartMedia A type of memory card to be used to store photographs taken with a digital camera. Software Application programs used by a PC. USB cable...
- Page 108 (Customer support) Tel. 0426-42-7499 Tokyo OLYMPUS AMERICA INC. Two Corporate Center Drive, Melville, NY 11747-3157, U.S.A. Tel. 631-844-5000 (Technical support) Tel. 1-888-553-4448 distec@olympus.com OLYMPUS OPTICAL CO. (EUROPA) GMBH. (Premises/Goods delivery) Wendenstraße 14-18, 20097 Hamburg, Germany Tel. 040-237730 (Letters) Postfach 10 49 08, 20034 Hamburg, Germany...