Table of Contents
Advertisement
Advertisement
Table of Contents

Related Manuals for NDS EndoVue SC-SX19


Summary of Contents for NDS EndoVue SC-SX19
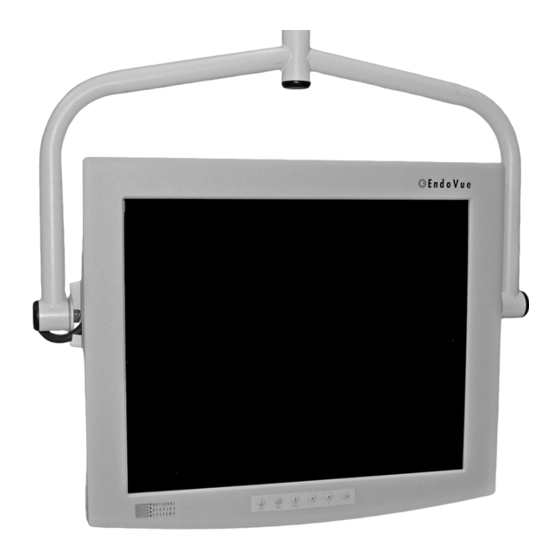
- Page 1 EndoVue Surgical Displays Desk Top or Wall Mount...
-
Page 3: Table Of Contents
Table of Contents Tab 1 Safety Considerations ---------------------------------------------------------------------------- ii Declaration of Conformity ----------------------------------------------------------------------iii Limited Warranty ---------------------------------------------------------------------------------iii Tab 2 About This Manual --------------------------------------------------------------------------------1 Quick Startup ---------------------------------------------------------------------------------------1 Powering On The Unit -------------------------------------------------------------------------1 First Time Users and Initial Test --------------------------------------------------------------1 Tab 3 Connector Panels ----------------------------------------------------------------------------------2 Display Mounting to Base -----------------------------------------------------------------------3 Tab 4 Control ----------------------------------------------------------------------------------------------4... - Page 4 CAUTION This symbol alerts the user that important literature concerning the operation of this unit has been included. Therefore, it should be read carefully in order to avoid potential problems. This symbol warns user that un-insulated voltage within the unit may have sufficient magnitude to cause electrical shock.
-
Page 5: Declaration Of Conformity
Proof of Purchase will be required by NDS to substantiate date of purchase. Such proof of purchase must be an original bill of sale or receipt containing the name and address of the seller and the purchaser and the serial number of the product. -
Page 6: About This Manual
EndoVue display. Apply power to the peripheral device, then to the display. The National Display Systems (NDS) logo is displayed, followed shortly by video. The electronics, designed by NDS, incorporates proprietary SmartSync™ technology which at initialization, examines the incoming signal and automatically displays the video image in its proper format. This eliminates making adjustments to most video sources. -
Page 7: Connector Panels
Connector Panels EndoVue 19 EndoVue 19 with SDI EndoVue 15 EndoVue 15 with SDI Notes 1. An S-Video signal may be applied via 2 BNC terminated cables to the Y and C labeled BNC connectors or a DIN 4 terminated cable, but not both. 2. -
Page 8: Display Mounting To Base
Display Mounting to Stand Attach the stand to the display using the four supplied thumbscrews. Note: Display Stand is an optional accessory. Order Part Number: 26B0063... -
Page 9: Tab 4 Control
Control The EndoVue displays are controlled via a 6 button keypad. The keypad, located on the bottom front of the display, allows the user to make adjustments to various display parameters using the On Screen Menus (OSM) system. Image Adjustments Adjust Brightness Press the Brightness / Contrast button to display the Brightness control. -
Page 10: Tab
Menu Systems Overview Press the MENU button once to open the Menu System. The current video input is shown in the Display Mode tab on the top right of the menu. The Menu System opens with Picture menu displayed. Press the button to select the menu you want to work with, then press the SCROLL button to select the parameter. -
Page 11: Video Source
Video Source Inputs Menu When the display is powered on Auto Source Select looks at the previously selected video source first. If a signal is present it is displayed, otherwise Auto Source Select starts scanning the inputs for a signal. To switch to a different input source, press the INPUT button to open the input menu. -
Page 12: Display Set
Setting Up the Display SDI Picture Menu S-Video Picture Menu Composite Picture Menu Horizontal Position Moves the image to the left or right. Press to horizontally center the image. Vertical Position Moves the image up or down. Press to vertically center the image. Sharpness Press to adjust the sharpness (focus) of the displayed image. -
Page 13: Vga Picture Menu
Image may be displayed with black bars on the top and bottom and on the left and right. Select using buttons. SmartSync™ On initialization NDS’ proprietary SmartSync™ technology examines the incoming signal and automatically displays the video image in its proper format. To run select SmartSync™ and press the button. When the input is RGBS the resolution toggles from 737 x 464 to 720 x 480 or vice versa each time SmartSync™... -
Page 14: Color Menus
Color Menus SDI, RGBS, YPbPr, S-Video and Composite Gamma (VGA) Press to select a preset Gamma, Video or PACS Notes: 1. Video is a color corrected Look Up Table (LUT) available with VGA. 2. Picture Archive Communications System (PACS) is a DICOM-like LUT available with VGA. Saturation (SDI, RGBS, YPbPr, S-Video and Composite) Press to set the saturation (color intensity) of the image. -
Page 15: Setup Menu
Setup Menu Menu Position Places the menu in 1 of 9 predefined screen positions. Press the button to select any of the 9 screen positions. Language Selects 1 of 7 languages: English, Deutsch, Francais, Italiano, Scandinavia, Espanol or Dutch. Press the button to select any of the 7 languages. -
Page 16: Defaults Menu
Defaults Menu Factory Defaults Displays Restoring Factory Defaults message and returns all settings to their factory preset values. Press the SCROLL button to highlight Factory Defaults, then press the button. User Defaults Allows up to five customized user settings to be saved. Setting User Defaults 1. -
Page 17: Troubleshooting
The image should have one column off the screen on the right side if the Frequency is set correctly. Black Screen Power the display Off and On. If the NDS logo appears then the display is working properly. Check if the power management feature (DPMS) is enabled. An “Out of Range” message appears in the upper left hand corner when an input source is out of the display’s resolution range. -
Page 18: Drawing And Dimensions
Drawing and Dimensions EndoVue 15 Display Stand is an optional accessory. Order Part Number: 26B0063... -
Page 19: Endovue 19
EndoVue 19... -
Page 20: Data Connectors And Pin Outs
Serial and / or Touch Screen Control Pin Name Description RXD Touch Screen Data Receive TXD Flash Upgrade & Touch Screen Transmit GND Ground RXD Flash Upgrade Receive Data Note: The following cables are available from NDS. Flash Upgrade Cable order part number: 35Z0009... -
Page 21: Power Connector And Pin Out
Power Connector and Pin Out 24 volt connector + 24 Shield 24 Volt Extension Cables Note: Use of an extension cable may invalidate the unit’s UL Classification. Use only copper wire for power wiring. Power extension cable shall be constructed in accordance with applicable hospital and electrical codes. -
Page 22: Tab 9 Specifications
Specifications Model SC-X15 SC-SX19 Viewable Diagonal (inches) 15.0 19.0 Brightness (cd/m², typical) Native Resolution 1024 x 768 1280 x 1024 Dot Pitch (mm) .297 .294 170° 170° Vertical Viewing Angle 170° 170° Horizontal Viewing Angle Contrast Ratio (nominal) 500:1 600:1 Vertical Freq (Hz, max) Bandwidth (MHz, max) 0.7 V p-p... -
Page 23: Video Inputs
The information disclosed in this document, including all designs and related materials, is the valuable property of NDS and / or its licensors and, as appropriate, they reserve all patent, copyright, and other proprietary rights to this document, including all design, manufacturing reproduction, use, and sales rights thereto, except to the extent said rights are expressly granted to others. -
Page 24: Contact
NDS North America National Display Systems Europe Corporate Headquarters Nijverheidscentrum 2D 16245 Vineyard Blvd. 2761 JP Zevenhuizen (ZH) Morgan Hill, CA 95037 The Netherlands Tel: 408.776.0085 Tel: 0031 180 63 43 56 Fax: 408.776.9878 Fax: 0031 180 63 21 91 E Mail: support@nationaldisplay.com...