
Related Manuals for NDS Radiance Ultra SERIES


Summary of Contents for NDS Radiance Ultra SERIES
-
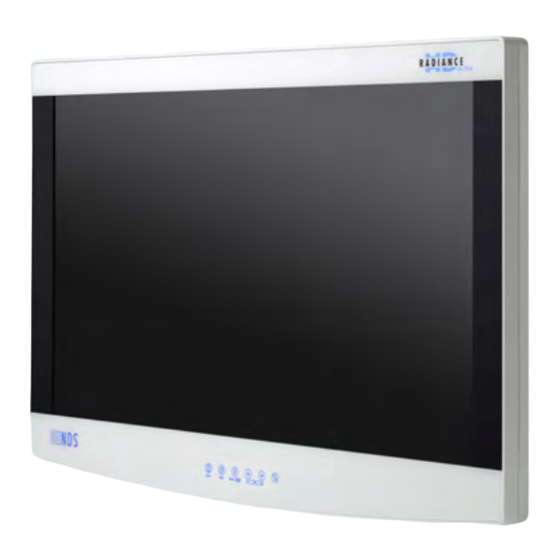
Page 1: User Manual
Radiance® Ultra with optional ZeroWire Embedded Wireless Technology USER MANUAL ENGLISH... - Page 3 © 2016 NDS Surgical Imaging, LLC. All rights reserved. Information in this document has been carefully checked for accuracy; however, no guarantee is given to the correctness of the contents. This document is subject to change without notice. NDSsi provides this information as reference only.
-
Page 5: Table Of Contents
Table of Contents Safety Information ................. .iii Warnings and Cautions . - Page 6 Specifications and Supported Resolutions............23 Specifications.
-
Page 7: Safety Information
Safety Information Warnings and Cautions This symbol alerts the user that important information regarding the installation and/or operation of this equipment follows. Information preceded by this symbol should be read carefully in order to avoid damage to the equipment. This symbol warns the user that un-insulated voltage within the unit may have sufficient magnitude to cause electrical shock. -
Page 8: Intended Use And Contraindications
Note: If your display is configured with embedded ZeroWire, please refer to the ZeroWire “Intended Use and Contraindications” statement on page 25. Intended Use Radiance Ultra series monitors are intended for use in a medical environment to display high quality video and graphic images. Contraindications 1. -
Page 9: Terms And Conditions
NDS neither assumes nor authorizes any person to assume for it any other liabilities in conjunction with and/or related to the sale and/or use of its products. To ensure proper use, handling and care of NDS products, customers should consult the product specific literature, instruction manual, and/or labeling included with the product or otherwise available. - Page 10 COMMERCIAL USAGE, CUSTOM, TRADE OR OTHERWISE, ARE HEREBY EXPRESSLY EXCLUDED AND DISCLAIMED. NDS, its suppliers and/or distributors are not liable, directly or by way of indemnity for any special, incidental, consequential, punitive, exemplary or indirect damages, including but not limited to alleged damages for...
-
Page 11: Display User Interface
Display User Interface Display Keypad The Display Keypad is centered on the lower front surface of the display enclosure, providing controls for adjustment of display parameters using the On Screen Display (OSD) Menu system. Menu Navigation MENU Buttons: Open the OSD Menus To open the Input Menu (see page 2), tap the INPUT button twice. -
Page 12: Input Menu
Input Menu The Primary image is designated by selection of a Primary input. If a Secondary input is selected, the Primary image will share the screen display with a Secondary image that is presented in configurations ranging from small to large Picture-In-Picture (PIP) to equal halves of Split-Screen displays, as shown on page 12. To select Primary and Secondary Inputs from a single display, tap the INPUT button twice to access the... -
Page 13: Display Menu
Display Menu To open the Display Menu, tap the MENU button. The ZeroWire Menu displays by default, with details of the current Primary and Secondary inputs listed left and right across the top of the menu above the menu tabs. To select other menus, tap the buttons to highlight the menu tab, then tap the... -
Page 14: Zerowire Receiver Status Messages
At the ZeroWire embedded Receiver display, begin the ZeroWire linking process by tapping the button. The display of the ZeroWire embedded Receiver unit will go black when the Primary Input is automatically switched to ZeroWire. A series of linking status messages in the lower corner of the display will indicate progressive stages in the linking process. -
Page 15: Picture Menu
Picture Menu To access the Picture Menu, tap the button once after opening the Display Menu. Picture Menu Parameters Horizontal Position To horizontally center the image, tap the buttons. Vertical Position To vertically center the image, tap the buttons. H-Sharpness To increase sharpness (edge enhancement) of the displayed image in the Horizontal plane, tap the buttons. - Page 16 SmartSync™/Alternative Modes: (VGA, RGBS, YPbPr, and SOG only) NDS proprietary SmartSync technology examines incoming signals to automatically display the video image in its proper format. Alternative Modes are used to manually distinguish between modes whose timing characteristics are very close.
-
Page 17: Color Menu
To select a color correction setting, tap the buttons. User: Default values replaced by user modified settings. NDS: Factory calibrated to match NDS specifications of 2.2 gamma/6500K color temperature. SMPTE-C: Factory calibrated to meet the SPMTE-C standard. BT-709: Factory calibrated to meet the BT-709 standard. -
Page 18: Setup Menu
MENU UNLOCKED message displays. Communication Port To select a Communication Port for control of the display using NDS Unified Serial Commands, tap the buttons. For connector details, see “Data Connectors and Pinouts” on page 18. RS-232: Connect an RJ-25 cable to the RS-232 port. - Page 19 DVI-1 Output To change Redrive or Screen settings, tap the button, which toggles selection between the two settings. Redrive: Outputs DVI-1 signal input to DVI-1 RE-DRIVE (Output) connector. Screen: Outputs display image, including PIP and OSD, to the DVI-1 RE-DRIVE (Output) connector. Display Image DVI-1 + VGA Redrive...
- Page 20 User Defaults To save changes to default parameters in a User Default profile, tap the button to select a User Defaults SCROLL profile marked “Empty, ” and tap the button to save the profile. The “Saving User Defaults” message displays while processing.
- Page 21 To enable the dynamic IP setting, tap the SCROLL button until the DHCP (Dynamic Host Configuration Protocol) checkbox is highlighted blue, and then tap either of the buttons to toggle DHCP on or off. With DHCP on, Network IP address, Subnet Mask and Gateway are disabled because they will automatically be configured when the unit is connected to a network supporting automatic setup.
-
Page 22: Picture In Picture Controls
Picture In Picture Controls PIP: Secondary Image Size Control When starting with only a Primary input selected, selecting a Secondary input will first display as a Small PIP image. To change the size of a Secondary image, close OSD Menus, and tap the buttons to scroll through the PIP modes described below. -
Page 23: General Purpose Input/Output
General Purpose Input/Output The General Purpose Input/Output (GPIO) control allows the user to step through the Secondary image sizes and swap the Primary and Secondary images as described on page 12, and to display a Record indicator in the upper left corner of the display. - Page 24 14 | Display User Interface...
-
Page 25: Enclosure Assembly And Cleaning
Enclosure Assembly and Cleaning Cable Cover Installation 1. Connect power, control, and video cables before installing the cable cover. 2. Align the cable cover to the cable well recess on the back of the display. 3. Slide the cable cover forward into the recess, with cables positioned under the cut-outs. 4. - Page 26 16 | Enclosure Assembly and Cleaning...
-
Page 27: Connector Panels Overview
Connector Panels Overview Radiance Ultra Product Configurations Secondary Board Product Configurations Configurations Digital Analog Product ZeroWire Input/ Input/ Input/ Number 27" 32" Receiver TruColor Output Output Output 90R0100 90R0102 90R0104 90R0106 ... -
Page 28: Data Connectors And Pinouts
Data Connectors and Pinouts DVI-I Digital and Analog DVI-I IN Supports digital and analog (RGBS / YPbPr) signals. Analog data appears on pin 8, and pins C1 - C5. C1 C2 C5 C5 C3 C4 Pin Signal Pin Signal Pin Signal T.M.D.S. -
Page 29: Control Connectors And Pinouts
No Connection Transmit Return Receive No Connection No Connection Receive Return No Connection No Connection Flash Upgrade Cable, part number 35Z0047, is available from NDS. Name Description +5 VDC Data Transmit Return Data Transmit Ground Connector Panels Overview | 19... -
Page 30: Rj-11 (6 Pin) Rs-232 Serial Control
RJ-11 (6 pin) RS-232 Serial Control RJ-11 Serial Command Adapter Cable, part number 35Z0093, is available from NDS. Name Description No Connection No Connection No Connection Receive Ground Transmit General Purpose Input/Output Connector RJH 4-pin Telephone Handset Connector Name Description... -
Page 31: Power Connector And Pinout
Power Connector and Pinout 24 VDC Connector Name Description Ground Ground +24 VDC Power Input Electrical Symbols Equipotentiality This symbol appears next to the display Potential Equalization Conductor (ground post). Closed (On) Switch This symbol appears on the closed, or on, side of the display On/Off switch. Open (Off) Switch This symbol appears on the open, or off, side of the display On/Off switch. - Page 32 22 | Connector Panels Overview...
-
Page 33: Specifications And Supported Resolutions
Specifications and Supported Resolutions Specifications Specifications are subject to change without notice. Contact factory for current specifications. Radiance Ultra 27” Radiance Ultra 32” Radiance Ultra 32” TruColor Viewing Area (Diagonal) 27.0 in. (685 mm) 31.5 in. (800 mm) 31.5 in. (800 mm) Typical Luminance (cd/m Native Resolution... -
Page 34: Supported Resolutions
Supported Resolutions DVI Supported Resolutions Signal Parameter Supported Range Active Resolution (Horizontal x Vertical) 640 x 480 min to 1920 x 1200 max Refresh Rate (Vertical Frequency) 23.98 Hz up to 85 HZ Pixel Clock (Pixel Frequency) 25 MHz up to 165 MHz The DVI-D input can automatically detect any valid digital DVI signal within the resolution, vertical refresh, and pixel clock ranges specified in the table above. -
Page 35: Zerowire® Embedded Technology
ZeroWire Receiver for display of images during endoscopic and general surgical procedures. The Radiance Ultra series and ZeroWire G2 wireless video system is a non-sterile reusable device not intended for use in the sterile field. -
Page 36: Zerowire Specifications
ZeroWire Specifications: The ZeroWire System provides wireless delivery of video signals from the DVI or 3G-SDI output of OR video sources to the DVI input of a video display. It operates as a 60Ghz-based wireless HD system in compliance with FCC (Part 15) rules governing the unlicensed 57-64 GHz band which is located in the millimeter-wave (mmW) portion of the electromagnetic spectrum. -
Page 37: Avoiding Co-Channel Interference
Avoiding Co-Channel Interference If the ZeroWire G2 deployment is a typical one-system per room, there are essentially no restrictions. The transmitter’s Channel Selection feature picks the channel that is least susceptible to interference from the two available channels based on the result of its scan at power on. Some of the factors affecting isolation of the ZeroWire G2 channels are listed below: 1. -
Page 38: Zerowire Transmitter Setup
ZeroWire G2 Transmitter ‘Y’ Adapter Cables ZeroWire G2 Transmitters and Receivers used with NDS supported displays of up to 32" can use an optional ‘Y’ adapter cable for powering the ZeroWire unit. Two types of ‘Y’ adapter cables are available. Where applicable, the appropriate Y-cable is included in the display accessory kit. -
Page 39: Zerowire G2 Transmitter Power Supplies
XLR ‘Y’ Adapter Cable (35X0097 ZeroWire G2 Transmitter Power Supplies ZeroWire Transmitter and Receiver units can be directly powered with the included 24 VDC power supply. J3 of the ‘Y’ adapter or 24 VDC power Supported 24 VDC supply cable power supply model connects here numbers... -
Page 40: Zerowire Quick Start Linking
ZeroWire Quick Start Linking 1. Connect a DVI or SDI video source to the display-mounted ZeroWire Transmitter. 2. On the receiving Radiance Ultra ZeroWire display, tap the button three times to access the Input Menu. INPUT 3. Confirm that ZeroWire is available as Primary input. 4. -
Page 41: Wireless Linking Status Messages
Wireless Linking Status Messages When initiating a link, the typical sequence of status messages presented on the Receiver display begins with “Searching for Transmitter” and a reminder to activate the Transmitter. Searching for Transmitter If not activated already, activate on ZeroWire Transmitter Stage 1: Searching for Transmitter - If not activated already, activate on ZeroWire Transmitter Establishing Link... - Page 42 Wireless Linked Stage 3: Wireless Linked If a link cannot be established or verified within 60 seconds, the “No Transmitter Found” status message will be presented on the Receiver display. For suggestions on how to solve linking problems, see “ZeroWire Troubleshooting”...
-
Page 43: Troubleshooting
Troubleshooting Display Troubleshooting Image Size is Large for the Screen (VGA, RGBS, YPbPr, or SOG analog inputs only) If the image does not appear to be the correct format, then SmartSync must be run. To run SmartSync, press the MENU button. In the Picture Menu, tap the SCROLL button to highlight SmartSync and tap the button. -
Page 44: Zerowire Troubleshooting
Y' Cable: If you are using the ‘Y’ cable to supply power to the ZeroWire display-mounted transformer, confirm that it is connected to an NDS 24VDC power supply and that the power supply is energized. Stand Alone Power Supply: If the stand alone power supply is being used confirm that it is fully inserted into the wall socket. -
Page 45: Electromagnetic Compatibility Tables
Electromagnetic Compatibility Tables ZeroWire has been tested in an OR environment and the product did not interfere with electrosurgical, ultrasound, X-Ray, medical displays and life monitoring equipment. Neither did the aforementioned equipment interfere with ZeroWire. Additionally, since ZeroWire operates in 57 – 64 GHz, typically wireless LAN and mobile phones will not cause interference as they operate outside the ZeroWire frequency range. -
Page 46: Electromagnetic Emissions
Electromagnetic Emissions Guidance and manufacturer’s declaration; electromagnetic emissions The product is intended for use in the electromagnetic environment specified below. The customer or the user of the product should assure that it is used in such an environment. Emissions Compliance Electromagnetic environment-- guidance RF emissions Group 1... - Page 47 Guidance and manufacturer’s declaration; electromagnetic immunity The product is intended for use in the electromagnetic environment specified below. The customer or the user of the product should assure that it is used in such an environment. Immunity test IEC 60601 test level Compliance level Electromagnetic environment - guidance Portable and mobile RF communications equipment should be used no closer to any part of the product, including cables, than the recommended separation distance calculated from the...
-
Page 48: Recommended Separation Distances
Recommended Separation Distances Recommended separation distances between portable and mobile RF communications equipment and the product The product is intended for use in an electromagnetic environment in which radiated RF disturbances are controlled. The customer or the user of the product can help prevent electromagnetic interference by maintaining a minimum distance between portable and mobile RF communications equipment (transmitters) and the product as recommended below, according to the maximum output power of the communications equipment. -
Page 50: Contact
Corporate Headquarters 5750 Hellyer Ave San Jose, CA 95138 408 776 0085 info@ndssi.com Europe GSI Distribution (USD) GmbH Münchner Strasse 2A 82152 Planegg Germany +49 89 31 707 100 info.gsig-europe@gsig.com Asia Pacific East Square Omori 6-20-14 Minamioi, Shinagawa-ku Tokyo 140-0013 Japan +81 3 5753 2466 info@ndssi.jp...