Advertisement
Table of Contents
- 1 Table of Contents
- 2 Contents
- 3 Identification of Safety Symbols
- 4 Specifications
- 5 Safety Rules
- 6 Packing List
- 7 Assembly
- 8 Operation
- 9 Maintenance
- 10 Service and Adjustments
- 11 Environmentally Safe Battery Disposal
- 12 Troubleshooting Table
- 13 Limited Warranty
- 14 Exploded View
- Download this manual
Advertisement
Table of Contents

Related Manuals for Snapper SP60V


Summary of Contents for Snapper SP60V
- Page 1 21” 60V Lawn Mower Model SP60V SNAPPER IS A TRADEMARK OF BRIGGS & STRATTON POWER PRODUCTS GROUP, LLC AND IS USED UNDER LICENSE Rev. 01 11/20/15...
-
Page 2: Table Of Contents
TABLE OF CONTENTS Contents Maintenance Identification of Safety Symbols Service and Adjustments Specifications Environmentally safe battery disposal Safety Rules Troubleshooting Table Packing List Limited Warranty Assembly Exploded View Operation Parts List IDENTIFICATION OF SAFETY SYMBOLS SYMBOL NAME DESIGNATION/EXPLANATION Volts Voltage Amperes Current Hertz... -
Page 3: Specifications
SYMBOL NAME DESIGNATION/EXPLANATION Keep Bystanders Away Keep Bystanders Away Keep hands and feet away from blade and Keep Hands and Feet Away cutting area. No Reach Do not reach hands or feet under mower deck. Do not operate on inclines greater than 15º. No Slope Mow across the face of slopes, never up and down. -
Page 4: Safety Rules
SAFETY RULES or jewelry that can get caught in moving WARNING: Read and understand all parts. The wearing of protective gloves and instructions before using this product. Failure safety footwear is recommended. to follow all instructions listed below may result in electric shock, fire, and/or serious personal •... - Page 5 • Maintain lawn mower. Keep cutting edges batteries, other batteries may cause injury or sharp and clean for best and safety damage to the mower. Use with Snapper 60V performance. Batteries (Model # SBA260V, SBA460V) . • If lawn mower strikes a foreign objects...
- Page 6 reduce the risk of serious personal injury, do from the mower by pulling the charger cord. not store outside or in vehicles. • Do not use a damaged charger. Replace the charger cords or the charger immediately. • Under extreme usage or temperature conditions, battery leakage may occur.
-
Page 7: Packing List
PACKING LIST PART NAME FIGURE PART NO. Lawn Mower Mulching Plug Side Discharge Chute Grass Catcher Bag Handle Knob Handle Bolt 60V Battery (Model # SBA460V) 60V Charger (Model # SCH60V) Owner’s Manual Quick Start Guide... -
Page 8: Assembly
ASSEMBLY UNPACKING • If a cable is damaged, contact an Authorized Service Dealer. This product requires assembly. • Carefully remove the product and any • Pull and rotate the handle knobs (1) 90° accessories from the box. Make sure that all to the unlocked position on both sides to items listed in the packing list are included. - Page 9 INSTALLING THE UPPER HANDLE • Align the upper handle (1) with the lower handle (2) on both sides. Slide the handle bolts (3) through the holes in the handles and tighten with the handle knobs (4) on both sides. If the connection is not stiff, hand tighten the handle knobs.
- Page 10 INSTALLING SIDE DISCHARGE TO INSTALL BATTERY PACK CHUTE • Lift and hold up the battery door (1). • Lift the side discharge cover (1). • Align the battery (2) with the mower’s battery port. • Align the grooves (2) on the discharge chute (3) with the pins (4) on the underside of the •...
-
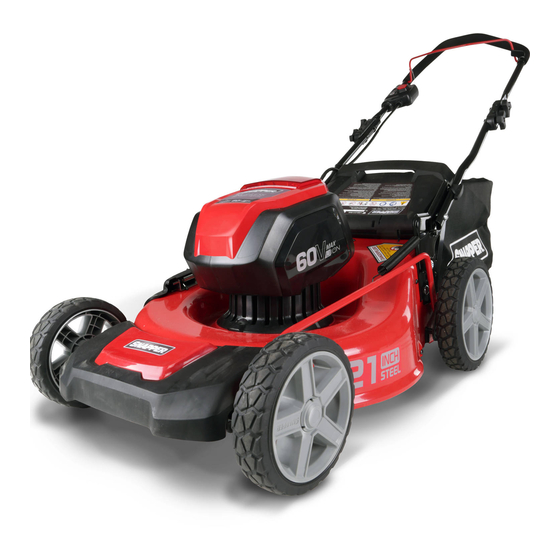
Page 11: Operation
Lower Handle knobs Height handle Upper adjustment handle lever Battery door Side discharge cover Grass catcher Handle knobs Rear chute cover Rear wheel Front wheel Side discharge Mulching chute plug SNAPPER SNAPPER 60V Battery 60V Charger (Model#: SBA460V) (Model#: SCH60V) - Page 12 STARTING/STOPPING THE MOWER WARNING: Ensure that other people and pets remain at least 100 feet (30 m) away To start the motor: when the mower is in use. • Open the battery door. INSPECT THE CUTTING AREA. Remove all • Insert the battery. stones, sticks, wire, bones, and other debris that •...
- Page 13 SLOPE GAUGE to prevent electric shock, do not operate the mower in damp or wet conditions. WARNING: Slopes are a major factor • Do not mow in circles. Travel back and forth related to accidents involving slips and falls, across the lawn. which can result in severe injury.
- Page 14 EMPTYING THE GRASS CATCHER • Stop mower, allow blades to completely stop, and remove the battery. • Lift the rear discharge cover. • Lift the grass catcher bag by its handle to remove from mower. • Empty grass clippings. • Lift the rear discharge cover and reinstall the grass catcher bag as described earlier in this manual.
-
Page 15: Maintenance
ALWAYS remove the battery when servicing or transporting the mower. Use only SNAPPER replacement blade (Model# 2900519). • REMOVE BATTERY. • While wearing leather padded gloves,... - Page 16 MAINTENANCE STORING THE MOWER The following steps should be taken in order to prepare the lawn mower for storage. • Clean the mower as described in the previous section. • Inspect the blade, and replace it or sharpen it, if required (refer to the Maintenance section).
-
Page 17: Service And Adjustments
SERVICE AND ADJUSTMENTS • When servicing the mower, use only and damage, which could expose moving identical replacement parts that are parts or allow objects to be thrown. As a available from the manufacturer. In order safety precaution, check these components to obtain replacement parts, call the frequently, and immediately replace any toll-free helpline, at 1-800-317-7833. -
Page 18: Environmentally Safe Battery Disposal
ENVIRONMENTALLY SAFE BATTERY DISPOSAL The batteries used in this mower's battery pack contain the following toxic and corrosive material: LITHIUM-ION. WARNING: Toxic materials must be disposed of in a specified manner in order to prevent contamination of the environment. Before disposing of damaged or worn out Lithium-Ion battery packs, contact your local waste disposal agency for information and specific instructions. -
Page 19: Troubleshooting Table
TROUBLESHOOTING TABLE PROBLEM POSSIBLE CAUSE SOLUTION The battery is not charged. Charge the battery. The switch is defective. Replace the switch (call the tollfree helpline, at 1-800-317-7833). Grass jammed between the Remove battery; check under deck for The mower does deck and blade. -
Page 20: Limited Warranty
4. Routine maintenance items such as lubricants, blade sharpening; 5. Normal deterioration of the exterior finish due to use or exposure. SNAPPER HELPLINE Warranty service is available by calling the Snapper toll-free helpline, 9 a.m. to 5 p.m. EST. at 1-800-317-7833... -
Page 21: Exploded View
EXPLODED VIEW 4 25... - Page 22 PARTS LIST ITEM NO. PART NO. DESCRIPTION 311121519 Upper handle assembly 311031519 Lower handles 32910131 Nut M10 3221637 Bolt M10x20 341011179 Back panel 311131519 Grass Flap 341251179 Rear cover 332111179 Torsional spring(rear cover) 332021179 Axle (rear cover) 3290506 Split washer 8 342031179 Rubber pad (Height adjustment bracket) 333011519...