Advertisement
Table of Contents
- 1 How Your Serger Operates
- 2 Getting Ready to Sew
- 3 Stitch Length Adjustment
- 4 Stitch Width Adjustment
- 5 Presser Foot Adjustment
- 6 Three - Thread Serging
- 7 Two - Thread Serging
- 8 Differential Feed Adjustment
- 9 Specialty Threads
- 10 Replacing Needles
- 11 Replacing Knives
- 12 Replacing a Light Bulb
- 13 Troubleshooting Guide
- 14 Specification
- 15 Do's and Don'ts
- Download this manual
Advertisement
Table of Contents

Related Manuals for Baby Lock Pro Line BL4-838D


Summary of Contents for Baby Lock Pro Line BL4-838D
- Page 1 WWW.MANUALSONCD.COM Downloaded from www.Manualsoncd.com...
- Page 2 CONGRATULATIONS! You are now entering an exciting new era in sewing. As an owner of the Baby Lock you have become a part of the serger sewing revolution, opening the door to new adventures and possibilities in your sewing creativity.
- Page 3 Downloaded from www.Manualsoncd.com...
-
Page 4: How Your Serger Operates
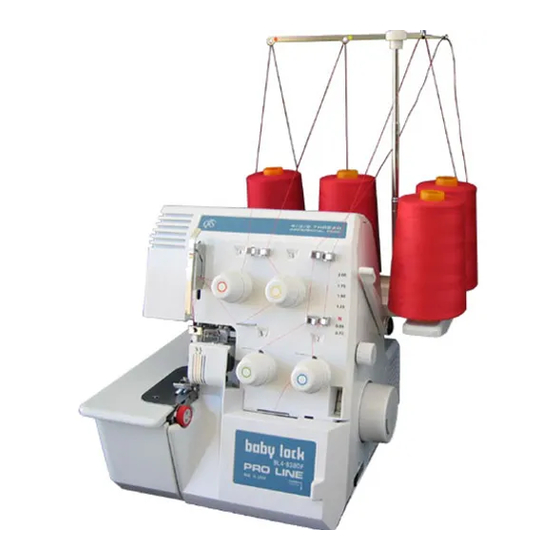
Turn the handwheel (toward you) and watch the movement and operation of the various parts. Don’t bother about fabric right now. It does not hurt your Baby Lock serger to stitch without fabric under the presser foot. - Page 5 1 – 2 Parts of the machine Downloaded from www.Manualsoncd.com...
-
Page 6: Getting Ready To Sew
2 – 1 Setting up your machine After removing Styrofoam packing materials from the box, gently lift your Baby Lock serger by grasping the handle provided on the top of the machine. Place on a serger sewing table or any level surface providing ample work area to the left of the machine. - Page 7 2 – 3 Thread All types of thread may be used on your Baby Lock, but you will find that 100% long – staple polyester thread, cross wound on a cone will consistenly provide the best stitch performance. Because the threads pass through many thread guides at a fast pace it is important that the thread be of uniform thickness, high strength, and allow a minimum amount of linting.
- Page 8 2 – 4 Threading Method I – Tying on The fastest and easiest way to thread your Baby Lock is to cut off the unwanted thread and tie its end to the beginning of the new thread, as follows: 1. Clip the existing thread just above its cone/ spool.
- Page 9 2 – 5 Threading Method II – Manual If thread breaks or is allowed to run out, it will be necessary to rethread manually. A threading diagram is conveniently located on the inside of the front cover of the machine. It is important that manual threading be done in the following sequence: A.
- Page 10 C. Right needle Place thread on the second (yellow) spindle and follow the yellow color – coded path, ending with the right needle. D. Left needle Place thread on the far – left (orange) spindle and follow the orange color – coded path, ending with the left needle.
- Page 11 2 – 6 How to use the needle threader 1. Rotate the handwheel and bring the needles to their highest position. (You can find this position through the stitch length indicator window, see page 12). 2. Turn the needle threader dial clockwise until the threading hook comes through the eye of the needle.
- Page 12 2 – 7 Knives The two devices used to perform cutting are referred to as knives – the upper knife and lower knife – located at the right edge of the needle plate. Unlike household knives, they are approximately 1/16” thick, and pose no danger in handling.
-
Page 13: Stitch Length Adjustment
3 STITCH LENGTH ADJUSTMENT The serger is pre – set for a stitch length of 3 mm. This equals about 10 stitches per inch which is ideal for seaming and Overedging most fabrics. For narrow rolled edging, overedging or seaming very light weight fabrics you may prefer a shorter length. -
Page 14: Stitch Width Adjustment
4 STITCH WIDTH ADJUSTMENT The machine is pre – set for stitch width of 3.5 mm (5.7 mm). Stitch width can be widened by moving the stitch fingers apart, or narrowed by moving them closer together, within a range from 3.5 mm – 7.5 mm. Adjust the width according to the type of fabric used and the finished stitch appearance desired. -
Page 15: Presser Foot Adjustment
5 PRESSER FOOT ADJUSTMENT The pressure on your Baby Lock presser foot has been pre – adjusted at the factory and rarely needs adjustment. For very thick fabrics you might find it necessary to decrease the pressure on the presser foot in order for it to accommodate the thickness of the fabric and feed through smoothly. - Page 16 6 START SERGING When sewing on your serger you may leave the presser foot in the “down” position for most sewing applications. Begin by placing under the tip of the presser foot. As you step on the pedal, the feed dogs will move the fabric into the needle.
- Page 17 7 FOUR – THREAD SERGING Your serger is pre – set for four – thread serging, the most common mode of serger sewing. It provides a very durable yet fully stretchable seam or overedge on all types of fabric. With tensions properly set, the lower looper thread forms a flat, non –...
- Page 18 7 – 1 Overedging (Overcasting) When making a garment with 5/8” pressed open seams, you will find the most efficient method for finishing seam allowance is to serge all cut edges of each pattern piece prior to construction. Since notches will be cut away during serging, use a water soluble pen/pencil to mark location of any matching points.
- Page 19 7 – 4 Serging curves To serge around inside or outside curves, handle fabric as you do in conventional sewing, but guide your fabric into the knife, not the needle. Remember, cutting takes place before sewing. Also, since the long serger presser foot holds the fabric more securely, you may need to raise and lower the presser foot several times to work.
-
Page 20: Three - Thread Serging
* At the end of the seam Stitch 1 stitch off the end of the seam. Clear the stitch fingers (See page 15). Turn fabric over and reposition under the presser foot with the needle at the seam edge. Sew 5 – 6 stitches over the previous stitches, being careful not to cut previous stitches, then chain off the fabric. - Page 21 To convert your serger to narrow three – thread stitching (3.5 mm – 5.3 mm) snip the left – hand needle thread just above the eye. Remove the thread from the orange color – coded thread guides and remove the left needle. (Figure 50 ~ 51). NOTE: Please tighten the left –...
-
Page 22: Two - Thread Serging
9 TWO – THREAD SERGING Two – thread serging provides a decorative, but functional seam, known as the flatlock seam. On garments ranging from lingerie to fake – fur coats it produces flat, non – bulk seam. Use it to seam fake – fur fabrics, and you will find that the stitches “disappear”... - Page 23 When you are doing two – thread serging for the first time, use a medium weight fabric to sew a test sample for determining correct tension setting. Begin by setting needle tension to “1.5” and lower looper tension to “4”. Sew the sample. If threads are not balanced make adjustments according to illustrations. Record correct tension on chart, page 35.
- Page 24 9 – 3 Flatlock seams Flatlock seams are ideal for many fabrics, including interlock, spandex, tricot, sweatshirt fleece, fake – fur and synthetic suede. Flatlock seaming may be used on many woven fabrics, as well, but be sure to make a test seam first to determine whether it will have the necessary strength.
- Page 25 9 – 5 Blind Hemming It is possible to create a type of blindhem on your Baby Lock serger which will provide a sturdy finish for sportswear, childrens wear and home decorator items.
- Page 26 10 NARROW ROLLED EDGING The narrow rolled edge setting is used to achieve the narrowest (1.5 mm) stitch possible on your Baby Lock serger. It is used for seaming sheer and light weight fabrics, as well as edging and hemming all but heaviest fabrics.
- Page 27 10 – 2 Three – thread narrow rolled edge Use three – thread rolled edging to provide a secure seam or decorative edge on light to medium weight fabrics. Remove the stitch finger. (See steps 3 ~ 5, page 25). Remove left needle;...
- Page 28 10 – 4 Seaming sheers with rolled edge Use the three – thread narrow edge setting when sewing sheer fabrics which would normally require French seam finishing. The stitch length should be set at “2” and tension may be adjusted for a rolled or non – rolled finish, according to your preference.
-
Page 29: Differential Feed Adjustment
12 SPECIALTY THREADS There are a growing number of specialty threads available today which will sew well on your Baby Lock serger. They can be used to enhance appearance, add strength or elasticity, or create special effects, depending on the characteristics of the thread you choose. - Page 30 13 SPECIALTY THREAD GUIDE Synthetic Topstitch/ Soft, Stretchy Metallic Buttonhole Twist Nylon Edging or flatlock Excellent for providing Highly decorative edge APPLICATION seaming all type soft elastic seams on for sportswear, evening sportswear, home lingerie, swimwear, wear, holiday gifts and decorator items activewear, silky, rolled home décor.
- Page 31 Monofilament Lingerie/ Machine Silk or Rayon Pearl Cotton Nylon Embroidery Topstitch Crochet Cotton (Transparent) 2-ply Baby Yarn 1/16” Ribbon (Silk, Rayon) Fashion accessories, Lingerie, lightweight High luster edging or Edging or flatlock, home decorator items fabrics where stress is flatlock seaming for seaming of garments, requiring strong seams, not a factor, edging soft...
-
Page 32: Replacing Needles
14 REPLACING NEEDLES Raise needle to highest position by turning handwheel toward you. Loosen black needle clamp screw (use small 3. Insert new needle with flat side of the needle to the screwdriver) and remove needle. back and tighten needle clamp screw. Note: You will find it easier to hold the needle with the long tweezers rather tan between your fingers. -
Page 33: Replacing A Light Bulb
Replace lamp cover and tighten screw. 17 CLEANING Your Baby Lock serger will operate at best performance for many years if kept clean at all times. The cutting action of the serger creates much more lint than you will find on convential sewing machine. This lint impedes the efficiency of the serger and also acts as a sponge to draw oil from it. -
Page 34: Troubleshooting Guide
18 TROUBLE SHOOTING GUIDE Before taking your machine in for service, check the following: Machine fails to start … Are electrical plugs properly connected? Is the power switch turned on? Check household circuit breaker or fuse. * Thread breaks… Is machine threaded correctly? Check each thread guide, all tension discs. Did you unthread the needles before rethreading the lower looper? Is the needle inserted correctly? Is the needle blunt? -
Page 35: Specification
19 SPECIFICATION Item Specification Stitch width (standard) 3.5 ~ 7.5 mm Stitch width (narrow rolled edging) 1.5 mm (M) Stitch length 1 ~ 4 mm Number of threads 4, 3 or 2 thread Needle DC x 1F #11 or # 14 Maximum sewing speed 1500 rpm Machine weight... - Page 36 21 CHART FOR TENSION ADJUSTMENT TENSIONS FABRIC NEEDLE THREAD STITCH STITCH STITCH ORANGE YELLOW GREEN BLUE SIZE TYPE LENGTH WIDTH L Needle R Needle Upper looper Lower looper 4-thread seaming or overcastting 2 ~ 3 5.7 ~ 7.5 5 ~ 8 4 ~ 6 2 ~ 4 2 ~ 4...