Table of Contents
Advertisement
Advertisement
Table of Contents

Related Manuals for Zeiss Axio Zoom.V16


Summary of Contents for Zeiss Axio Zoom.V16
- Page 1 Stereo Zoom Light Microscopy - ZEISS Axio Zoom.V16...
-
Page 2: Table Of Contents
Contents Brief Description ..........................3 Reference ............................3 Location ............................3 Suggestion for “Materials and Methods” ..................3 Suggestion for “Acknowledgements” ................... 4 People and Contacts........................4 Optics ............................4 Features and Specifications ......................5 Objective ............................5 Filter-Sets ............................6 Additional Equipment ........................ -
Page 3: Brief Description
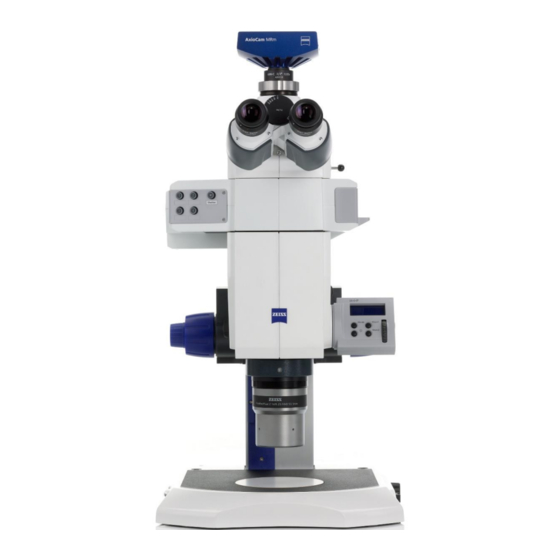
Brief Description Axio Zoom.V16 is a stereo microscope that successfully combines a large field of view, zoom, and working distance. Axio Zoom.V16 combines a 1x zoom with a numerical aperture of NA 0.25. It achieves a considerable numerical aperture for a medium zoom range: superior fluorescence brightness in large object fields. -
Page 4: Suggestion For "Acknowledgements
Suggestion for “Acknowledgements” This work was partially supported by PPBI - Portuguese Platform of BioImaging (PPBI- POCI-01-0145-FEDER-022122) co-funded by national funds from OE - "Orçamento de Estado" and by european funds from FEDER - "Fundo Europeu de Desenvolvimento Regional”. People and Contacts Adriano O. -
Page 5: Features And Specifications
• Objective nosepiece Z • Eyepieces: PL 10x/23 Br. foc. Objective • Magnification: 1x • Zeiss System: PlanNeoFluar Z • Class: Achromatic objective • Numerical Aperture (A): 0.25 • Free Working Distance (mm): 56 • Pixel Size for 0.7x (µm): 6.4857 •... -
Page 6: Filter-Sets
• Brand: Asus® • Model: i9S • Features: Intel I5 4460 up to 3.2 GHz (quad-core); 8GB RAM; 1TB HDD • OS: Windows 7 Professional • Available Software: Zeiss Zen 2.1 (blue edition) Monitor • Brand: Samsung • Model: S24C450B... -
Page 7: System Overview
System Overview WARNINGS and Advice • Before you get started for the first time on this microscope consult the responsible people for proper training • ONLY turn ON the lamp if it has been off for more than one hour •... -
Page 8: Potential Techniques
Do not forget to register your utilization in the logbook • A free software license is available for ZEN lite at ZEISS website. Install and use such version in your own personal computer for downstream image analysis (see Downstream Image Processing and Analysis) •... -
Page 9: Set Up
Set Up Sample Preparation Colony and Biofilm Observation This stereoscope allows visualization of colonies and biofilms previously grown/developed onto plates supplemented with any media. Simply place the plate in the centre of the transillumination base. Do not remove the cover. Initial Set Up 1. - Page 10 2.4. Computer 3. All motorized components will run through an initializing phase, including the SYCOP 3 (System Control Panel) 4. Meanwhile, in the computer’s desktop directory, run ZEN (blue edition) and select ZEN Pro 5. Place the specimen in the centre of the round insert plate 6.
- Page 11 7. Adjust the tube towards camera image acquisition by pulling out the control bar. Alternatively, if you only intend to use the eyepieces for visualization, please consult other guidelines (See Operating Manually) 8. Although you can operate the microscope in manual mode, without using ZEN 2.1 (See Operating Manually), we strongly advise you to use the available software for observation and image acquisition (Go to Single Image Acquisition or Visualization)
-
Page 12: Final Set Up
Final Set Up 1. Before you switch off the devices confirm the next user and if so, ask whether he or she will be using the microscope in the next hour 2. Remove the specimen from the transillumination base 3. If there is an interval of more than one hour to the next user, switch off the devices. -
Page 13: Zen 2.1 (Blue Edition) Guidelines
ZEN 2.1 (blue edition) Guidelines The ZEN 2.1 (blue edition) can be equipped with several modules, applications and licenses. This guideline is strictly specific for the ZEN 2.1 (blue edition) version available on the microscope’s computer. In other words, only for ZEN 2 pro on the computer. The ZEN 2.1 user interface is divided into three main areas. -
Page 14: Single Image Acquisition Or Visualization
Single Image Acquisition or Visualization 1. Go to the Locate tab 2. In the Favorites section, select the contrast method or filter set you would like to acquire or visualize The FL off mode activates the transmitted light and closes the shutter of incident light (switching off fluorescence optics). - Page 15 You can now pull the diaphragm slide slowly to the front for adjusting the light intensity. Notice that the bright field contrast method is regularly set as default (See Other Guidelines -> Contrast Methods and Filter Sets). Finally, once you finished the visualization in the FL off mode (transmitted light illumination), do not forget to close the transmitted light by moving the diaphragm slide until the front stop.
- Page 16 4. Click in the blue header of the Camera tool. Then, in the Settings section, select the adequate exposure time or Auto Exposure option. Although, it is possible to increase or decrease the Exposure Time during visualization as function of the fluorophores’ signal. To get back to the default settings, click in the Default button.
- Page 17 To increase or decrease the objective magnification in the SYCOP 3, go to the Microscope tab and select the magnification in the Function sub-tab – Joystick – Side Wheels Hint: When focusing on the Bright Field contrast method try to adjust slightly the diaphragm slide in order to obtain greater detail and contrast Hint: If you are getting problems focusing the sample, use the Min/Max button in the Histogram (Centre Screen Area ->...
-
Page 18: Multidimensional Image Acquisition (Multi-Channel Images)
Multidimensional Image Acquisition (Multi-Channel Images) 1. Go to the Acquisition tab You can create a new blank experiment. Alternatively, you can use one of the pre- set experiments. Try to follow the protocol until the end and then look at the pre-set experiments that may be useful for your experiment. - Page 19 5. To create the experiment, click in the Save button You have created a new blank experiment. For any change in the experiment, an asterisk (*) will appear after the file name. This means that the experiment was modified and not saved. Save your experiments from time to time to ensure that your settings are not lost.
- Page 20 9. In the Acquisition Block section, click in the Add New button. Add as many blocks as contrast methods/filter sets you would like to acquire. For instance, to acquire images of Bright Field, GFP, mRFP and YFP, four blocks must be added. This approach will generate one image for each contrast method and filter set.
- Page 21 If you have selected multiple contrast methods that require distinct illumination methods (e.g. Bright Field and Fluorescence), you must use the Wait block. To set a Wait block, just click in the Wait button. As it is strictly required to operate the diaphragm slide between transitions of transmitted and incident light (e.g.
- Page 22 11. Select the first block in the timeline of events 12. Now in the Acquisition Parameter group, click in the blue header of the Channels tool 13. Click in the + button to open the Add Dye or Contrast Method dialog...
- Page 23 14. Select the desired filter set (from the Dye Database) or contrast method (from the Contrasting Methods). You can search for a dye by entering its name (or starting letter) in the Search input field (See above the available Filter-Sets) 15.
- Page 24 16. Once you have selected a dye(s) or contrast method, one will be displayed in the Channels tool 17. Set the Exposure Time for each channel, just right beneath the channels list. There will be more than one channel in a multichannel block. Thus, the Exposure Time should be set one channel at a time 18.
- Page 25 19. To save the experiment together with all the settings, click in the Options button of the Experiment Manager section and select the Save entry !!! Save ONLY self-made-experiments!!! Do not save previously pre-set experiments, unless they are yours 20. Finally, select the first block of the timeline of events (in the Experiment Designer tool) and click in the Start Experiment button 21.
-
Page 26: Channel Combine Or Image Overlay
Channel Combine or Image Overlay 1. Go to the Processing tab 2. Click in the Single button 3. Click in the blue header of the Method tool... - Page 27 4. Click in the Utilities group to display the dropdown list of tools included in this category 5. Search for the Add Channel tool and click in it...
- Page 28 6. Click in the blue header of the Input tool 7. Select images of channels you would like to combine. To do so, click in the small preview image within the Input tool. You will see a preview of all open images. To select an image, just click in it 8.
- Page 29 9. Click in the blue header of the Output tool and select the Create New Output option only. Additionally, you can name the new image as you like by clicking in the Naming button 10. Finally, click in the Apply button.
-
Page 30: Extracting Single Fluorescence Images Of A Multichannel Image
Extracting Single Fluorescence Images of a Multichannel Image 1. Select the Processing tab. Open the Method tool and under Utilities select the entry Create Image Subset 2. In the Image Parameters group, open the Input tool and select the multichannel image as input 3. -
Page 31: Closing Zen 2.1
4. Finally, click in the Apply button. The single channel image will be displayed in the Centre Screen Area Closing ZEN 2.1 1. To end ZEN 2.1 software, go to File -> Exit. Alternatively, you can press ALT + F4 on your keyboard or click in the Close icon of the program bar. !!!Note: If you haven’t saved your files, the Save/Keep Documents dialog will open before the program closes. -
Page 32: Downstream Image Processing And Analysis
Downstream Image Processing and Analysis A free software license is available for ZEN lite at ZEISS website . Install https://www.zeiss.com/microscopy/int/products/microscope-software/zen-lite.html) and use such version in your own personal computer for downstream image analysis Open 1. Go to File -> Open 2. - Page 33 2. On the Display tab click in the 0.45 button. The display curve will be adapted to a gamma value of 0.45. This will set the optimum colour presentation. If you do not see this button activate the Show all mode 3.
-
Page 34: Add Scale Bar Or Arrows
Add Scale Bar or Arrows 1. In the Center Screen Area, select the Graphics tab 2. Click in the Scale Bar or Draw Arrow buttons. The scale bar will appear directly in the image and in the Annotations/Measurements as an entry. To set an arrow, the button will turn blue and then you can draw an arrow over the image You can access to numerous formatting possibilities by right-clicking in the annotation (scale bar, arrow, etc). -
Page 35: Distance Measurements
Distance Measurements 1. Go to Graphics -> Line 2. Draw the line over the object you would like to measure 3. In the Center Screen Area, select the Graphics tab. An entry of the Line type will appear together with the positions and sizes (these measurements are not the distance length between the two-point edges of the line) 4. -
Page 36: Cropping Region Of Interest (Roi)
Cropping Region of Interest (ROI) 1. Go to Graphics -> Draw Region of Interest 2. Draw a square or rectangular region over the region of interest 3. Right-click in the drawn region. This will open the context menu. Select Create Subset Images from ROI in this dialog 4. -
Page 37: Export
Export 1. Go to the Processing tab 2. Click in the Single button 3. Click in the blue header of the Method tool... - Page 38 4. In the Method tool, open the Export/Import group and select the Image Export method 5. Under Method Parameters group, select the Parameters tool, and set the desired export settings, such as file type, quality, export folder, … 6. Click in the blue header of the Input tool...
- Page 39 7. Select the images you would like to export. To do so, click in the small preview image within the Input tool. You will see a preview of all open images. To select an image, just click in it 8. Yet in the Input tool, select only the Switch to Output option 9.
-
Page 40: Other Guidelines
Other Guidelines Using the STOP button The STOP button is for instantaneous deactivation of a moving motorized focusing drive to prevent collision with a specimen on the latter. 1. Press the STOP button to switch off the focusing drive. The STOP button is on the left-hand side of the drive 2. - Page 41 3. Ensure that the aperture diaphragm is completely open. To do so, turn the rotary knob up (on the right-hand side of the microscope) 4. Adjust the dioptre-setting ring in the focusing eyepieces if known, otherwise set it to "0" and do not remove your glasses or contact lenses. The white and red dot stand for "0"...
- Page 42 Contrast Methods and Filter Sets Whether selecting a contrast method or a filter set the following table presents only manual operations that should be avoided with ZEN 2.1 software in most of the cases. Contrast Method/ Symbol/ Control Device Instruction Filter Set Number Setting Wheel/ Fluar...
-
Page 43: Further Protocols, Tutorials And Guidelines
Zeiss Zen 2 lite • SYCOP 3 System Control Panel Operating Manual • ZEN 2.1 (blue edition) User Guide • Axio Zoom.V16 Operating Manual • ZEN 2012 (blue edition) Quick Guide: Multi Dimensional Imaging • ZEN 2012 (blue edition) Quick Guide: Import/Export...