Fortinet FortiMail-100 Install Manual
Secure messaging platform
Hide thumbs
Also See for FortiMail-100:
- Quick start manual (2 pages) ,
- Quick start manual (2 pages) ,
- Quick start manual (2 pages)
Table of Contents
Advertisement
Advertisement
Table of Contents
Troubleshooting

Related Manuals for Fortinet FortiMail-100


Summary of Contents for Fortinet FortiMail-100
- Page 1 FortiMail™ Secure Messaging Platform Version 4.0 Patch 1 Install Guide...
- Page 2 FortiGuard-Antivirus, FortiGuard-Intrusion, FortiGuard-Web, FortiLog, FortiAnalyzer, FortiManager, Fortinet®, FortiOS, FortiPartner, FortiProtect, FortiReporter, FortiResponse, FortiShield, FortiVoIP, and FortiWiFi are trademarks of Fortinet, Inc. in the United States and/or other countries. The names of actual companies and products mentioned herein may be the trademarks of their respective owners.
-
Page 3: Table Of Contents
Cautions and warnings....................21 Grounding ......................... 21 Rack mount instructions ................... 21 Environmental specifications ..................22 Mounting the FortiMail unit ..................22 FortiMail-100 and FortiMail-100C ................22 FortiMail-400......................22 FortiMail-2000A and FortiMail-4000A ............... 23 FortiMail-2000B ......................25 FortiMail-5001A ......................25 FortiMail™... - Page 4 Contents Powering on the FortiMail unit..................26 FortiMail-100 and FortiMail-100C ................26 FortiMail-400......................26 FortiMail-2000A and FortiMail-4000A ............... 26 FortiMail-2000B ......................27 FortiMail-5001A ......................27 Connecting to the network ..................27 Turning off the FortiMail unit ..................27 Powering off the FortiMail-5001A board ..............27 Connecting to the web-based manager or CLI............
- Page 5 Transparent mode deployment............119 Configuring DNS records ................... 119 Configuring DNS records for the FortiMail unit itself..........119 Configuring a private DNS server ................121 FortiMail™ Secure Messaging Platform Version 4.0 Patch 1 Install Guide Revision 2 http://docs.fortinet.com/ • Feedback...
- Page 6 Example 3: FortiMail unit in DMZ................151 Configuring the firewall ................... 152 Configuring the email user accounts ..............157 Configuring the MUAs..................... 157 Testing the installation .................... 157 FortiMail™ Secure Messaging Platform Version 4.0 Patch 1 Install Guide Revision 2 http://docs.fortinet.com/ • Feedback...
- Page 7 Telnet connections to the SMTP port number ............163 Log messages ......................164 Greylist and sender reputation displays..............165 Mail queues and quarantines.................. 165 Packet capture......................165 Index...................... 169 FortiMail™ Secure Messaging Platform Version 4.0 Patch 1 Install Guide Revision 2 http://docs.fortinet.com/ • Feedback...
-
Page 8: Http://Docs.fortinet.com
Contents FortiMail™ Secure Messaging Platform Version 4.0 Patch 1 Install Guide Revision 2 http://docs.fortinet.com/ • Feedback... -
Page 9: Introduction
• Conventions Registering your FortiMail unit Before you begin, take a moment to register your Fortinet product at the Fortinet Technical Support web site, https://support.fortinet.com. Many Fortinet customer services, such as firmware updates, technical support, and FortiGuard Antivirus and other FortiGuard services, require product registration. -
Page 10: Training
Fortinet Tools and Documentation CD Many Fortinet publications are available on the Fortinet Tools and Documentation CD shipped with your Fortinet product. The documents on this CD are current at shipping time. For current versions of Fortinet documentation, visit the Fortinet Technical Documentation web site, http://docs.fortinet.com. -
Page 11: Conventions
Fortinet technical documentation uses the conventions described below. IP addresses To avoid publication of public IP addresses that belong to Fortinet or any other organization, the IP addresses used in Fortinet technical documentation are fictional and follow the documentation guidelines specific to Fortinet. The addresses used are from the private IP address ranges defined in RFC 1918: Address Allocation for Private Internets, available at http://ietf.org/rfc/rfc1918.txt?number-1918. -
Page 12: Http://Docs.fortinet.com
Caution: Warns you about commands or procedures that could have unexpected or undesirable results including loss of data or damage to equipment. Typographical conventions Fortinet documentation uses the following typographical conventions: Table 1: Typographical conventions in Fortinet technical documentation Convention Example Button, menu, text box, From Minimum log level, select Notification. -
Page 13: Key Concepts
SMTP (ESMTP) servers. FortiMail units can scan SMTP traffic for spam and viruses, and support several SMTP extensions. For details, see the Fortinet Knowledge Center article Supported SMTP- related RFCs. -
Page 14: Imap
However, due to the notion of relay in SMTP, the SMTP client may be either: • an email application on a user’s personal computer FortiMail™ Secure Messaging Platform Version 4.0 Patch 1 Install Guide Revision 2 http://docs.fortinet.com/ • Feedback... -
Page 15: Mta
For example, if the FortiMail unit is not configured to protect the SMTP server whose IP address is 192.168.1.1, all SMTP connections destined for 192.168.1.1 will be treated as outgoing, regardless of their origin. FortiMail™ Secure Messaging Platform Version 4.0 Patch 1 Install Guide Revision 2 http://docs.fortinet.com/ • Feedback... -
Page 16: The Role Of Dns In Email Delivery
In addition, you may also be required to configure the DNS server with an MX record, an A record, and a reverse DNS record for protected domain names and for the domain name of the FortiMail unit itself. FortiMail™ Secure Messaging Platform Version 4.0 Patch 1 Install Guide Revision 2 http://docs.fortinet.com/ • Feedback... -
Page 17: Mx Record
FortiMail high availability (HA) instead. For details, see “FortiMail high availability modes” on page Note: For more information on gateway mode and server mode, see “FortiMail operation modes” on page FortiMail™ Secure Messaging Platform Version 4.0 Patch 1 Install Guide Revision 2 http://docs.fortinet.com/ • Feedback... -
Page 18: A Record
IP address of the FortiMail unit is 10.10.10.1, a public DNS server’s reverse DNS zone file for the 10.10.10.0/24 subnet might contain: 1 IN PTR fortimail.example.com. FortiMail™ Secure Messaging Platform Version 4.0 Patch 1 Install Guide Revision 2 http://docs.fortinet.com/ • Feedback... -
Page 19: Fortimail Web-Based Manager Modes
Config-only HA: Up to 25 FortiMail units use an identical configuration, but do not synchronize data, and therefore operate as independent FortiMail units. Fortinet recommends HA to achieve uninterrupted service. FortiMail™ Secure Messaging Platform Version 4.0 Patch 1 Install Guide Revision 2 http://docs.fortinet.com/... -
Page 20: Http://Docs.fortinet.com
FortiMail high availability modes Key concepts For more information on HA, see the FortiMail Administration Guide. FortiMail™ Secure Messaging Platform Version 4.0 Patch 1 Install Guide Revision 2 http://docs.fortinet.com/ • Feedback... -
Page 21: Hardware Installation
Reliable Earthing: Reliable earthing of rack-mounted equipment should be maintained. Particular attention should be given to supply connections other than direct connections to the branch circuit (e.g. use of power strips). FortiMail™ Secure Messaging Platform Version 4.0 Patch 1 Install Guide Revision 2 http://docs.fortinet.com/ • Feedback... -
Page 22: Environmental Specifications
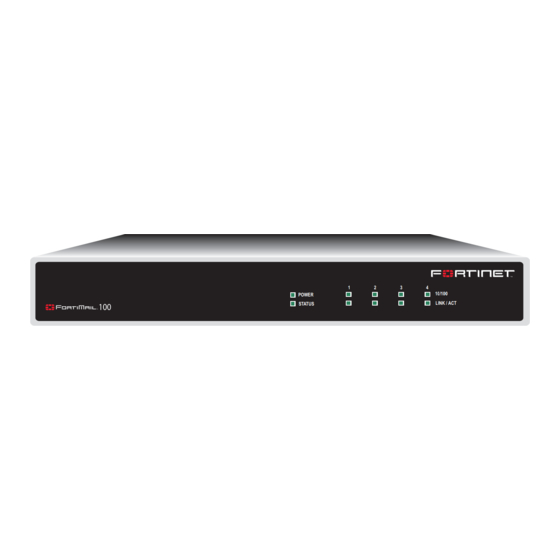
Mounting the FortiMail unit FortiMail-100 and FortiMail-100C Adhere the rubber feet included in the package to the underside of the FortiMail unit, near the corners of the unit if not already attached. -
Page 23: Fortimail-2000A And Fortimail-4000A
• attaching the slide rail to the sides of the FortiMail unit • mounting the FortiMail unit to the rack or cabinet FortiMail™ Secure Messaging Platform Version 4.0 Patch 1 Install Guide Revision 2 http://docs.fortinet.com/ • Feedback... -
Page 24: Http://Docs.fortinet.com
3 Push down on the lock while pulling the rail completely out of the slide rail assembly. 4 Repeat these steps for the other slide rail assembly. You will attach this part to the side of the FortiMail unit. FortiMail™ Secure Messaging Platform Version 4.0 Patch 1 Install Guide Revision 2 http://docs.fortinet.com/ • Feedback... -
Page 25: Fortimail-2000B
Before using the FortiMail-5001A board, it must be inserted into an Advanced Telecommunications Computing Architecture (ACTA) chassis such as the FortiGate-5140, FortiGate-5050, or FortiGate-5020 chassis. FortiMail™ Secure Messaging Platform Version 4.0 Patch 1 Install Guide Revision 2 http://docs.fortinet.com/ • Feedback... -
Page 26: Powering On The Fortimail Unit
Powering on the FortiMail unit FortiMail-100 and FortiMail-100C The FortiMail-100 does not have a power switch. To power on the FortiMail unit 1 Connect the AC adapter to the power connection at the back of the FortiMail unit. -
Page 27: Fortimail-2000B
FortiMail-5001A To power on the FortiMail-5001A board, you must turn on the chassis power. For details, see the FortiGate 5000 series chassis guides at http://docs.fortinet.com. Connecting to the network Until the FortiMail unit is configured with an IP address and other settings in the Quick... -
Page 28: Connecting To The Web-Based Manager Or Cli
Microsoft Internet Explorer version 6.0 or greater, or a recent version of Mozilla Firefox, with Adobe Flash Player 10 or greater plug-in • a crossover Ethernet cable FortiMail™ Secure Messaging Platform Version 4.0 Patch 1 Install Guide Revision 2 http://docs.fortinet.com/ • Feedback... -
Page 29: Connecting To The Cli
SSH connection, either local or through the network To connect to the CLI using a local serial console connection, you must have: • a computer with a serial communications (COM) port FortiMail™ Secure Messaging Platform Version 4.0 Patch 1 Install Guide Revision 2 http://docs.fortinet.com/ • Feedback... -
Page 30: Http://Docs.fortinet.com
“Updating the firmware” on page For information about how to use the CLI, including how to connect to the CLI using SSH or Telnet, see the FortiMail CLI Reference. FortiMail™ Secure Messaging Platform Version 4.0 Patch 1 Install Guide Revision 2 http://docs.fortinet.com/ • Feedback... -
Page 31: Using The Front Panel's Control Buttons And Lcd Display
• the operating mode You can also use the front panel to reset the FortiMail unit to the default settings for its firmware version. FortiMail™ Secure Messaging Platform Version 4.0 Patch 1 Install Guide Revision 2 http://docs.fortinet.com/ • Feedback... -
Page 32: Http://Docs.fortinet.com
After using the front panel to configure these basic settings, you must still connect to the web-based manager to complete additional setup. To continue, see “Connecting to the web-based manager” on page FortiMail™ Secure Messaging Platform Version 4.0 Patch 1 Install Guide Revision 2 http://docs.fortinet.com/ • Feedback... -
Page 33: Fortimail-2000B Hardware Installation
To install the sliding rail kit 1 Locate the components for installing the rail kit assembly: • Two sliding rail assemblies (1) • Two Velcro straps (2) FortiMail™ Secure Messaging Platform Version 4.0 Patch 1 Install Guide Revision 2 http://docs.fortinet.com/ • Feedback... -
Page 34: Http://Docs.fortinet.com
Position the left and right rail end pieces of the rail module labeled FRONT facing inward and orient each end piece to seat in the square holes on the front side of the vertical rack flanges (3). FortiMail™ Secure Messaging Platform Version 4.0 Patch 1 Install Guide Revision 2 http://docs.fortinet.com/ • Feedback... -
Page 35: Http://Docs.fortinet.com
Position the left and right rail end pieces of the rail module labeled FRONT facing inward and orient each end piece to seat in the round holes on the front side of the vertical rack flanges (7). FortiMail™ Secure Messaging Platform Version 4.0 Patch 1 Install Guide Revision 2 http://docs.fortinet.com/ • Feedback... -
Page 36: Http://Docs.fortinet.com
4 To install the system into the rack, do the following: • Pull the inner slide rails out of the rack until they lock into place (11). FortiMail™ Secure Messaging Platform Version 4.0 Patch 1 Install Guide Revision 2 http://docs.fortinet.com/ • Feedback... -
Page 37: Http://Docs.fortinet.com
5 To engage and release the slam latch, do the following: • Facing the front, locate the slam latch on either side of the system (15). FortiMail™ Secure Messaging Platform Version 4.0 Patch 1 Install Guide Revision 2 http://docs.fortinet.com/ • Feedback... -
Page 38: Http://Docs.fortinet.com
6 To route the cables, do the following: • Locate the inner and outer CMA brackets on the interior sides of both rack flanges (18). FortiMail™ Secure Messaging Platform Version 4.0 Patch 1 Install Guide Revision 2 http://docs.fortinet.com/ • Feedback... -
Page 39: Removing The System From The Rack
Removing the system from the rack To remove the system from the rack 1 Locate the lock levers on the front ends of both inner rails (1). FortiMail™ Secure Messaging Platform Version 4.0 Patch 1 Install Guide Revision 2 http://docs.fortinet.com/ • Feedback... -
Page 40: Installing The Cable Management Arm
1 Locate the components for installing the Cable Management Arm (CMA) assembly: • Cable Management Arm tray (1) • Cable Management Arm (2) • Nylon cable tie wraps (3) FortiMail™ Secure Messaging Platform Version 4.0 Patch 1 Install Guide Revision 2 http://docs.fortinet.com/ • Feedback... -
Page 41: Http://Docs.fortinet.com
Align and engage each side of the tray with the receiver brackets on the inner edges of the rails and push forward until the tray clicks into place (4). FortiMail™ Secure Messaging Platform Version 4.0 Patch 1 Install Guide Revision 2 http://docs.fortinet.com/ • Feedback... -
Page 42: Http://Docs.fortinet.com
At the back of the system, fit the latch on the front end of the CMA on the innermost bracket of the slide assembly until the latch engages (6). FortiMail™ Secure Messaging Platform Version 4.0 Patch 1 Install Guide Revision 2 http://docs.fortinet.com/ • Feedback... -
Page 43: Http://Docs.fortinet.com
4 To move the CMA away from the CMA tray, do the following: • The CMA can be pulled away from the system and extended away from the tray for access and service (9). FortiMail™ Secure Messaging Platform Version 4.0 Patch 1 Install Guide Revision 2 http://docs.fortinet.com/ • Feedback... -
Page 44: Http://Docs.fortinet.com
Using the tie wraps provided, bundle the cables together as they enter and exit the baskets so they do not interfere with adjacent systems (11). FortiMail™ Secure Messaging Platform Version 4.0 Patch 1 Install Guide Revision 2 http://docs.fortinet.com/ • Feedback... -
Page 45: Installing The Hard Drives
When you format a hard drive, allow enough time for the formatting to be completed. Be aware that high-capacity hard drives can take a number of hours to format. FortiMail™ Secure Messaging Platform Version 4.0 Patch 1 Install Guide Revision 2 http://docs.fortinet.com/ • Feedback... -
Page 46: Http://Docs.fortinet.com
See the documentation provided with your operating system for more information. 1 If present, remove the front bezel. See “Installing the Bezel” on page FortiMail™ Secure Messaging Platform Version 4.0 Patch 1 Install Guide Revision 2 http://docs.fortinet.com/ • Feedback... -
Page 47: Http://Docs.fortinet.com
Insert the hard-drive carrier into the drive bay until the carrier contacts the backplane. • Close the handle to lock the drive in place. 4 If applicable, install the bezel. See “Installing the Bezel” on page FortiMail™ Secure Messaging Platform Version 4.0 Patch 1 Install Guide Revision 2 http://docs.fortinet.com/ • Feedback... -
Page 48: Installing The Bezel
A lock on the bezel restricts access to the power button, optical drive, and hard drive(s). The LCD panel and navigation buttons are accessible through the front bezel. FortiMail™ Secure Messaging Platform Version 4.0 Patch 1 Install Guide Revision 2 http://docs.fortinet.com/ • Feedback... -
Page 49: Connecting The Keyboard, Mouse, And Monitor
2 Rotate the left side of the bezel toward the system. 3 Press the bezel to the system to engage the latch. Connecting the keyboard, mouse, and monitor FortiMail™ Secure Messaging Platform Version 4.0 Patch 1 Install Guide Revision 2 http://docs.fortinet.com/ • Feedback... -
Page 50: Connecting The Power Cables
Figure 18: Connecting the power cables. Connect the system’s power cable(s) to the system and, if a monitor is used, connect the monitor’s power cable to the monitor. FortiMail™ Secure Messaging Platform Version 4.0 Patch 1 Install Guide Revision 2 http://docs.fortinet.com/ • Feedback... -
Page 51: Securing The Power Cord
Plug the other end of the power cables into a grounded electrical outlet or a separate power source such as an uninterruptible power supply (UPS) or a power distribution unit (PDU). FortiMail™ Secure Messaging Platform Version 4.0 Patch 1 Install Guide Revision 2 http://docs.fortinet.com/ • Feedback... -
Page 52: Http://Docs.fortinet.com
Securing the power cord FortiMail-2000B hardware installation FortiMail™ Secure Messaging Platform Version 4.0 Patch 1 Install Guide Revision 2 http://docs.fortinet.com/ • Feedback... -
Page 53: Fortimail-5001A Hardware Installation
• Changing FortiMail SW11 switch settings • FortiMail mounting components • Inserting a FortiMail board • Removing a FortiMail board • Resetting a FortiMail board • Troubleshooting FortiMail™ Secure Messaging PlatformVersion 4.0 Patch 1Install Guide Revision 2 http://docs.fortinet.com/ • Feedback... -
Page 54: Changing Fortimail Sw11 Switch Settings
Changing FortiMail SW11 switch settings FortiMail-5001A hardware installation Changing FortiMail SW11 switch settings The SW11 switch on the FortiMail board is factory set by Fortinet to detect a shelf manager (Figure 20). This is the correct setting if you are installing the FortiMail board in a chassis that contains an operating shelf manager (such as the FortiGate-5140 or FortiGate-5050 chassis). -
Page 55: Fortimail Mounting Components
When locked into place and positioned correctly the board front panel is flush with the chassis front panel. The board is also connected to the chassis backplane. FortiMail™ Secure Messaging PlatformVersion 4.0 Patch 1Install Guide Revision 2 http://docs.fortinet.com/ • Feedback... -
Page 56: Inserting A Fortimail Board
If the FortiMail board is not receiving power, the IPM LED glows solid blue and all other LEDs remain off. For descriptions of the LEDs, see the FortiMail-5001A QuickStart Guide. FortiMail™ Secure Messaging PlatformVersion 4.0 Patch 1Install Guide Revision 2 http://docs.fortinet.com/ • Feedback... -
Page 57: Http://Docs.fortinet.com
Caution: To avoid damaging the lock, make sure you squeeze the handles fully to unlock them before opening. The handles should pop easily out of the board front panel. FortiMail™ Secure Messaging PlatformVersion 4.0 Patch 1Install Guide Revision 2 http://docs.fortinet.com/ • Feedback... -
Page 58: Http://Docs.fortinet.com
(Out of Service) Green Power Status If you have installed an AMC module in the FortiMail board, the AMC LEDs are lit as described in Table FortiMail™ Secure Messaging PlatformVersion 4.0 Patch 1Install Guide Revision 2 http://docs.fortinet.com/ • Feedback... -
Page 59: Removing A Fortimail Board
1 Attach the ESD wrist strap to your wrist and to an available ESD socket or wrist strap terminal. 2 Disconnect all cables from the FortiMail board, including all network cables, the console cable, and any USB cables or keys. FortiMail™ Secure Messaging PlatformVersion 4.0 Patch 1Install Guide Revision 2 http://docs.fortinet.com/ • Feedback... -
Page 60: Http://Docs.fortinet.com
Fully Closed and Locked 8 Carefully slide the board completely out of the slot. 9 Re-attach the protective metal frame before shipping or storing the FortiMail board. FortiMail™ Secure Messaging PlatformVersion 4.0 Patch 1Install Guide Revision 2 http://docs.fortinet.com/ • Feedback... -
Page 61: Resetting A Fortimail Board
FortiGate-5000 Series Firmware and FortiUSB Guide. If this does not solve the problem, contact Fortinet Technical Support. FortiMail status LED is flashing during system operation Normally, the FortiMail Status LED is off when the FortiMail board is operating normally. -
Page 62: Http://Docs.fortinet.com
Troubleshooting FortiMail-5001A hardware installation FortiMail™ Secure Messaging PlatformVersion 4.0 Patch 1Install Guide Revision 2 http://docs.fortinet.com/ • Feedback... -
Page 63: Updating The Firmware
For late-breaking information specific to the firmware release version, see the Release Notes available with that release. Note: In addition to major releases that contain new features, Fortinet releases patch releases that resolve specific issues without containing new features and/or changes to existing features. -
Page 64: Http://Docs.fortinet.com
• If the new firmware image does not operate successfully, reboot the FortiMail unit to discard the temporary firmware and resume operation using the existing firmware. FortiMail™ Secure Messaging Platform Version 4.0 Patch 1 Install Guide Revision 2 http://docs.fortinet.com/ • Feedback... -
Page 65: Installing Firmware
CLI” on page To install firmware using the web-based manager 1 Log in to the Fortinet Technical Support web site, https://support.fortinet.com/. 2 Download the firmware image file to your management computer. 3 Log in to the web-based manager as the “admin” administrator, or an administrator account whose domain is “system”... -
Page 66: Installing Backup Firmware
FortiGuard Antivirus definitions are up-to-date. For more information, see “Configuring scheduled updates” on page Installing backup firmware You can install backup firmware which can be loaded if the primary firmware fails. FortiMail™ Secure Messaging Platform Version 4.0 Patch 1 Install Guide Revision 2 http://docs.fortinet.com/ • Feedback... -
Page 67: Http://Docs.fortinet.com
Installing backup firmware To install backup firmware 1 Log in to the Fortinet Technical Support web site, https://support.fortinet.com/. 2 Download the firmware image file to your management computer. 3 Connect your management computer to the FortiMail console port using a RJ-45-to- DB-9 serial cable or a null-modem cable. -
Page 68: Restoring Firmware
IP addresses of network interfaces. For information on reconnecting to a FortiMail unit whose network interface configuration has been reset, see “Connecting to the web-based manager or CLI” on page FortiMail™ Secure Messaging Platform Version 4.0 Patch 1 Install Guide Revision 2 http://docs.fortinet.com/ • Feedback... -
Page 69: Http://Docs.fortinet.com
Enter TFTP server address [192.168.1.168]: 10 Type the IP address of the TFTP server and press Enter. The following message appears: Enter Local Address [192.168.1.188]: FortiMail™ Secure Messaging Platform Version 4.0 Patch 1 Install Guide Revision 2 http://docs.fortinet.com/ • Feedback... -
Page 70: Http://Docs.fortinet.com
After you install new firmware, update the antivirus definitions. For details, see “Configuring scheduled updates” on page FortiMail™ Secure Messaging Platform Version 4.0 Patch 1 Install Guide Revision 2 http://docs.fortinet.com/ • Feedback... -
Page 71: Choosing The Operation Mode
This section contains the following topics: • Characteristics of gateway mode • Characteristics of transparent mode • Characteristics of server mode • Configuring the operation mode FortiMail™ Secure Messaging Platform Version 4.0 Patch 1 Install Guide Revision 2 http://docs.fortinet.com/ • Feedback... -
Page 72: Characteristics Of Gateway Mode
When hiding, the FortiMail unit preserves the IP address and domain name of the SMTP client in IP headers and the SMTP envelope and message headers, rather than replacing them with its own. FortiMail™ Secure Messaging Platform Version 4.0 Patch 1 Install Guide Revision 2 http://docs.fortinet.com/ • Feedback... -
Page 73: Characteristics Of Server Mode
External MTAs connect to the FortiMail unit, which itself is also the protected email server. FortiMail™ Secure Messaging Platform Version 4.0 Patch 1 Install Guide Revision 2 http://docs.fortinet.com/ • Feedback... -
Page 74: Configuring The Operation Mode
2 In the System Information widget, in the Operation Mode row, select Change. 3 From Operation Mode, select either Gateway, Server, or Transparent. FortiMail™ Secure Messaging Platform Version 4.0 Patch 1 Install Guide Revision 2 http://docs.fortinet.com/ • Feedback... -
Page 75: Http://Docs.fortinet.com
The FortiMail unit changes the operation mode and restarts. When it has completely restarted, reconnect to the web-based manager of the FortiMail unit to continue the installation. FortiMail™ Secure Messaging Platform Version 4.0 Patch 1 Install Guide Revision 2 http://docs.fortinet.com/ • Feedback... -
Page 76: Http://Docs.fortinet.com
Configuring the operation mode Choosing the operation mode FortiMail™ Secure Messaging Platform Version 4.0 Patch 1 Install Guide Revision 2 http://docs.fortinet.com/ • Feedback... -
Page 77: Quick Start Wizard
Caution: Failure to configure a strong administrator password could compromise the security of your FortiMail unit. To proceed to Step 2: Configuring the network settings and system time, select Next >. FortiMail™ Secure Messaging Platform Version 4.0 Patch 1 Install Guide Revision 2 http://docs.fortinet.com/ • Feedback... -
Page 78: Step 2: Configuring The Network Settings And System Time
To proceed to Step 3: Configuring local host settings, select Next >. Figure 28: Quick Start Wizard: Step 2 (gateway mode or server mode) FortiMail™ Secure Messaging Platform Version 4.0 Patch 1 Install Guide Revision 2 http://docs.fortinet.com/ • Feedback... -
Page 79: Http://Docs.fortinet.com
CLI through port1 and other bridging network interfaces, and which the FortiMail unit will use when connecting to the Fortinet Distribution Network (FDN), such as 192.168.1.99. For details on the management IP, see the FortiMail Administration Guide. -
Page 80: Step 3: Configuring Local Host Settings
Note: The local domain name should be globally DNS-resolvable only if the FortiMail unit is used as a relay server for outgoing email. To proceed to Step 4: Adding protected domains, select Next >. FortiMail™ Secure Messaging Platform Version 4.0 Patch 1 Install Guide Revision 2 http://docs.fortinet.com/ • Feedback... -
Page 81: Http://Docs.fortinet.com
SMTP Server Port Enter the port number on which the FortiMail unit’s SMTP server will listen for SMTP connections. The default port Number number is 25. FortiMail™ Secure Messaging Platform Version 4.0 Patch 1 Install Guide Revision 2 http://docs.fortinet.com/ • Feedback... -
Page 82: Step 4: Adding Protected Domains
To proceed to Step 5: Configuring incoming antispam and antivirus settings, select Next >. Figure 31: Quick Start Wizard: Step 4 (gateway mode and transparent mode) FortiMail™ Secure Messaging Platform Version 4.0 Patch 1 Install Guide Revision 2 http://docs.fortinet.com/ • Feedback... -
Page 83: Http://Docs.fortinet.com
FortiMail unit. For details, see “Configuring DNS records” on page 95 (gateway mode) or “Configuring DNS records” on page 119 (transparent mode). FortiMail™ Secure Messaging Platform Version 4.0 Patch 1 Install Guide Revision 2 http://docs.fortinet.com/ • Feedback... -
Page 84: Step 5: Configuring Incoming Antispam And Antivirus Settings
To proceed to Step 6: Configuring access control rules and outgoing antispam and antivirus settings, select Next >. Figure 35: Quick Start Wizard: Step 5 FortiMail™ Secure Messaging Platform Version 4.0 Patch 1 Install Guide Revision 2 http://docs.fortinet.com/ • Feedback... -
Page 85: Step 6: Configuring Access Control Rules And Outgoing Antispam And Antivirus Settings
TLS profiles and select them in access control rules. For details, see the FortiMail Administration Guide. To proceed to Step 7: Reviewing and saving the configuration, select Next >. FortiMail™ Secure Messaging Platform Version 4.0 Patch 1 Install Guide Revision 2 http://docs.fortinet.com/ • Feedback... -
Page 86: Http://Docs.fortinet.com
“example” domain ending with a three-letter top-level domain name. Regular Mark this check box to use regular expression syntax instead of wildcards to specify the recipient pattern. expression FortiMail™ Secure Messaging Platform Version 4.0 Patch 1 Install Guide Revision 2 http://docs.fortinet.com/ • Feedback... -
Page 87: Http://Docs.fortinet.com
If you want your new rule to be evaluated before another rule, move your new access control rule to its intended position in the list. For details, see the FortiMail Administration Guide. FortiMail™ Secure Messaging Platform Version 4.0 Patch 1 Install Guide Revision 2 http://docs.fortinet.com/ • Feedback... -
Page 88: Step 7: Reviewing And Saving The Configuration
FortiMail Administration Guide. 2 If you have subscribed to FortiGuard Antivirus or FortiGuard Antispam services, connect the FortiMail unit to the Fortinet Distribution Network (FDN) to update related packages. For details, see “Connecting to FortiGuard services” on page 3 You may need to configure additional features that may be specific to your operation mode and network topology, such as configuring your router or firewall, and records on your public DNS server. -
Page 89: Connecting To Fortiguard Services
Note: You must first register the FortiMail unit with the Fortinet Technical Support web site, https://support.fortinet.com/, to receive service from the FDN. The FortiMail unit must also... -
Page 90: Http://Docs.fortinet.com
If the FortiMail unit cannot successfully connect, or if your FortiGuard Antispam license does not exist or is expired, a message appears notifying you that a connection error has occurred. FortiMail™ Secure Messaging Platform Version 4.0 Patch 1 Install Guide Revision 2 http://docs.fortinet.com/ • Feedback... -
Page 91: Configuring Scheduled Updates
Configuring scheduled updates You can configure the FortiMail unit to periodically request FortiGuard Antivirus and FortiGuard Antispam engine and definition updates from the FDN or override server. FortiMail™ Secure Messaging Platform Version 4.0 Patch 1 Install Guide Revision 2 http://docs.fortinet.com/ • Feedback... -
Page 92: Configuring Push Updates
IP address and port number. Within 60 seconds, the FortiMail unit then requests the package update as if it were a scheduled or manually initiated update. FortiMail™ Secure Messaging Platform Version 4.0 Patch 1 Install Guide Revision 2 http://docs.fortinet.com/ • Feedback... -
Page 93: Http://Docs.fortinet.com
IP. When an update is available, the FDN will send push notifications to this IP address and port number. 5 Click Refresh. A dialog appears, notifying you that the process could take a few minutes. FortiMail™ Secure Messaging Platform Version 4.0 Patch 1 Install Guide Revision 2 http://docs.fortinet.com/ • Feedback... -
Page 94: Manually Requesting Updates
If an update was available, new version numbers appear for the packages that were updated. If you have enabled logging, messages are recorded to the event log indicating whether the update was successful or not. FortiMail™ Secure Messaging Platform Version 4.0 Patch 1 Install Guide Revision 2 http://docs.fortinet.com/ • Feedback... -
Page 95: Gateway Mode Deployment
A record in the example.com zone file to resolve fortimail.example.com into a public IP address: fortimail IN A 10.10.10.1 FortiMail™ Secure Messaging Platform Version 4.0 Patch 1 Install Guide Revision 2 http://docs.fortinet.com/ • Feedback... -
Page 96: Configuring Dns Records For The Fortimail Unit Itself
In the DNS configuration to support this and the other DNS-dependent features, you would configure the following three records: example.net IN MX 10 fortimail.example.net fortimail IN A 10.10.10.1 FortiMail™ Secure Messaging Platform Version 4.0 Patch 1 Install Guide Revision 2 http://docs.fortinet.com/ • Feedback... -
Page 97: Configuring A Private Dns Server
In addition to the public DNS server, consider providing a private DNS server on your local network to improve performance with features that use DNS queries. FortiMail™ Secure Messaging Platform Version 4.0 Patch 1 Install Guide Revision 2 http://docs.fortinet.com/ • Feedback... -
Page 98: Example 1: Fortimail Unit Behind A Firewall
Internet, outside of the network protected by the firewall. The FortiMail unit protects accounts for email addresses ending in “@example.com”, which are hosted on the local email server. FortiMail™ Secure Messaging Platform Version 4.0 Patch 1 Install Guide Revision 2 http://docs.fortinet.com/ • Feedback... -
Page 99: Configuring The Firewall
With the FortiMail unit behind a FortiGate unit, you must configure firewall policies to allow traffic between the internal network and the Internet. To create the required policies, complete the following: FortiMail™ Secure Messaging Platform Version 4.0 Patch 1 Install Guide Revision 2 http://docs.fortinet.com/ • Feedback... -
Page 100: Http://Docs.fortinet.com
Because FortiGuard-related services for FortiMail units are not predefined, you must define them before you can create a service group that contains those services. Note: For more information on protocols and port numbers used by FortiMail units, see the Fortinet Knowledge Center article FortiMail Traffic Types and TCP/UDP Ports. -
Page 101: Http://Docs.fortinet.com
3 In Group Name, enter a name to identify the service group entry, such as PO3_IMAP_services. 4 In the Available Services area, select POP3 and IMAP, then select the right arrow to move them to the Members area. FortiMail™ Secure Messaging Platform Version 4.0 Patch 1 Install Guide Revision 2 http://docs.fortinet.com/ • Feedback... -
Page 102: Http://Docs.fortinet.com
First, create a firewall policy that allows incoming FortiMail services that are received at the virtual IP address, then applies a static NAT when forwarding the traffic to the private network IP address of the FortiMail unit. FortiMail™ Secure Messaging Platform Version 4.0 Patch 1 Install Guide Revision 2 http://docs.fortinet.com/ • Feedback... -
Page 103: Http://Docs.fortinet.com
4 Select NAT. 5 Select OK. To add the Internet-to-email-server policy 1 Go to Firewall > Policy > Policy. 2 Select Create New. 3 Complete the following: FortiMail™ Secure Messaging Platform Version 4.0 Patch 1 Install Guide Revision 2 http://docs.fortinet.com/ • Feedback... -
Page 104: Configuring The Muas
Internet, outside of the private network. The FortiMail unit protects accounts for email addresses ending in “@example.com”, which are hosted on the local email server. FortiMail™ Secure Messaging Platform Version 4.0 Patch 1 Install Guide Revision 2 http://docs.fortinet.com/ • Feedback... -
Page 105: Configuring The Firewall
FortiMail unit • between the protected email server and the Internet To create the required policies, complete the following: FortiMail™ Secure Messaging Platform Version 4.0 Patch 1 Install Guide Revision 2 http://docs.fortinet.com/ • Feedback... -
Page 106: Http://Docs.fortinet.com
Name Enter a name to identify the firewall address entry, such as FortiMail_address. Type Select Subnet/IP Range. Subnet /IP Range Enter 10.10.10.5/32. Interface Select wan1. FortiMail™ Secure Messaging Platform Version 4.0 Patch 1 Install Guide Revision 2 http://docs.fortinet.com/ • Feedback... -
Page 107: Http://Docs.fortinet.com
3 Complete the following: Name Enter a name to identify the virtual IP entry, such as protected_email_server_VIP_wan1. External Interface Select wan1. Type Select Static NAT. FortiMail™ Secure Messaging Platform Version 4.0 Patch 1 Install Guide Revision 2 http://docs.fortinet.com/ • Feedback... -
Page 108: Http://Docs.fortinet.com
3 Complete the following: Source Interface/zone Select dmz. Source Address Name Select protected_email_server_address. Destination Select wan1. Interface/zone Destination Address Select FortiMail_address. Name Schedule Select ALWAYS. FortiMail™ Secure Messaging Platform Version 4.0 Patch 1 Install Guide Revision 2 http://docs.fortinet.com/ • Feedback... -
Page 109: Http://Docs.fortinet.com
4 Select NAT. 5 Select OK. To add the local-users-to-email-server policy 1 Go to Firewall > Policy > Policy. 2 Select Create New. 3 Complete the following: FortiMail™ Secure Messaging Platform Version 4.0 Patch 1 Install Guide Revision 2 http://docs.fortinet.com/ • Feedback... -
Page 110: Configuring The Muas
Testing the installation Basic configuration is now complete, and the installation may be tested. For testing instructions, see “Testing the installation” on page 159. FortiMail™ Secure Messaging Platform Version 4.0 Patch 1 Install Guide Revision 2 http://docs.fortinet.com/ • Feedback... -
Page 111: Example 3: Fortimail Unit In Dmz
To deploy the FortiMail unit in the DMZ of a firewall, you must complete the following: • Configuring the firewall • Configuring the MUAs • Testing the installation FortiMail™ Secure Messaging Platform Version 4.0 Patch 1 Install Guide Revision 2 http://docs.fortinet.com/ • Feedback... -
Page 112: Configuring The Firewall
2 Select Create New. 3 Complete the following: Name Enter a name to identify the firewall address entry, such as FortiMail_address. Type Select Subnet/IP Range. FortiMail™ Secure Messaging Platform Version 4.0 Patch 1 Install Guide Revision 2 http://docs.fortinet.com/ • Feedback... -
Page 113: Http://Docs.fortinet.com
Because FortiGuard-related services for FortiMail units are not predefined, you must define them before you can create a service group that contains those services. Note: For more information on protocols and port numbers used by FortiMail units, see the Fortinet Knowledge Center article FortiMail Traffic Types and TCP/UDP Ports. -
Page 114: Http://Docs.fortinet.com
IP address on the internal network of the FortiGate unit to the IP address of the FortiMail unit • from an IP address on the DMZ of the FortiGate unit to the IP address of the protected email server FortiMail™ Secure Messaging Platform Version 4.0 Patch 1 Install Guide Revision 2 http://docs.fortinet.com/ • Feedback... -
Page 115: Http://Docs.fortinet.com
Enter a name to identify the virtual IP entry, such as FortiMail_VIP_internal. External Interface Select internal. Type Select Static NAT. External IP Enter 172.16.1.2. Address/Range Mapped IP Enter 192.168.1.5. Address/Range FortiMail™ Secure Messaging Platform Version 4.0 Patch 1 Install Guide Revision 2 http://docs.fortinet.com/ • Feedback... -
Page 116: Http://Docs.fortinet.com
Select internal. Source Address Name Select internal_address. Destination Select dmz. Interface/zone Destination Address Select FortiMail_VIP_internal. Name Schedule Select ALWAYS. Service Select SMTP_quar_services. Action Select ACCEPT. FortiMail™ Secure Messaging Platform Version 4.0 Patch 1 Install Guide Revision 2 http://docs.fortinet.com/ • Feedback... -
Page 117: Http://Docs.fortinet.com
1 Go to Firewall > Policy > Policy. 2 Select Create New. 3 Complete the following: Source Interface/zone Select dmz. Source Address Name Select FortiMail_address. Destination Select internal. Interface/zone FortiMail™ Secure Messaging Platform Version 4.0 Patch 1 Install Guide Revision 2 http://docs.fortinet.com/ • Feedback... -
Page 118: Configuring The Muas
Basic configuration is now complete, and the installation may be tested. For testing instructions, see “Testing the installation” on page 159. For information on configuring additional features, see the FortiMail Administration Guide. FortiMail™ Secure Messaging Platform Version 4.0 Patch 1 Install Guide Revision 2 http://docs.fortinet.com/ • Feedback... -
Page 119: Transparent Mode Deployment
AntiSpam > Quarantine > Spam Report in the advanced mode of the web-based manager) is configured: • Case 1: Web Release Host Name/IP is empty/default • Case 2: Web Release Host Name/IP is configured FortiMail™ Secure Messaging Platform Version 4.0 Patch 1 Install Guide Revision 2 http://docs.fortinet.com/ • Feedback... -
Page 120: Http://Docs.fortinet.com
120, in this case, two A records are required; the difference is highlighted in bold): example.net IN MX 10 fortimail.example.net fortimail IN A 10.10.10.1 webrelease IN A 10.10.10.1 1 IN PTR fortimail.example.net. FortiMail™ Secure Messaging Platform Version 4.0 Patch 1 Install Guide Revision 2 http://docs.fortinet.com/ • Feedback... -
Page 121: Configuring A Private Dns Server
121, and the Use MX Record option is enabled, Table 7 on page 122 illustrates differences between the public and private DNS servers for the authoritative DNS records of example.com. FortiMail™ Secure Messaging Platform Version 4.0 Patch 1 Install Guide Revision 2 http://docs.fortinet.com/ • Feedback... -
Page 122: Example 1: Fortimail Unit In Front Of An Email Server
Pattern Authentication authenticated Status < none > Action RELAY To deploy the FortiMail unit in front of an email server, you must complete the following: FortiMail™ Secure Messaging Platform Version 4.0 Patch 1 Install Guide Revision 2 http://docs.fortinet.com/ • Feedback... -
Page 123: Configuring The Protected Domains And Session Profiles
To configure the transparent mode options of the session profile 1 Go to Policy > Policies > IP Policies in the advanced mode of the web-based manager. FortiMail™ Secure Messaging Platform Version 4.0 Patch 1 Install Guide Revision 2 http://docs.fortinet.com/ • Feedback... -
Page 124: Configuring The Proxies And Implicit Relay
1 Go to Mail Settings > Proxies in the advanced mode of the web-based manager. 2 Configure the following: Port 1 Incoming SMTP connections are dropped Outgoing SMTP connections are passed through FortiMail™ Secure Messaging Platform Version 4.0 Patch 1 Install Guide Revision 2 http://docs.fortinet.com/ • Feedback... -
Page 125: Testing The Installation
Email Server Router Internet port2 port1 Main Internal Email Server Internal SMTP Protected Domain: Internal SMTP 172.16.1.10 Relay B @example.com Relay A Email Domain: @example.com FortiMail™ Secure Messaging Platform Version 4.0 Patch 1 Install Guide Revision 2 http://docs.fortinet.com/ • Feedback... -
Page 126: Configuring The Protected Domains And Session Profiles
SMTP server is connected. (transparent mode only) Note: Selecting the wrong network interface will result in the FortiMail sending email traffic to the wrong network interface. FortiMail™ Secure Messaging Platform Version 4.0 Patch 1 Install Guide Revision 2 http://docs.fortinet.com/ • Feedback... -
Page 127: Configuring The Proxies And Implicit Relay
FortiMail unit can scan and process the connection. If not enabled, the FortiMail unit can either block or permit the connection to pass through unmodified. FortiMail™ Secure Messaging Platform Version 4.0 Patch 1 Install Guide Revision 2 http://docs.fortinet.com/ • Feedback... -
Page 128: Testing The Installation
The FortiMail unit does not receive non-SMTP traffic. (This would result in unnecessary processing and resource usage.) FortiMail™ Secure Messaging Platform Version 4.0 Patch 1 Install Guide Revision 2 http://docs.fortinet.com/ • Feedback... -
Page 129: Http://Docs.fortinet.com
(If the administrator’s computer is not directly connected but is instead part of a management LAN, a route must also be configured for port1.) FortiMail™ Secure Messaging Platform Version 4.0 Patch 1 Install Guide Revision 2 http://docs.fortinet.com/ • Feedback... -
Page 130: Http://Docs.fortinet.com
Internet access or, increasingly, by infecting subscriber’s computers or phones. Infected devices become part of a botnet that can be used to infect more devices, and to send spam. FortiMail™ Secure Messaging Platform Version 4.0 Patch 1 Install Guide Revision 2 http://docs.fortinet.com/ • Feedback... -
Page 131: Configuring The Connection With The Radius Server
(An MSISDN is the number associated with a mobile device, such as a SIM card on a cellular phone network.) The IP address is only temporarily associated with this identifier while the device is joined to the network. FortiMail™ Secure Messaging Platform Version 4.0 Patch 1 Install Guide Revision 2 http://docs.fortinet.com/ • Feedback... -
Page 132: Http://Docs.fortinet.com
(e.g. 192.168.1.10) or host order (e.g. 10.1.168.192). 4 Verify that routing and firewall policies permit RADIUS accounting records to reach the FortiMail unit. FortiMail™ Secure Messaging Platform Version 4.0 Patch 1 Install Guide Revision 2 http://docs.fortinet.com/ • Feedback... -
Page 133: Removing The Network Interfaces From The Bridge
The network interface will be removed from the bridge, and may be configured with its own IP address. 4 In IP/Netmask, type the IP address and netmask of the network interface. FortiMail™ Secure Messaging Platform Version 4.0 Patch 1 Install Guide Revision 2 http://docs.fortinet.com/ • Feedback... -
Page 134: Configuring The Session Profiles
1 Go to Profile > Session in the advanced mode of the web-based manager. 2 Select New. 3 In Profile Name, type a name for the session profile, such as external_session_profile. 4 Configure the following: FortiMail™ Secure Messaging Platform Version 4.0 Patch 1 Install Guide Revision 2 http://docs.fortinet.com/ • Feedback... -
Page 135: Http://Docs.fortinet.com
1 Go to Profile > Session in the advanced mode of the web-based manager. 2 Select New. 3 In Profile Name, type a name for the session profile, such as internal_session_profile. 4 Configure the following: FortiMail™ Secure Messaging Platform Version 4.0 Patch 1 Install Guide Revision 2 http://docs.fortinet.com/ • Feedback... -
Page 136: Configuring The Ip-Based Policies
SMTP servers. 5 Select OK. Configuring the IP-based policies Session profiles are applied to IP-based policies governing SMTP client connections. FortiMail™ Secure Messaging Platform Version 4.0 Patch 1 Install Guide Revision 2 http://docs.fortinet.com/ • Feedback... -
Page 137: Configuring The Outgoing Proxy
FortiMail unit can scan and process the connection. If not enabled, the FortiMail unit can either block or permit the connection to pass through unmodified. FortiMail™ Secure Messaging Platform Version 4.0 Patch 1 Install Guide Revision 2 http://docs.fortinet.com/ • Feedback... -
Page 138: Testing The Installation
If some subscribers require TLS or do not use authentication, consider first making separate session profiles and IP-based policies for those subscribers. For information on configuring additional features, see the FortiMail Administration Guide. FortiMail™ Secure Messaging Platform Version 4.0 Patch 1 Install Guide Revision 2 http://docs.fortinet.com/ • Feedback... -
Page 139: Server Mode Deployment
A record in the example.com zone file to resolve fortimail.example.com into a public IP address: fortimail IN A 10.10.10.1 FortiMail™ Secure Messaging Platform Version 4.0 Patch 1 Install Guide Revision 2 http://docs.fortinet.com/ • Feedback... -
Page 140: Configuring Dns Records For The Fortimail Unit Itself
In the DNS configuration to support this and the other DNS-dependent features, you would configure the following three records: example.net IN MX 10 fortimail.example.net fortimail IN A 10.10.10.1 FortiMail™ Secure Messaging Platform Version 4.0 Patch 1 Install Guide Revision 2 http://docs.fortinet.com/ • Feedback... -
Page 141: Configuring A Private Dns Server
In addition to the public DNS server, consider providing a private DNS server on your local network to improve performance with features that use DNS queries. FortiMail™ Secure Messaging Platform Version 4.0 Patch 1 Install Guide Revision 2 http://docs.fortinet.com/ • Feedback... -
Page 142: Example 1: Fortimail Unit Behind A Firewall
I N M X 10 f or t i m ai l . exam pl e. com @ exam pl e. com f or t i m ai l I N A 10. 10. 10. 1 FortiMail™ Secure Messaging Platform Version 4.0 Patch 1 Install Guide Revision 2 http://docs.fortinet.com/ • Feedback... -
Page 143: Configuring The Firewall
To add a firewall address for the FortiMail unit 1 Go to Firewall > Address > Address. 2 Select Create New. 3 Complete the following: FortiMail™ Secure Messaging Platform Version 4.0 Patch 1 Install Guide Revision 2 http://docs.fortinet.com/ • Feedback... -
Page 144: Http://Docs.fortinet.com
Because FortiGuard-related services for FortiMail units are not predefined, you must define them before you can create a service group that contains those services. Note: For more information on protocols and port numbers used by FortiMail units, see the Fortinet Knowledge Center article FortiMail Traffic Types and TCP/UDP Ports. -
Page 145: Http://Docs.fortinet.com
Enter a name to identify the virtual IP entry, such as FortiMail_VIP. External Interface Select wan1. Type Select Static NAT. External IP Enter 10.10.10.1. Address/Range Mapped IP Enter 172.16.1.5. Address/Range 4 Select OK. FortiMail™ Secure Messaging Platform Version 4.0 Patch 1 Install Guide Revision 2 http://docs.fortinet.com/ • Feedback... -
Page 146: Configuring The Email User Accounts
You may choose to create additional email user accounts later, but you should create at least one email user account for each protected domain that you can use in order to verify connectivity for the domain. FortiMail™ Secure Messaging Platform Version 4.0 Patch 1 Install Guide Revision 2 http://docs.fortinet.com/ • Feedback... -
Page 147: Configuring The Muas
Internet, outside of the private network. The FortiMail unit hosts and protects accounts for email addresses ending in “@example.com”. FortiMail™ Secure Messaging Platform Version 4.0 Patch 1 Install Guide Revision 2 http://docs.fortinet.com/ • Feedback... -
Page 148: Configuring The Firewall
FortiMail unit. To create the required policies, complete the following: • Configuring the firewall addresses • Configuring the service group FortiMail™ Secure Messaging Platform Version 4.0 Patch 1 Install Guide Revision 2 http://docs.fortinet.com/ • Feedback... -
Page 149: Http://Docs.fortinet.com
4 In the Available Services area, select HTTP, HTTPS, SMTP, POP3, and IMAP, then select the right arrow to move them to the Members area. FortiMail™ Secure Messaging Platform Version 4.0 Patch 1 Install Guide Revision 2 http://docs.fortinet.com/ • Feedback... -
Page 150: Configuring The Email User Accounts
6 In Display Name, enter the name of the user as it should appear in a MUA, such as "Test User 1". 7 Select OK. FortiMail™ Secure Messaging Platform Version 4.0 Patch 1 Install Guide Revision 2 http://docs.fortinet.com/ • Feedback... -
Page 151: Configuring The Muas
I N A 10. 10. 10. 1 Server M ode Em ai l D om ai n: @ exam pl e. com FortiMail™ Secure Messaging Platform Version 4.0 Patch 1 Install Guide Revision 2 http://docs.fortinet.com/ • Feedback... -
Page 152: Configuring The Firewall
IP address of the FortiMail unit by creating firewall address entries. To add a firewall address for the FortiMail unit 1 Go to Firewall > Address > Address. FortiMail™ Secure Messaging Platform Version 4.0 Patch 1 Install Guide Revision 2 http://docs.fortinet.com/ • Feedback... -
Page 153: Http://Docs.fortinet.com
Because FortiGuard-related services for FortiMail units are not predefined, you must define them before you can create a service group that contains those services. Note: For more information on protocols and port numbers used by FortiMail units, see the Fortinet Knowledge Center article FortiMail Traffic Types and TCP/UDP Ports. -
Page 154: Http://Docs.fortinet.com
4 In the Available Services area, select HTTP, HTTPS, SMTP, POP3, and IMAP, then select the right arrow to move them to the Members area. 5 Select OK. FortiMail™ Secure Messaging Platform Version 4.0 Patch 1 Install Guide Revision 2 http://docs.fortinet.com/ • Feedback... -
Page 155: Http://Docs.fortinet.com
FortiMail unit to the Internet. Last, create a firewall policy that allows outgoing email and other FortiMail connections from the local email users to the FortiMail unit. FortiMail™ Secure Messaging Platform Version 4.0 Patch 1 Install Guide Revision 2 http://docs.fortinet.com/ • Feedback... -
Page 156: Http://Docs.fortinet.com
3 Complete the following: Source Interface/zone Select internal. Source Address Name Select local_email_users_address. Destination Select dmz. Interface/zone Destination Address Select FortiMail_VIP_internal. Name Schedule Select ALWAYS. FortiMail™ Secure Messaging Platform Version 4.0 Patch 1 Install Guide Revision 2 http://docs.fortinet.com/ • Feedback... -
Page 157: Configuring The Email User Accounts
Basic configuration is now complete, and the installation may be tested. For testing instructions, see “Testing the installation” on page 159. For information on configuring additional features, see the FortiMail Administration Guide. FortiMail™ Secure Messaging Platform Version 4.0 Patch 1 Install Guide Revision 2 http://docs.fortinet.com/ • Feedback... -
Page 158: Http://Docs.fortinet.com
Example 3: FortiMail unit in DMZ Server mode deployment FortiMail™ Secure Messaging Platform Version 4.0 Patch 1 Install Guide Revision 2 http://docs.fortinet.com/ • Feedback... -
Page 159: Testing The Installation
Publ i c D N S Ser ver Tr anspar ent M ode I nt er nal Em ai l Ser ver FortiMail™ Secure Messaging Platform Version 4.0 Patch 1 Install Guide Revision 2 http://docs.fortinet.com/ • Feedback... - Page 160 NAT devices such as firewalls or routers • connectivity of the FortiMail unit with the Fortinet Distribution Network (FDN) • external email servers’ connectivity with and the configuration of the public DNS server that hosts the MX records, A records, and reverse DNS records for your domain names •...
-
Page 161: Troubleshooting Tools
ICMP on your network, hosts may appear to be unreachable to ping and traceroute, even if connections using other protocols can succeed. FortiMail™ Secure Messaging Platform Version 4.0 Patch 1 Install Guide Revision 2 http://docs.fortinet.com/ • Feedback... -
Page 162: Nslookup
FortiMail-400 # execute nslookup host antispam.fortigate.com Name: antispam.fortigate.com Address: 212.95.252.120 Name: antispam.fortigate.com Address: 72.15.145.66 Name: antispam.fortigate.com Address: 69.90.198.55 For more information on CLI commands, see the FortiMail CLI Reference. FortiMail™ Secure Messaging Platform Version 4.0 Patch 1 Install Guide Revision 2 http://docs.fortinet.com/ • Feedback... -
Page 163: Telnet Connections To The Smtp Port Number
For example, to send a test email message (commands that you would type are highlighted in bold; responses from the FortiMail unit are not bolded): $ telnet fortimail.example.com 25 Trying fortimail.example.com... Connected to fortimail.example.com. Escape character is '^]'. FortiMail™ Secure Messaging Platform Version 4.0 Patch 1 Install Guide Revision 2 http://docs.fortinet.com/ • Feedback... -
Page 164: Log Messages
During troubleshooting, you may find it useful to reduce the logging severity threshold for more verbose logs, to include more information on less severe events. FortiMail™ Secure Messaging Platform Version 4.0 Patch 1 Install Guide Revision 2 http://docs.fortinet.com/ • Feedback... -
Page 165: Greylist And Sender Reputation Displays
By recording packets, you can trace connection states to the exact point at which they fail, which may help you to diagnose some types of problems that are otherwise difficult to detect. FortiMail™ Secure Messaging Platform Version 4.0 Patch 1 Install Guide Revision 2 http://docs.fortinet.com/ • Feedback... - Page 166 3 Select the name and location of the output file, such as C:\Documents and Settings\username\fortimail_sniff.txt. 4 Press Enter to send the CLI command to the FortiMail unit, beginning packet capture. FortiMail™ Secure Messaging Platform Version 4.0 Patch 1 Install Guide Revision 2 http://docs.fortinet.com/ • Feedback...
- Page 167 You can convert the plain text file to a format (.pcap) recognizable by Wireshark (formerly called Ethereal) using the fgt2eth.pl Perl script. To download fgt2eth.pl, see the Fortinet Knowledge Center article Using the FortiOS built-in packet sniffer. Note: The fgt2eth.pl script is provided as-is, without any implied warranty or technical support, and requires that you first install a Perl module compatible with your operating system, such as ActivePerl (http://www.activestate.com/Products/activeperl/index.mhtml).
- Page 168 Troubleshooting tools Testing the installation Figure 58: Viewing sniffer output in Wireshark For additional information on packet capture, see the Fortinet Knowledge Center article Using the FortiOS built-in packet sniffer. For more information on CLI commands, see the FortiMail CLI Reference.
-
Page 169: Index
"admin" account digital subscriber line (DSL) advanced mode discard air flow ambient temperature DNS-resolvable antispam documentation antivirus commenting on Fortinet asynchronous digital subscriber line (ADSL) domain name certificate authentication local downgrade basic mode drive blank Bayesian database training installing bezel... - Page 170 FortiGuard push updates keyboard scheduling updates FortiGuard Antispam FortiGuard Antivirus Fortinet customer service Fortinet Distribution Network (FDN) license validation Fortinet Distribution Server (FDS) local domain name Fortinet documentation login ID Fortinet Knowledge Center Fortinet Technical Support front panel...
- Page 171 FortiGuard Antivirus and FortiGuard Antispam MSISDN reputation Secure Shell (SSH) US-ASCII secure SMTP security certificate self-signed verify server mode configuration email user virus example VLAN shielded twisted pair (STP) FortiMail™ Secure Messaging Platform Version 4.0 Patch 1 Install Guide Revision 2 http://docs.fortinet.com/ • Feedback...
- Page 172 Index web browser warnings web-based manager warnings, security mode webmail FortiMail™ Secure Messaging Platform Version 4.0 Patch 1 Install Guide Revision 2 http://docs.fortinet.com/ • Feedback...
- Page 173 www.fortinet.com...
- Page 174 www.fortinet.com...