
Related Manuals for Interlogix TVB-5801


Summary of Contents for Interlogix TVB-5801
- Page 1 TruVision Stainless Steel IP Cameras Configuration Manual P/N 1073371-EN • REV B • ISS 27MAR18...
- Page 2 Copyright © 2018 United Technologies Corporation. Interlogix is part of UTC Climate, Controls & Security, a unit of United Technologies Corporation. All rights reserved. Trademarks and Trade names used in this document may be trademarks or patents registered trademarks of the manufacturers or vendors of the respective products.
-
Page 3: Table Of Contents
Content Introduction 3 Default settings to access the camera 3 Network access 4 Checking your web browser security level 4 Activating the camera 5 Overview of the camera web browser 6 Camera configuration 8 Configuration menu overview 8 Local configuration 9 System time 11 Network settings 12 Recording parameters 19... - Page 4 Restore default settings 69 Import/export a configuration file 70 Upgrade firmware 70 Reboot camera 71 Camera operation 72 Logging on and off 72 Live view mode 72 Playing back recorded video 73 Searching event logs 75 Operating PTZ control 77 TruVision Stainless Steel IP Cameras Configuration Manual...
-
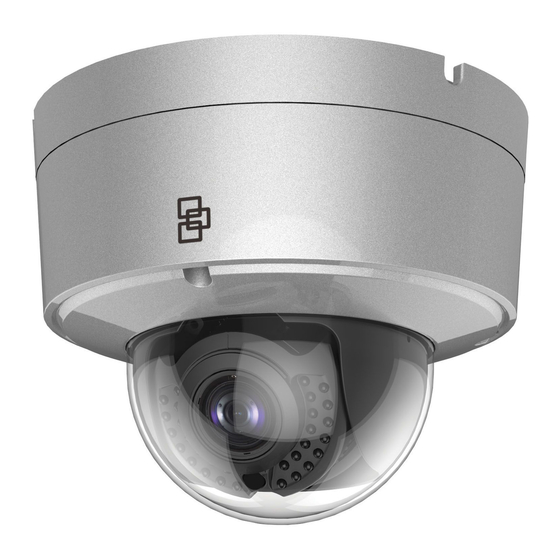
Page 5: Introduction
This is the configuration manual for the following TruVision models: IP stainless steel outdoor box camera housings: • TVB-5801 (2 MPX camera, 3.8 to 16 mm lens) • TVB-5802 (2 MPX camera, 11 to 40 mm lens) IP stainless steel dome camera: •... -
Page 6: Network Access
Network access This manual explains how to configure the camera over the network with a web browser. ® TruVision IP cameras can be configured and controlled using Microsoft Internet ® Explorer and other browsers. The procedures described use Microsoft Internet Explorer (IE) web browser. -
Page 7: Activating The Camera
To add the camera’s IP address to Internet Explorer’s list of trusted sites: 1. Open Internet Explorer. 2. Click Tools, and then Internet Options. 3. Click the Security tab and then select the Trusted sites icon. 4. Click the Sites button. -
Page 8: Overview Of The Camera Web Browser
Activation via TruVision Device Manager: For instructions on how to activate the camera using TruVision Device Manager, refer to the TruVision Device Manager User Manual. Go to www.interlogix.com/video/product/truvision-device-manager and click Downloads. Overview of the camera web browser Use the camera web browser to view, record, and play back recorded videos as well as manage the camera from any PC with access to the same network as the camera. - Page 9 Name Description Live view Click to view live video. Playback Click to play back video. Click to search for event logs. There are three main types: Alarm, Exception and Operation. Configuration Click to display the configuration window for setting up the camera. Viewer View live video.
-
Page 10: Camera Configuration
Camera configuration This chapter explains how to configure the cameras through a web browser. After the camera hardware has been installed, configure the camera’s settings through the web browser. Administrator rights are required to configure the cameras over the internet. The camera web browser permits configuration of the camera remotely using a PC. -
Page 11: Local Configuration
Configuration menus Description Image Defines the image parameters, OSD settings, overlay text, and privacy mask. See “Video image” on page 23 for further information on the setup. Security Defines who can access and use the camera, their passwords and access privileges, RTSP authentication, IP address filter, and SSH. Basic Event Defines Motion Detection, Tamper-proof, Alarm Input/Output, and Exceptions. - Page 12 Parameters Description Live View Parameters Protocol Specifies the network protocol used. Options include: TCP, UDP, MULTICAST and HTTP. Live View Performance Specifies the transmission speed. Options include: Shortest Delay or Auto. Rules Enable or disable the display of intelligent metadata in Live View mode on the browser.
-
Page 13: System Time
System time Network Time Protocol (NTP) is a protocol for synchronizing the clocks of network devices, such as IP cameras and computers. Connecting network devices to a dedicated NTP time server ensures that they are all synchronized. To define the system time and date: 1. -
Page 14: Network Settings
Network settings Accessing the camera through a network requires that you define certain network settings. Use the “Network” menu to define the network settings. See Figure 4 below for further information. Figure 4: Network window (TCP/IP tab shown) Menu tabs Description TCP/IP NIC Type: Enter the NIC type. - Page 15 Menu tabs Description 239.255.255.255. Only specify this option if you are using the multicast function. Some routers prohibit the use of multicast function in case of a network storm. Enable Multicast Discovery: Enables the automatic detection of the online network camera via private multicast protocol in the LAN. DNS server: Specifies the DNS server for your network.
- Page 16 Menu tabs Description UPnP The UPnP (Universal Plug and Play) protocol allows devices to connect seamlessly and to simplify the implementation of networks in the home and corporate environments. With the function enabled, you do not need to configure the port mapping for each port, and the camera is connected to the Wide Area Network (WAN) via the router.
- Page 17 To define the DDNS parameters: 1. From the menu toolbar, click Configuration > Network > DDNS. 2. Select Enable DDNS to enable this feature. 3. Select DDNS Type. Two options are available: DynDNS and IPServer. • Select DDNS Type. Select one of the following options: •...
- Page 18 Note: The switch or router to which the camera is connected must support the IEEE 802.1X standard, and a server must be configured. Please apply and register a user name and password for 802.1X in the server. To define the QoS parameters: 1.
- Page 19 To set up the email parameters: 1. In Configuration > Network, click the Email tab to open its window. 2. Configure the following settings: Sender: The name of the email sender. Sender’s Address: The email address of the sender. SMTP Server: The SMTP Server, IP address or host name. SMTP Port: The SMTP port.
- Page 20 Confirm: Confirm the password. Receiver1: The name of the first user to be notified. Receiver’s Address1: The email address of the first user to be notified. Receiver2: The name of the second user to be notified. Receiver’s Address2: The email address of the second user to be notified. Receiver3: The name of the third user to be notified.
-
Page 21: Recording Parameters
Click to save the settings. -Or- To create a certificate request: Click the Create button beside “Create Certificate Request”. Enter the country, host name/IP and the other information requested. 3. Click to save the settings. Download the certificate request and submit it to the trusted certificate authority for signature, such as Symantec or RSA. - Page 22 Figure 5: Video/Audio Settings menu (Video tab shown) Parameter descriptions Video Stream Type: Specifies the streaming method used. Options include: Main Stream (Normal), Sub Stream and Third stream. Video Type: Specifies the stream type you wish to record. Select Video Stream to record video stream only. Select Video&Audio to record both video and audio streams.
- Page 23 Parameter descriptions I Frame Interval: A video compression method. It is strongly recommended not to change the default value 50. SVC: Select OFF/ON to disable/enable the SVC function. Select Auto and the device will automatically extract frames from the original video when the network bandwidth is insufficient.
- Page 24 NVR or other platforms to generate a VCA alarm. For example, with an Interlogix NVR (please check the Interlogix website for the latest NVR models supporting this feature), you can draw a virtual line in the NVR playback window, and search the objects or people crossing this virtual line.
-
Page 25: Video Image
Video image You may need to adjust the camera image depending on the camera model or location background in order to get the best image quality. You can adjust the brightness, contrast, saturation, hue, and sharpness of the video image. See Figure 6 below. Use this menu to also adjust camera behavior parameters such as exposure time, iris mode, video standard, day/night mode, image flip, WDR, digital noise reduction, white balance, and indoor/outdoor mode. - Page 26 Parameter Description Night: Configure the Image Adjustment, Exposure Settings, Backlight, White Balance and Image Enhancement settings for night mode only. Custom 24h settings This is used when the camera is in an outdoor situation where the day and night is defined by the amount of daylight or a trigger via an alarm input.
- Page 27 Parameter Description Smart IR (supported When enabled, it can avoid over exposure of an image due to IR cameras only) LED glare. IR Light (supported Select ON/OFF to Enable/disable IR. cameras only) Enable: the IR illuminators will be ON when the camera switches to night mode.
-
Page 28: Osd (On Screen Display)
Parameter Description 9. Video Adjustment Mirror Inverts the image. Options are Left/Right, Up/Down, Center, and OFF. Default is OFF. Hallway View To invert the 16:9 aspect ratio, enable the rotate function. Best used when installing the camera in a scene with a narrow angle of view. - Page 29 To position the date/time and name on screen: 1. From the menu toolbar, click Configuration > Image > Settings. 2. Select the Display Name check box to display the camera’s name on screen. You can modify the default name in the text box of Camera Name.
-
Page 30: Text Overlay
Text overlay You can add up to four lines of text on screen. This option can be used, for example, to display emergency contact details. Each text line can be positioned anywhere on screen. See Figure 7 below. Figure 7: Text overlay menu To add on-screen text: 1. -
Page 31: Picture Overlay
Figure 8: Camera image settings menu – Privacy mask window To add a privacy mask area: 1. From the menu toolbar, click Configuration > Image > Privacy Mask. 2. Select Enable Privacy Mask. 3. Click Draw Area. 4. Click and drag the mouse in the live video window to draw the mask area. Note: You are allowed to draw up to four areas on the same image. -
Page 32: Motion Detection Alarms
Figure 9: Camera image settings menu To add a picture: 1. From the menu toolbar, click Configuration > Image > Picture Overlay. 2. Click Browse to select a picture and Upload to upload it. 3. Select the Enable Picture Overlay check box to enable the function. - Page 33 Figure 10: Motion detection window (Normal configuration mode shown) Defining a motion detection alarm requires the following tasks: 1. Area settings: Define the on-screen area that can trigger a motion detection alarm and the detection sensitivity level (see Figure 10, item 1). 2.
- Page 34 as define the percentage of the motion detection area that the object must occupy, select day or night mode, and set up eight differently configured defined areas. To set up motion detection in normal mode: 1. From the menu toolbar, click Configuration >...
- Page 35 Notify Alarm Recipient Send an exception or alarm signal to the remote management software when an event occurs. Send Email Sends an email to a specified address when there is an alarm. Note: You must configure email settings before enabling this option.
- Page 36 4. Under Switch Day and Night Settings, select OFF, Auto D/N Switch, or Scheduled D/N settings. Default is OFF. Auto-switch and Scheduled-switch allow you to set different settings for day and night as well as different periods. 5. Select Area No. and click Draw Area.
- Page 37 12. Choose the day and click to set the detailed time period. You can copy the schedule to other days. 13. Click to save changes. 14. Specify the linkage method for when an event occurs. Check one or more response methods for the system when a motion detection alarm is triggered.
-
Page 38: Tamper-Proof Alarms
Tamper-proof alarms You can configure the camera to trigger an alarm when the lens is covered and to take an alarm response action. Figure 11: Tamper-proof alarm window To set up tamper-proof alarms: 1. From the menu toolbar, click Configuration >... -
Page 39: Exception Alarms
4. Click Edit to edit the arming schedule for tamper-proof alarms. The arming schedule configuration is the same as that for motion detection. See “To set up motion detection” for more information. 5. Specify the linkage method when an event occurs. Select one or more response methods for the system when a tamper-proof alarm is triggered. -
Page 40: Alarm Inputs And Outputs
3. Specify the linkage method when an event occurs. Select one or more response methods for the system when a tamper-proof alarm is triggered. Notify Alarm Recipient Send an exception or alarm signal to the remote management software when an event occurs. Send Email Sends an email to a specified address when there is an exception alarm. -
Page 41: Face Detection
Send Email Sends an email to a specified address when there is an alarm input or output alarm. Note: You must configure email settings before enabling this option. See “To set up the email parameters” on page 17 for further information. If you want to send the event snapshot together with the email, select the Attached Snapshot option. - Page 42 Figure 13: Face detection window To define face detection: 1. From the menu toolbar, click Configuration > Smart Event > Face Detection. 2. Select Enable Face Detection to enable the function. 3. Select Enable Dynamic Analysis Face Detection if you want the face detected to be marked with a green frame in live view.
-
Page 43: Audio Exception Detection
Notify Alarm Recipient Send an exception or alarm signal to the remote management software when an event occurs. Send Email Sends an email to a specified address when there is a face detection alarm. Note: You must configure email settings before enabling this option. -
Page 44: Cross Line Detection
To define audio exception detection: 1. From the menu toolbar, click Configuration > Smart Event > Audio Exception Detection. 2. Select Audio Loss Exception to activate the function. 3. Select Sudden Increase of Sound Intensity Detection to detect a steep rise in the sound level of the surveillance scene. - Page 45 bidirectional. Unidirectional is crossing the line from left to right or from right to left. Bidirectional is crossing the line from both directions. A series of linkage methods can be triggered if an object is detected crossing the line. To define cross line detection: 1.
-
Page 46: Intrusion Detection
Notify Alarm Recipient Send an exception or alarm signal to the remote management software when an event occurs. Send Email Sends an email to a specified address when there is a cross line detection alarm. Note: You must configure email settings before enabling this option. - Page 47 Figure 15: Intrusion detection window To define intrusion detection: 1. From the menu toolbar, click Configuration > Smart Event > Intrusion Detection. 2. Select the Enable Intrusion Detection check box to enable the function. 3. Click Draw Area, and then draw a rectangle on the image as the defense region. When you draw the rectangle, all lines should connect end-to-end to each other.
-
Page 48: Defocus Detection
6. Specify the linkage method when an event occurs. Select one or more response methods for the system when an intrusion detection alarm is triggered. Notify Alarm Recipient Send an exception or alarm signal to the remote management software when an event occurs. Send Email Sends an email to a specified address when there is an alarm. -
Page 49: Scene Change Detection
Figure 16: Defocus detection window To define defocus detection: 1. From the menu toolbar, click Configuration > Smart Event > Defocus Detection. 2. Select the Enable Defocus Detection check box to enable the function. Sensitivity: The range is between 1 and 100. The higher the sensitivity level, the smaller the defocus required to trigger an alarm. - Page 50 Figure 17: Scene change detection window To define scene change detection: 1. From the menu toolbar, click Configuration > Smart Event > Scene Change Detection. 2. Select the Enable Scene Change Detection check box to enable the function. 3. Configure the sensitivity ranging from 1 to 100, the higher the sensitivity, the easier the change of scene can trigger the alarm.
-
Page 51: Region Entrance Detection
Notify Alarm Recipient Sends an exception or alarm signal to the remote management software when an event occurs. Send Email Sends an email to a specified address when there is a scene change detection alarm. Note: You must configure email settings before enabling this option. See “To set up the email parameters”... - Page 52 Figure 18: Region entrance detection window To define region entrance detection: 1. From the menu toolbar, click Configuration > Smart Event > Region Entrance Detection. 2. Select the Enable Entrance Detection check box to enable the function. 3. Choose the region number to be configured. 4.
-
Page 53: Region Exiting Detection
Notify Alarm Recipient Send an exception or alarm signal to the remote management software when an event occurs. Send Email Sends an email to a specified address when there is an alarm. Note: You must configure email settings before enabling this option. - Page 54 Figure 19: Region exiting detection window To define region exiting detection: 1. From the menu toolbar, click Configuration > Smart Event > Region Exiting Detection. 2. Select the Enable Exiting Detection check box to enable the function. 3. Click Draw Area, and then draw a rectangle on the image as the designated region.
-
Page 55: Unattended Baggage Detection
Notify Alarm Recipient Send an exception or alarm signal to the remote management software when an event occurs. Send Email Sends an email to a specified address when there is an alarm. Note: You must configure email settings before enabling this option. - Page 56 Figure 20: Unattended baggage detection window To define unattended baggage detection: 1. From the menu toolbar, click Configuration > Smart Event > Unattended Baggage Detection. 2. Select the Enable Unattended Baggage Detection check box to enable the function. 3. Click Draw Area, and then draw a rectangle on the image as the designated region.
-
Page 57: Object Removal Detection
Notify Alarm Recipient Send an exception or alarm signal to the remote management software when an event occurs. Send Email Sends an email to a specified address when there is an alarm. Note: You must configure email settings before enabling this option. - Page 58 Figure 20: Object removal detection window To define object removal detection: 1. From the menu toolbar, click Configuration > Smart Event > Object Removal Detection. 2. Select the Enable Unattended Baggage Detection check box to enable the function. 3. Click Draw Area, and then draw a rectangle on the image as the designated region.
-
Page 59: Snapshot Parameters
Notify Alarm Recipient Send an exception or alarm signal to the remote management software when an event occurs. Send Email Sends an email to a specified address when there is an alarm. Note: You must configure email settings before enabling this option. - Page 60 Figure 21: Snapshot window To set up scheduled snapshots: 1. From the menu toolbar, click Configuration > Storage > Snapshot. 2. Select Enable Timing Snapshot to enable continuous snapshots. 3. Select the required format of the snapshot, such as JPEG. 4.
-
Page 61: Nas Settings
3. Select the required format of the snapshot, such as JPEG. 4. Select the required resolution and quality of the snapshot. 5. Enter the time interval between two snapshots. Select the unit of time from the drop- down list: milliseconds or seconds. 6. -
Page 62: Storage Devices
To set up a NAS system: 1. From the menu toolbar, click Configuration > Storage > NAS. 2. Enter the IP address of the network disk, and the NAS file path. 3. Click Save to save changes. Storage devices Use the storage management window to display the capacity, free space available, and the working status of the HDD of the NAS and the SD card in the camera (if supported). -
Page 63: Recording Schedule
Recording schedule You can define a recording schedule for the camera in the “Record Schedule” window. The recording is saved to the NAS or SD card configured in the camera. The camera’s SD card provides a backup in case of network failure. The SD card is not provided with the camera. - Page 64 If you select “All Day”, select one of the record types from the drop-down list box: • Continuous: For continuous recording. • Motion detection: Video is recorded when the motion is detected. • Alarm: Video is recorded when the alarm is triggered via the external alarm input.
-
Page 65: Rs-485 Settings
RS-485 settings The RS-485 serial port is used to connect to light and wiper devices. Configuration of these parameters should be done before you connect to any devices. Note: Only supported cameras include RS-485 settings. To set up RS-485 settings: 1. - Page 66 6. Enter the arming schedule interface and click-and-drag the mouse on the time bar to set the time during which object counting will be active. 7. Select the linkage method. 8. Click Save to save the settings. To set up counting statistics: Note: An SD card must be installed and configured for use with the camera in order to save count data and generate reports.
-
Page 67: Camera Management
Camera management This chapter describes how to use the camera once it is installed and configured. The camera can be accessed using a web browser. User management This section describes how to manage users. You can: Add or delete users ... - Page 68 Operator: This user can only change the configuration of his/her own account. An operator cannot create or delete other users. Viewer: This user has the permission of live view, playback and log search. However, they cannot change any configuration settings. Add and delete users The administrator can create up to 31 users.
-
Page 69: Rtsp Authentication
Basic Permissions Camera Configuration Remote: Video Output Control Remote: Serial Port Control 7. Click to save the settings. To delete a user: 1. Select the required user under the User tab. 2. Click Delete button. A message box appears. Note: Only the administrator can delete a user. 3. -
Page 70: Ip Address Filter
To define RTSP authentication: 1. From the menu toolbar, click Configuration > Security > RTSP Authentication. 2. Select the Authentication type Enable Disable in the drop-down list to enable or disable the RTSP authentication. The authentication credentials are the same as the Admin user. -
Page 71: Defining The Security Service
Defining the security service This function enables SSH and allows you to define its password. It is only used by Technical Support. Figure 22: Security service window To enable the illegal login lock: 1. Click Configuration > Security > Security Service. -
Page 72: Import/Export A Configuration File
To upgrade firmware version: 1. Download the latest firmware version from our web site at: http://www.interlogix.com/video/category/ip-cameras 2. When the firmware file has downloaded, extract the file to the required destination. Note: Do not save the file on your desktop. -
Page 73: Reboot Camera
TruVision Device Manager User Manual, ensure that the firmware update file has already been downloaded to the local computer. To access the TruVision Device Manager User Manual, go to www.interlogix.com/video/product/truvision-device-manager and click Downloads. Reboot camera The camera can be easily rebooted remotely. -
Page 74: Camera Operation
Camera operation This chapter describes how to use the camera once it is installed and configured. Logging on and off You can easily log out of the camera browser window by clicking the Logout button on the menu toolbar. You will be asked each time to enter your user name and password when logging in. -
Page 75: Playing Back Recorded Video
Playing back recorded video You can easily search and play back recorded video in the playback interface. Note: You must configure the NAS or insert an SD card in the dome camera to be able to use the playback functions. See “Storage devices” on page 60 for more information. To search recorded video stored on the camera’s storage device for playback, click Playback on the menu toolbar. - Page 76 Name Description Enable digital zoom. Capture a snapshot image of the playback video. Start/Stop clipping video files. Recording type The color code displays the recording type. Recording types are schedule recording, alarms recording and manual recording. The recording type name is also displayed in the current status window.
-
Page 77: Searching Event Logs
To archive recorded snapshots: 1. Click to open the snapshot search window. 2. Select the snapshot type and the start and end time. 3. Click Search to search for the snapshots. 4. Select the required snapshots, and click Download to download them. Searching event logs You must configure a NAS or SD card in the dome camera to be able to use the log functions. - Page 78 Figure 25: Log window 1. Major Type 4. Start search 5. Save searched logs 2. Minor Type 3. Start and end search time You can search for recorded logs by the following criteria: Major type: There are four types of logs: All Types, Alarm, Exception, and Operation. See Table 1 below for their descriptions.
-
Page 79: Operating Ptz Control
Main log type Minor log types: Description of events included Operation Power On, Abnormal Shutdown, Remote Reboot, Remote Login, Remote Logout, Remote Configure parameters, Remote Start Record, Remote Stop Record, Remote PTZ Control, Remote Initialize HDD, Remote Playback by File, Remote Playback by Time, Remote Export Config file, Remote import config file, Remote Get Parameters, Remote Get Working Status, Establish Transparent Channel, Disconnect Transparent Channel, Start Bidirectional Audio, Stop... - Page 80 Note: 1. To do pan/tilt movement using the direction buttons, the camera connected to the network must support RS-485 and a pan/tilt unit must be installed in the camera. Please properly set the PTZ parameters on the RS-485 Settings page referring to Defining RS-485 settings 2.
- Page 81 4. Configure the preset number, preset tour time and preset tour speed. Preset Tour Duration: The dwell time. The length of time in seconds for which a camera stays at a preset before moving to the next preset. Preset Tour Speed: The speed the camera moves from one preset to another.
- Page 82 Index link to exception alarms, 38 link to face detection alarm, 41 Alarm inputs link to intrusion detection alarm, 46, 51, 53, 55, set up, 38 Alarm outputs link to motion detection, 33 set up, 38 link to scene change detection alarm, 49 Alarm types Email parameters motion detection, 30...
- Page 83 Network, 37 formatting, 60 Network protocol Snapshots setup, 8, 9 archive snapshots from recorded files, 74 Network settings event-triggered, 57 overview of local camera parameters, 8, 9 save during live view mode, 72 set up, 12 scheduled, 57 NTP synchronization, 11 Streaming main/sub setup, 8, 9 System time...