Table of Contents
Advertisement
Quick Links
Download this manual
See also:
Configuration Manual
Advertisement
Table of Contents

Summary of Contents for Interlogix TruVision TVD-5801
- Page 1 TruVision Stainless Steel Dome Camera Installation Guide P/N 1073434-EN • REV A • ISS 27FEB18...
- Page 3 © 2018 United Technologies Corporation, Copyright Interlogix is part of UTC Climate, Controls & Security, a unit of United Technologies Corporation. All rights reserved. Trademarks Trade names used in this document may be trademarks or and patents registered trademarks of the manufacturers or vendors of the respective products.
- Page 4 For more information on warranty disclaimers and product safety information, please check www.firesecurityproducts.com/policy/product-warning/ or scan the QR code: Contact For contact information go to: www.interlogix.com or information www.firesecurityproducts.com and manuals To get translations for this and other product manuals go to:...
-
Page 5: Table Of Contents
SD memory card installation 11 Mounting the dome camera 12 Mounting the TVJ-JBS junction box 12 Using the camera with an Interlogix NVR or Hybrid DVR or another system 12 Using the camera with TruVision Navigator 13 Access the camera over the internet 13... -
Page 6: Introduction
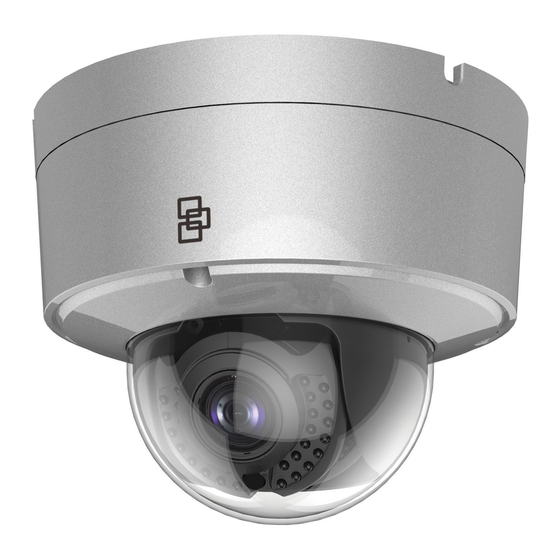
Introduction Product overview This is the installation guide for the TruVision Stainless Steel dome camera model: • TVD-5801 (2MPX camera, 2.8-12 mm lens) Installation This section provides information on how to install the cameras. Installation environment When installing your product, consider these factors: •... -
Page 7: Package Contents
immediately if the camera is wet and ask a qualified service person for servicing. Moisture can damage the camera and also create the danger of electric shock. Servicing: Do not attempt to service this camera • yourself. Any attempt to dismantle or remove the covers from this product will invalidate the warranty and may also result in serious injury. - Page 8 CD with configuration manual Equipment disposal sheet and TruVision Device Manager Battery disposal sheet Drill template Video test cable Screws Drywall anchor 7.5 × 24.5 mm (4 pcs) Screw M4 × 25 mm (4 pcs) Torx driver Water joint: Provides water resistance to network cable connector Installation Guide...
-
Page 9: Camera Description
CAUTION: Use direct plug-in UL listed power supplies marked Class 2/CE certified or LPS (limited power source) of the required output rating as listed on the unit. Camera description Figure 1: Dome camera description and connectors Bubble assembly SD card slot Lens Video test port Dome liner... -
Page 10: Ir Illuminators
IR illuminators The camera’s built-in IR illumination provides high-quality video in low-light environments, even when there is no other illumination available. You can configure the IR illumination using a web browser or a client software, such as TruVision Navigator. If the function is enabled, the IR light is On when the camera enters night (black and white) mode. -
Page 11: Sd Memory Card Installation
SD memory card installation To install the SD memory card in the dome camera Loosen the three torx screws on the bubble assembly. Insert the memory card into the SD card slot until it clicks into place. Reinstall the bubble assembly on the camera base. Installation Guide... -
Page 12: Mounting The Dome Camera
Refer to the installation guide provided with the TVJ-JBS junction box for instructions on mounting the camera in conjunction with the TVJ-JBS junction box. Using the camera with an Interlogix NVR or Hybrid DVR or another system Please refer to the NVR/DVR user manuals for instructions on connecting and operating the camera with these systems. -
Page 13: Using The Camera With Truvision Navigator
Using the camera with TruVision Navigator The camera can be connected to an Interlogix NVR, hybrid DVR, or directly to TruVision Navigator. Please refer to the user manual of TruVision Navigator and/or of the NVR or hybrid DVR for instructions. - Page 14 Note: • The default IP address of the camera is 192.168.1.70. • For the camera to enable DHCP by default, you must activate the camera via TruVision Device Manager. Please refer to the following section, “To activate the camera via TruVision Device Manager.” Type the password in the Password field.
- Page 15 Figure 3: Example of a configuration window To activate the camera via TruVision Device Manager: For instructions on how to activate the camera using TruVision Device Manager, refer to the TruVision Device Manager User Manual. Go to www.interlogix.com/video/product/truvision- device-manager and click Downloads. Installation Guide...
-
Page 16: Specifications
Specifications Electrical Voltage input 12 VDC, PoE+ Power consumption Max. 16 W Miscellaneous Connectors Audio In/Out, Alarm In/Out, 12 VDC Power, Ethernet RJ45 PoE port Operating temperature -40 to +60°C (-40 to +140°F) Dimensions 165.4 × 130 mm (6.51 x 5.12 in.) Weight 3.36 kg (7.41 lb.) Environmental rating... -
Page 17: Pin Definitions
Pin definitions There are eight wires on a standard UTP/STP cable and each wire is color-coded. The following shows the pin allocation and color of straight and crossover cable connection: Figure 4: Straight-through cable White/Orange White/Orange Orange Orange White-Green White-Green Blue Blue White/Blue... - Page 18 Installation Guide...
- Page 19 Installation Guide...
- Page 20 Installation Guide...


