Table of Contents
Advertisement
Advertisement
Table of Contents

Related Manuals for ResMed AirMini


Summary of Contents for ResMed AirMini
- Page 1 Clinical guide English...
-
Page 2: Table Of Contents
AutoSet Response ....................... 9 SmartStart ..........................9 SmartStop ..........................9 HumidX and HumidX Plus ....................9 Setting up the AirMini system ....................10 Setting up the machine ...................... 10 Adding optional humidification ................... 10 Connecting your mask......................10 Connecting machine and smart device ................. 11 Starting therapy ........................ - Page 3 Cleaning the AirMini tubing ..................19 Cleaning the F20 connector ..................19 Cleaning the N20 connector ..................19 Cleaning the AirFit P10 for AirMini ................20 Replacing the air filter ....................20 Cleaning the AirMini machine ..................20 Reprocessing ........................20 Cleaning masks ......................
-
Page 4: Welcome
WARNING Read this entire guide before using the machine. CAUTION The AirMini app is not intended for remote titration, and all changes to therapy settings modify an existing prescribed setting. A physician should be consulted for any prescription changes. Legal notice This guide, as well as the computer programs described herein, are supplied on the condition that they may only be used in accordance with their stated purpose. - Page 5 Neither the name, trademarks, service marks or logos of Apple Inc. may be used to endorse or promote products derived from the Apple Software without specific prior written permission from Apple. Except as expressly stated in this notice, no other rights or licenses, express or implied, are granted by Apple herein, including but not limited to any patent rights that may be infringed by your derivative works or by other works in which the Apple Software may be incorporated.
-
Page 6: Security
The AirMini and the AirMini app use security features to help protect patient privacy and prevent unauthorised access to patient data. These include: Use of a quick response (QR) code to establish trust between the AirMini and the AirMini app •... -
Page 7: Software And Firmware Updates
Once a firmware update becomes available for AirMini, a message will appear on the user's smart device when the AirMini app is accessed. If an AirMini app software update is required, a message will indicate that a software update is needed. -
Page 8: At A Glance
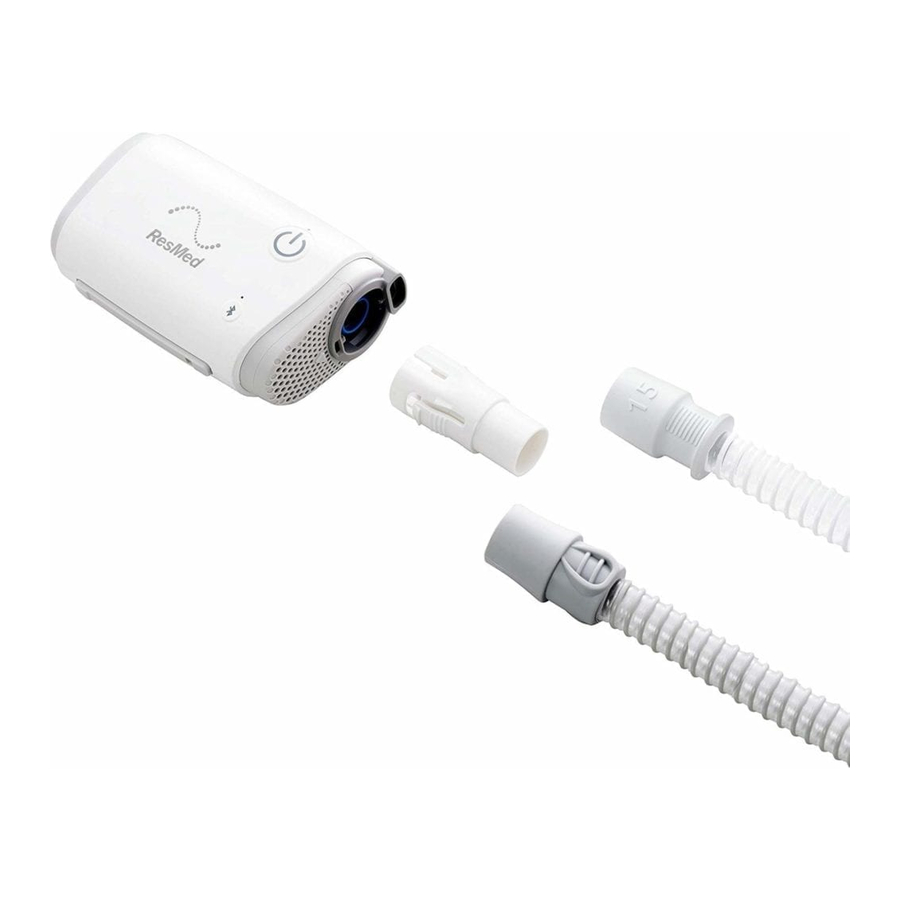
At a glance The AirMini system includes the AirMini machine, a power supply unit, a drawstring bag, and one of the following: • AirMini setup pack - F20: air tubing and F20 connector AirMini setup pack - N20: air tubing, N20 connector, HumidX™ and HumidX Plus •... -
Page 9: Therapy Information
Flow limitation As the upper airway begins to collapse, the shape of the inspiratory flow-time curve changes. The AirMini recognises and treats traditional as well as less common flow-limited breath wave forms. Snore Snoring is sound generated by vibrations of the walls of the upper airway. It is often preceded by... -
Page 10: Apnoea
AutoSet for Her mode AutoSet for Her mode is based on key aspects of ResMed’s AutoSet algorithm and delivers therapeutic responses tailored to the characteristics of female OSA patients. The AutoSet for Her is similar to ResMed’s AutoSet algorithm with the following modifications: Reduced rate of pressure increments designed to help prevent arousals. -
Page 11: Cpap Mode
If two apnoeas occur within a minute, the pressure reached in response to the second apnoea will become the new minimum treatment pressure until the next treatment session. Patients who use AutoSet for Her will still get the benefits of ResMed's AutoSet technology including improved sensitivity to flow-limitation and Central Sleep Apnoea Detection with Forced Oscillation Technique. -
Page 12: Expiratory Pressure Relief
It is useful when the ambient humidity level is very low. For example, at high altitudes or on an aircraft. The HumidX and HumidX Plus can be used with the N20 connector for AirMini and AirFit P10 for AirMini only. -
Page 13: Setting Up The Airmini System
P10 for AirMini. Refer to the mask device compatibility list on www.resmed.com for more information. Refer to the mask user guide for fitting information. See Using clinical mode for information on preparing to use the AirMini app with a smart device. Setting up the machine 1. -
Page 14: Connecting Machine And Smart Device
• From time to time, the terms of use may be updated and the patient may be required to provide consent again. • If the patient agrees to allow the AirMini app to upload their data to the cloud, it will be uploaded from the AirMini app to a secure server. -
Page 15: Starting Therapy
7. Select the machine name from the list to connect. 8. The first time you pair the AirMini machine with the smart device, you will need to perform the authentication procedure. When prompted by the AirMini app, begin the authentication process by tapping Scan code. If permission has not been granted already, you will be prompted by the AirMini app to allow the use of the smart device’s camera and then to position the machine’s QR code within the... -
Page 16: Stopping Therapy
Using clinical mode In clinical mode, ResMed’s AirMini app acts as the clinical menu and as the patient’s user interface. You can access, view and change therapy and machine settings using the AirMini app. Note: Data sent through Bluetooth is encrypted. -
Page 17: Using The Device Settings Menu
Using the device settings menu In clinical mode (machine settings) you can scroll through clinical settings and change them as required. Adjusting clinical settings The following clinical settings must be configured for each patient individually and should be periodically reassessed to ensure optimal therapy: Therapy Parameter Description... - Page 18 Note: Settings, date, time and machine run hours will not be erased. Erase AirMini Tapping the Erase AirMini data on phone button opens a confirmation dialog. Once you confirm that data on phone you want to erase therapy data, information stored on the phone will be erased.
-
Page 19: Navigating The Sleep Screen
7. To start therapy, go to the Sleep screen and tap START To enable or disable EPR or to switch SmartStart or SmartStop on or off: 1. Slide the on or off switches for the parameter you want to enable, disable or switch on or off. 2. -
Page 20: Viewing Information About The Airmini
AirMini app during 95 percent of the patient's therapy. To access the Dashboard, tap the Dashboard icon in the Navigation tab. Viewing information about the AirMini The About AirMini machine screen provides the following information about the AirMini: •... -
Page 21: Disconnecting The Airmini Tubing
Note: The HumidX and HumidX Plus cannot be washed. Disconnecting the AirMini tubing Disconnect the AirMini tubing from the machine by pressing the side buttons on the cuff and pulling it away. Unplugging the machine Unplug the power supply unit from the power outlet and the machine. -
Page 22: Cleaning And Replacing Parts
Note: The HumidX and HumidX Plus cannot be washed. Cleaning the AirMini tubing 1. Clean and check the AirMini tubing each week. AirMini tubing should be replaced at least every six months. 2. Wash the AirMini tubing in warm water using a mild, liquid detergent. -
Page 23: Cleaning The Airfit P10 For Airmini
Wipe the exterior of the AirMini machine with a dry cloth each week. Reprocessing If the AirMini machine is used by multiple patients, the AirMini air tubing as well as the HumidX must be discarded and replaced because they cannot be disinfected. -
Page 24: Troubleshooting
Advise patients that they cannot use the AirMini app on an airplane. • Because the AirMini app cannot be used on an airplane, advise patients to disable Bluetooth (or to enter airplane mode). While connected to power, patients should disable Bluetooth by... - Page 25 Start/Stop button on the AirMini machine. The Bluetooth indicator light on the AirMini machine is constantly white. It is not possible to pair to the machine. Bluetooth is disabled. Turn off airplane mode on the...
- Page 26 Ramp start pressure may be too low. Increase ramp start pressure using the AirMini app. The patient feels that too much air is being delivered from the AirMini machine. The Ramp Time feature may be turned off. Turn on the Ramp Time feature using the AirMini app.
-
Page 27: General Warnings And Cautions
Note: The patient may need to use the HumidX or HumidX Plus when ambient humidity conditions change. The AirMini machine appears in the machine selection list, but it is not possible to establish a connection. The AirMini machine name was not selected in the Tap the device name in the machine selection list to confirm machine selection list. -
Page 28: Technical Specifications
• The F20, N20 and P10 connectors for AirMini are fitted with vents. The F20 connector for AirMini is also fitted with an AAV. The AAV and vents have specific safety functions to prevent carbon dioxide build-up in the mask and should be kept clean and clear. - Page 29 (eg, pressure or flow) is affected by other equipment, move the machine away from the possible cause of interference. The AirMini complies with Part 15 of the FCC Rules and Industry Canada license-exempt RSS standards. Operation is subject to the following two conditions: This machine may not cause harmful interference, and this machine must accept any interference received, including interference that may cause undesired operation.
- Page 30 [cm H O (hPa)] Flow (maximum) at set pressures The following are measured accordingly to ISO 80601-2-70:2015 at the end of the specified air tubing: Pressure AirMini machine and AirMini air tubing cm H O (hPa) L/min (including uncertainty) English...
- Page 31 The A-weighted sound power level measured according to ISO 17510:2015: Air tubing connected to AirMini F20 connector with mask 27 dBA with uncertainty of 3 dBA Air tubing connected to the AirMini N20 or P10 connectors 23 dBA with uncertainty of 3 dBA with mask...
-
Page 32: Symbols
Notes: • The manufacturer reserves the right to change these specifications without notice. • The mask system does not contain PVC, DEHP or phthalates. This product is not made with natural rubber latex. • Electromagnetic emissions The following are measured accordingly to ISO 80601-2-70:2015 at the end of the specified air tubing: Emissions test Compliance RF emissions CISPR 11... -
Page 33: Servicing
ResMed. ResMed recommends that the AirMini machine be inspected and serviced by an authorised ResMed Service Centre if there is any sign of wear or concern with device function. Otherwise, service and inspection of the products generally should... -
Page 34: Limited Warranty
• CPAP machine (including external power supply units) This warranty is only available to the initial consumer. It is not transferable. If the product fails under conditions of normal use, ResMed will repair or replace, at its option, the defective product or any of its components. - Page 35 ResMed Ltd 1 Elizabeth Macarthur Drive Bella Vista NSW 2153 Australia See ResMed.com for other ResMed locations worldwide. AirFit, AirMini, AutoSet, HumidX and SmartStart are trademarks and/or registered trademarks of the ResMed family of companies. For patent and other intellectual property information, see ResMed.com/ip.