Table of Contents
Advertisement
Advertisement
Table of Contents

Related Manuals for Grizzly G3102


Summary of Contents for Grizzly G3102
- Page 1 MODEL G3102/G3103 VERTICAL MILL OWNER'S MANUAL COPYRIGHT © OCTOBER, 2008 BY GRIZZLY INDUSTRIAL, INC., REVISED MARCH, 2015 (ST) WARNING: NO PORTION OF THIS MANUAL MAY BE REPRODUCED IN ANY SHAPE OR FORM WITHOUT THE WRITTEN APPROVAL OF GRIZZLY INDUSTRIAL, INC.
- Page 2 This manual provides critical safety instructions on the proper setup, operation, maintenance, and service of this machine/tool. Save this document, refer to it often, and use it to instruct other operators. Failure to read, understand and follow the instructions in this manual may result in fire or serious personal injury—including amputation, electrocution, or death.
-
Page 3: Table Of Contents
Functional Overview ........2 Cleaning & Protecting ........33 Identification ........... 3 Lubrication ........... 34 G3102 Machine Data Sheet ......4 G3103 Machine Data Sheet ......7 SECTION 7: SERVICE ........37 Troubleshooting ........... 37 SECTION 1: SAFETY ........10 Adjusting Gibs .......... -
Page 4: Introduction
For your convenience, we always keep current vertical spindle movement using the coarse or Grizzly manuals and most updates available on our website at www.grizzly.com. Any updates to fine downfeed controls. your machine will be reflected in these documents The operator selects available spindle speeds by as soon as they are complete. -
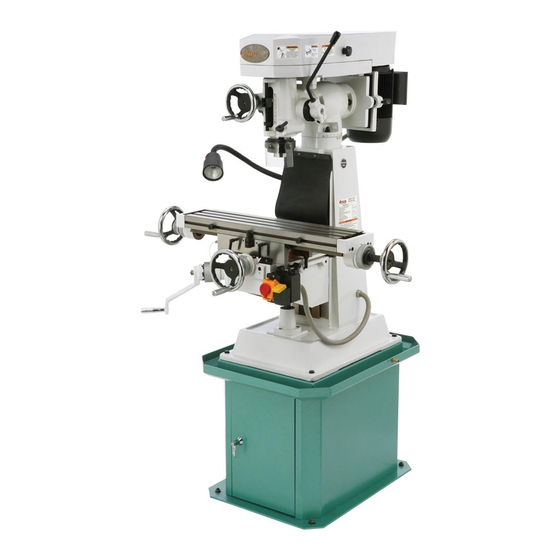
Page 5: Identification
Identification Figure 1. Model G3102/G3103 identification. A. Fine Downfeed Handwheel M. Spindle Motor B. Coarse Downfeed Lever N. Turret C. V-Belt Cover O. Downfeed Selection Knob D. Longitudinal (X-Axis) Handwheel P. Halogen Work Light E. Longitudinal Power Feed (Model G3103) Q. -
Page 6: G3102 Machine Data Sheet
G3102 Machine Data Sheet MACHINE DATA SHEET Customer Service #: (570) 546-9663 · To Order Call: (800) 523-4777 · Fax #: (800) 438-5901 MODEL G3102 VERTICAL MILL Product Dimensions: Weight................................800 lbs. Width (side-to-side) x Depth (front-to-back) x Height............... 45-1/2 x 41 x 66-5/8 in. - Page 7 The information contained herein is deemed accurate as of 3/2/2015 and represents our most recent product specifications. Model G3102 PAGE 2 OF 3 Due to our ongoing improvement efforts, this information may not accurately describe items previously purchased. G3102/G3103 Vertical Mill...
- Page 8 The information contained herein is deemed accurate as of 3/2/2015 and represents our most recent product specifications. Model G3102 PAGE 3 OF 3 Due to our ongoing improvement efforts, this information may not accurately describe items previously purchased. G3102/G3103 Vertical Mill...
-
Page 9: G3103 Machine Data Sheet
The information contained herein is deemed accurate as of 3/2/2015 and represents our most recent product specifications. Model G3103 PAGE 1 OF 3 Due to our ongoing improvement efforts, this information may not accurately describe items previously purchased. G3102/G3103 Vertical Mill... - Page 10 The information contained herein is deemed accurate as of 3/2/2015 and represents our most recent product specifications. Model G3103 PAGE 2 OF 3 Due to our ongoing improvement efforts, this information may not accurately describe items previously purchased. G3102/G3103 Vertical Mill...
- Page 11 The information contained herein is deemed accurate as of 3/2/2015 and represents our most recent product specifications. Model G3103 PAGE 3 OF 3 Due to our ongoing improvement efforts, this information may not accurately describe items previously purchased. G3102/G3103 Vertical Mill...
-
Page 12: Section 1: Safety
Everyday ery. Never operate under the influence of drugs or eyeglasses are NOT approved safety glasses. alcohol, when tired, or when distracted. -10- G3102/G3103 Vertical Mill... - Page 13 Contact our debris. Make sure they are properly installed, Technical Support at (570) 546-9663. undamaged, and working correctly. -11- G3102/G3103 Vertical Mill...
-
Page 14: Additional Safety Instructions For Mills
Use a brush or vacuum, and never clear chips while the spindle is turning. time you are experiencing difficulties per- forming the intended operation, stop using the machine! Contact our Technical Support at (570) 546-9663. -12- G3102/G3103 Vertical Mill... -
Page 15: Section 2: Circuit Requirements
SECTION 2: CIRCUIT REQUIREMENTS 110/220V Operation Power Connection Device The Model G3102/G3103 comes pre-wired with a NEMA 5-15 plug for connection to power. If you rewire the motor to 220V, we recommend using the plug/receptacle shown in Figure 2 for 220V. -
Page 16: 220V Conversion
Re-configure the two metal terminal jumpers serious personal injury. so that terminals Z2 and U2 are connected and U2 and V1 are connected, as shown in Figure 3. Ground Figure 3. Motor configured for 220V operation. -14- G3102/G3103 Vertical Mill... -
Page 17: Section 3: Setup
• Standard Screwdriver ......... 1 • Hex Wrench 3mm ........1 • Wrench or Socket 16mm ......1 The Model G3102/G3103 Unpacking is a heavy machine. Serious personal injury may occur if safe moving methods are not used. To Your machine was carefully packaged for safe be safe, get assistance transportation. -
Page 18: Inventory
Screwdrivers Standard & Phillips ..1 Each for the sake of expediency, replacements can be Drawbar ⁄ "-14 x 10 ⁄ " ......1 obtained at your local hardware store. K. Table T-Bolts ..........2 Figure 5. Model G3102/G3103 inventory. -16- G3102/G3103 Vertical Mill... -
Page 19: Clean Up
Great products for removing shipping grease. Children and visitors may be seriously injured if unsuper- vised around this machine. Lock entrances to the shop or disable start switch or power connection to prevent unsupervised use. Figure 6. Cleaner/degreasers available from Grizzly. -17- G3102/G3103 Vertical Mill... -
Page 20: Moving & Placing Mill
When mounting the machine, use shims and The Model G3102/G3103 a precision level to make sure the table is is a heavy machine. -
Page 21: Mounting To Shop Floor
Figure 10. Machine mount example. mounting your machine and choose the best that fits your specific application. Anchor Stud Lag Bolt & Shield Anchor Figure 9. Typical fasteners for mounting to concrete floors. -19- G3102/G3103 Vertical Mill... -
Page 22: Assembly
Failure to follow this warning slide the handwheels onto the shaft, then could result in serious personal injury or tighten the set screws in the handwheel hub even death! to secure them. -20- G3102/G3103 Vertical Mill... -
Page 23: Test Run
— Investigate and correct strange or unusual noises or vibrations before operating the machine further. Always turn the machine OFF and disconnect it from power before investigating or correcting potential prob- lems. -21- G3102/G3103 Vertical Mill... -
Page 24: Spindle Break-In
V-belts for a spin- dle speed of 2220 RPM. Repeat Steps 3–5 for this speed. Turn the mill OFF. The spindle break-in pro- cedure is now complete and the machine is ready for operation. -22- G3102/G3103 Vertical Mill... -
Page 25: Section 4: Operations
Like all machinery there is potential danger ning any projects. Regardless of the con- when operating this machine. Accidents are tent in this section, Grizzly Industrial will frequently caused by lack of familiarity or not be held liable for accidents caused by failure to pay attention. - Page 26 Model G3102 Longitudinal Limit Stops Table Locks Figure 16. Model G3102 longitudinal limit stops. Note: The longitudinal limit stops on the Model Figure 14. Table locks. G3103 are adjusted for use with the limit switch &...
-
Page 27: Model G3103 Power Feed
H. Ball Handle: Manually positions the table. Flip the ON/OFF switch up to turn the power feed ON. Graduated Dial: Marked in 0.001" incre- ments, each complete revolution is equal to 0.125" of longitudinal table travel. -25- G3102/G3103 Vertical Mill... -
Page 28: Head Rotation
The turret rotates 360° around the column (see Figure 23). Figure 21. Head tilted 45° to the left. Tools Needed Wrench 19mm ........... 1 To tilt the head: DISCONNECT THE MILL FROM POWER! Figure 23. Head and turret rotated 45° to the left. -26- G3102/G3103 Vertical Mill... -
Page 29: Setting Spindle Speed
Use the following formula to calculate the required spindle speed (RPM) for your opera- tion: Recommended Spindle Cutting Speed (FPM) x 12 Speed Tool Dia. (in inches) x 3.14 (RPM) -27- Double if using carbide cutting tool G3102/G3103 Vertical Mill... - Page 30 (RPM). 1600 1280 Step 2: 50 SFM (from the chart) x 4 = 200. 2760 2220 1320 Step 3: 200 / 0.625" (diameter of cutter) = 320. Figure 27. V-belt configuration chart. -28- G3102/G3103 Vertical Mill...
-
Page 31: Downfeed Controls
H. Downfeed Selector: Enables either the coarse or fine downfeed control. Tighten the selector to enable the fine downfeed handwheel, and loosen it to enable the coarse downfeed lever. -29- G3102/G3103 Vertical Mill... -
Page 32: Loading/Unloading Tooling
Figure 33. Drawbar inserted through the top of the spindle. -30- G3102/G3103 Vertical Mill... -
Page 33: Section 5: Accessories
⁄ " T-slots. • Flame hardened vise bed and jaws. • Sealed bearing system. • 8200 lbs. of clamping pressure. Figure 36. G1075 52-PC. Clamping Kit. Figure 38. T10064 Milling vise (handle included, but not shown. -31- G3102/G3103 Vertical Mill... - Page 34 Gun Treatment 12 oz Spray ® H3789—G96 Gun Treatment 4.5 oz Spray See the current Grizzly catalog for full specifica- ® tions. Features: 4.330" overall height (horizontal), 6.750" height to center hole (vertical), #3 Morse Taper, 0.465" T-slot width, and 117 lb approximate shipping weight.
-
Page 35: Section 6: Maintenance
Lubricate quill downfeed gears (Page 35). • Note: This maintenance schedule is based on average usage. Adjust the maintenance schedule to match your actual usage to keep your mill run- ning smoothly and to protect your investment. -33- G3102/G3103 Vertical Mill... -
Page 36: Lubrication
Make sure the oil reservoir is full, then pull the handle (see Figure 43) and release it to send the lubricant through the lines. Handle Cross Leadscrew Fill Cap Figure 45. Cross leadscrew viewed from underneath the knee. Figure 43. One-shot way oiler. -34- G3102/G3103 Vertical Mill... - Page 37 (see Figure 48). Spring Gears Figure 48. Right side of quill gear shaft exposed. -35- G3102/G3103 Vertical Mill...
- Page 38 Figure 50. End cap from the right side of the quill gear shaft. -36- G3102/G3103 Vertical Mill...
-
Page 39: Section 7: Service
5. Tighten/replace mounting bolts in floor; relocate/ unevenly. shim machine. 6. Replace dented fan cover or fan. 6. Motor fan is rubbing on fan cover. 7. Motor bearings are at fault. 7. Test by rotating shaft; rotational grinding/loose shaft requires bearing replacement. -37- G3102/G3103 Vertical Mill... - Page 40 4. Workpiece not securely clamped to table or 4. Check that clamping is tight and sufficient for the mill vise. operation; make sure mill vise is tight to table. 5. Adjust gibs properly (Page 39). 5. Gibs are too loose. -38- G3102/G3103 Vertical Mill...
-
Page 41: Adjusting Gibs
Knee Gib Adjustment Screw Note: Refer to Figures 51–53 for the loca- (1 of 2) tions of the table, cross slide, and knee gib adjustment screws. Figure 53. Knee gib adjustment screw (1 of 2). -39- G3102/G3103 Vertical Mill... -
Page 42: Adjusting Backlash
0.005"–0.010" of backlash is acceptable. The backlash of the longitudinal and cross leadscrew can be adjusted by changing the gap in the leadscrew nuts (see Figures 54–55). Longitudinal Leadscrew Nut Screws Figure 54. Longitudinal leadscrew nut. Cap Screws -40- G3102/G3103 Vertical Mill... -
Page 43: Section 8: Electrical
CONVERTING TO 220V OPERATION. CIRCUIT REQUIREMENTS. You MUST fol- The Model G3102/G3103 is pre-wired for low the CIRCUIT REQUIREMENTS section 110V operation. If you plan to operate your on Page 13. If you are unsure about the... -
Page 44: 110V Electrical Wiring Diagram
Work Light V-Belt Cover Safety Switch Electrical Panel Ground Motor 110V Transformer 110V Power ON/OFF Switch Spindle Direction Switch Power Wiring Junction Box Ground NEMA 5-15 PLUG Grnd As Recommended -42- READ ELECTRICAL SAFETY G3102/G3103 Vertical Mill ON PAGE 41! - Page 45 Figure 58. V-belt cover safety switch wiring. Figure 59. 110V motor wiring. Figure 56. Electrical panel wiring. Figure 57. Power wiring junction box. Figure 60. Power ON/OFF and spindle direction switches. -43- READ ELECTRICAL SAFETY G3102/G3103 Vertical Mill ON PAGE 41!
-
Page 46: Conversion Wiring Diagram
Safety Switch 24V Halogen Work Light Electrical Panel Ground Motor 220V Transformer 220V Power ON/OFF Switch Spindle Direction Switch Power Wiring Junction Box Ground NEMA 6-15 PLUG Grnd As Recommended -44- READ ELECTRICAL SAFETY G3102/G3103 Vertical Mill ON PAGE 41! -
Page 47: Section 9: Parts
SECTION 9: PARTS Head Breakdown 59-1 59-2 10-1 22-1 73-4 73-3 51 52 73-6 20-1 73-5 73-1 73-2 -45- G3102/G3103 Vertical Mill... - Page 48 QUILL DOG 73-4 P3102073-4 MOTOR FAN P3102035 HEX BOLT M8-1.25 X 20 73-5 P3102073-5 S CAPACITOR 150M 250V 1-5/8 X 3-1/8 P3102036 FLAT WASHER 8MM 73-6 P3102073-6 R CAPACITOR 20M 450V 1-5/8 X 3-1/8 P3102037 DRAWBAR -46- G3102/G3103 Vertical Mill...
-
Page 49: Main
Main Breakdown 109-1 115-2 115-1 114A -47- G3102/G3103 Vertical Mill... - Page 50 ELEVATION CRANK P3102163 CIRCUIT BREAKER 2-POLE 220V 109-1 P3102109-1 KNEE GRADUATED DIAL P3102164 TERMINAL BLOCK 15-POLE P3102110 ELEVATION GEAR P3102165 LONG. LIMIT BLOCK (G3102) P3102111 ELEVATION LEADSCREW P3102165 LONG. LIMIT SWITCH (G3103) P3102112 ELEVATION LEADSCREW BASE -48- G3102/G3103 Vertical Mill...
-
Page 51: Electrical & Accessories
HEX WRENCH 5MM P3102163 CIRCUIT BREAKER 2-POLE 220V P3102173 HEX WRENCH 6MM P3102164 TERMINAL BLOCK 15-POLE P3102174 WRENCH 10/12MM P3102166 SCREWDRIVER PHILLIPS #2 P3102175 WRENCH 16/18MM P3102167 SCREWDRIVER FLAT #2 P3102185 TOOLBOX P3102168 FACE MILL 3" -49- G3102/G3103 Vertical Mill... -
Page 52: Label Placement
MUST maintain the original location and readability of the labels on the machine. If any label is removed or becomes unreadable, REPLACE that label before using the machine again. Contact Grizzly at (800) 523-4777 or www.grizzly.com to order new labels. -50-... - Page 53 Would you recommend Grizzly Industrial to a friend? _____ Yes _____No Would you allow us to use your name as a reference for Grizzly customers in your area? Note: We never use names more than 3 times. _____ Yes _____No 10.
- Page 54 FOLD ALONG DOTTED LINE Place Stamp Here GRIZZLY INDUSTRIAL, INC. P.O. BOX 2069 BELLINGHAM, WA 98227-2069 FOLD ALONG DOTTED LINE Send a Grizzly Catalog to a friend: Name_______________________________ Street_______________________________ City______________State______Zip______ TAPE ALONG EDGES--PLEASE DO NOT STAPLE...
-
Page 55: Warranty And Returns
WARRANTY AND RETURNS Grizzly Industrial, Inc. warrants every product it sells for a period of 1 year to the original purchaser from the date of purchase. This warranty does not apply to defects due directly or indirectly to misuse, abuse, negligence, accidents, repairs or alterations or lack of maintenance.