Table of Contents
Advertisement
Quick Links
Advertisement
Table of Contents

Related Manuals for Savin 40105


Summary of Contents for Savin 40105
-
Page 1: Operating Instructions
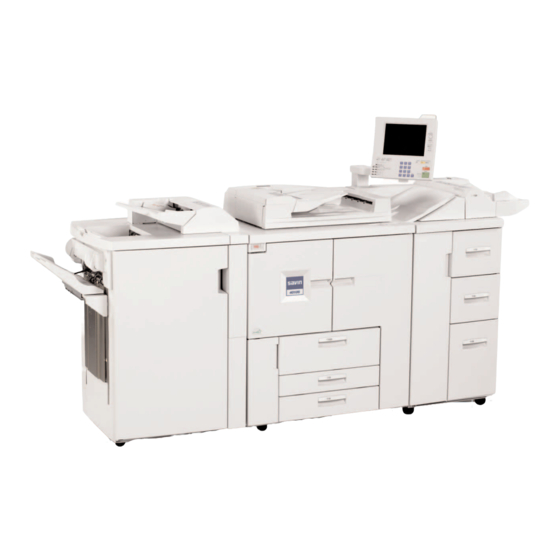
Placing Originals Copying Troubleshooting User Tools (Copier/Document Server Features) Specifications For safe and correct operation of this machine, please be sure to read the Safety Information in the General Settings Guide before you use it. Operating Instructions Copy Reference... - Page 2 Type 1 : 4090/9002/LD090/Aficio 2090 • Type 2 : 40105/10512/LD0105/Aficio 2105 Certain types may not be available in some countries. For details, contact your local dealer. Two kinds of size notation are employed in this manual. With this machine refer to the inch version.
- Page 3 In accordance with IEC 60417, this machine uses the following symbols for the main power switch: a means POWER ON. c means STAND BY.
-
Page 4: Manuals For This Machine
❖ ❖ ❖ ❖ Printer Reference 1 Describes system settings and operations for the machine's printer function. ❖ ❖ ❖ ❖ Printer Reference 2 (PDF file - CD-ROM1) Describes operations, functions, and troubleshooting for the machine's print- er function. - Page 5 ❖ ❖ ❖ ❖ Manuals for DeskTopBinder V2 Lite DeskTopBinder V2 Lite is a utility included on the CD-ROM labeled “Scanner Driver & Document Management Utilities”. • DeskTopBinder V2 Lite Setup Guide (PDF file - CD-ROM2) Describes installation of, and the operating environment for DeskTop- Binder V2 Lite in detail.
-
Page 6: What You Can Do With This Machine
What You Can Do with This Machine Page 88 Page 89 Page 93 Insert Designation Sheet Page 94 Page 101 Page 95 Page 103 Page 98 Stamp Text Page 108 Introducing New Product in this year Page 86 Scanning Position Page 72 Page 86 Page 74... - Page 7 Page 46 Page 42 Page 56 Page 60 Page 56 Page 60 Page 60 Page 60 Page 60 Page 60 Page 46 Page 50 Page 63 Page 63 inch Page 65 Page 65 inch inch Page 65 Page 65 Mix 1 & 2 Sided Page 71 Page 35 Page 36...
-
Page 8: Table Of Contents
TABLE OF CONTENTS Manuals for This Machine ...i What You Can Do with This Machine...iv How to Read This Manual ...1 Machine Types ...2 Functions that Require Options ... 3 Control Panel... 4 1. Placing Originals Originals ... 7 Sizes and Weights of Recommended Originals... 7 Sizes Detectable by Auto Paper Select ... - Page 9 Scanning Position ... 72 Margin Adjustment ...74 Erase...75 3 Edges Full Bleed ...81 Double Copies... 82 Image Repeat... 83 Centering...85 Covers...86 Designate ... 88 Chapters...89 Designation Sheet Copy ...91 Insert Designation Sheet ...92 Slip Sheets ...93 Background Numbering ... 94 Preset Stamp ...
- Page 10 5. Specifications Combination Chart... 141 Supplementary Specifications... 142 INDEX... 154 viii...
-
Page 11: How To Read This Manual
How to Read This Manual Symbols In this manual, the following symbols are used: R WARNING: This symbol indicates a potentially hazardous situation that might result in death or serious injury if you use the machine without following the instructions under this symbol. -
Page 12: Machine Types
Machine Types This machine comes in two models that differ by in copy speed. To determine which model you have, see the inside front cover. Copy speed Type 1 90 copies/minute " × 11"K) (A4K, 8 Type 2 105 copies/minute "... -
Page 13: Functions That Require Options
Functions that Require Options Available functions depend on the configuration of your machine and which op- tions you have. See the table below. ❍Required options Functions Large Capacity Tray (LCT) Booklet finisher Finisher 3000B (100-sheet staples) To use the Punch function, you need the optional punch unit. ❍... -
Page 14: Control Panel
Control Panel Status indicator Machine status is described by this indi- cator. By default, this indicator is turned off. You can select to light the status indi- cator. For more information, see “Control Panel”, General Settings Guide. Colour Flashing green Lit green Flashing red Lit red... - Page 15 Function keys Press the appropriate key to select any of the following function keys: • Copier • Document Server • Printer • Scanner Function status indicator These show the status of the functions. • Green: the function is active. • Red: the function has been interrupt-...
-
Page 17: Placing Originals
Originals Sizes and Weights of Recommended Originals ❖ ❖ ❖ ❖ Metric version Where original is set Original size Exposure glass Up to A3 Auto Document Feeder 1-sided originals: (ADF) A3L – A5KL 2-sided originals: A3L – A5KL Thin Paper mode: A3L –... -
Page 18: Sizes Detectable By Auto Paper Select
Placing Originals • Originals with perforated lines • Originals with indexes, tags, or other projecting parts • Sticky originals, such as translucent paper • Thin, highly flexible originals • Bound originals, such as books • Transparent or translucent originals, such as OHP transparencies or tracing paper Note ❒... -
Page 19: Missing Image Area
❖ ❖ ❖ ❖ Exposure glass Positioning mark Horizontal size Maximum scanning area (297x420 mm) 11"x17" (279x432 mm) ❖ ❖ ❖ ❖ ADF Maximum scanning area (297x432 mm) Sizes difficult to detect It is difficult for the machine to automatically detect the sizes of the following types of originals, so select the paper size manually instead. -
Page 20: Placing Originals
Placing Originals Placing Originals Note ❒ Place originals only after any correction fluid or ink have completely dried. Not taking this precaution may result in a dirtied exposure glass and blem- ished copies. Reference For document sizes you can set, see p.7 “Originals”. Original Orientation When you place the original into the ADF, lay it face up so you can see the print. - Page 21 ❖ ❖ ❖ ❖ 90° ° ° ° Turn This function rotates the copy image by 90°. If you cannot place originals as described because the size is A3 or A4, or because of specific circumstances, you cannot staple copies. In such cases, select [ Example: When you want to staple copies, but you cannot select [ cause the original size is A3K (11"...
- Page 22 Placing Originals Reverse orientation This function rotates the copy image by 180° ( This is useful for copying torn originals. For example, if the left side of the orig- inal is damaged and is difficult to set, position it as shown below. A A A A Press [Reverse Orientation].
-
Page 23: Placing Originals On The Exposure Glass
Placing Originals on the Exposure Glass Reference When you place originals on the exposure glass, you can specify the way cop- ies are delivered. See p.139 “Eject Copy Face Up/Down in Glass”. A A A A Lift the exposure glass cover or ADF. Important ❒... -
Page 24: Placing Originals In The Auto Document Feeder (Adf)
Placing Originals Placing Originals in the Auto Document Feeder (ADF) Settings should be made in the following situations: ❖ ❖ ❖ ❖ When placing originals of more than 100 pages: See p.15 “Batch mode”. ❖ ❖ ❖ ❖ When placing originals one by one: See p.16 “SADF mode”. - Page 25 Note ❒ Once the bottom plate of the ADF rises, do not place or insert originals in the ADF. ❒ Straighten curls in the original before placing it in the ADF. ❒ To prevent multiple sheets being fed at once, fan stacks of originals before placing then in the ADF.
- Page 26 Placing Originals SADF mode In SADF mode, each page is automatically fed when placed, even when an orig- inal is placed page by page. A A A A Press [Special Original]. Note ❒ You can also set to display [SADF] in initial settings. See p.129 “Special Original Display”.
- Page 27 ❒ The sizes of originals that can be placed together with this function are as fol- lows: A3L, B4L, A4KL, B5KL, A5KL, 11" × 17"L, 8 Metric version × 11"K, 8 KL, 16 K KL A4KL, 11" × 17"L , 8 Inch version 8"...
- Page 28 Placing Originals Placing custom size originals When placing custom size originals in the ADF, specify the size of the originals. Note ❒ Paper with a vertical length of 128–297 mm (5.1" – 11.6") and a horizontal length of 128–432 mm (5.1" – 17.0") can be placed with this function. A A A A Press [Special Original].
-
Page 29: Copying
Basic Procedure A A A A When the machine is set for user codes, enter a user code using the number keys, and then press the { { { { #} } } } key. Reference For Users Codes, see “User Codes”, General Settings Guide. B B B B Make sure the machine is in Copy mode. -
Page 30: How To Operate
Copying C C C C Make sure no previous settings remain. Note ❒ To clear previous settings, press the { { { { Clear Modes} } } } key. D D D D Place originals. Reference See p.10 “Placing Originals”. E E E E Make the desired settings. -
Page 31: Auto Start
Auto Start If you press the { { { { Start} } } } key during the warm-up period, the { { { { Start} } } } key will blink and your copies will be made as soon as warm-up finishes. A A A A Make any adjustments to copy settings during the warm-up period. -
Page 32: Left Original Beeper
Copying C When copying is complete, remove originals and copies. D Press the { { { { Interrupt} } } } key again. The Interrupt indicator goes out. Left Original Beeper The error message appears if you leave originals on the exposure glass after copying. -
Page 33: Job Preset Display
- Job Preset display The preset jobs appear as shown below. Job being printed Job number Note ❒ When more than ten jobs are set up including jobs for other functions. Editing job preset You can check and change the contents of preset jobs. You also can delete preset jobs. -
Page 34: Deleting A Job
Copying To change job contents after checking A A A A Check job contents. B B B B Change contents, and then press [OK]. C C C C Press [Yes] in the confirmation dialog box. You return to the copy screen. To delete a job after checking its contents A A A A Check job contents. -
Page 35: Copying Onto Special Paper
Copying onto Special Paper Copying onto OHP transparencies To make copies onto OHP transparencies, you need to specify the paper type. For details, see “Paper Tray Settings”, General Settings Guide. A A A A Select the paper tray in which the OHP transparencies are loaded. Note ❒... - Page 36 Copying Important ❒ Set the tab stock in the tray placing the tab side outwards. ❒ When you set tab stock in the tray, always use the end fence. ❒ Tab stocks are always brought from top. ❒ When a paper jam has occurred, check the order of originals and tab stock, and then restart copying.
-
Page 37: Copying From The Multi Bypass Tray (Tray 7)
Copying from the Multi Bypass Tray (Tray 7) The multi bypass tray (Tray 7) can be used the same way as other trays. Also, thick paper of larger than A4 (8 Note ❒ You cannot use the label paper in the multi bypass tray (Tray 7). ❒... - Page 38 Copying C C C C Fit the side fence to the paper, and then set the end fence (B B B B ). Note ❒ To remove the end fence, slide it to the left. D D D D Press the elevator switch on the multi bypass tray (Tray 7). Note ❒...
- Page 39 E E E E Select Tray 7 on the control panel. Setting the tab stock in multi bypass tray (Tray 7) A Set the side fences to the paper size. B Set the tab stock in the multi bypass tray (Tray 7), and fit the side fences to the tab stock.
- Page 40 Copying C Enter the vertical size of the paper using the number keys, and then press [#] or the { { { { #} } } } key. D Enter the horizontal size of the paper using the number keys, and then press [#] or the { { { { #} } } } key.
-
Page 41: Copy Functions
Copy Functions Adjusting Copy Image Density Three types of adjustment are available: ❖ ❖ ❖ ❖ Auto image density The machine automatically adjusts image density. ❖ ❖ ❖ ❖ Manual image density You can adjust the density of the original in nine increments. ❖... -
Page 42: Selecting Original Type Setting
Copying Selecting Original Type Setting Select one of the following six types to match originals: ❖ ❖ ❖ ❖ Text Select this mode when originals contain only text (no pictures). ❖ ❖ ❖ ❖ Photo Delicate tones in photographs and pictures can be reproduced with this mode. -
Page 43: Selecting Copy Paper
When the original type keys are not displayed A A A A Press [Original Type]. B B B B Select the type, and then press [OK]. When the dark background is selected A Select the density of the background in three levels. B Press [OK]. - Page 44 Copying Auto Paper Select A A A A Make sure that [Auto Paper Select] is selected. Note ❒ Trays with a key mark Tray Settings”, General Settings Guide. Manual Paper Select A A A A Select the paper tray, multi bypass tray (Tray 7), or LCT. The indicator corresponding to the selected paper tray is highlighted.
-
Page 45: Preset Reduce/Enlarge
Preset Reduce/Enlarge You can select a preset ratio for copying. Reference You can display two types of enlarge/reduce ratio. See p.131 “Shortcut R/E”. You can change the displayed ratio from the default to the frequently used one. See p.131 “Preset Reduce/Enlarge”. You can change the priority of Reduce/Enlarge ratio. -
Page 46: Zoom
Copying - Create Margin Mode Use “Create Margin” to reduce the image to 93% of its original size and to place the reduced image at the center. By combining it with the Reduce/Enlarge func- tion, you can also provide the Reduce/Enlarge copy with a margin. Reference For setting margins, see p.131 “Create Margin Ratio”. -
Page 47: Auto Reduce/Enlarge
B B B B Enter the ratio. n ] and [o To select a ratio with [n A Select a preset ratio that is closest to the desired ratio. B Adjust the ratios with [n Note ❒ To change the ratio in 1% increments, just press [n the ratio in 10% increments, press and hold down [n ❒... - Page 48 Copying ❖ ❖ ❖ ❖ Metric version Where original is placed Exposure glass ❖ ❖ ❖ ❖ Inch version Where original is placed Exposure glass Reference For originals whose size is difficult to detect automatically, see p.9 “Sizes dif- ficult to detect”. A A A A Press [Auto Reduce/Enlarge].
-
Page 49: Size Magnification
Size Magnification This function calculates an enlargement or reduction ratio based on the lengths of the original and copy. A inch Note ❒ Measure and specify the lengths of the original and copy by comparing “A” with “a.” ❒ You can enter sizes within the following ranges. Metric version 1 –... -
Page 50: Directional Magnification (%)
Copying Directional Magnification (%) Copies can be reduced or enlarged at different reproduction ratios, horizontally and vertically. a: Horizontal ratio b: Vertical ratio Note ❒ You can also select a preset ratio closest to the desired ratio using [Reduce] or [Enlarge], and then adjust with [n ❒... -
Page 51: Directional Size Magnification (Inch)
B Adjust the horizontal ratio using [n Note ❒ Pressing [n n ] or [o o ] changes the ratio in 1% increments. Pressing and n ] or [o holding down [n ❒ If you have entered a ratio incorrectly, readjust using [n C Adjust the vertical ratio using [n C C C C Place originals, and then press the { { { { Start} } } } key. -
Page 52: Sort
Copying C C C C Enter the horizontal size of the original using the number keys, and then press [#] or the { { { { #} } } } key. D D D D Enter the horizontal size of the copy using the number keys, and then press [#] or the { { { { #} } } } key. - Page 53 A A A A Press [ B B B B Enter the number of copy sets using the number keys. Note ❒ The maximum number of sets is 9999. ❒ To confirm the type of finishing, press the { { { { Sample Copy} } } } key. See p.43 “Sample copy”.
- Page 54 Copying Changing the number of sets You can change the number of copy sets during copying. Note ❒ This function can only be used when the Sort function is operative. A A A A When “Copying” is displayed, press the { { { { Stop} } } } key. B B B B Press [Change Quantity].
- Page 55 Shift tray off in sort/stack A A A A Press [Output/Cstmz. Function]. B B B B Press [Sort/Stack Shift Tray Off]. C C C C Place originals, and then press the { { { { Start} } } } key. Separation Use this function to have separation sheets inserted between sets.
-
Page 56: Stack
Copying Stack This function collates copies of pages from a multi-page original. Stacks of each page's copies are shifted for ease of separation. A A A A Press [ B B B B Enter the number of copies using the number keys. C C C C Place originals, and then press the { { { { Start} } } } key. - Page 57 Copy Functions Note ❒ The following types of paper cannot be stapled: • Translucent paper • OHP transparencies • Label paper (adhesive labels) • Coated paper • Curled paper • Highly flexible paper • Paper of mixed sizes (differing horizontal dimensions, such as A4 L and A3 L) Reference You can change the stapling position set on the staple keys.
- Page 58 Copying Stapling position and original setting Place all originals in the ADF in the orientation in which they can be read nor- mally. When placing the original on the exposure glass, keep the same orienta- tion, but set the original facing downwards. When there is copy paper that is identical in size and orientation to the original, staple positions are as follows: This table shows staple positioning.
- Page 59 A A A A Select one of the stapling positions. Note ❒ When you select the stapling position, Sort mode is automatically selected. Reference p.48 “Stapling position and original setting” B B B B Enter the number of copy sets using the number keys. C C C C Place originals, and then press the { { { { Start} } } } key.
-
Page 60: Punch
Copying Punch The optional finisher and punch unit are required to use this function. This function makes punch holes in copies. ❖ ❖ ❖ ❖ 2 holes ❖ ❖ ❖ ❖ 3 holes ❖ ❖ ❖ ❖ 4 holes Note ❒... - Page 61 Reference You can change the punch type set on the punch keys. See p.140 “Select Punch Type”. When you want to punch on the right, see p.130 “Customize Function: Copy”. Punch hole positions Orientation in which original is set Exposure glass 2 holes 3 holes 4 holes...
- Page 62 Copying Exposure glass 2 holes 3 holes 4 holes The above table shows the punch hole positions. The orientation of the paper does not indicate direction of delivery. A A A A Select the punch position. Orientation in which original is set Punch hole positions...
-
Page 63: Duplex
B B B B Place the originals, and then press the { { { { Start} } } } key. Note ❒ For 90° turn punch type, press [ Duplex There are two types of duplex. Note ❒ You cannot use the following copy paper with this function: •... - Page 64 Copying Originals and copy orientation You can select the orientation to copy two-sided originals onto two-sided pages. • Top to Top • Top to Bottom Note ❒ The Default is [Top to Top]. You can change the default orientation with the User Tools.
- Page 65 Original orientation and completed copies The resulting copy image will differ according to the orientation in which you place originals (widthwise K, or lengthwise L). The above table shows the orientation of images on the front and back of copies, not the direction of delivery.
-
Page 66: Sided Combine
Copying F F F F Place originals, and then press the { { { { Start} } } } key. Note ❒ When placing originals on the exposure glass, start with the first page to be copied. When placing originals in the ADF, set so that the last page is on the bottom. - Page 67 ❖ ❖ ❖ ❖ 1 Sided, 8 Pages → → → → Combine 1 Side Copies 8 one-sided originals to one side of a sheet. 1 2 3 4 5 6 7 8 ❖ ❖ ❖ ❖ 2 Sided, 1 Page → → → → Combine 1 Side Copies 1 two-sided original to one side of a sheet.
- Page 68 Copying ❖ ❖ ❖ ❖ 2 Sided, 4 Pages → → → → Combine 1 Side Copies 4 two–sided originals to one side of a sheet. ❖ ❖ ❖ ❖ Orientation of the Original and Image Position of Combine • Open to Left R Originals •...
- Page 69 B B B B Press [Combine]. C C C C Check that [Combine 1 Sided] is selected, and then press [1 Sided] or [2 Sided]. To change the copy order A Press [Copy Order]. B Select copy order, and then press [OK]. D D D D Select the number of originals to combine.
-
Page 70: Sided Combine
Copying 2 Sided Combine Combines various pages of originals onto one sheet sides. ❖ ❖ ❖ ❖ 1 Sided, 4 Pages → → → → Combine 2 Side Copies 4 one-sided originals to one sheet with two pages per side. ❖... - Page 71 ❖ ❖ ❖ ❖ 2 Sided, 4 Pages → → → → Combine 2 Side Copies 2 two-sided originals to one sheet with two pages per side. ❖ ❖ ❖ ❖ 2 Sided, 8 Pages → → → → Combine 2 Side Copies 4 two-sided originals to one sheet with four pages per side.
- Page 72 Copying A A A A Press [Dup./Combine/Series]. B B B B Press [Combine]. C C C C Press [Combine 2 Sided], and then press [1 Sided] or [2 Sided] for originals. Reference To change the orientation of original and copy, press [Orientation]. See p.54 “Originals and copy orientation”.
-
Page 73: Series Copies
Series Copies Separately copies the front and back of a two-sided original, or the two facing pages of a bound original onto two sheets. ❖ ❖ ❖ ❖ 2 Sided → → → → 1 Sided You can make one-sided copies from two-sided originals. ❖... - Page 74 Copying ❖ ❖ ❖ ❖ Inch version Original 11" × 17"L " × 11"L A A A A Press [Dup./Combine/Series]. B B B B Press [Series]. C C C C Press [2 Sided → → → → 1 Sided] or [Book → → → → 1 Sided]. Reference If you select [2 Sided →...
-
Page 75: Copying Book Originals
Copying Book Originals A book is made by copying two or more originals in page order. ❖ ❖ ❖ ❖ Book → → → → 2 Sided Copies a two-page spread original onto both sides of a sheet. ❖ ❖ ❖ ❖ Multi → → → → 2 Sided Copies each two-page spread original as it is onto both sides of a sheet. - Page 76 Copying • 2 Sided → Booklet Open to Left Open to Right ❖ ❖ ❖ ❖ Magazine Copies two or more originals to make copies in page order (for when they are folded and stacked). • 1 Sided → Booklet Open to Left Open to Right •...
- Page 77 Note ❒ The machine sets the reproduction ratio automatically to match the paper size and copies the originals together onto the paper. ❖ ❖ ❖ ❖ Metric version Original ❖ ❖ ❖ ❖ Inch version Original 11" × 17"L " × 11"L Book →...
- Page 78 Copying Multi → → → → 2 Sided A A A A Press [Dup./Combine/Series]. B B B B Press [Book]. C C C C Press [Front and Back → → → → 2 Sided]. Reference To change the orientation of original and copy, press [Orientation]. See p.54 “Originals and copy orientation”.
- Page 79 B B B B Press [Dup./Combine/Series]. C C C C Press [Book]. D D D D Press [1 Sided] or [2 Sided] for originals. E E E E Press [Booklet]. F F F F Select the paper size. G G G G Place originals, and then press the { { { { Start} } } } key.
- Page 80 Copying • Open to right Note ❒ In this mode, the machine sets the reproduction ratio automatically to match the paper size and copies the originals together onto the paper. Reference You can erase a 3 mm (0.1 inch) boundary margin around all four edges of originals in Combine mode.
-
Page 81: Mix 1 & 2 Sided
Mix 1 & 2 Sided You can copy two types of original, one-sided and two-sided, onto one or both sides of a sheet. Note ❒ You can scan originals from the exposure glass, batch mode or SADF mode. ❒ You cannot combine with sample copy or designate function. A A A A Press [Dup./Combine/Series].