Table of Contents
Advertisement
Operation Manual
(With installation instructions)
Device No.
• Always charge the master station before use.
• When the master station is not in use, always set it on the
charging stand.
Read this "Operation and Installation Manual " prior to usage to ensure safe and correct operation.
Keep this in a safe place for future reference.
*The illustrations and images in this manual may vary from the actual items.
Use a nickel-hydrogen battery for the rechargeable battery. A nickel hydrogen battery is a valuable
resource that can be recycled. Please recycle nickel-hydrogen batteries.
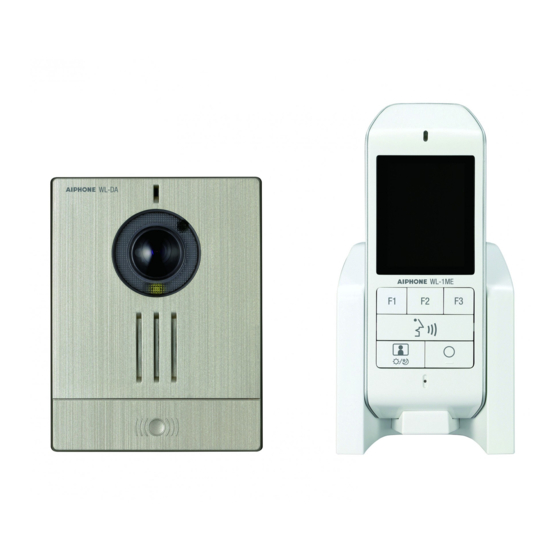
Wireless video intercom
WL-11.En
n : Destination No
The warranty term of this product is two years.
Ni-MH
Advertisement
Table of Contents

Related Manuals for Aiphone WL-11


Summary of Contents for Aiphone WL-11
- Page 1 Operation Manual (With installation instructions) Wireless video intercom WL-11.En Device No. n : Destination No • Always charge the master station before use. • When the master station is not in use, always set it on the charging stand. Read this "Operation and Installation Manual " prior to usage to ensure safe and correct operation.
-
Page 2: Table Of Contents
Confi rmation and Preparation Contents Confi rmation and Preparation For ease-of-use Features ............3 Checking the remaining battery level ..50 Checking the remaining battery level of the Precautions ............ 9 video door station ........50 Package Contents ........13 Replacing batteries ........51 Part Names and Function......14 Replacing the battery of the video door Master station ..........14... -
Page 3: Features
Confi rmation and Preparation Features Wireless master station with monitor master station (Notation in this manual: • Responding to a call from the entrance (Page 24) Ding-dong, ding-dong. • Checking recorded images (Page 31) • Recording image of the entrance (Page 28) Wireless video door station with camera video door station... - Page 4 Confi rmation and Preparation Precautions Warning / Avertissement Do not handle the AC adapter cord as follows. Do not dismantle or alter the unit. • • • • • Keep the unit and the charging stand away from water or any •...
- Page 5 Confi rmation and Preparation Caution / Attention Do not put your ear close to the speaker when using the intercom. Install the intercom unit in a position where it will not easily Pay attention to the polarity and the indications when disposing of them.
- Page 6 Confi rmation and Preparation Warning / Avertissement Do not splash with or immerse in freshwater or ocean water. from the equipment and discontinue use. present. déchargées. conditions sont différentes. utilisé pendant une longue durée. Caution / Attention Do not apply strong impacts or throw the product. Do not use or leave the product in a high temperature location.
- Page 7 Confi rmation and Preparation Communication of master station and door station • • • • • • • • • • • FCC information FCC Part 15 • • • • ISED Notices and other information For Monitor unit: For Camera unit: Pour le poste intérieur: Pour la platine de rue:...
- Page 8 RE Directive Hereby, AIPHONE declares that the radio equipment is in compliance with Directive 2014/53/EU. The full text of the EU declaration of conformity is available at the following internet address: www.aiphone.net Important safety information / Informations importantes de sécurité...
-
Page 9: Precautions
Confi rmation and Preparation Precautions ■ Handling of rechargeable batteries and other batteries to be used Hazard Do not perform the following actions. There is a risk of burns and injuries from liquid leaks, heat generation, and explosions of rechargeable batteries and other batteries. Observe the following points when charging a rechargeable battery or using a rechargeable battery or other battery. - Page 10 Device malfunction could result. Notes • Aiphone is not responsible for damage caused by the content of this product or its specifi cations. • Aiphone is not responsible for damage caused by failures, defects, or operation mistakes of this product.
- Page 11 Normal operation will be restored when moisture evaporates. • Aiphone assumes no responsibility for corruption of saved information (such as changes to or deletion of saved information). • Freezing conditions may affect the video quality and button functionality.
- Page 12 Confi rmation and Preparation Precautions • If warm air from inside the room enters the unit, the internal and external temperature difference may cause condensation on the camera. Plugging of cable holes and other gaps where warm air might enter is recommended for preventing condensation.
-
Page 13: Package Contents
Confi rmation and Preparation Package Contents After opening the box, make sure that the following items are included. Master station Battery pack Charging stand Model name: WLW-BT.E * Do not peel off the vinyl cover of the battery pack. * Ne retirez pas le couvercle en vinyle de la batterie. -
Page 14: Part Names And Function
Confi rmation and Preparation Part Names and Function Master station Status indicator Status Notifi cation content Priority The remaining battery power fl ashing of the video door station is LCD screen low. Replace the battery. High (Page 51) * Not a touch panel. ↕... - Page 15 Confi rmation and Preparation Using the function buttons ( Functions manipulated by the function buttons ( ) are displayed on the screen when available. * The functions displayed on the screen change in accordance with the status of this device. The functions displayed on the screen can be manipulated by the function button just below.
-
Page 16: Screen
Confi rmation and Preparation Part Names and Function Screen How to read screen The following are screen examples. The actual display may differ. Standby screen • Standby screen will be brighter when the master station is picked up from the charging stand. •... - Page 17 Confi rmation and Preparation Reading the battery level of the master station Full Suffi ciently charged. Use within this range. Battery power is low. • "Charge battery" will be displayed on the standby screen. Place the master station on the charging stand. (Red light blinking) Empty Reference for usage time after fully charged (after 16 hours of charging from running out of...
-
Page 18: Video Door Station
Confi rmation and Preparation Part Names and Function Video door station Microphone Illumination sensor Camera Remove protective fi lm before use. LED for night illumination The LED light will automatically illuminate in low-light settings when a call is placed. The light will Speaker turn off at the end of a call. -
Page 19: Installation
Installation Installing the video door station Remove the mounting frame from Adjust the camera angle the video door station Camera angle adjustment lever 0° +19° (facing front) (facing up) Camera angle adjustment lever Locking The camera angle can be adjusted from 0° screw through 19°. - Page 20 Installation Installing the video door station Camera range and mounting position Projection range at 500 mm in front of camera Normal Wide Approx. 450 mm Approx. 1,450 mm Normal Horizontal Vertical Camera angle:0° Camera angle:19° 500 mm 500 mm 500 mm Approx.
-
Page 21: Installing The Charging Stand
Installation Installing the charging stand Connecting the power adapter to the charging stand Connect the power adapter to connector terminal on the rear side of the charging stand Hook the cable N o t e s • Set the master station on the charging stand when it is not in use. •... -
Page 22: Charging The Master Station
• The remaining battery power displayed just after the battery pack is installed may be lower than the actual value. • "AIPHONE" is displayed on the screen after the master station is switched on, and the • Do not trap the connector of the battery status indicator switches on red. -
Page 23: Setting The Date And Time
Installation Setting the Date and Time Set the date and time before using it for the fi rst time. This date and time is used for the listed dates and times of recordings. N o t e s • The date and time may revert back to the default setting when, for example, the battery pack is removed, etc. -
Page 24: Use
Receiving a call Answering a door call and communicating When the call button of the video door station is pressed Ding-dong, ding-dong. View a visitor by looking at the Extending the talk time screen After "Extend" is displayed the screen, press (Extend) •... -
Page 25: Operations During Placing A Call And Communication
Operations during placing a call and communication Adjust video to enhance visibility (visibility correction) This function is used when the face of a visitor projected on the screen is diffi cult to see due to backlighting. This function can be used during placing a call, communication, and monitoring from the video door station. Setting backlight correction Stopping correction Press... -
Page 26: Switching The Screen Format
Operations during placing a call and communication Switching the screen format N o t e s Switching video screen format of the video door station between normal and wide • Manual image recording is not possible during widescreen display. You can switch the video of the video door (Page 28) station between "Normal"... - Page 27 Changing the display position of the Changing a moved display posi- screen tion to the initial display position The display position of the normal screen can be switched and changed. Press (Preset) Press (Move) when an image “Preset complete” will be displayed, and the from the video door station is initial display position will be changed.
-
Page 28: Recording Video Of The Video Door Station
Operations during placing a call and communication Recording video of the video door station When a call is received from the video door station, recording starts automatically. (Automatic image recording) If necessary, recording is possible after the automatic image recording. (Manual image recording) N o t e s •... -
Page 29: When The Ambient Noise Is Too Loud To Talk (Press-To-Talk)
When the ambient noise is too loud to talk (Press-to-Talk) This unit prioritizes the loud side and switches automatically so the quiet side can be heard. Press-to-talk is useful when the ambient noise is loud enough to interrupt audio. Woof, woof Woof, woof... -
Page 30: View Outside
View outside View (monitor) the entrance Video door station video and audio can be monitored. N o t e s • This function can be used only when "Door Monitoring settings" is "Enable". (Page 46) Press on the standby When talk to the other party screen. -
Page 31: Playing Recordings
Playing recordings Playing recordings To play recorded images, fi rst display the playback queue screen. Check recording. N o t e s • When there are newly recorded unviewed images, the status indicator fl ashes in blue, and "Missed Calls" will be displayed on the standby screen. •... - Page 32 Playing recordings When the recording is displayed on the screen, press (Play) Images of the selected recording will be displayed in order from the fi rst image. * In the case of a manual recording, only one image will be displayed. Press to end playback...
-
Page 33: Lock Recordings
Lock recordings Recordings can be locked from being deleted. N o t e s • Locked recordings will not be overwritten by new recording images. • Up to 20 recordings can be locked. • When 20 items are locked, "Lock" will not be displayed on the screen. To lock another recording, remove the lock of recordings. -
Page 34: Deleting Recordings
Playing recordings Deleting recordings There are two methods to delete recordings: delete a single selected item or delete all recordings. Deleting a single recording Press (Delete) N o t e s • Protected recordings cannot be deleted. Cancel protection and delete the recording. - Page 35 Deleting all recordings Select "Delete All Recorded Images" using (V) and press (Select) N o t i c e • Deleting all recordings also deletes protected recordings. Press (Menu) on the standby screen A confi rmation message will be displayed. To continue, select "Yes"...
-
Page 36: Confi Guration
Confi guration Setting personal preferences Setting and adjustment list The settings of each function of the master station can be changed or adjusted in accordance with use. N o t e s • If there is no operation for approx. one minute during confi guration, confi guration will be canceled, and the standby screen returns. -
Page 37: Sound Settings
Confi guration Sound settings When the call button of the door station was pressed Adjusting the master station ringtone volume Adjust the master station ringtone volume from 0 through 5. The default setting is "3". Press (Menu) on the standby screen T h e M aste r S t at i o n R i n g to n e Vo lum e settings screen will be displayed. - Page 38 Confi guration Setting personal preferences Adjusting the ringtone of the master Using (V), select "Handset station Ringtone", and then press (Select) Choose a combination from the 4 instruments and 4 melodies for the ringtone of the master station. Instrument Melody ♪Piano 1 to 4 ♪Vibraphone...
- Page 39 Confi guration Select the melody using (Λ) The ringtone of the selected instrument and melody will be confi gured. After selection, press (Select) A "beep" sound will be heard when the confi guration is fi nished.
- Page 40 Confi guration Setting personal preferences Adjusting the master station speaker volume Using (V), select "Handset Speaker Volume", and then press (Select) Adjust the master station speaker volume during communication from 1 through 5. The default setting is "3". Press (Menu) on the standby screen The menu screen will be displayed.
- Page 41 Confi guration Adjusting the video door station Select "Door Station Speaker speaker volume Volume" using (V) and press (Select) Adjust the video door station speaker volume during communication from 1 through 5. The default setting is "3". Press (Menu) on the standby screen The menu screen will be displayed.
- Page 42 Confi guration Setting personal preferences Enable/Disable the tone when a button Select "Handset Button Feedback" is pressed using (V) and press (Select) Conf igure whether to generate a master station button feedback tone when a button is pressed. The default setting is "Enable". Press (Menu) on the standby screen...
-
Page 43: Master Station Settings
Confi guration Master station settings When the call button of the door station was pressed Adjusting the brightness of the screen Adjust the brightness from 1 through 5. The default setting is "3". Press (Menu) on the standby screen The Screen Brightness settings screen will be displayed. - Page 44 Confi guration Setting personal preferences Set Enable/Disable for the status Select "Missed Call LED" using indicator for missed calls (V) and press (Select) Confi gure whether to make the status indicator fl ash in blue when there is a unviewed image. The default setting is "Enable".
-
Page 45: Video Door Station Settings
Confi guration Video door station settings When the call button of the door station was pressed Set Enable/Disable for the Night Select "Night Illumination LED" Illumination LED using (V) and press (Select) C o n f i g u r e w h e t h e r t o s w i t c h o n t h e i l l u m i n a t i o n o f t h e v i d e o d o o r s t a t i o n automatically at night individually during calls/ communication or monitoring. - Page 46 Confi guration Setting personal preferences Confi guring whether to use the Select "Enable" or "Disable" using monitoring function (Λ) or Configure whether to use the monitoring function. The default setting is "Disable". N o t e s • When "Enable" is confi gured, the battery power of the video door station is consumed faster.
- Page 47 Confi guration Select "Door Monitoring" using After selection, press (Select) (V) and press (Select) A "beep" sound will be heard when the confi guration is fi nished. When “Enable” was confi gured Press the call button of the video door station Before I forget! The Door Monitoring settings screen will be...
-
Page 48: Other Settings
Confi guration Setting personal preferences Other settings When the call button of the door station was pressed Check Video Door Station Battery level Using (V), select "Initialize", and then press (Select) Check the remaining battery power of the video door station using the master station. Refer to “Checking the remaining battery level of the video door station”... - Page 49 Confi guration Setting the display mode Select "Display Mode" using (V) and press (Select) You can configure “Display Mode”, which is used for storefront displays or similar cases. In Display Mode, "Demonstration" will be displayed at the top of the screen. C a u t i o n •...
-
Page 50: Checking The Remaining Battery Level
Notes and Support Checking the remaining battery level Checking the remaining battery level of the video door station Check the remaining battery level of the video door station from the master station. For the procedure to check the remaining battery level of the master station, refer to “Reading the remaining battery level of the master station”... -
Page 51: Replacing Batteries
Notes and Support Replacing batteries Replacing the battery of the video door station Remove the video door station Attach the battery cover from the mounting frame • Set the hooks of the upper section of the battery cover and attach the battery cover. -
Page 52: Replacing The Battery Pack Of The Master Station
Notes and Support Replacing the battery pack of the master station The battery pack is consumable device. Replace with a new battery pack after the following conditions: even after approx. 16 hours of charging, "Charge battery" is displayed after several minutes of communication, and the remaining battery power reference fl... -
Page 53: Cleaning
For ease-of-use Cleaning Gently wipe using a soft, dry cloth. Device surface can easily get scratches. Wipe them gently with a eyeglass cleaner cloth or similar material. For tough stains, use a lightly damp cloth and neutral detergent diluted in water. R e q u e s t •... -
Page 54: Troubleshooting
For ease-of-use Troubleshooting If a problem occurs while operating the system, check the following items. Reference Problem Cause Solution Page Screen is black If the master station is not Either press any button on the master placed on the charging stand station or place it on the charging stand. - Page 55 “Night Illumination LED” - “During Call/ on automatically even LED” - “During Call/ Communication” of the master station to when there is a call Communication” of the “Enable”. from the door at night master station confi gured to “Disable”? HP: www.aiphone.com Telephone: 800-692-0200 Mail: tech@aiphone.com...
- Page 56 The battery pack has To replace the battery pack, please The icon fl ashes several minutes after reached end-of-life. contact Aiphone customer service. communication starts even after charging When the unit is Has the connector of the Connect the connector of the battery...
-
Page 57: Specifi Cations
Destination US and Canada Wireless Video Intercom - Master Station WL-1ME.E1 (FCC ID: 2ALNEWL1MEE1, IC: 4361A-WL1MEE1) Power source Build-in Ni-MH battery (AIPHONE WLW-BT.E) 2.4V DC (2000mAh) Wireless type DECT6.0 Display 2.4 inch TFT color LCD monitor (240 x 320pixels) Operation temperature 0 to 40°C (32 to 104°F) - Page 58 "Hong Kong, Singapore, Malaysia, Saudi Arabia, UAE Philippines, Indonesia,Turkey, South Africa" Wireless Video Intercom - Master Station WL-1ME.E3 Power source Build-in Ni-MH battery (AIPHONE WLW-BT.E) 2.4V DC (2000mAh) Wireless type DECT Display 2.4 inch TFT color LCD monitor (240 x 320pixels)
- Page 59 For ease-of-use WL-11.E5 Destination Mexico Wireless Video Intercom - Master Station WL-1ME.E5 Power source Build-in Ni-MH battery (AIPHONE WLW-BT.E) 2.4V DC (2000mAh) Wireless type DECT Display 2.4 inch TFT color LCD monitor (240 x 320pixels) Operation temperature 0 to 40 C (32 to 104F)
-
Page 60: Caracteristiques Techniques
Destination US et Canada Wireless Vidéo Interphone - Moniteur WL-1ME.E1 (FCC ID: 2ALNEWL1MEE1, IC: 4361A-WL1MEE1) Alimentation Batterie Ni-MH (AIPHONE WLW-BT.E) 2.4V DC (2000mAh) Technologies sans fi l DECT6.0 Affi chage 2.4 inch TFT color LCD monitor (240 x 320 pixels) Tenue à... - Page 61 AIPHONE CO.,LTD., 10th fl oor Meiji Yasuda Seimei Nagoya Building, Issued October 2018 A P1018KQ 61075 1-1 Shinsakae-machi, Naka-ku, Nagoya, Aichi, 460-0004, JAPAN...