Aiphone IX series Web Setting Manual
Ip network-compatible intercom.
video door station.
door station.
software version 1.00 or later
Hide thumbs
Also See for IX series:
- Operation manual (234 pages) ,
- Web setting manual (93 pages) ,
- Setting manual (31 pages)
Table of Contents
Advertisement
IX System
IP network-compatible intercom
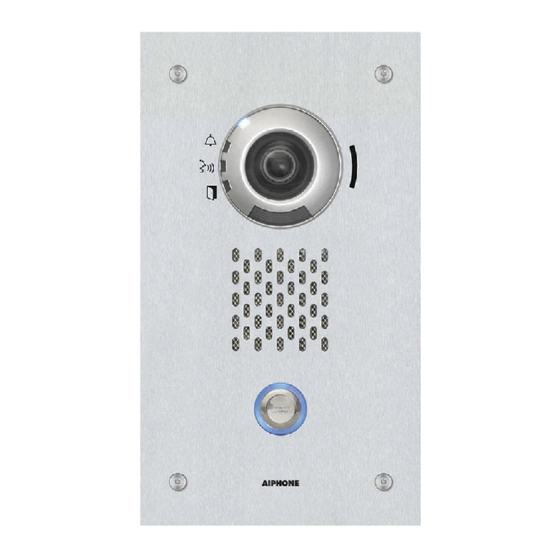
Video Door Station
IX-DV, IX-DVF , IX-DVF-P, IX-DVF-2RA, IX-DVF-RA, IX-DVF-L
Door Station
IX-SSA, IX-SSA-2RA, IX-SSA-RA
Web Setting Manual
Software version 1.00 or later
Important
• Before configuring and using the system, read Web Setting Manual (this document) and Operation Manual carefully.
• For the installation and connection of each device, refer to "Installation Manual."
• Begin installation after reading and understanding the procedures for system configuration.
• The setting file must be backed up and stored in a safe location after configuration is complete.
• The illustrations and images in this manual may vary from the actual ones.
Advertisement
Table of Contents

Related Manuals for Aiphone IX series


Summary of Contents for Aiphone IX series
- Page 1 IX System IP network-compatible intercom Video Door Station IX-DV, IX-DVF , IX-DVF-P, IX-DVF-2RA, IX-DVF-RA, IX-DVF-L Door Station IX-SSA, IX-SSA-2RA, IX-SSA-RA Web Setting Manual Software version 1.00 or later Important • Before configuring and using the system, read Web Setting Manual (this document) and Operation Manual carefully. •...
-
Page 2: Table Of Contents
Table of contents Introduction 1. Notational symbols in this manual ..................5 2. Product manuals ........................6 3. Configuring the system ......................7 4. Flowcharts for configuring the system .................. 8 4.1 For Static IPv4 Address ....................9 4.2 For IPv4 Address with DHCP ..................14 4.3 For static IPv6 address .................... - Page 3 3. System Information ......................85 3.1 Custom Sound Registry ....................85 4. Call Settings ........................87 4.1 Station Information ...................... 87 4.2 Called Stations (for Door)♣ ..................87 4.3 Call Origination ......................90 4.4 Incoming Call ......................99 5. Option Input / Relay Output Settings ................101 5.1 Option Input ......................
- Page 4 Introduction This manual describes how to set up IX-DV, IX-DVF(-*), and IX-SSA(-*) through a web browser. IX system offers a separate manual for Installation, Settings, and Operations. Refer to the relevant manual.
-
Page 5: Introduction
Introduction 1. Notational symbols in this manual The following symbols identify important information concerning operational procedures. This symbol indicates that failure to observe this warning or improper use may result in serious Warning injury or death. This symbol indicates that failure to observe this caution or improper use may result in moderate Caution injury or product damage. -
Page 6: Product Manuals
IX Support Tool Setting Manual (Electronic format (PDF file).) found on our Web site at https:// Describes how to configure and maintain the system using IX Support Tool. (For www.aiphone.net/product/support/ system administrator) download and reference. Monitoring Software (IX Supervision Tool) Operation Manual (Electronic format (PDF file).) -
Page 7: Configuring The System
Introduction 3. Configuring the system After installing and connecting all stations, the system will need to be fully configured before it will be operational. IX system can be configured in one of the two methods below. Choose one method. Using the "IX Support Tool" (1) is the recommended method. -
Page 8: Flowcharts For Configuring The System
Introduction 4. Flowcharts for configuring the system When configuring the system through a browser, follow the flowchart that fits the application. Save the setting file after configuring the system. Refer to “Settings File Backup (→page 153)” for information on how to save setting data. If the setting data is not saved, it may be impossible to restore it after maintenance or after-sales servicing. -
Page 9: For Static Ipv4 Address
Introduction For Static IPv4 Address Important • Save the setting file after configuring the system. Refer to “Settings File Backup (→page 153)”. • If the setting data is not saved, it may be impossible to restore it after maintenance or after-sales servicing. 4.1.1 Create new data Use this flowchart to create a new setting file, e.g., when installing a new system. - Page 10 Introduction 4.1.2 Change the settings Use this flowchart to change the settings. 1. Log in to the Web server of the station whose settings are to be modified. “Log in to the Web server of the station to be configured (→page 45)” 2.
- Page 11 Introduction 4.1.3 Add a station Use this flowchart to add a station. 1. Connect a PC to the station to be added. Connect stations one at a time to avoid IP address conflict. “Connecting to a PC (→page 44)” 2. Log in to the Web server of the station to be added. “Log in to the Web server of the station to be configured (→page 45)”...
- Page 12 Introduction 4.1.4 Delete a station Use this flowchart to delete a station. Important • Be sure to perform Step 1 below. Otherwise, operation may become slower. 1. Delete the data for the station to delete from all other stations and software. 2.
- Page 13 Introduction 4.1.5 Replace a station Use this flowchart to replace a station. Can the Web server of the station to be replaced be accessed? 1. Back up the setting file of the station to be 1. Replace the station. replaced. “Settings File Backup (→page 153)”...
-
Page 14: For Ipv4 Address With Dhcp
Introduction For IPv4 Address with DHCP Important • Due to the architecture of the IX system, DHCP configuration is only recommended for network environments utilizing managed (static) IP address leasing. For how to set up the DHCP server, refer to its manual. •... - Page 15 Introduction 7. Configure the station. "Configuring the station" “Configuring the Station (→page 59)” 8. Configure other stations in the same manner. Refer to each station's Web Setting Manual. 9. Done.
- Page 16 Introduction 4.2.2 Change the settings Use this flowchart to change the settings. 1. Log in to the Web server of the station whose settings are to be modified. “Log in to the Web server of the station to be configured (→page 45)” 2.
- Page 17 Introduction 4.2.3 Add a station Use this flowchart to add a station. 1. Configure the DHCP server to assign a static IP address. For how to set up the DHCP server, refer to its manual. 2. Connect a PC to the station to be added. Connect stations one at a time to avoid IP address conflict.
- Page 18 Introduction 4.2.4 Delete a station Use this flowchart to delete a station. Important • Be sure to perform Step 1 below. Otherwise, operation may become slower. 1. Delete the data for the station to delete from all other stations and software. 2.
- Page 19 Introduction 4.2.5 Replace a station Use this flowchart to replace a station. 1. Configure the DHCP server so that the new station installed inherits the IP address assigned to the replaced station. Refer to the DHCP server's manual for information on how to configure the DHCP server. Can the Web server of the station to be replaced be accessed? 2.
-
Page 20: For Static Ipv6 Address
Introduction For static IPv6 address Important • Save the settings after configuring the system. Refer to “Settings File Backup (→page 153)”. • If the setting data is not saved, it may be impossible to restore it after maintenance or after-sales servicing. 4.3.1 Create new data Use this flowchart to create a new setting file, e.g., when installing a new system. - Page 21 Introduction 4.3.2 Change the settings Use this flowchart to change the settings. 1. Log in to the Web server of the station whose settings are to be modified. “Log in to the Web server of the station to be configured (→page 45)” 2.
- Page 22 Introduction 4.3.3 Add a station Use this flowchart to add a station. 1. Connect a PC to the station to be added. Connect stations one at a time to avoid IP address conflict. “Connecting to a PC (→page 44)” 2. Log in to the Web server of the added station using its IPv4 address (default value). “Log in to the Web server of the station to be configured (→page 45)”...
- Page 23 Introduction 4.3.4 Delete a station Use this flowchart to delete a station. Important • Be sure to perform Step 1 below. Otherwise, operation may become slower. 1. Delete the data for the station to delete from all other stations and software. 2.
- Page 24 Introduction 4.3.5 Replace a station Use this flowchart to replace a station. Can the Web server of the station to be replaced be accessed? 1. Back up the setting file of the station to be 1. Replace the station. replaced. “Settings File Backup (→page 153)”...
-
Page 25: For Stateless Ipv6 Address
Introduction For Stateless IPv6 Address Important • Save the setting file after configuring the system. Refer to “Settings File Backup (→page 153)”. • If the setting data is not saved, it may be impossible to restore it after maintenance or after-sales servicing. 4.4.1 Create new data Use this flowchart to create a new setting file, e.g., when installing a new system. - Page 26 Introduction 7. Log in to the Web server of each station with the IPv6 addresses identified. “Log in to the Web server of the station to be configured (→page 45)” 8. Configure “Language (→page 63)”. Click [Update] to update the settings. 9.
- Page 27 Introduction 4.4.2 Change the settings Use this flowchart to change the settings. 1. Log in to the Web server of the station whose settings are to be modified. “Log in to the Web server of the station to be configured (→page 45)” 2.
- Page 28 Introduction 4.4.3 Add a station Use this flowchart to add a station. Support Tool is needed to configure the system using this flowchart. Install Support Tool, and set for IPv6. For set up information, refer to "IX Support Tool Setting Manual." 1.
- Page 29 Introduction 4.4.4 Delete a station Use this flowchart to delete a station. Important • Be sure to perform Step 1 below. Otherwise, operation may become slower. 1. Delete the data for the station to delete from all other stations and software. 2.
- Page 30 Introduction 4.4.5 Replace a station Use this flowchart to replace a station. Support Tool is needed to configure the system using this flowchart. Install Support Tool, and set for IPv6. For set up information, refer to "IX Support Tool Setting Manual." Can the Web server of the station to be replaced be accessed? 1.
-
Page 31: For Ipv6 Address With Dhcp
Introduction For IPv6 Address with DHCP Important • Save the setting file after configuring the system. Refer to “Settings File Backup (→page 153)”. • If the setting data is not saved, it may be impossible to restore it after maintenance or after-sales servicing. 4.5.1 Create new data Use this flowchart to create a new setting file, e.g., when installing a new system. - Page 32 Introduction 7. First, configure “Language (→page 63)”. Click [Update] to update the settings. 8. Configure the station. "Configuring the station"“Configuring the Station (→page 59)” Refer to "Web Setting Manual" for each station. 9. Done.
- Page 33 Introduction 4.5.2 Change the settings Use this flowchart to change the settings. 1. Log in to the Web server of the station whose settings are to be modified. “Log in to the Web server of the station to be configured (→page 45)” 2.
- Page 34 Introduction 4.5.3 Add a station Use this flowchart to add a station. 1. Configure the DHCP server to assign a static IP address. The DUID of the station is "00030001 + MAC address." For how to set up the DHCP server, refer to its manual. 2.
- Page 35 Introduction 4.5.4 Delete a station Use this flowchart to delete a station. Important • Be sure to perform Step 1 below. Otherwise, operation may become slower. 1. Delete the data for the station to delete from all other stations and software. 2.
- Page 36 Introduction 4.5.5 Replace a station Use this flowchart to replace a station. 1. Configure the DHCP server so that the new station installed inherits the IP address assigned to the replaced station. The DUID of the station is "00030001 + MAC address." For how to set up the DHCP server, refer to its manual.
-
Page 37: Startup And Configuration
Startup and configuration... -
Page 38: System Requirements
Startup and configuration 1. System requirements Your PC must satisfy the following system requirements for configuration. Network Ethernet (10 BASE-T, 100 BASE-TX) Web browser Microsoft Edge/Internet Explorer 10.0, 11.0 / Mozilla Firefox 59 or 60 (TLS1.0, 1.1, or 1.2 enabled) -
Page 39: Part Names
Startup and configuration 2. Part Names IX-DV IX-DVF Front Back Front Back Status indicator (orange/blue) Camera angle adjustment lever Call indicator (green) MAC address Communication indicator (orange) Terminal cover Camera Option connector terminal Microphone LAN terminal (PoE/PSE) Door release indicator (green) LAN terminal (PoE/PD) LED for night illumination Reset button... - Page 40 Startup and configuration IX-DVF-2RA IX-DVF-RA Back Front Front Back Status indicator (orange/blue) Urgent call button Call indicator (green) Camera angle adjustment lever Communication indicator (orange) MAC address Camera Terminal cover Microphone Option connector terminal Door release indicator (green) LAN terminal (PoE/PSE) LED for night illumination LAN terminal (PoE/PD) Speaker...
- Page 41 Startup and configuration IX-DVF-P IX-DVF-L Back Front Back Front Status indicator (orange/blue) Hearing aid (T mode) compatible microphone Call indicator (green) Camera angle adjustment lever Communication indicator (orange) MAC address Camera Terminal cover Microphone Option connector terminal Door release indicator (green) LAN terminal (PoE/PSE) LED for night illumination LAN terminal (PoE/PD)
- Page 42 Startup and configuration IX-SSA-2RA IX-SSA Front Back Front Back IX-SSA-RA Front Back Status indicator (orange/blue) MAC address Call indicator (green) Terminal cover Communication indicator (orange) Option connector terminal Microphone LAN terminal (PoE/PSE) Door release indicator (green) LAN terminal (PoE/PD) Speaker Reset button *1*2 Call button...
- Page 43 Startup and configuration ■ Indicators : On; : Off Name Status (pattern) Description Status Orange Normal flashing Booting indicator flashing 0.75sec 0.75sec Fast flashing Device failure, startup error 0.25 sec 0.25 sec Long OFF time flashing Communication failure 0.5sec 4sec Long initial light ON flashing Firmware version upgrading...
-
Page 44: Connecting To A Pc
Startup and configuration 3. Connecting to a PC Connect the station with a PC using a PoE compatible switch. • Use CAT5e/6 straight cable to connect the devices through the LAN port. • The station will start up with the default IP address of 192.168.1.160 and subnet mask of 255.255.255.0. Change the PC IP address as necessary. -
Page 45: Log In To The Web Server Of The Station To Be Configured
Startup and configuration 4. Log in to the Web server of the station to be configured Apply power to the station. • Power is supplied by a PoE compatible switch. • The status indicator flashes (orange) when the station is starting. •... - Page 46 Startup and configuration Select the language. The login window of the selected language will be displayed. • The Web settings window will also be displayed in the selected language.
- Page 47 Startup and configuration Enter your ID and password. Privileges Default values Administrator privileges ID: admin Password: admin User privileges ID: user Password: user Important • When you first log on, be sure to change your ID and password. Click [Login] to show the setting window. Note •...
-
Page 48: Setting Window
Startup and configuration 5. Setting window When logging into the Web server of the station, the following setting window will be displayed. This window will be used to configure the station. • Depending on PC and OS being used, the window may be slightly different. •... - Page 49 Startup and configuration Repeat Steps 1 through 3 for other titles. • To log out of the Web server of the station, click [Log out] in the setting menu. Note • To stop configuring, do not use [x] to close the window. Instead, click [Log out]. If [Log out] is not used, you will be unable to login for approximately 1 hour.
-
Page 50: System Settings List
Startup and configuration 6. System settings list The table below shows all the settings for the system. The symbols indicate the following: ♦: Indicates a required field. A value must be entered. Retain the default settings, unless a change is necessary. ♣: Indicates that Support Tool has uploaded the data. - Page 51 Startup and configuration Access privilege Reference Entry page ✔ Primary Server IPv4 ✔ IPv6 ✔ Secondary Server IPv4 ✔ IPv6 ✔ SIP Connections SIP Signaling Port♦ ✔ User Agent ✔ SIP Server Primary Server ✔ Password ✔ IPv4 Address ✔ IPv6 Address ✔...
- Page 52 Startup and configuration Access privilege Reference Entry page ✔ ✔ Video (IX-DV and Video Encoder 1 Resolution IX-DVF(-*) only) ✔ ✔ Frame Rate [fps] ✔ ✔ Select Profile ✔ ✔ I-picture interval♦ ✔ ✔ Bit rate [kbps] ✔ RTP Start Port♦ ✔...
- Page 53 Startup and configuration Access privilege Reference Entry page ✔ ✔ Enable NTP ✔ Synchronization Interval [hour]♦ ✔ Primary Server Address IPv4 ✔ IPv6 ✔ Port♦ ✔ Secondary Server Address IPv4 ✔ IPv6 ✔ Port♦ System Information ✔ ✔ Custom Sound Registry Call Settings ✔...
- Page 54 Startup and configuration Access privilege Reference Entry page Option Input / Relay Output Settings ✔ Option Input Option Input Advanced Name Settings ✔ Function ✔ Type ✔ Detection Time Range ✔ API 1 ✔ API 2 ✔ Relay Output Relay Output Name Advanced Settings ✔...
- Page 55 Startup and configuration Access privilege Reference Entry page ✔ ✔ Email Event Trigger Outgoing Normal Call ✔ ✔ Incoming Normal Call ✔ ✔ Outgoing Priority Call ✔ ✔ Incoming Priority Call ✔ ✔ Outgoing Urgent Call ✔ ✔ Incoming Urgent Call ✔...
- Page 56 Startup and configuration Access privilege Reference Entry page ✔ Transmission Trigger Begin Outgoing Call ✔ Begin Communication (Source) ✔ End Communication ✔ Change contact ✔ Unit error ✔ Periodical Transmission ✔ Initialization Notice ✔ End Outgoing Call ✔ Begin Incoming Call ✔...
- Page 57 Startup and configuration Access privilege Reference Entry page ✔ ✔ Chime Weekly Schedule Start Time ✔ ✔ Chime ✔ ✔ Daily Schedule Start Time ✔ ✔ Chime ✔ Country ✔ State/County/Region ✔ City/Locality ✔ Organization ✔ Organizational Unit ✔ Common Name ✔...
- Page 58 Startup and configuration Access privilege Reference Entry page ✔ ✔ Camera (IX-DV and Adjustment Backlight Compensation IX-DVF(-*) only) ✔ ✔ Low Light Sensitivity ✔ ✔ White LED Call / Communication ✔ ✔ Monitored Maintenance ✔ Firmware Update ✔ Initialization Initialization ✔...
-
Page 59: Configuring The Station
Configuring the Station Important • The symbols indicate the following: ♦: Be sure to input the settings. Upon use, leave the unnecessary items at their default values. ♣: Indicates that IX Support Tool has uploaded the data. If the entry is altered through a Web browser, the data will not be applied to IX Support Tool. -
Page 60: Station Information
Configuring the Station 1. Station Information Identification ■ Number♦♣ Description Enter the station number. Give each station a unique number. The set station number will be displayed on the recipient side when an outgoing call is made. Settings 3 - 5 digits Default values —... -
Page 61: Id And Password
Configure the Authentication ID used to connect to the station from a 3rd party product using ONVIF. Settings 1 - 32 alphanumeric characters Default values aiphone ■ ONVIF Password (IX-DV and IX-DVF(-*) only) ♦ Description Configure the Authentication Password used to connect to the station from a 3rd party product using ONVIF. - Page 62 Configure the Authentication ID used to connect to the station from a 3rd party product using RTSP. Settings 1 - 32 alphanumeric characters Default values aiphone ■ RTSP Password ♦ Description Configure the Authentication Password used to connect to the station from a 3rd party product using RTSP.
-
Page 63: Language
Configuring the Station Language ■ Language Description Configure the language for the following on the station. • Language used for various settings (including the station name) • Set the email and System Log language. Settings • Japanese • English Default values English Note •... -
Page 64: Time
Configuring the Station Time 1.4.1 Time Zone ■ Select time zone Description Select the time zone. Settings Select from 99 regions Default values (GMT-08:00) Pacific Standard Time (US), Tijuana Note • When you first login to Web configuration with the station in its default state, this will be set as follows depending on the language selected when logging in. -
Page 65: Expanded System
Configuring the Station Expanded System Description Not used. -
Page 66: Network Settings
Configuring the Station 2. Network Settings IP Address Important • When a setting related to the IP Address is updated, the station will restart. In some cases, it may take around 10 minutes for the station to start up. 2.1.1 Static / DHCP Description Select the addressing method for the IP Address selected. - Page 67 Configuring the Station 2.1.2 IPv4 Address Important • When "Static / DHCP" is "DHCP," and the entered "IP Address," "Subnet Mask," and "Default Gateway" are updated, these changes will not be applied. ■ IP Address♦♣ Description Set the IP address. Do not use duplicate IP addresses.
-
Page 68: Dns
Configuring the Station If the IPv4 or IPv6 address for each item was configured by hostname, a DNS server must be configured for name resolution. 2.2.1 Primary Server ■ IPv4 Description Configure the IPv4 address of the primary DNS server. Settings 1.0.0.1 - 223.255.255.254 Default values... -
Page 69: Sip
1 - 36 alphanumeric characters Default values — 2.3.2 SIP Server Configure integration with 3rd party SIP based PBX systems. Please contact your local Aiphone distribution for more information. 2.3.2.1 Primary Server ■ ID Description Configure the user ID used to authenticate with the IP-PBX. - Page 70 Configuring the Station ■ Password Description Configure the password used to authenticate with the IP-PBX. Settings 1 - 24 alphanumeric characters Default values — Note • The "Password" is displayed as "●●●●●" in the Settings window. ■ IPv4 Address Description Configure the IPv4 address of the IP-PBX.
- Page 71 Configuring the Station ■ IPv6 Address Description Configure the IPv6 address of the IP-PBX. Settings ::FF:0 - FEFF:FFFF:FFFF:FFFF:FFFF:FFFF:FFFF:FFFF or hostname (1 - 64 alphanumeric characters) Default values — ■ Port♦ Description Configure the port number for communicating with the IP-PBX. Settings 1 - 65535 Default values...
- Page 72 Configuring the Station 2.3.3 Miscellaneous ■ Register Transmission Interval [sec]♦ Description Configure the interval at which to send Register to the IP-PBX. Settings 10-14400 sec Default values 3600 sec ■ DTMF digit interval timeout [sec]♦ Description Configure the time to timeout signal reception, when a DTMF signal is not received from the VoIP Phone for a continuous period of time.
-
Page 73: Multicast Address (Ix-Dv And Ix-Dvf(-*) Only)
Configuring the Station Multicast Address (IX-DV and IX-DVF(-*) only) This should be configured when you enable the multicast feature in “Called Stations (for Door)♣ (→page 87)”. 2.4.1 For Call ■ IPv4 Description Configure the IPv4 multicast address. IPv4 multicast addresses should be unique for each station. Settings 224.0.0.0 - 239.255.255.255 Default values... -
Page 74: Video (Ix-Dv And Ix-Dvf(-*) Only)
Configuring the Station Video (IX-DV and IX-DVF(-*) only) 2.5.1 Video Encoder 1 Configure settings for videos during calls between IX system stations, during communication, and during calls with VoIP phones. The coding system will be H.264 / AVC. ■ Resolution Description Choose the resolution. - Page 75 Configuring the Station ■ Select Profile Description Configure the profile. Settings • Baseline • Main • High Default values Main ■ I-picture interval♦ Description Configure the interval at which I-pictures are sent. Settings 1 - 100 Default values ■ Bit rate [kbps] Description Set the bit rate.
- Page 76 Configuring the Station 2.5.2 Video Encoder 2 If you want to transmit video in ONVIF, you should configure these. To view video from IX-DV or IX-DVF(-*) with a 3rd party product, refer to “Viewing video from IX-DV or IX-DVF(-*) with 3rd party products (ONVIF) (→page 156)”.
- Page 77 Configuring the Station ■ Select Profile [H.264 / AVC] Description Configure the profile for H.264 / AVC. Settings • Baseline • Main • High Default values Main ■ I-picture interval [H.264/AVC]♦ Description Choose the intervals for transmitting pictures of H.264 / AVC. Settings 1 - 100 Default values...
-
Page 78: Audio
Configuring the Station Audio ■ Audio Codec Description Select the audio codec. Settings • G.711 (μ-law) • G.711 (A-law) • G.722 Default values G.711 (μ-law) Important • When changing from "G.711" to "G.722" or from "G.722" to "G.711," the station will restart. In some cases, it may take around 10 minutes for the station to restart. - Page 79 Configuring the Station ■ Audio RTP Transmission Interval [msec] Description Select the transmission interval for RTP audio. Settings 20, 40, 60, 80, 100 msec Default values 20msec ■ RTP Idle Detection Time [sec]♦ Description Configure the time to detect the idle state of RTP audio. If RTP audio is not received within the specified time during a call or when paging, it will be disconnected.
- Page 80 Configuring the Station 2.6.1 Audio Buffer ■ Packets Buffered at Audio Start Description Configure the number of packets buffered until audio is started. Settings 0 - 4 Default values ■ Maximum Packets Buffered Description Set the maximum number of packets to be buffered. When the system receives more packets, the oldest packets are discarded.
-
Page 81: Packet Priority
Configuring the Station Packet Priority Important • When a VLAN-related setting is updated, the station will restart. In some cases, it may take around 10 minutes for the station to restart. ■ TOS Value (Audio)♦ Description Configure the audio packet priority (TOS Value). Settings 0x00 - 0xFF Default values... - Page 82 Configuring the Station ■ VLAN ID♦ Description Configure the VLAN ID. Settings 1 - 4094 Default values ■ VLAN Priority Description Configure the VLAN priority. Settings 0 (low) to 7 (high) Default values...
-
Page 83: Ntp
Configuring the Station 2.8.1 Enable NTP Description Configure whether to obtain the time from an NTP server. Settings • Yes • No Use Default values No Use 2.8.2 Synchronization Interval [hour]♦ Description Configure the interval for synchronizing the clock with the NTP server. Settings 1-255 hours (by one hour) Default values... - Page 84 Configuring the Station 2.8.3.2 Port♦ Description Set the port number for communicating with NTP. Settings 1 - 65535 Default values 2.8.4 Secondary Server 2.8.4.1 Address ■ IPv4 Description Configure the IPv4 address of the secondary NTP server. When using a Hostname, set up “DNS (→page 68)”.
-
Page 85: System Information
Configuring the Station 3. System Information Custom Sound Registry A maximum of 100 audio files may be registered for use as calling tones, etc. (total length of within approximately 200 seconds). ■ Custom Sound Registry Description Register the audio files to be used for ringtones, etc. Settings •... - Page 86 Note • When using this as a calling tone or ringtone, add a period of silence after the audio source. • Sample files of custom sounds are provided on our website (https://www.aiphone.net/product/) for download and use as audio sources. How to delete a custom sound Check the [Delete] box of the audio file to delete.
-
Page 87: Call Settings
Configuring the Station 4. Call Settings Station Information ■ Call Button Function Description Configure functionality when the call button is pressed. Settings • Call: Make an outgoing call. • Call, Cancel Call, End Communication: Make an outgoing call, or end the outgoing call or communication. - Page 88 Configuring the Station How to configure Called Stations (for Door) Select the group number to configure from "Option Input #." • Settings for the selected group are displayed. Configure the stations to register to the group. When done, click [Update]. ■...
- Page 89 Configuring the Station ■ Station Type: Description Select the station type. Settings • IX-MV • IX-MV7-* • IX-RS-* • IX-DV, IX-DVF(-*) • IX-SS-2G • IX-SSA(-*) • VoIP Phone • IX-EA, IX-EAU: Not used. • IX-FA: Not used. Default values — ■...
-
Page 90: Call Origination
Configuring the Station Call Origination Click [Call Origination]. Or, click "Call Origination" in the Setting menu to switch to the outgoing call screen. 4.3.1 Call Origination Advanced Settings How to configure advanced Call Origination settings In "Call Button / Option Input #," select "Call Button," "Option Input 1" to "Option Input 6." •... - Page 91 Configuring the Station ■ Ringback Tone Description Configure the calling tone heard from this station when an outgoing call is made. Settings • None • Call Pattern 1 • Call Pattern 2 • Call Pattern 3 • Call Pattern 4 •...
- Page 92 Configuring the Station 4.3.1.1 Standard Mode Settings Configure the call group number and call priority when “Call Method (→page 90)” is set to "Standard Destination". ■ Call Destination Description Configure the call destination group number. Settings 01 - 10 Default values Call Button: 01 Option Input 1-5: ―...
- Page 93 Configuring the Station ■ Schedule Settings Configure this if “Call Method (→page 90)” is set to "Change Destination by Schedule." How to configure the Weekly Schedule Configure the switchover time, call group number, and call priority for the outgoing call destination, each day from Sunday to Saturday.
- Page 94 Configuring the Station How to configure Daily Schedule Configure the switchover time, call group number, and call priority for the outgoing call destination, in units of one day. A schedule one year from the set day can be configured. 12 schedules can be set for each day. Calendar Set schedule list Select the day for which to set a schedule from "Calendar."...
- Page 95 Configuring the Station ■ Priority Description Configure the call priority. Settings • Normal • Priority • Urgent Default values — How to delete Daily Schedule Select the day for which to delete a schedule from "Calendar." Schedules for the selected day are displayed in the "Set schedule list." •...
- Page 96 Configuring the Station 4.3.2 Tone Settings ■ Busy Tone Description Select the tone heard from this device when an outgoing call is made and the other station is on a call. Settings • None • Call Pattern 1 • Call Pattern 2 •...
- Page 97 Configuring the Station ■ Error Tone (Call Failed) Description Select the tone that will be heard from this station when an outgoing call fails. Settings • None • Call Pattern 1 • Call Pattern 2 • Call Pattern 3 • Call Pattern 4 •...
- Page 98 Configuring the Station 4.3.3 Call Restart Function ■ Call Restart Function Description Enable/Disable the Call Restart Function. Call Restart Function: If the station is reset during an outgoing call, the call is automatically resumed after the station recovers. However, a call may only be resumed twice in a row. Settings •...
-
Page 99: Incoming Call
Configuring the Station Incoming Call 4.4.1 Call Answer Settings ■ Auto Answer Description Configures Auto Answer for incoming individual calls. Auto Answer: When an incoming call is received, this function automatically connects the call without having to answer it. Calls from VoIP phones and transferred calls will not be automatically answered. - Page 100 Configuring the Station ■ Ringback Tone Count [time(s)] Description Configure the number of times the ringtone plays. Settings • Infinite: The ringtone continues until the call is connected or the caller stops calling. • 1 - 20 times Default values Infinite 4.4.3 VoIP Phone...
-
Page 101: Option Input / Relay Output Settings
Configuring the Station 5. Option Input / Relay Output Settings Option Input 5.1.1 Option Input Advanced Settings Important • Do not change the "Function," "Detection Time Range," or "Detection time [msec / sec]♦" settings for contact input 6 on IX- DVF-2RA, IX-DVF-RA, IX-SSA-2RA, or IX-SSA-RA. - Page 102 Configuring the Station ■ Function Description Configure option input function. Settings • No Function • Call: Option input originates an outgoing call. Be sure to configure “Call Origination Advanced Settings (→page 90)” (outgoing call via option input 1 through 6). •...
-
Page 103: Relay Output
Configuring the Station Relay Output Click [Relay Output]. Or, click "Relay Output" in the Setting menu to switch to the Relay Output window. Important • The four relay output methods are shown below. Redundant configuration is possible for each relay output. If multiple commands occur during a single relay output, the latest command will take priority. - Page 104 Configuring the Station 5.2.1 Relay Output Advanced Settings How to configure Relay Output Select the relay output to configure in "Relay Output #." • The settings of the selected contact output are displayed. Configure each item. When configuration is complete, click [Update]. ■...
- Page 105 Configuring the Station Note • For "Incoming Page," relay output is performed even during message paging and external input paging. • For "Monitored," relay output is performed even during scan monitoring. Latch Output advanced settings “Function (→page 104)” is set to "Latch Output," select the station operating state for when relay output occurs. This can be selected for each operation priority (multiple selections allowed).
- Page 106 Configuring the Station Important • Configure the Authentication Key using 1 to 4 digits if the electrical lock connected to this device will be released by operating IX-MV. • Configure a setting value for the Authentication Key that differs from the Authentication Key set in "Communication Audio Messages"...
- Page 107 Configuring the Station Configure the "Start Time" and "End Time" for each day of the week. When done, click [Update]. ■ Start Time Description Set the time when contact output starts. Settings 00:00 - 23:59 Default values ■ End Time Description Configure the time to stop relay output.
- Page 108 Configuring the Station How to configure Daily Schedule Configure the time at which relay output will be performed, in units of one day. A schedule one year from the set day can be configured. 12 schedules can be set for each day. Calendar Set schedule list Select the day for which to set a schedule from "Calendar."...
- Page 109 Configuring the Station ■ End Time Description Configure the time to stop relay output. If this is set earlier than “Start Time (→page 108)”, the end time will be for the following day. Settings 00:00 - 23:59 Default values How to delete Daily Schedule Select the day for which to delete a schedule from "Calendar."...
-
Page 110: Function Settings
Configuring the Station 6. Function Settings Paging Settings ■ Paging Pretone Description Configure the announcement tone when a page is received. Settings • None • Call Pattern 1 • Call Pattern 2 • Call Pattern 3 • Call Pattern 4 •... -
Page 111: Email
Configuring the Station Email Configure the email function (function that sends information on station operation to the set email address). 6.2.1 Server Settings ■ SMTP Server Description Set the SMTP server. Configure either the IP address or hostname. Settings 1 - 255 alphanumeric characters Default values —... - Page 112 Configuring the Station 6.2.2 Authentication Settings ■ SMTP Authentication Description Set whether to enable or disable SMTP authentication. Settings • ON • OFF Default values ■ Mode Description Set the SMTP authentication mode. Settings • LOGIN • CRAM-MD5 Default values LOGIN ■...
- Page 113 Configuring the Station 6.2.3 Email Addresses ■ Destination 1 Description Configure the email recipient address. Settings 1 - 64 alphanumeric characters Default values — ■ Destination 2 Description Configure the email recipient address. Settings 1 - 64 alphanumeric characters Default values —...
- Page 114 Configuring the Station 6.2.4 Email Event Trigger Configure the sending trigger used to send emails. A sending trigger can be configured for each destination address. ■ Outgoing Normal Call Description An email message will be sent when an outgoing call of "Normal" priority is made. Settings •...
- Page 115 Configuring the Station ■ Incoming Priority Call Description An email message will be sent when an incoming call of "Priority" priority is received. Settings • Checked: Send • Unchecked: Do not send Default values Unchecked: Do not send ■ Outgoing Urgent Call Description An email message will be sent when an outgoing call of "Urgent"...
- Page 116 Configuring the Station ■ SD Card Error Description An email message will be sent when a microSD card access error is detected. If multiple errors are detected in a row, the email message will not be sent from the second time onward. Settings •...
- Page 117 Configuring the Station ■ Periodic Log Transmit Time Description Configure the transmission time when sending "Periodic Log Transmission." Settings From 00:00 to 23:59 Default values 00:00 ■ Periodic Log Transmit Interval Description Configure the transmission interval when sending "Periodic Log Transmission." Settings 1 day - 7 days Default values...
- Page 118 Configuring the Station 6.2.6 Send Test Email Send a test email to the destination address set in “Email Addresses (→page 113)”. How to send a test email Click [Send]. The following email is sent to the set email address. Example of sending an email message: When sending a test email from the station (Station Number: 003, Station Name: Door Station 3, Location: 2F West) △△△△@△△△△△.com...
- Page 119 Configuring the Station 6.2.7 Additional Settings (IX-DV and IX-DVF(-*) only) ■ Attach Image Description Choose whether to attach an image file captured on camera to the email message when a Normal/Priority/Urgent call triggers due to “Email Event Trigger (→page 114)”. Settings •...
-
Page 120: Cgi
Configuring the Station For details of the CGI function, contact the local Aiphone representative. 6.3.1 CGI Functionality Description Configure whether to receive CGI control commands. Settings • Enable • Disable Default values Disable Important • When multiple CGI control commands are received, CGI control may fail. -
Page 121: Sif
Configuring the Station For details of the SIF function, contact the local Aiphone representative. 6.4.1 SIF Functionality Description Set whether the SIF function is used. Settings • Enable • Disable Default values Disable 6.4.2 SIP URI Format Description Configure whether SIP_URI is specified by the other device. If set to "Enable," TERMID cannot be used. - Page 122 Configuring the Station ■ Program Type Description Set the SIF program type code. Settings 0000 - 1111 If this is set to "0000," "0001," or "0011," the “Transmission Trigger (→page 123)” setting will be disabled. Default values — ■ IPv4 Description Set the IPv4 address of the SIF destination.
- Page 123 Configuring the Station 6.4.4 Transmission Trigger Configure the SIF sending trigger when “Program Type (→page 122)” is set to "0010" or "0100-1111." ■ Begin Outgoing Call Description A SIF command is sent when an outgoing call is made. Settings • Checked: Send •...
- Page 124 Configuring the Station ■ Change contact Description A SIF command is sent when there has been a change in the contact input or relay output. Settings • Checked: Send • Unchecked: Do not send Default values Unchecked: Do not send ■...
- Page 125 Configuring the Station ■ Latch Reset Description If "Relay Output" - “Function (→page 104)” is set to "Latch Output," a SIF command will be sent when the flashing light is restored. Settings • Checked: Send • Unchecked: Do not send Default values Unchecked: Do not send ■...
- Page 126 Configuring the Station ■ Begin Communication (Destination) Description A SIF command is sent when a call is responded to. Settings • Checked: Send • Unchecked: Do not send Default values Unchecked: Do not send ■ Begin Record Description Sends out an SIF command when recording is started. Settings •...
- Page 127 Configuring the Station 6.4.5 Periodical Transmission Interval ■ Periodical Transmission Interval♦ Description Configure the transmission interval when “Periodical Transmission (→page 124)” is configured to periodically send the status of this station via SIF command. Settings • 0 (Do not send) - 1440 (min) •...
- Page 128 Configuring the Station 6.4.6 SIF File Management ■ SIF Communication Settings (sif.ini) Description Upload or download the content in “SIF Settings (→page 121)” with "sif.ini." • Upload: Click [Browse], select a file, and then click [Upload]. • Download: Click [Download] to save the file. Settings —...
-
Page 129: Record
Configuring the Station Record Recording video/audio requires an SD standard compliant microSD memory card that meets the following specifications. Standard Storage capacity Format Speed class microSDHC memory cards 4 GB to 32 GB FAT32 SD speed class 10 UHS speed class 1 or greater Important •... - Page 130 Configuring the Station ■ Prevent Overwrite Description Configure whether overwriting old video/audio files is prohibited, when the number of saved video/audio files or the microSD card storage space is full. Settings • Enable • Disable Default values Disable ■ Video Recording File Length Description Configure the interval for dividing files when a single video/audio recording becomes too long.
- Page 131 Configuring the Station 6.5.1 Schedule Settings 6.5.1.1 Weekly Schedule Configure the video and audio recording time for each day from Sunday to Saturday. 12 schedules can be set for each day. How to configure the weekly schedule Configure the "Start Time" and "End Time" for each day of the week. When done, click [Update].
-
Page 132: Communication Audio Messages
Configuring the Station Communication Audio Messages Configure the Communication Audio Messages. Communication Audio Messages: This function transmits the messages such as the location when a call starts and when receiving a key entered on the numerical keypad of the other station (IX-MV7-* or VoIP Phone). 6.6.1 Start Communication Description... - Page 133 Configuring the Station 6.6.2 Code Received Configure the message sent when the key is received. Four patterns can be set for the authentication key and message. ■ Code Description Configure the authentication key that authenticates the input key commands from IX-MV7-* or an VoIP Phone.
-
Page 134: Chime
Configuring the Station Chime Configure the chime tone heard from this device linked with the set schedule. Click [Chime]. Or, click "Chime" in the Setting menu to switch to the Chime window. 6.7.1 Weekly Schedule Configure the chime tone start time and the chime tone for each day from Sunday through Saturday. 50 schedules can be set for each day. - Page 135 Configuring the Station ■ Chime Description Configure the chime sound to play. Settings • None • Call Pattern 1 • Call Pattern 2 • Call Pattern 3 • Call Pattern 4 • Call Pattern 5 • Call Pattern 6 • Tremolo Sound •...
- Page 136 Configuring the Station 6.7.2 Daily Schedule Configure the chime tone start time and the chime tone, in units of one day. A schedule one year from the set day can be configured. 50 schedules can be set for each day. Calendar Set schedule list How to configure Daily Schedule...
- Page 137 Configuring the Station ■ Chime Description Configure the chime sound to play. Settings • None • Call Pattern 1 • Call Pattern 2 • Call Pattern 3 • Call Pattern 4 • Call Pattern 5 • Call Pattern 6 • Tremolo Sound •...
-
Page 138: Csr
Configuring the Station Generate a signature request (CSR) to submit when requesting a server certificate from a certificate authority (CA). How to generate a signature request (CSR) Enter each item. Click [Create]. Specify the storage location, and then save the file that is generated. •... - Page 139 Configuring the Station ■ Common Name Description Set the common name. Settings 1-64 alphanumeric characters Default values The IP address of the station.
-
Page 140: Ssl Certificate
Configuring the Station SSL Certificate Upload the server certificate and CA certificate obtained from a certificate authority (CA). Important • When the SSL Certificate is uploaded, the device will restart. It may take around 10 minutes for the device to finish restarting. The station cannot be used until it has finished restarting. -
Page 141: Ieee 802.1X
Configuring the Station 6.10 IEEE 802.1X Configure the settings for IEEE 802.1X authentication. Important • When the "IEEE802.1X" setting is changed, the device will restart. It may take around 10 minutes for the device to finish restarting. The station cannot be used until it has finished restarting. ■... - Page 142 Configuring the Station ■ Certificate Authority Description Upload a CA certificate. Settings • Upload: Click [Browse], select a file, and then click [Upload]. • Delete: Click [Delete] to delete registered data. Default values — ■ Client Certificate Description Upload the certificate for client authentication if "EAP" is set to "TLS." Settings •...
-
Page 143: Station Settings
Configuring the Station 7. Station Settings Volume / Tone 7.1.1 Volume ■ Transmit Description Configure the transmit volume for calls and monitoring. Settings Volume (1) to Volume (10) Default values ■ Receive Description Configure the receive volume during calls. The calling tone volume will be changed as well. Settings 1 - 10 Default values... - Page 144 Configuring the Station ■ Paging Description Set the receive volume when receiving a page. Settings 1 - 10 Default values 7.1.2 Tone ■ Communication Timeout Notification Description Configure the tone heard when an outgoing call is made but the call times out without the destination station answering.
- Page 145 Configuring the Station ■ Auto Answer Tone Description Configure the tone heard when an individual call is received with “Auto Answer (→page 99)” to "ON." Settings • None • Call Pattern1 • Call Pattern2 • Call Pattern3 • Call Pattern4 •...
- Page 146 Configuring the Station ■ Key Received Description Configure the tone to send to the other station when the door release key entered using the numerical keypad on the other station (station performing a door release operation) matches the authentication key of this station. The tone will be heard on the other station. Settings •...
- Page 147 Configuring the Station ■ Error Description Configure the sound to play when an error occurs. Settings • None • Call Pattern1 • Call Pattern2 • Call Pattern3 • Call Pattern4 • Call Pattern5 • Call Pattern6 • Tremolo Sound • Busy Response Tone •...
-
Page 148: Communication
Configuring the Station Communication ■ Talk Timeout [sec]♦ Description Configure the call duration when making an outgoing call from this station or answering a call from an incoming page. The call duration during an incoming call will be the call duration configured on the other station. -
Page 149: Monitor
Configuring the Station Monitor ■ Prevent Being Monitored Description Configure whether to prohibit monitoring from another station. Settings • OFF • ON Default values ■ Monitored Notification Tone Description Configure the tone heard when monitoring from another station starts. Settings •... -
Page 150: Camera (Ix-Dv And Ix-Dvf(-*) Only)
Configuring the Station Camera (IX-DV and IX-DVF(-*) only) Configure the settings for the camera. 7.4.1 Adjustment ■ Backlight Compensation Description Send an image for which backlight compensation was performed to the other station, when an outgoing call is made or the station is being monitored. The compensation can be removed on the other station. -
Page 151: Maintenance
Configuring the Station 8. Maintenance Firmware Update After accessing our Web site at https://www.aiphone.net/product/ and downloading the most recent firmware version for the station, update the firmware. How to update the firmware Click [Browse] and select the firmware file to download. -
Page 152: Initialization
Configuring the Station Initialization How to initialize Click [Initialization] or [Initialize User Settings]. • Initialization: All settings revert to their default values. The system log and outgoing/incoming call history is cleared. • Initialize User Settings: Only user settings are initialized. Click [OK]. -
Page 153: Settings File Backup
Configuring the Station Settings File Backup Back up the setting file so it can be used to restore the system. How to back up the setting file Important • When a setting is changed, back up the setting file. With the backup setting file, the settings of a replaced station can easily be restored. -
Page 154: System Log
Configuring the Station System Log Obtain the system log to view the operation of the station. The log is mainly used for after-sales servicing. How to view the system log Click [Download]. Specify the storage location to save the system log. •... -
Page 155: Syslog
Configuring the Station syslog ■ IPv4 Address Description Not used. ■ IPv6 Address Description Not used. -
Page 156: Viewing Video From Ix-Dv Or Ix-Dvf(-*) With 3Rd Party Products (Onvif)
Configuring the Station 9. Viewing video from IX-DV or IX-DVF(-*) with 3rd party products (ONVIF) IX-DV and IX-DVF(-*) are compatible with the "ONVIF profile S" ONVIF interface standard. Video from IX-DV and IX-DVF(-*) cameras can be viewed on 3rd party products compatible with ONVIF specifications. - Page 157 AIPHONE CO., LTD., NAGOYA, JAPAN Ⓐ Issue Date: Nov.2018 1118 MQ 60143...