Table of Contents
Advertisement
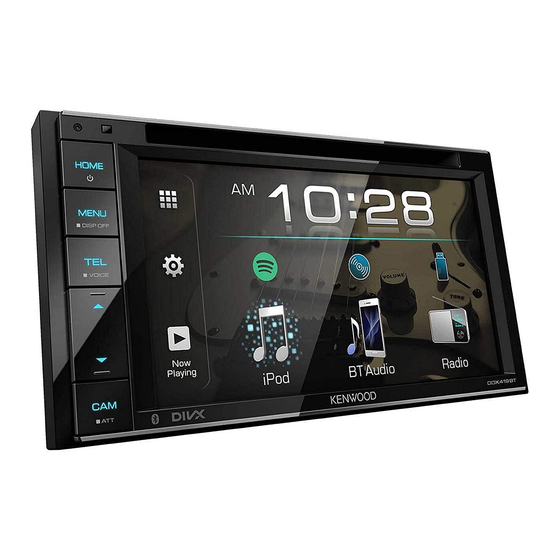
MONITOR WITH DVD RECEIVER
ENGLISH
INSTRUCTION MANUAL
DDX419BT
(Region 3 – DVD Region Code 3 Area)
DDX419BTM
(Region 2 – DVD Region Code 2 Area)
DDX4019BT
(Region 4 – DVD Region Code 4 Area)
This instruction manual is used to describe the models listed above. Model availability and features (functions)
may differ depending on the country and sales area.
© 2018 JVC KENWOOD Corporation
B5A-2608-00 (MN/M2N/XN/A9N)
Advertisement
Table of Contents

Related Manuals for Kenwood DDX419BT


Summary of Contents for Kenwood DDX419BT
- Page 1 (Region 4 – DVD Region Code 4 Area) This instruction manual is used to describe the models listed above. Model availability and features (functions) may differ depending on the country and sales area. © 2018 JVC KENWOOD Corporation B5A-2608-00 (MN/M2N/XN/A9N)
- Page 2 Important Notice Important Notice To ensure proper use, please read through this CAUTIONS manual before using this product. It is especially To care for the unit important that you read and observe WARNINGS • If you have parked the car for a long time in hot or and CAUTIONS in this manual.
- Page 3 Sembollü (üzerinde çarpı işareti olan RoHS Directive 2011/65/EU çöp kutusu) ürünler ev atıkları olarak Manufacturer: atılamaz. Eski elektrik ve elektronik JVC KENWOOD Corporation ekipmanlar, bu ürünleri ve ürün atıklarını 3-12, Moriya-cho, Kanagawa-ku, Yokohama-shi, geri dönüştürebilecek bir tesiste Kanagawa, 221-0022, Japan değerlendirilmelidir.
-
Page 4: Table Of Contents
Connection..................22 Turning on the power ..............4 Bluetooth mobile phone ............24 Turning off the power ..............4 Illustrations of DDX419BT are mainly used for Bluetooth audio player ............. 26 Putting the unit in standby ............4 explanation. KENWOOD Music Mix ............26 Turning off the screen ..............4... -
Page 5: Component Names And Operations
• VOICE (Hold): Activates voice dialing. • ATT (Hold): Attenuates the sound. 8 Volume/ATT knob • Volume (Turn): Adjusts the audio volume. * Only for DDX419BT. • ATT (Press): Attenuates the sound. 9 CAM button DDX4019BT • (Press): Displays the picture from the connected camera. -
Page 6: Basic Operations
On the pop-up short-cut menu, touch as screen. To cancel attenuation: follows: On the Home screen, touch as follows: For DDX419BT/DDX419BTM: Press and hold the same button again. For DDX4019BT: Press the same button again. To turn on the screen: Touch the screen. ENGLISH... -
Page 7: Getting Started
Then, on the <Setup> screen, touch as follows: are available. If another language has been [System] <Security Code> : [SET] selected, the text language for external monitors E.g. Initial settings screen for DDX419BT will be set to English. Enter a four-digit number ( ), then •... -
Page 8: Clock Settings
[Enter]. • You can customize the Home screen. (Page 32) • To display the Home screen from other screens, press HOME. E.g. Clock settings screen for DDX419BT Clock settings Display the Home screen. <Synchronize> • Radio Data System (Initial)*1: Synchronizes the clock time with FM RDS. -
Page 9: Source Control Screen
AV-IN Playing • Touching [<] scrolls the text if not all of the text Source control screen E.g. Source/option selection screen for DDX419BT is shown. You can perform the playback operation from the 7 Displays/hides other available operation keys* source control screen during playback. -
Page 10: List/Setting Screen
Various Screens and Operations Various Screens and Operations Common operation keys on source control screen Using touch screen operation during * About playback mode: • The appearance of the operation keys may differ, – Available playback modes differ depending on the source, disc playback however the similar operation keys have the same type, connected device, etc. -
Page 11: Disc
Audio playback information and key 5 Exits from the current screen or returns to the operation E.g. Inserting a disc for DDX419BT previous screen. • For playback information, see “Source control screen” 6 Changes the page to display more items. - Page 12 Disc Disc Selecting a folder/track on the list Make the settings. <Down Mix> When playing back a multi-channel disc, this DISC Mode Display the folder/track list. setting affects the signals reproduced through the Menu Language English On the source control screen, touch as follows: front and/or rear speakers.
-
Page 13: Video
Displays the aspect ratio selection screen. Touch [ Aspect] to select the aspect ratio. E.g. Video playback source control screen for E.g. Video menu control screen for DDX419BT <Full>*2: For 16:9 original pictures DDX419BT 4:3 signal 16:9 signal 1 Media type... - Page 14 <Full> setting. To delete the last entry, touch [DIR/ This feature may not be used for some video sources. E.g. Video menu control screen for DDX419BT CLR]. *2 While DivX is played back with <Screen Ratio> set to [16:9] [Return] Displays the previous screen or menu.
-
Page 15: Usb
Audio E.g. USB list screen for DDX419BT Select an item in each layer until you reach and select the desired file. E.g. USB source control screen for DDX419BT Selecting a folder/track using alphabet Select the file type as follows: search [Audio] Plays back audio files. -
Page 16: Android
Settings for USB playback Display the <USB Mode> screen. On the source control screen, touch as follows: USB cable (commercially available) E.g. Android source control screen for DDX419BT Make the settings. Touching the operation keys performs the following actions: USB Mode... -
Page 17: Ipod/Iphone
iPod/iPhone iPod/iPhone Bluetooth connection Select a category ( ), then select a Connecting an iPod/iPhone Pair the iPod/iPhone with this unit via Bluetooth. desired item ( • For playable iPod/iPhone types and other (Page 22) iPod information, see page 47. Artist 000000001 Playlists •... -
Page 18: Radio
Radio Radio 9 TI indicator [TI]*1 (For FM RDS features) Listening to the radio p Operation keys* Activates TI standby reception mode. q ST/MONO indicator • When TI is activated, the unit is ready The unit switches to FM alarm scene automatically The ST indicator lights up when receiving an FM to switch to traffic information if when receiving an alarm signal from FM broadcast. - Page 19 Settings for other FM Radio Data System (Hold) features Automatic presetting — AME (Auto E.g. Radio source control screen for DDX419BT Memory) Display the <Radio Mode> screen. On the source control screen, touch as follows: On the source control screen, touch as follows: The station selected in step 1 is stored into the preset number [P1] to [P5] you have selected.
-
Page 20: Spotify
Spotify Spotify Radio Radio With Spotify, your music is everywhere. Working out, <AF Regional> <Auto TP Seek> partying or relaxing, the right music is always at your When driving in an area where FM reception is not • ON (Initial): Automatically searches for a station fingertips. - Page 21 Spotify Spotify Install the latest version of the Spotify application on Operation keys on source control screen Playback operations your smartphone. • The appearance of the operation keys may differ, • For Android devices: Search for “Spotify” in Google however the similar operation keys have the same Playback information and key operation Play to find and install the most recent version.
-
Page 22: Other External Components
Other External Other External Spotify Spotify Components Components *3 Not available for tracks in a playlist. Selecting a track *4 Not available for tracks in the Radio. *5 Available only for premium account users. Display the Spotify menu screen. AV-IN On the source control screen, touch as follows: Creating your station (Start Radio) Connecting an external component... -
Page 23: Using Camera
Other External Components Other External Components To display the camera screen manually To display parking guidelines Using camera • When <Front Camera> is set to [ON], the picture Set <Parking Guidelines> to [ON] (Page 33) or Install the front view camera or rear view camera from the front view camera is displayed. -
Page 24: Bluetooth
Preparation and switch between these five devices. • To use the Bluetooth function, you need to turn on For DDX419BT: the Bluetooth function of the device. Select the microphone (built-in or external) to use. See <MIC SETUP> on page 28. - Page 25 Bluetooth® Bluetooth® Auto pairing Pairing a Bluetooth device using a PIN code Select the unit (“DDX4”) on your When <Auto Pairing> is set to [ON] (page 28), (for Bluetooth 2.0) Bluetooth device. iOS devices (such as iPhone) are automatically paired Display the <PIN Code Set> screen. •...
-
Page 26: Bluetooth Mobile Phone
Device Name 5 Remove adjust the volume of the call or earpiece. • Call information is displayed if acquired. DDX419BT/DDX419BTM: Press the volume • Phone operation is not available while the picture buttons. from the connected camera is displayed. DDX4019BT: Turn the volume knob. - Page 27 Bluetooth® Bluetooth® When item 4 is selected in step 2: Select a contact ( ), then make a call ( Making a call When item 1, 2 or 3 is selected in step 2: Enter the phone number ( ), then make a Display the phone control screen.
-
Page 28: Bluetooth Audio Player
Presetting phone numbers You can change the device to use when two devices You can preset up to five phone numbers. KENWOOD Music Mix are connected. Display the phone control screen. When “BT Audio” is selected as the source, you can... -
Page 29: Bluetooth Settings
Bluetooth® Bluetooth® 1 Tag data* (current track title/artist name/album Bluetooth settings Selecting an audio file from the menu title) You can change various settings for using Bluetooth • Pressing [<] scrolls the text if not all of the text is Display the audio menu. -
Page 30: Settings
Time Alignment Enter automatically. Answer the calls manually. • Natural (Initial)/Rock/Pops/Easy/Top40/Jazz/ Powerful/User <Auto Pairing> E.g. Audio settings screen for DDX419BT • ON (Initial): Establishes pairing automatically Equalizer SRC Name with an iOS device (such as iPhone) connected Preset Q factor... - Page 31 Settings Settings <Stage EQ> <Sound Effect> Store your own sound adjustments Moves the center of the sound to the lower or higher Adjust the sound effect. point. Select the height. Select a preset sound mode. • OFF (Initial)/Low/Middle/High <Loudness> Select a band ( ) and adjust the level ( Adjusts loudness.
- Page 32 Settings Settings <Speaker/X’over> <Time Alignment> Adjust the crossover frequency of the selected speaker. Make fine adjustments to the delay time of the speaker Setting the speakers and crossover • Adjustable items vary depending on the selected output to create a more suitable environment for your frequency speaker type/speaker size/crossover settings.
-
Page 33: Display Settings
Dimmer Audio Auto from that of the actual scene. Display User Customize Enter 80 cm OSD Clock Input <Background>: Change the background design. 150 cm +70 cm Demonstration System Scroll Once E.g. Display settings screen for DDX419BT +0 cm ENGLISH... - Page 34 • You can also adjust the illumination color yourself. Touching [<] scrolls the text regardless of this setting. Touch [Edit] to display the illumination color E.g. Image adjustment screen for DDX419BT adjustment screen, then select the dimmer setting and adjust the color. The adjustment is saved in <Home Customize>...
-
Page 35: Input Settings
<Rear Camera Interruption> • ON: Displays the picture from the rear view camera Select the color system of the external monitor. E.g. Input settings screen for DDX419BT when you shift the gear to the reverse (R) position. • NTSC/PAL (Initial) –... -
Page 36: System Settings
([OK] or [Next]) ( Beep If [iPod/iPhone] is selected in step 1: Change the navigation settings. Smartphone Setup E.g. System settings screen for DDX419BT <Guidance> USB 1 Wire Bluetooth Select which front speakers are used for the navigation <Language>... - Page 37 Settings Settings <Bluetooth Setup> <DivX(R) VOD> [USB 1 Wire] Select this when the device is connected via the USB input Configure settings for using a Bluetooth device, such This unit has its own Registration Code. Once you terminal (cable from the rear as connection and other general operations.
- Page 38 Please select the function to assign to the button. containing an update file. • To obtain the update file, visit <www.kenwood.com/cs/ce/>. Done Connect a USB device with the update file to the unit. Repeat steps 2 and 3 to register other buttons.
-
Page 39: Remote Controller
Remote Controller Remote Controller • For DDX419BT/DDX419BTM: This unit can be • If the Remote Controller operates only over shorter CAUTION operated using the remote controller (RC-DV340) distances or does not operate at all, it is possible that • Put the Remote Controller in a place where it will supplied with this unit. -
Page 40: Basic Operations For Rc-Dv340 (Supplied)
Remote Controller Remote Controller DIRECT Enters direct search mode. Basic operations for RC-DV340 (supplied) DVD/VCD (DVD mode) CLEAR Deletes a character while in direct Common operations (AUD mode) Moves the cursor when displaying a search mode. menu. • Selects the source. Selects a track. -
Page 41: Basic Operations For Kna-Rcdv331 (Optionally Purchased)
Remote Controller Remote Controller MAP DIR/OPEN Not used for this unit. Basic operations for KNA-RCDV331 iPod/Android (AUD mode) (optionally purchased) NAV/DISP Switches between the current Selects music/videos. source control screen and the Starts/pauses playback. navigation screen. ZOOM OUT/IN Not used for this unit. 2 ZONE Not used for this unit. - Page 42 Remote Controller Remote Controller * +/CLEAR Deletes a character while in direct Music Disc/Audio file/Video file/Picture file USB (AUD mode) search mode. (AUD mode) /FM+ / /AM− Selects a folder. # BS/DIRECT Enters direct search mode. /FM+ / /AM− Selects a folder. Selects a file.
-
Page 43: Kenwood Remote App
Remote Controller KENWOOD Remote APP Before installation WARNINGS KENWOOD Remote is an application that connects • DO NOT connect the ignition wire (red) and the Precautions on installation and connection and controls compatible KENWOOD car receivers via battery wire (yellow) to the car chassis (ground), you •... - Page 44 Installation and Connection Installation and Connection • If your car’s ignition does not have an ACC position, Parts list for installation Installation procedure connect the ignition wires to a power source that Note: This parts list does not include all the package can be turned on and off with the ignition key.
-
Page 45: Installing The Unit
• Connect to the car’s steering remote harness using the steering remote cable (“). Contact Installing the trim plate your KENWOOD dealer for details. (Only for DDX4019BT) 3 Microphone input (MIC) (Page 44) 4 Audio video input (AV-IN) Connect the following type of 4-pole mini plug:... -
Page 46: Wiring Connection
Installation and Connection Installation and Connection Wiring connection 10 A fuse ] *2 Connect the antenna cord to the antenna terminal Front view camera input USB input terminal (1 m) Purple with white stripe To the car’s reverse lamp harness when using the optional rear view camera REVERSE Light green To the car’s parking brake detection switch harness... -
Page 47: References
References References • This unit can play back files that meet the conditions – AAC files copy-protected with FairPlay (except Maintenance those stored on an iPod/iPhone). below: Cleaning the unit – Bit rate: – Files which have data such as AIFF, ATRAC3, etc. MP3: 8 kbps –... - Page 48 References References Picture files – This unit can recognize a total of 5 000 files and Language codes (for DVD language selection) • This unit can play back the following files with 250 folders (a maximum of 999 files per folder) in a Afar Scots Gaelic following codec and extension code:...
- Page 49 References References • Electrostatic shock at connecting a USB device may Latvian, Lettish Samoan About USB playback cause abnormal playback of the device. In this case, MG Malagasy Shona Important disconnect the USB device then reset this unit and Maori Somali Make sure all important data has been backed up to the USB device.
-
Page 50: Troubleshooting
In Insert a finalized disc. The unit does not work at all. this case, visit the following KENWOOD web site: Finalize the discs with the component which you Reset the unit. (Page 4) <www.kenwood.com/cs/ce/>... - Page 51 Troubleshooting Troubleshooting Tracks on the recordable/rewritable discs are not Sound is distorted. Android Deactivate the equalizer either on this unit or the played back as you have intended them to play. Sound cannot be heard during playback. Playback order may differ from the one played back iPod/iPhone.
- Page 52 Troubleshooting Troubleshooting Echo or noise occurs. “Hung Up Error” appears. Bluetooth Adjust the microphone unit position. The call has not ended yet. Park your car, and use Phone sound quality is poor. Adjust the echo volume or noise reduction volume. the connected mobile phone to end the call.
-
Page 53: Specifications
Specifications Specifications Monitor section DVD player section Bluetooth section Picture Size (W × H) 6.2 inches (diagonal) wide D/A Converter 24 bit Technology Bluetooth V3.0 137.5 mm × 77.2 mm Audio Decoder Linear PCM/Dolby Audio/ Frequency 2.402 GHz to 2.480 GHz Display System Transparent TN LCD panel MP3/WMA/WAV/AAC (.m4a) - Page 54 Frequency (Hz): 30/40/50/60/70/80/90/100/ AM tuner section Video Output Level 1 Vp-p/75 Ω 120/150/180/220/250/ (RCA jack) Frequency Range DDX419BT: Through Analog RGB Input* 0.7 Vp-p/75 Ω 531 kHz to 1 611 kHz (9 kHz) Slope (dB/Oct.): DDX419BTM: −6/−12/−18/−24 * Not applicable for Indonesian models.
- Page 55 12 V DC car battery Installation 178 mm × 100 mm × Dimensions 162 mm (W × H × D) Weight (Main Unit) DDX419BT/DDX419BTM: 1.7 kg DDX4019BT: 1.8 kg (including trim plate) Design and specifications are subject to change without notice. ENGLISH...
-
Page 56: Trademarks And Licenses
JVC KENWOOD Corporation is software without specific prior written permission. under license. Other trademarks and trade names are those of their respective owners. - Page 60 For updated information (the latest Instruction Manual, system updates, new functions, etc.), please visit the following website: <www.kenwood.com/cs/ce/>...