Advertisement
Quick Links
CS530 / CS530W
Network Camera
Quick Installation Guide
Connect the Cables
LAN cable from PC to switch/router: If your LAN cable from
PC has been connected to the Cable/ADSL modem, please re-
connect it to the Ethernet port of your network switch/router.
Ethernet port on camera: Use the bundled RJ-45 LAN cable to
connect the Ethernet port of the IP camera to the Ethernet port
of your switch/router. Note you must use wired Ethernet to
configure wireless connection on CS530W
Wireless antenna (for CS530W only): If you are installing a
Compro CS530W, attach the supplied wireless antenna to the
connector provided on the back of the camera.
Power: Attach the power adapter to the camera's power
connector and connect the power plug to a power outlet.
Package Contents
Please check the package contents. If anything is missing, please
don't hesitate to contact your local distributor.
Network camera
RJ-45 LAN cable
Screw for ceiling mount x 3,
Quick installation guide
screw anchor x 3, camera pad x4
Installation CD
Wall mount plate
Wireless antenna (only available
Power adapter
for CS530W)
Mount the Camera
Follow the instruction below to mount the camera on the wall or ceiling.
Fix the mounting plate.
Attach the IP camera.
L o o s e n t h e s c r e w t h a t
Let fastening bracket slide
fixes the trapezoid-shaped
i n t o i t s p o s i t i o n o n t h e
fastening bracket
camera base (as circled).
Push and hold the fastening
Tighten the screw on the
bracket to the right.
fastening bracket.
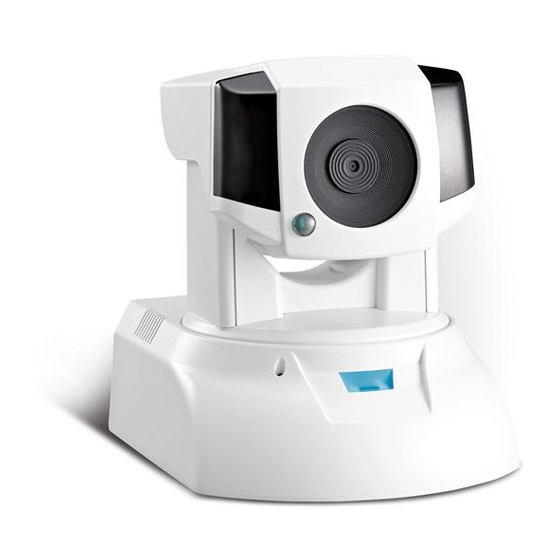
CS530 Hardware Overview
Network Video Recorder
IR LEDs x 6 (12 in total)
Reset button
Light sensor
Audio output
Lens
Microphone in
IR LEDs x 6 (12 in total)
Power connector
Built-in microphone
LED status indicator
Ethernet port
* Do not rotate your CS530/CS530W camera manually as it may
damage your camera.
To begin setup, insert the installation CD into your CD-ROM
drive, and the iWizard will start automatically. ( If it doesn't,
browse the contents of the CD and run the 'iWizard.exe').
Then, select the language and the device you wish to set up.
The first step shows how to connect all the cables. Hit [Next]
twice to proceed with the 2nd step in which the iWizard scans
for available cameras on your local network. Then select your
camera from the list, and wait until the live video and camera
information are displayed on the right. (You can double-check
the device name and the MAC ID which are printed on the serial
number sticker on the back of the camera and on the package).
Click [Next] when you're ready. Meanwhile, if you see the
Windows Security Alert dialog box during the search, please
choose [Unblock].
CS530W Hardware Overview
IR LEDs x 6 (12 in total)
Ethernet port
2x
2x
Light sensor
Reset button
Lens
Audio output
IR LEDs x 6 (12 in total)
Microphone in
D e t a c h a b l e w i r e l e s s
Power connector
antenna
WPS button
Microphone
LED status indicator
Set Up the Software
The default password is `admin.' Enter a new password here
(please note down your new password). You can also click
[Next] to skip this process.
Check the camera name, date and time setting.
Advertisement

Related Manuals for COMPRO CS530


Summary of Contents for COMPRO CS530
- Page 1 Power connector LED status indicator antenna WPS button Ethernet port Microphone Network Camera * Do not rotate your CS530/CS530W camera manually as it may LED status indicator Quick Installation Guide damage your camera. Wireless antenna (only available Power adapter for CS530W)
- Page 2 No part of this document may be copied or reproduced in any form or by any means without the prior written consent of Compro Technology, Inc. Compro Technology makes no warranties with respect to this documentation and disclaims any implied warranties of merchantability, quality, or fitness for any particular purpose.
- Page 3 Federal Communication Commission Interference Statement This equipment has been tested and found to comply with the limits for a Class B digital device, pursuant to Part 15 of the FCC Rules. These limits are designed to provide reasonable protection against harmful interference in a residential installation.