Table of Contents
Advertisement
Quick Links
Advertisement
Table of Contents

Related Manuals for Russound ST2S


Summary of Contents for Russound ST2S
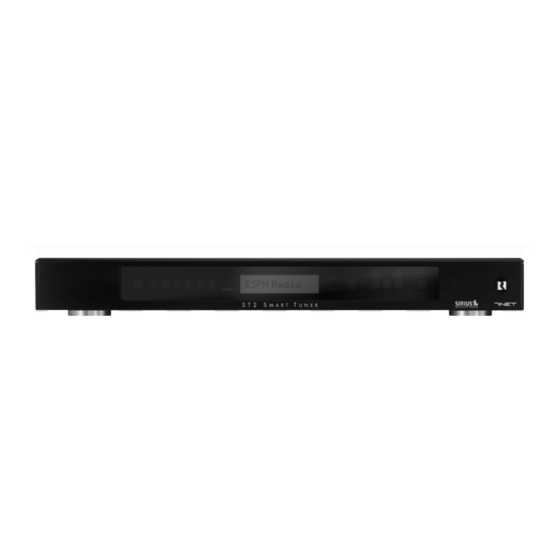
- Page 1 ST2S Smart Tuner Installation Manual...
-
Page 2: Important Safeguards
(servicing) instructions in the literature accompanying the appliance. If you have any questions please call Russound Inc. at 1-800-638-8055 or 603-659-5170. Safety Instructions: 1. Read Instructions - All the safety and operating instructions should be read before the appliance is operated. -
Page 3: Table Of Contents
Product Introduction...4-5 Component Guide ST2S Front Panel...6 ST2S Rear Panel ...7 ST2-RC Remote Control...8 ST2S Setup and Connections Basic Connections ...9 ST2-KP and CAi Connections ...10 CAV6.6 Connections ...11 Antenna Connections...12-14 ST2S Operation SIRIUS Radio Activation ...15 SIRIUS Radio Displays ...15 SIRIUS Radio Modes ...16... -
Page 4: Product Introduction
® communication link, the ST2S Tuner is designed to meet your needs. The ST2S Tuner is like having two radios in one. The AM/FM tuner provides broadcast of local AM/FM stations, and the SIRIUS tuner delivers all the diversity and choices available to SIRIUS radio subscribers. - Page 5 CAi system. There are two source audio outputs and two IR connections - one for each tuner in the ST2S. You will need at least one IR link cable (Russound P/N 09-0508) for INTRODUCTION these connections (one is supplied with each CAi system).
-
Page 6: Component Guide St2S Front Panel
COMPONENT GUIDE ST2S FRONT PANEL DROP-DOWN COVER - Hinged see-through cover protects the selection buttons on the tuner MAIN POWER SWITCH - Turns power on and off BANK SELECT BUTTON - Selects bank 1-6 MEMORY SELECT BUTTONS - Sets and selects memory presets 1-6 for each bank... -
Page 7: St2S Rear Panel
RS232 Interface 1 Keypad 2 RNET LINK IN/LINK OUT - Links to other Russound components that are RNET compatible, displays frequency and other information on the UNO keypads RS-232 INTERFACE - The RS-232 Interface allows the tuner to be controlled by PC or other devices that have an RS-232 Interface. -
Page 8: St2-Rc Remote Control
TUNE SELECT - nel selection (numeric input) TUNE UP/DOWN - station or channel numbers FAV 1/FAV 2 - Sets/ preset selection on ST2S tuner SEEK UP/DOWN (AM/FM) Seeks the next tuned station up/down FAV 2 (SIRIUS) Scrolls through banks 1-6... -
Page 9: St2S Setup And Connections Basic Connections
There are two IR connections - one for each tuner in the ST2S. You will need two IR link cables (Russound P/N 09-0508) for these connections. There is a unique IR code set each for Tuner 1 and Tuner 2, which allow each to be controlled independently. -
Page 10: St2-Kp And Cai Connections
IR EMITTERS Source Connections with CAi Series Controller/Amplifier The diagram depicts a typical setup using the ST2S Tuner with a CAi Series amplifier. Each tuner in the ST2 unit must be connected as a separate source for audio inputs. ST2 Smart Tuner... -
Page 11: Cav6.6 Connections
CAV6.6 keypad ports, NOT the ports on the ST2 Tuner. NOTE: When viewed from the BACK, Tuner 1 output is on the RIGHT side of the ST2S, and the Tuner 1 (Source 1) input is on the LEFT side of the source input section of the CAV6.6. -
Page 12: Antenna Connections
Connecting an Indoor or Outdoor AM/FM Antenna The diagram above depicts a typical setup using the ST2S Tuner with the included FM antenna and AM loop antenna. Also shown are two outdoor AM/FM antenna options (not included). (Not to scale) - Page 13 Verify that Channel 184 is playing by pressing the Tune Up/Tune Down buttons. Enter Signal Strength Mode by pressing and holding the ST/MONO button on the ST2S front panel. ST2S SETUP AND CONNECTIONS ANTENNA CONNECTIONS repeaters are used to boost the signal, which can be received by antennas placed in or near windows.
- Page 14 ST2S SETUP AND CONNECTIONS ANTENNA CONNECTIONS Grounding an Outdoor Antenna If the tuner is used with an outdoor antenna, the antenna must be grounded against static charges and voltage surges. Consult the instructions that came with the antenna or contact the antenna manu- facturer for proper installation instructions.
-
Page 15: St2S Operation
Display ANTENNA ERROR ACQUIRING SIGNAL INVALID CHANNEL UPDATING CHANNELS CALL 888-539-SIRIUS TO SUBSCRIBE SUBSCRIPTION UPDATED ST2S OPERATION SIRIUS RADIO OVERVIEW Mode to enter the SIRIUS Mode selection. Band Condition Antenna not connected Loss of signal, acquiring channel audio... -
Page 16: Sirius Radio Modes
ST2S OPERATION SIRIUS RADIO MODES SIRIUS Radio Modes There are six user “modes” for selecting music, viewing music information, retrieving ID and locking channels on the SIRIUS Tuner: Preset (default or normal) Category Search Now Playing Display Preferences SIRIUS ID... -
Page 17: Preset
(e.g., The Vault, The Roadhouse, CNN). Channel selection in this mode is refined to scrolling only those channels in the selected category. ST2-RC ST2-KP UNO-S2 Hold Hold Hold Hold ST2S OPERATION SIRIUS RADIO MODES UNO-LRC1 Hold Hold... -
Page 18: Now Playing
ST2S OPERATION SIRIUS RADIO MODES Category Search Mode (1 1 . . C C A A T T S S E E A A R R C C H H ) (continued) Next Category This button press accesses the next category from the current category. -
Page 19: Sirius Id
SIRIUS during the activation procedure (Example: 1 1 2 2 3 3 4 4 5 5 6 6 7 7 8 8 9 9 0 0 1 1 2 2 ) ST2S SIRIUS ID Mode SIRIUS ID Number Mode Band Exit Current Mode ST2-RC ST2-KP UNO-S2 ST2-RC ST2-KP UNO-S2 MONO ST2S OPERATION SIRIUS RADIO MODES UNO-LRC1 UNO-LRC1... -
Page 20: Channel Lock
To change a code: 1. Select CHANGE CODE. Press ENTER CODE appears. 2. Using the remote control, enter the new four-digit code. RE-ENTER appears. Enter the new code again. SAVED appears and the ST2S returns to normal mode. ST2-RC ST2-KP UNO-S2 Mode... -
Page 21: Front Panel Controls
The backup will then be avail- able in case tuner settings need to be restored. The “RNET Backup Utility” is available through the Document Center at www.russound.com . Also required are a DB9 male-to-female cable and laptop or desktop PC. -
Page 22: St2-Rc Remote Control
ST2-RC REMOTE CONTROL ST2-RC Remote Control Operation The ST2-RC remote control is the only means of remote operation of the ST2S in a non--RNET system. The ST2S front panel displays information for the tuner that is receiving commands from the ST2-RC. -
Page 23: St2-Kp Keypad Controls
To activate the ST2-KP, press . Press power down the keypad display. The keypad remains powered until the ST2S Tuner is turned off. Selecting the desired tuner To select a different tuner, press and hold keypad has been hardware jumper-selected to Tuner 1 or Tuner 2, it will not switch between the two tuners.) The backlight color of the display will be... -
Page 24: Uno-S2 Keypad Controls With Cav6.6
ST2S OPERATION UNO-S2 KEYPAD CONTROLS WITH CAV6.6 CAV6.6-UNO-S2 Keypad Operation NOTE: To control the ST2 Tuner through the UNO-S2 keypad, the tuner must be configured as a source using the CAV6.6 programming steps. Turning the unit on The tuner is power managed by the CAV6.6 or other RNET-enabled controller. -
Page 25: Uno-S2 Keypad Controls With Cav6.6
BANK SELECT hold) MEM UP/DOWN stations (press) NOTE: UNO-S2 keypads are connected to the CAV6.6 to control the ST2S through RNET. UNO-S2 keypads do not connect directly to the ST2 Tuner. ST2S OPERATION 5-second preview before next station Used for bank selection (press and... -
Page 26: Uno-Lrc1 Remote Control With Cav6.6
ST2S OPERATION UNO-LRC1 REMOTE CONTROL WITH CAV6.6 UNO-LRC1 Remote Control Operation Turning the unit on The tuner is power managed by the CAV6.6 or other RNET-enabled controller. If the tuner is in standby mode, any button press of the UNO-LRC1 will bring the tuner out of standby mode when used with the UNO keypad. -
Page 27: Uno-Lrc1 Remote Control With Cav6.6
TUNER 1 (SIRIUS) or TUNER 2 (AM/FM) INFO - SIRIUS Now Playing mode toggle SEEK UP/DOWN - (AM/FM) Seeks next tuned station up/down (SIRIUS) Next/previous preset, category, info item, display preference GUIDE - SIRIUS Category Search mode toggle ST2S OPERATION... -
Page 28: St2S Tuner Programming
(US or Euro), factory initialization and system information. If the ST2S is used with a non-RNET system, the ST2S can be connected and operated without any setup programming. Follow the setup menus if custom names are desired, or for system info. -
Page 29: Factory Initialization
Factory Init menu. A “Yes” begins the initialization. 6. “Please wait” appears on the tuner during the process and “Cycle Power” appears when com- plete. 7. Cycle power on the ST2S tuner. ST2 TUNER SETUP MENU Chassis SYSTEM Setup... -
Page 30: System Info
ST2S TUNER PROGRAMMING ST2 TUNER SETUP MENU System Info (Chassis) The System Info menu shows the ST2 Tuner’s manufacturing build properties. 1. Enter the Setup Menu by pressing and holding the SELECT button. 2. TUNER SETUP appears. Press MEM Up/Down until SYSTEM INFO appears on the tuner. - Page 31 BANK # Mode MEMORY # Band 10. Press MODE/BAND when bank name is entered. 11. SAVE CHANGES will appear. 12. Press Tune Up/Down to select Yes or No. ST2S TUNER PROGRAMMING Sirius Setup Menu UPDATE FACTORY FIRMW INIT Procedure Procedure...
-
Page 32: Controller Id
The Controller ID procedure is used to identify the controller(s) that the SIRIUS tuner will respond to. Note: For the SIRIUS module that is installed in the ST2S chassis, “All Controllers” will be the default setting. Diagnostics (SIRIUS) The Diagnostics procedure is for factory use only. -
Page 33: System Info
“Yes” begins the initialization. 7. “Please wait” appears on the tuner during the process and “Cycle Power” appears when com- plete. 8. Cycle power on the ST2S tuner. System Info (SIRIUS) The System Info menu shows the SIRIUS module Press Select... -
Page 34: Tuner Setup Menu For Am/Fm
ST2S TUNER PROGRAMMING ST2 TUNER SETUP MENU Tuner Setup Menu for AM/FM It is important to select the desired tuner (Tuner 2 for AM/FM) using the SELECT button BEFORE accessing the Tuner Setup Menus. Memory Name (AM/FM) A memory preset must be created and saved before it can be named (see page 21). -
Page 35: Region
The backup and restore PC application “RNET Backup” is available through the Document Center at www.russound.com . Also required are a DB9 male-to-female cable and laptop or desk- top PC. AM/FM Setup Menu... -
Page 36: Programming For Cav6.6 Use
9. Press the Setup button three times to back out of the Installation Menu. Source Configuration Note: When the ST2S Tuner is used with the CAV6.6 or other RNET controller, it is configured as an RNET command type “Peripheral” and is connected via the RNET bus. This makes the tuner behave as a fully integrated device with UNO-S2 keypad support. -
Page 37: Technical Specifications
ST2S Smart Tuner Dimensions: 17"W x 8"D x 1.8"H (43 x 20.3 x 4.4 cm) Weight: 7 lbs. (3.2kg) Power Supply: 12VDC 1.25A Frequency Range: AM 530 - 1710 kHz FM 87.7 - 107.9 MHz FM Antenna Impedance: 75 ohm unbalanced... -
Page 38: Warranty & Repair
In these cases, repairs will be made on the basis of the retail value of the parts and labor. To return for repairs, the unit must be shipped to Russound at the owner's expense, along with a note explaining the nature of service required. Be sure to pack the unit in a corrugated container with at least three (3) inches of resilient material to protect the unit from damage in transit. - Page 39 NOTES...
- Page 40 603.659.5170 • fax 603.659.5388 e-mail: tech@russound.com www.russound.com ® © 2005 Russound All rights reserved. All trademarks are property of their respective owners. © 2005 SIRIUS Satellite Radio Inc. “SIRIUS” and the SIRIUS dog logo are registered trademarks of SIRIUS Satellite Radio Inc.