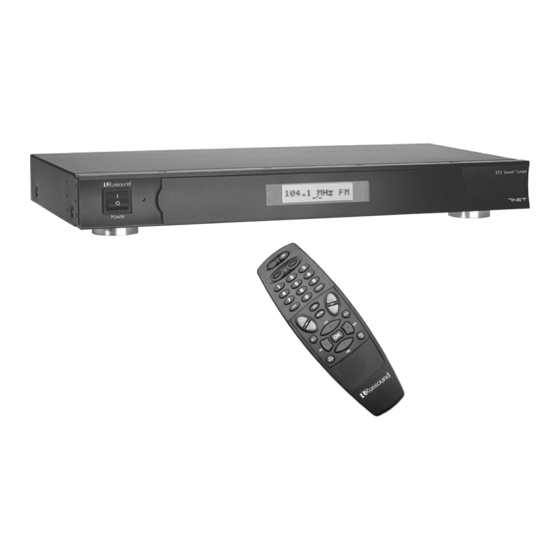
Russound ST2 Smart Tuner Instruction Manual
Dual am/fm tuner
Hide thumbs
Also See for ST2 Smart Tuner:
- Instruction manual (28 pages) ,
- Installation manual (28 pages) ,
- Integration manual (7 pages)
Table of Contents
Advertisement
Advertisement
Table of Contents

Related Manuals for Russound ST2 Smart Tuner


Summary of Contents for Russound ST2 Smart Tuner
- Page 1 ST2 Smart Tuner Dual AM/FM Tuner INSTRUCTION MANUAL...
-
Page 2: Important Safeguards
1. Power – WARNING: BEFORE TURNING ON THE POWER FOR THE FIRST TIME, READ THE FOLLOWING SECTION CAREFULLY. 2. Do Not Touch The ST2 With Wet Hands – Do not handle the ST2 or power cord when your hands are wet or damp. If water or any other liq- uid enters the ST2 cabinet, unplug the unit from power immediately and take the ST2 to a qualified service person for inspection. -
Page 3: Table Of Contents
ST2-RC Remote Control ...15 ST2-KP Keypad Controls ...16 UNO-S2 Keypad Controls with CAV6.6...17-18 UNO-LRC1 Remote Control with CAV6.6 ...19-20 ST2 Tuner Programming ST2 Chassis Setup Menu ...21 Source Number ...21 Update Firmware ...21 Factory Initialization ...22 System Info...23 Tuner Setup Menu for AM/FM...23 Memory Name...23... - Page 4 ST2 Tuner is designed to meet your needs. The ST2 Tuner is like having two radios in one. The two AM/FM tuner modules share one set of controls and display on the front of the unit, but each runs independently.
- Page 5 CAi system. There are two source audio outputs and two IR connections - one for each tuner in the ST2. You will need at least one IR link cable (Russound P/N 09-0508) for these connections (one is supplied with each CAi sys- tem).
-
Page 6: Component Guide
COMPONENT GUIDE ST2 FRONT PANEL MAIN POWER SWITCH - Turns power on and off POWER ON/OFF LED - Indicates power on or off REMOVABLE COVER LENS - Covers the selection buttons on the tuner BANK SELECT BUTTON - Selects bank 1-6... -
Page 7: St2 Rear Panel
RS-232 Interface. The RS-232 Interface also allows for firmware updates and program- ming (DB9 Cable) KEYPAD PORTS - RJ-45 Keypad ports for ST2-KP tuner keypads in dedicated, non-RNET sys- tems (Do not connect UNO keypads to these ports) -
Page 8: St2-Rc Remote Control
BANK SELECT - (numeric input 1-6) TUNE SELECT - tion (numeric input) TUNE UP/DOWN - station numbers BANK FAV 1/FAV 2 - Sets/ preset selection on ST2 tuner SEEK UP/DOWN up/down LOCAL/DISTANCE - FAV 2 OK - SEEK STEREO/MONO -... -
Page 9: St2 Setup And Connections
CAT-5 passthrough patch cable with simi- lar wiring terminations at each end. Connect one end of the cable to the RNET Link In of the ST2 tuner, and connect the other end of the patch cable to the RNET Link Out connection on the RNET-compatible device. -
Page 10: St2-Kp And Cav6.6
ST2. The keypad uses a 110 punchdown connection and an RJ-45 T568A connection to the tuner. Source Connections with CAV6.6 Controller/Amplifier The diagram depicts a typical setup using the ST2 Tuner with a CAV6.6 amplifier. Each tuner in the ST2 unit must be connected as a separate source for audio inputs. UNO-S2 keypads are connected to the CAV6.6 keypad ports, NOT the ports on the ST2 Tuner. -
Page 11: Cai Series And A-Bus Connections
IR EMITTERS Source Connections with CAi Series Controller/Amplifier The diagram depicts a typical setup using the ST2 Tuner with a CAi Series amplifier. Each tuner in the ST2 unit must be connected as a separate source for audio inputs. Smart Tuner NEWMARKET, NH U.S.A. -
Page 12: Antenna Connections
INTERFACE Connecting an Indoor and Outdoor Antenna The diagram above depicts a typical setup using the ST2 Tuner with the included FM antenna and AM loop antenna. Also shown are two outdoor antenna options (not included). (Diagram not to scale) -
Page 13: Antenna Connections
The diagram gives a general depiction of how an outdoor antenna should be grounded. For complete guidelines on antenna grounding procedures, please con- sult the National Electrical Code, Section 810, ANSI/NFPA No. 70-1984. ST2 SETUP AND CONNECTIONS ANTENNA CONNECTIONS Electric... -
Page 14: St2 Operation
ST2 OPERATION FRONT PANEL CONTROLS Front Panel Operation Turning the unit on To turn the unit on, push the On/Off button up on the front panel. Pushing the On/Off button down turns the tuner off. Selecting the desired tuner From the front panel, use Tuner 1 and Tuner 2. -
Page 15: St2-Rc Remote Control
ST2-RC Remote Control Operation Turning the unit on To take the ST2 tuner out of standby mode, push or any other button except TUNER 1 or TUNER 2. Selecting the desired tuner (Note: To change the tuner that is audio-active, you... -
Page 16: St2-Kp Keypad Controls
Turning the keypad on/off To activate the ST2-KP, press power down the keypad display. The keypad remains powered until the ST2 Tuner is turned off. Selecting the desired tuner To select a different tuner, press and hold keypad has been hardware jumper-selected to Tuner 1 or Tuner 2, it will not switch between the two tuners.) The backlight color of the display will be... -
Page 17: Uno-S2 Keypad Controls With Cav6.6
CAV6.6-UNO-S2 Keypad Operation NOTE: To control the ST2 Tuner through the UNO-S2 keypad, the tuner must be configured as a source using the CAV6.6 programming steps. Turning the unit on The tuner is power managed by the CAV6.6 or other RNET-enabled controller. If the tuner is in standby mode, any button press of the UNO-S2 keypad will bring the tuner out of standby mode. -
Page 18: Uno-S2 Keypad Controls With Cav6.6
MEM UP/DOWN - stations (press) NOTE: UNO-S2 keypads are connected to the CAV6.6 to control the ST2 through RNET. UNO-S2 keypads do not connect directly to the ST2 Tuner. Used for bank selection (press Scrolls through memory preset... -
Page 19: Uno-Lrc1 Remote Control With Cav6.6
Only configured presets will be displayed. Mute Press the audio output. . To seek . Press again con- ST2 OPERATION again. for bank up for bank down. button to mute/unmute the tuner . The to scroll... -
Page 20: Uno-Lrc1 Remote Control With Cav6.6
ST2 OPERATION UNO-LRC1 REMOTE CONTROL WITH CAV6.6 UNO SELECTION - UNO must be the selected source for control of the CAV6.6 and any connected compo- nents. Select UNO before sending UNO-LRC1 remote commands. POWER - Power managed by CAV6.6 NUMERIC INPUT - Number buttons for direct... -
Page 21: St2 Tuner Programming
Follow the setup menus if custom names are desired, or for system information. If the ST2 is used with an RNET system such as CAV6.6, the following minimum setup must be per- formed for the ST2 to be properly controlled by the CAV6.6. -
Page 22: Factory Initialization
Factory Init menu. A “Yes” begins the initialization. 6. “Please wait” appears on the tuner during the process and “Cycle Power” appears when com- plete. 7. Cycle power on the ST2 tuner. Chassis SYSTEM Setup INIT... -
Page 23: System Info
System Info (Chassis) The System Info menu shows the ST2 Tuner’s manufacturing build properties. 1. Enter the Setup Menu by pressing and holding the TNR SEL button. 2. TUNER SETUP appears. Press MEM Up/Down until SYSTEM INFO appears on the tuner. -
Page 24: Region
ST2 TUNER PROGRAMMING ST2 TUNER SETUP MENU Bank Name (AM/FM) (cont’d) 14. Press BAND to save bank name. The Bank Name menu returns to the Tuner # prompt to name other banks, or press TNR SEL to exit the Bank Name menu. -
Page 25: Programming For Cav6.6 Use
9. Press the Setup button three times to back out of the Installation Menu. Source Configuration Note: When the ST2 Tuner is used with the CAV6.6 or other RNET controller, it is configured as an RNET command type “Peripheral” and is connected via the RNET bus. This makes the tuner behave as a fully integrated device with UNO-S2 keypad support. -
Page 26: Technical Specifications
Frequency Range: FM Antenna impedance: Sensitivity @ S/N: Image rejection: Sensitivity @ S/N: Image rejection: ST2 Smart Tuner Dimensions: 17"W x 8"D x 1.8"H (43 x 20.3 x 4.4 cm) Weight: 7 lbs. (3.2kg) 12VDC 1.5A AM 530 - 1710 kHz FM 87.7 - 107.9 MHz... -
Page 27: Warranty
The Russound ST2 Tuner is fully guaranteed against all defects in materials and workmanship for two (2) years from the date of purchase. During this period, Russound will replace any defective parts and correct any defect in workmanship without charge for either parts or labor. - Page 28 Russound Rev. 2 5/24/04 28-1150 5 Forbes Road, Newmarket, NH 03857 tel 603.659.5170 • fax 603.659.5388 e-mail: tech@russound.com ® Copyright © 2004 Russound All rights reserved. www.russound.com All trademarks are property of their respective owners. E. & O.E.