Dometic 9100 Operation Instructions Manual
Power channel awning led tube awning
Hide thumbs
Also See for 9100:
- User manual ,
- Installation manual (16 pages) ,
- Installaiton instructions (14 pages)
Table of Contents
Advertisement
REVISION A
Form No. 3316037.000 10/16
(French 3316038.000_A)
©2016 Dometic Corporation
LaGrange, IN 46761
POWER CHANNEL AWNING
LED TUBE AWNING
8956(X)(X)1.4(X)0(#) BASEMENT
8956(X)(X)2.4(X)0(#) STANDARD
8956(X)(X)3.4(X)0(#) REDUCED PITCH
FABRIC ROLLER TUBE ASSEMBLY
91XFFLL.000(#)T
Read these instructions carefully. These
instructions MUST stay with this product.
USA
SERVICE OFFICE
Dometic Corporation
1120 North Main Street
Elkhart, IN 46514
RECORD THIS INFORMATION FOR FUTURE
REFERENCE:
FRTA Model Number
FRTA Serial Number
Hardware Model Number
Hardware Serial Number
Date Purchased
Retailer / Qualified Installer
9100
HARDWARE
FRTA
601FFLL.000(#)
CANADA
Dometic Corporation
46 Zatonski, Unit 3
Brantford, ON N3T 5L8
CANADA
SERVICE CENTER &
DEALER LOCATIONS
Please Visit:
www.eDometic.com
Advertisement
Table of Contents

Related Manuals for Dometic 9100


Summary of Contents for Dometic 9100
- Page 1 REVISION A DEALER LOCATIONS SERVICE OFFICE Dometic Corporation Form No. 3316037.000 10/16 Dometic Corporation 46 Zatonski, Unit 3 Please Visit: (French 3316038.000_A) 1120 North Main Street Brantford, ON N3T 5L8 www.eDometic.com ©2016 Dometic Corporation Elkhart, IN 46514 CANADA LaGrange, IN 46761...
-
Page 2: Table Of Contents
For curved sides, please see the separate Hardware List in the Dealer Service Manual for the appropriate model. Use these instructions to ensure correct operation of product. Dometic Corporation reserves the right to modify appearances and specifications without notice. TABLE OF CONTENTS INTRODUCTION ..................................2... -
Page 3: Important Safety Instructions
IMPORTANT SAFETY INSTRUCTIONS General Safety Messages This manual has safety information and instructions to help you eliminate or reduce the risk of accidents and injuries. Failure to obey the following warn- Recognize Safety Information ings could result in death or serious injury: ●... -
Page 4: Open Awning
OPEN AWNING 1. PINCH HAZARD. Maintain a Verify valance is in correct position, and adjust if necessary. If awning is over-extended, press horizontal distance of at least 16″ between fully open awning and any permanent object. Failure toggle down (retract) briefly on awning switch until valance is in correct position. -
Page 5: Prepare Awning To Shed Water
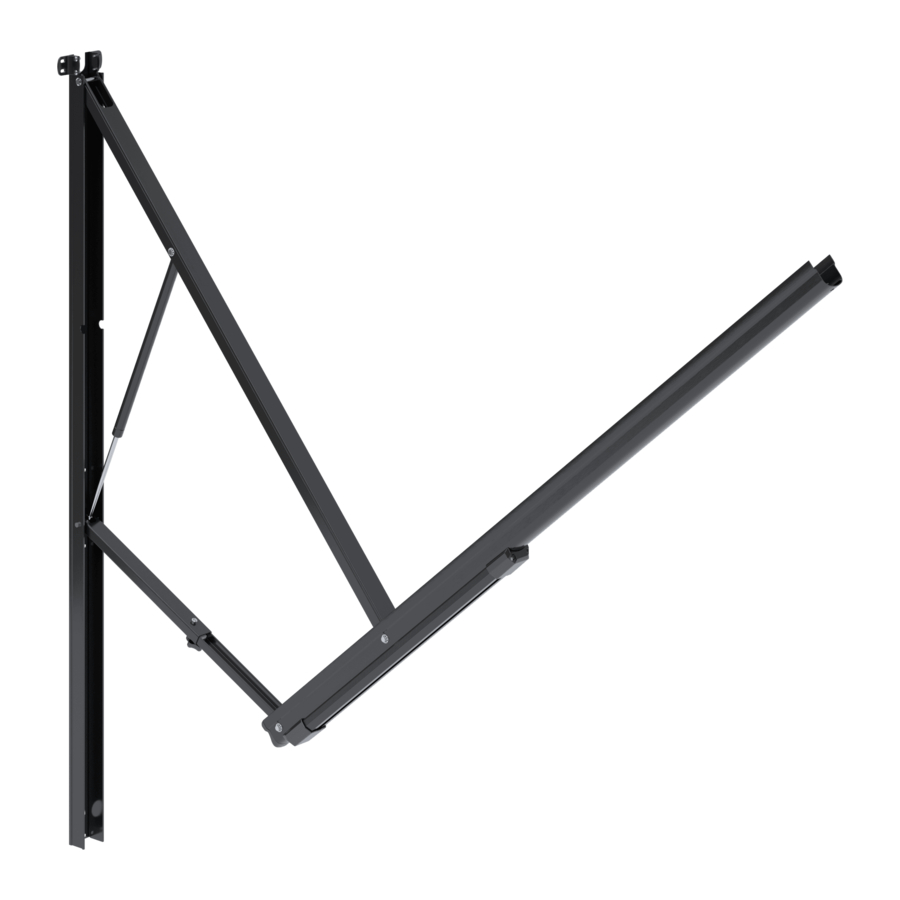
SET AWNING POSITION 4. While holding top arm assembly in place, tighten FIG. 3 Front Channel Spring Loaded Button adjustable knob to set pitch (slope). See (FIG. 3) & (FIG. 4). Adjustable Knob 5. IMPACT OR CRUSH HAZARD. ALWAYS lower one side of hardware into wa- ter shed position when adjusting awning [pitch / slope]. -
Page 6: Features And Accessories
SET AWNING POSITION 4. PINCH HAZARD. Keep CLEAR FIG. 5 of openings around adjustable pitch arm assem- Awning Rail bly while adjusting awning pitch (slope). Adjust- 10° Slope able pitch arm assembly (bottom arm) will tele- (Or 9″ Minimum) scope. -
Page 7: Operate Accessories
FEATURES AND ACCESSORIES Operate Accessories 3. Make sure alignment indicator on accessory base is pointed upward after install- S ee Instructions included with power channel ing into power channel. Otherwise, damage to accessories (if applicable). accessory or power channel could occur. Rotate base 90°, so longest lobe of power bayo- Remove Accessories... -
Page 8: Prepare Awning For Travel
CLOSE AWNING With awning fully closed, Test ignition interlock FIG. 9 system: Back Channel T esting of ignition interlock system is only Top Arm applicable to motorhomes. Assembly a. With vehicle ignition in ON position, attempt to open awning. b. -
Page 9: Pull Strap Method
CLOSE AWNING MANUALLY (POWER FAILURE) 1. L oosen adjustable knobs to allow awning to 6. If awning does not move (after confirming con- nections and charge on external power source), reset to original position. Then lightly tighten knobs on both arm assemblies to help ensure the motor may be defective. -
Page 10: General Care And Use
A pply a very small dab of VLP (Vinyl Liquid operating smoothly. Patch) on tip of cotton swab. 3. Lubricate all sliding surfaces of arm assemblies V LP is available from Dometic Cor- with silicone spray as needed. poration. Reference... -
Page 11: When To Get More Help
GENERAL CARE AND USE When To Get More Help b. Gently roll cotton swab around pinhole. The VLP will melt the coating (on fabric) and that If malfunctions occur (that cannot be corrected by will quickly fill in pinhole and blend with all reviewing these instructions), contact a qualified colored vinyls.