
Related Manuals for Asko T208H.W.AU


Summary of Contents for Asko T208H.W.AU
-
Page 1: Instructions For Use
INSTRUCTIONS FOR USE Tumble dryer T208H.W.AU TD75.B3XX Carefully read the instructions for use before using the dryer. -
Page 2: Table Of Contents
Dear Customer, We thank you for purchasing this quality ASKO product. We hope it meets all your expectations. Scandinavian design combines pure lines, everyday functionality, and high quality. These are the key characteristics of all our products, and the reason why they are highly appreciated across the globe. -
Page 3: Safety Precautions
• Failure to observe the instructions for use or inappropriate use of the tumble dryer may result in damage to the laundry or appliance, or injury to the user. • Instructions for use are available on our website at www.asko.com. • Your dryer is intended solely for household use. - Page 4 • Do not dry unwashed laundry in the dryer. • Laundry stained with oil, acetone, alcohol, oil derivatives, stain removers, turpentine, wax, and wax removers should be washed in a washing machine with hot water and detergent before it is dried in the dryer. •...
- Page 5 SAFETY • Only use the dryer to dry laundry that was washed with water. Do not dry any laundry that was washed or cleaned with fl ammable cleaners or substances (such as gasoline, trichloroethylene etc.) as this may result in an explosion.
- Page 6 • Do not let children younger than three years to come near the dryer, unless they are under constant supervision. • The dryer is made in compliance with all relevant safety standards. This dryer may be used by children aged 8 years and above and by persons with reduced physical, sensory or mental capabilities or lack of experience and knowledge, but only if they are supervised during the use of the appliance, if they have been provided relevant instructions regarding safe use of the...
-
Page 7: Dryer Description
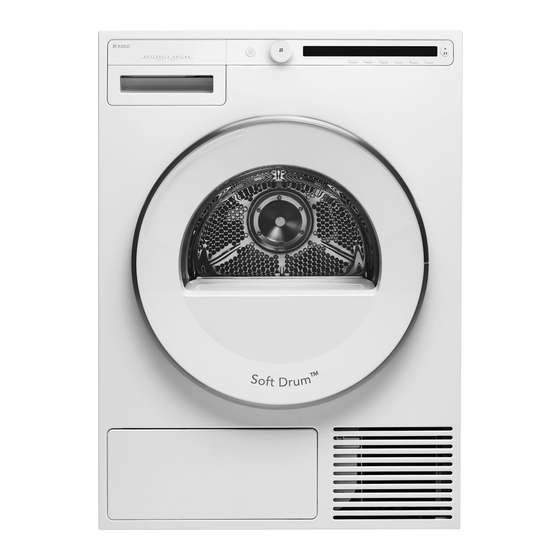
DRYER DESCRIPTION Main switch (ON/OFF) 2 3 4 5 Program selector knob Display unit Program selector buttons Button (start/pause) Rating plate with information about the dryer (on the inside of the drying machine door) QR and AUID code (on the inside of the drying machine door) Dryer door Door net fi... -
Page 8: Before Using The Appliance For The First Time
BEFORE USING THE APPLIANCE FOR THE FIRST TIME PACKAGING Remove all packaging. Please sort the materials in compliance with local recommendations (see chapter "DISPOSAL"). CLEANING Disconnect the dryer from the power mains and open the door towards you. Clean the dryer drum with a damp cloth and a mild detergent. -
Page 9: Installation And Connection
INSTALLATION AND CONNECTION After installation, wait for 24 hours without Free-standing appliance moving the appliance before using it for the fi rst time. The dryer may be placed adjacent to a washing If the dryer has to be laid down on one of the sides machine. - Page 10 (A+B), supplied in the cardboard box in the dryer drum. Tipping guard part B is designed to fi t on ASKO washing machines and it may be hard or impossible to mount on appliances of other brands. If the...
- Page 11 How to stack a dryer onto the washing machine (ASKO): There is a cardboard box in the dryer drum, containing the vacuum feet and the tipping guard. The tipping guard consists of two metal parts (A + Use two screws to attach the A part to the back of the dryer.
- Page 12 CHANGING THE DOOR OPENING DIRECTION To change the direction of door opening, proceed as follows. Open the door fully. Undo the screws and remove the door. Use a screwdriver to remove the door lock cover and undo the screw on the door lock. Push the door lock upwards and remove it.
- Page 13 Undo the door hinge assembly (left) and the door latch assembly (right), switch their positions, and replace the screws (door hinge assembly to the right- hand side, door latch assembly to the left-hand side). Use a screwdriver to remove the plastic part more easily.
- Page 14 DRAINING THE CONDENSATE The moisture from the laundry is extracted in the condenser unit and accumulated in the condensate tank. Condensate tank has to be emptied regularly (see chapter "CLEANING AND MAINTENANCE"). To simplifi ed and avoid emptying and interruption of the drying cycle due to full condensate tank, run the condensate discharge tube located at the back of the appliance directly into a drain.
- Page 15 CONNECTING TO THE POWER MAINS After installation, the dryer should stand still for two hours before it is connected to the power mains. Connect the appliance to an earthed power outlet. After installation, the wall outlet should be freely accessible. The outlet should be fi tted with an earth contact (in compliance with the relevant regulations).
-
Page 16: Advices Before Drying
ADVICES BEFORE DRYING LAUNDRY SYMBOLS This chapter includes several advices on how to prepare the laundry from drying. Observe the laundry symbols. LAUNDRY SORTING Textile maintenance symbols: Sort the laundry according to: Washing • type, • fabric thickness. Normal Delicate For the most even drying, make sure the laundry is Max. - Page 17 MATERIALS (FABRICS) SUITABLE FOR DRYING IN A TUMBLE DRYER Material is suitable for tumble drying. Clothes dried in a tumble dryer will be softer and lighter than air-dried clothes. The dryer does not cause any considerable wear of the fabric. The lint collected in the lint fi lter consists of dust and fabric fragments collected during the use of the laundry.
-
Page 18: Drying Process, Step By Step (1 - 7)
DRYING PROCESS, STEP BY STEP (1 – 7) STEP 1: SORT THE FABRICS See chapter "ADVICES BEFORE DRYING" STEP 2: TURN ON THE MAIN SWITCH. Turning on Press the on/off button. Turning off Press the on/off button. STEP 3: OPEN THE DRYER DOOR AND INSERT THE LAUNDRY. Open the dryer door towards you. - Page 19 STEP 4: CHOOSE THE DRYING PROGRAM. Choose the program by rotating the program selector knob in either direction. The program selector knob can be used when arrows appear on the display. Select the program based on the type and remaining moisture of the laundry you wish to dry. Anticipated program duration is indicated on the display.
- Page 20 Program Max. kg* Description 10. AIRING This program does not use a heater. Use it to refresh your clothes. Program duration can be adjusted from 15 minutes to 4 hours (in 15-minute steps). 11. SYSTEM SETTINGS Use the program selector knob to select System Settings. Confirm the selection by pressing the ENTER (button 2).
- Page 21 STEP 5: CHOOSING THE PROGRAM SETTINGS Using the program settings, the drying programs can be further adjusted to your wishes. Some program settings may not be available for your selected program. Selected program settings will remain stored after the end of the drying cycle and may be changed subsequently (except for delayed start which is not stored after the drying is complete).
- Page 22 5. Timed drying First, use the program selector knob to select the Timed Dry program. Press the button 5 to select a drying time from 30 minutes to 4 hours, in 15-minute steps. Use the button 6 (OK) to confi rm the Time 2:15 selected drying time.
- Page 23 STEP 6: CLOSE THE DOOR AND START THE DRYING PROCESS. Close the dryer door and press the Start/Pause button. Start (pressed briefl y – start/resume) Pause (pressed briefl y – drying temporarily suspended) Cancel (press and hold the button for 3 seconds) 2:20 Starting Remaining time...
- Page 24 STEP 7: END OF PROGRAM After the end of the drying program, Start Cycle completed succsessfully the display will indicate that the drying has been fi nished ("Cycle completed successfully"). Anti If you have selected the "anti-crease" creasing Cycle completed succsessfully option, the dryer will continue to operate after the end of the drying cycle for the amount of time specifi...
- Page 25 Favourite programs After the end of the drying program, Start Cycle completed succsessfully you can use the button 6 to store the program, including all extra settings, as your favourite program. Up to 4 favourite programs can be Make your list of four own favourite programs. stored.
-
Page 26: System Settings
SYSTEM SETTINGS In the main menu, use the program Enter System settings selector knob to select System Settings. Confi rm the selection by pressing the button 2. Then, use the program selector knob to scroll the list of settings that can be changed. •... - Page 27 PROGRAMS The main menu includes the entire set of programs that you can choose using the program selector knob. This setting allows only displaying the selected program in the main menu. Press the button 1 for to appear. Use Programs Sports wear Info Back...
- Page 28 RESET This means that all settings will return to the default settings and your own settings will be deleted. Confi rm the selection by pressing the Reset Info Back button 3 (YES). Press the button 6 to return to System Settings.
-
Page 29: Cleaning And Maintenance
CLEANING AND MAINTENANCE Before cleaning, make sure to switch off the appliance and disconnect it from the power mains (unplug the power cord from the outlet). CLEANING THE DOOR NET FILTER IN THE DOOR Open the fi lter housing. Pull out the net fi lter. Gently scrape the fi... - Page 30 EMPTYING THE CONDENSATE TANK After each drying cycle, empty the condensate tank. If the condensate tank is overfl owing the drying program will be paused automatically. A warning will appear on the display unit that the condensate tank has to be emptied. (Disregard this warning if you fed the condensate discharge hose into a drain, siphon, or a sink.) Pull out the condensate tank from the dryer, then turn it upside down over a washbasin, sink, or any...
- Page 31 CLEANING THE HEAT PUMP FILTER During cleaning, some water may be spilled. It is therefore recommended to place an absorbent cloth on the fl oor. Open the outer cover. Hold the levers on the inside cover and rotate them upwards. Remove the inside cover.
- Page 32 Use a soft dry cloth to also clean the heat pump fi lter housing and net. Lower part of the hosing contains a strainer which shall be cleaned thoroughly. Clean the heat pump fi lter housing and net after every 10 drying cycles or if necessary. With automatic heat pump net fi...
- Page 33 ADDITIONAL INFORMATION REGARDING CLEANING If you have inadvertently removed the entire net fi lter housing in the dryer door, reinstall it in the same position. Opening on the lower side of the door should occasionally be cleaned with a vacuum cleaner. If necessary, clean the fi...
- Page 34 CLEANING THE APPLIANCE EXTERIOR Wipe the dryer exterior using a soft damp cotton cloth and mild detergent. Do not use any cleaning agents that could damage the dryer (please observe the recommendations and warnings provided by the manufacturers of the cleaning agents). Wipe all parts of the dryer with a soft cloth until dry.
-
Page 35: Errors - What To Do
ERRORS – WHAT TO DO? Disturbances from the environment (e.g. the power grid) may result in various error reports (see Troubleshooting table). In such case: • Switch off the appliance, wait for 1 minute, switch the appliance back on, and repeat the drying program. •... - Page 36 Problem/error Cause What to do? Laundry not dried • Filters are not clean. • Clean the filters (see chapter "CLEANING AND or drying takes too MAINTENANCE"). long. • Dryer is placed in a closed • Make sure there is adequate supply of fresh air room;...
- Page 37 FAILURE DISPLAY In case of a failure while a program is in progress, the relevant Error X is indicated on the display unit. Press and hold the INFO button to Error 3 Info EXIT display the error description. Press the 6 EXIT button to return to Main Menu.
- Page 38 INFORMATION before, during, and after the program (depending on the model) Error indication on the display What to do? EN: Steam tank is empty. Please fill water. Fill the steam tank with distilled water or condensate. Pour the water through the steam tank filter located in the condensate tank housing.
-
Page 39: Servicing
SERVICING BEFORE CALLING A SERVICE TECHNICIAN 1, 2, 3 See the chapters "TROUBLESHOOTING and "CLEANING AND MAINTENANCE" and see if you can resolve the problem yourself. When you contact a service centre, please state the model (1), type (2), and serial number (3) of your dryer. - Page 40 STANDARD TESTS For the standard test the machine’s condensed water hose must be connected to a drain. Australia Drying performance AS/NZS 2442.1:1996. Auto normal dry, 8 kg cotton, temperature Normal. Energy declaration AS/NZS 2442.2:2000. Auto normal dry, 8 kg cotton, temperature Normal.
-
Page 41: Program Table
PROGRAM TABLE The following table lists the power consumption and duration for several programs. The table shows the eff ect on drying parameters at varying spinning speeds during the washing cycle. Actual consumption can vary depending on the room temperature, humidity, load, changes in power supply, and selected options. The following requirements apply to the consumption values specifi... -
Page 42: Disposal
DISPOSAL Disposal / recycling of packaging Our product packaging is made of environmentally friendly materials that can be recycled, disposed of, or destroyed without any hazard to the environment. To this end, packaging materials are labelled appropriately. The symbol on the product or its packaging indicates that the product should not be treated as normal household waste. -
Page 43: Quick Guide
QUICK GUIDE SORT THE FABRICS Sort the fabric by type and by how heavily soiled the laundry is. Observe the drying symbols on the laundry labels. Close the zippers, hook-and-loop fasteners and buttons. SWITCH ON THE MAIN ON/OFF SWITCH (ON/OFF) OPEN THE DRYER DOOR AND INSERT THE LAUNDRY. - Page 44 TD75.B3 SPHP AU/NZ en (02-18)