Table of Contents
Advertisement
Quick Links
Download this manual
See also:
Service Notes
Owner's Manual
Thank you, and congratulations on your choice of the Roland Digital Piano RD-700.
Before using this unit, carefully read the sections entitled: "IMPORTANT
SAFETY INSTRUCTIONS" (p. 2), "USING THE UNIT SAFELY" (p. 3), and
"IMPORTANT NOTES" (p. 5).
These sections provide important information concerning the proper operation of the
unit. Additionally, in order to feel assured that you have gained a good grasp of every
feature provided by your new unit, Owner's Manual should be read in its entirety. The
manual should be saved and kept on hand as a convenient reference.
.
Copyright © 2001 ROLAND CORPORATION
All rights reserved. No part of this publication may be reproduced in any form
without the written permission of ROLAND CORPORATION.
Advertisement
Table of Contents

Related Manuals for Roland RD-700


Summary of Contents for Roland RD-700
- Page 1 Owner’s Manual Thank you, and congratulations on your choice of the Roland Digital Piano RD-700. Before using this unit, carefully read the sections entitled: “IMPORTANT SAFETY INSTRUCTIONS” (p. 2), “USING THE UNIT SAFELY” (p. 3), and “IMPORTANT NOTES” (p. 5).
-
Page 2: Important Safety Instructions
CAUTION RISK OF ELECTRIC SHOCK DO NOT OPEN ATTENTION : RISQUE DE CHOC ELECTRIQUE NE PAS OUVRIR CAUTION: TO REDUCE THE RISK OF ELECTRIC SHOCK, DO NOT REMOVE COVER (OR BACK). NO USER-SERVICEABLE PARTS INSIDE. REFER SERVICING TO QUALIFIED SERVICE PERSONNEL. INSTRUCTIONS PERTAINING TO A RISK OF FIRE, ELECTRIC SHOCK, OR INJURY TO PERSONS. -
Page 3: Using The Unit Safely
• When using the unit with a rack or stand recom- mended by Roland, the rack or stand must be carefully placed so it is level and sure to remain stable. If not using a rack or stand, you still need... - Page 4 • The unit should be located so that its location or position does not interfere with its proper venti- lation. 101c • This (RD-700) for use only with Roland stand KS- 17. Use with other stands is capable of resulting in instability causing possible injury. 102b •...
-
Page 5: Important Notes
• Unfortunately, it may be impossible to restore the contents of data that was stored in another MIDI device (e.g., a sequencer) once it has been lost. Roland Corporation assumes no liability concerning such loss of data. • Use a reasonable amount of care when using the unit’s buttons, sliders, or other controls;... -
Page 6: Main Features
Tone adjustments (p. 73). Equipped With Organ Tone Wheel Sound Generator For organ Tones, the RD-700 comes equipped with an organ Tone wheel sound generator used in the Roland Combo Organ VK-7. This sound generator lets you recreate organ sounds, changing the level of each footage (p. -
Page 7: Table Of Contents
Precautions lors de l’installation de la carte d’extension Wave ... 19 Installer les cartes de série SRX ... 20 Vérification des cartes d’extension audio aprés installation ... 21 Connecting the RD-700 to External Equipment ... 22 Connecting Pedals... 23 Turning the Power On and Off ... 24 Turning On the Power... - Page 8 Applying Effects to the Sound (MULTI EFFECTS) ... 53 Selecting Stored Settings ([SETUP])... 54 Storing Settings to Setups ([WRITE]) ... 56 Using the RD-700 As a Master Keyboard... 59 What’s MIDI? ... 59 About MIDI Connectors... 59 Connecting to External MIDI Sound Generators ... 59 MIDI Send Channel Settings...
- Page 9 Detailed Settings for Each Function ([EDIT]) ... 68 Parameters That Can Be Set... 68 Setting Parameters ... 69 Making System Settings (System) ... 69 How to Make Settings ... 69 Adjusting the Volume (Master Volume) ... 70 Preventing Equalizer Settings from Being Switched (EQ Control) ... 70 Retaining the Current Tone Even When Tones Are Switched (Tone Remain) ...
- Page 10 Setting Reception and Blocking of MIDI Messages from External MIDI Controllers ... 91 Setting the Tuning Method (Temperament/Key)... 91 Other Functions (Utility)... 92 Transferring the RD-700’s Settings to an External MIDI Device (Bulk Dump) ... 92 Restoring the settings to the factory condition (Factory Reset)... 94 Connecting External MIDI Devices ... 95 Recording RD-700 Performances to an External MIDI Sequencer ...
- Page 11 Appendices ... 99 Troubleshooting... 99 Error Messages/Other Messages ... 103 Effect/Parameter List ... 104 Tone List ... 135 Rhythm Set List... 138 Arpeggio Style List ... 142 Rhythm Pattern List ... 143 Setup List... 144 Shortcut List ... 145 MIDI Implementation ... 146 Main Specifications...
-
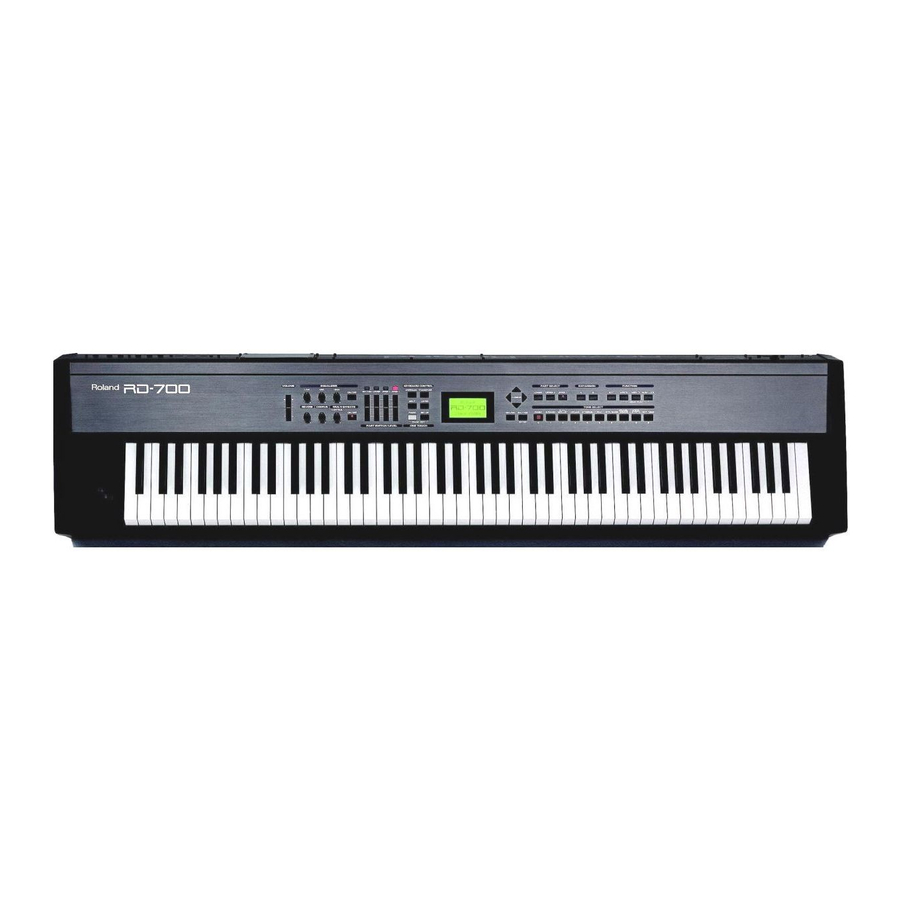
Page 12: Panel Descriptions
Panel Descriptions Front Panel VOLUME Slider Adjusts the overall volume that is output from the rear panel OUTPUT jacks and PHONES jack (p. 25). EQUALIZER [ON/OFF] Turns the equalizer on/off (p. 48). [LOW] knob Adjusts the sound's low-frequency range. [MID] knob Adjusts the sound's midrange frequencies. - Page 13 ], [ [WRITE] Stores the current settings to “Setup” (p. 56). [MIDI TX] Puts the RD-700 in control of the external MIDI sound generator (p. 59). [NUM LOCK] You can input numerical values with the TONE SELECT buttons when this button is lit (p. 37).
-
Page 14: Rear Panel
When the unit is grounded, a slight hum may occur, depending on the particulars of your installation. If you are unsure of the connection method, contact the nearest Roland Service Center, or an authorized Roland distributor, as listed on the “Information” page. Unsuitable places for connection... -
Page 15: Getting Ready
Up to two optional Wave Expansion Boards (SRX Series) can be installed in the RD-700. Wave Expansion Boards store Wave data, Patches, and Rhythm Sets, and by equipping the RD-700 with these boards, you can greatly expand your sound palette. Cautions When Installing an Wave Expansion Board ●... -
Page 16: Installing Srx Series Boards
Installing SRX Series Boards Before installing any Wave Expansion Board, turn off the power on the RD-700 and all devices connected to it. Refer to the following illustration of the RD-700’s rear panel, and remove the screws indicated. Then, remove the cover. - Page 17 Use the Installation Tool supplied with the Wave Expansion Board to turn the holders in the LOCK direction, so the board will be fastened in place. fig.Q-06.e LOCK Installation tool Use the screws that you removed in step 2 to fasten the cover back in place.
-
Page 18: Checking The Installed Wave Expansion Boards
Getting Ready Checking the Installed Wave Expansion Boards After installation of the Wave Expansion Boards has been completed, check to confirm that the installed boards are being recognized correctly. fig.panel CONTROL Turn on the power, as described in “Turning On the Power” (p. -
Page 19: Installation De La Carte D'extension Wave (French Language For Canadian Safety Standard)
Pour resserrer, tourner dans le sens des aiguilles d’une montre. ● Veillez à ne pas laisser tomber de vis dans le châssis du RD-700. ● Ne pas laisser la plaque arrière détachée. Après avoir installé la ou les carte(s) d’extension, bien remettre la plaque en place. -
Page 20: Installer Les Cartes De Série Srx
Getting Ready Installer les cartes de série SRX Avant d’installer une carte d’extension Wave, éteindre tous les appareils reliés au RD-700. Détacher la plaque arrière en enlevant les vis indiquées sur le schéma suivant. fig.Q-02.f Vis à enlever Insérer le connecteur de la carte dans un des créneaux pour la série SRX (SRX A, SRX B) tout en enfonçant les supports à... -
Page 21: Vérification Des Cartes D'extension Audio Aprés Installation
Pour tourner les supports en position LOCK (verrouillé), utilisez l’outil d’installation de la carte d’extension fournie à cet effet. De cette façon, la carte sera bien fixée à sa place. fig.Q-06.f Outil d'installation Reposez le couvercle en remettant les vis enlevées (comme spécifié) à... -
Page 22: Connecting The Rd-700 To External Equipment
MIDI OUT MIDI sequencer etc. Before you begin making connections, confirm the following. Is the volume level of the RD-700 or connected amp turned all the way down? Is the power to the RD-700 or connected amp turned off? Pedal switch (DP-2, DP-6 etc.) -
Page 23: Connecting Pedals
If you are using headphones, plug them into the PHONES jack. Connect pedal switches or expression pedals as necessary. Connecting Pedals Connect the pedal included with the RD-700 to one of the Pedal jacks. When connected to the Damper jack, the pedal can be used as a damper pedal. -
Page 24: Turning The Power On And Off
The unit is powered up, and the display's backlighting comes on. fig.00-07 Turn on the power to connected external devices. Adjust the volume of the connected external device. Adjust the RD-700’s volume to obtain the proper volume level. NOTE To prevent incorrect functioning of the Pitch Bend Lever (p. -
Page 25: Turning Off The Power
Also completely turn down the volume of any connected audio device and other equipment. Turn off the power to connected external devices. Press the lower portion of the [POWER] switch on the back of the RD-700. The power is switched off. fig.00-07 Adjusting the Volume fig.00-08... -
Page 26: Restoring The Factory Settings (Factory Reset)
Getting Ready Restoring the Factory Settings (Factory Reset) When using the RD-700 for the first time, start by returning the settings to their factory defaults so that the RD-700 operates as described in the procedures in the owner’s manual. Notes Never turn off the power during Factory Reset (while “Now,... - Page 27 fig.utility1.eps_150 Press CURSOR [ ] to select “Factory Reset All.” Press CURSOR [ A screen like the one shown below appears. fig.utility1.eps_150 To cancel the Factory Reset, press [DEC/NO]. Press [INC/YES]. The confirmation message appears. fig.LCD_150 To cancel the Factory Reset, press [DEC/NO]. Press [INC/YES] once again to start the Factory Reset operation.
-
Page 28: Adjusting The Display Contrast (Lcd Contrast)
The brightness of the display changes as the value is changed. Adjust the contrast so that the display is easy to view. ] to move the cursor to the “LCD The LCD CONTRAST setting affects the RD-700 as a whole (i.e., is a system setting). This setting remains stored in memory... -
Page 29: Tuning To Other Instruments' Pitches (Master Tune)
Press [EDIT] to make the indicator go dark. You are returned to the Tone screen. Tuning to Other Instruments’ Pitches (Master Tune) For a cleaner ensemble sound while performing with one or more other instruments, ensure that each instrument’s basic pitch is in tune with that of the other instruments. - Page 30 Getting Ready CONTROL Press CURSOR [ ] to move the cursor to the “Master Tune” parameter. Press [INC/YES] or [DEC/NO] to select the value (415.3– 440.0–466.2). Press [EDIT] to make the indicator go dark. You are returned to the Tone screen. For faster value increases, keep [INC/YES] pressed down and press [DEC/...
-
Page 31: Overview Of The Rd-700
OUTPUT and PHONES jacks. Units of Sound When using the RD-700, you will notice that a variety of different categories come into play when working with sounds. What follows is a simple explanation of each sound category. -
Page 32: Basic Operation Of The Rd-700
The currently selected Setup is displayed. Pressing CURSOR [ ] when the Tone screen or Tone Wheel Screen is displayed switches the RD-700 to this screen. You can also have this screen displayed by pressing [SETUP]. You can change the Setups. -
Page 33: About The Cursor Buttons
[MIDI TX] When [MIDI TX] is pressed, the button’s indicator lights up, and the RD-700 switches to the mode enabling it to control an external MIDI sound generator. The status of this button determines whether the RD-700’s buttons are used to control the Local Parts ([MIDI TX] off), or to control the MIDI TX Parts ([MIDI TX] on). -
Page 34: Listening To The Demo (Demo Play)
Listening to the Demo (DEMO PLAY) Here’s how to listen to these songs. The RD-700 features the internal demo songs that exhibit the special capabilities of the instrument. Song Name RD Party Retro-Active Escape High-End Speak No me digas Pastorale fig.panel... -
Page 35: Performing With The Keyboard
The performance setting (Single Mode ➔ p. 41) is selected as the piano tone for the entire keyboard. With the RD-700, you can also make more detailed settings to make the sound even better match your favorite piano performances. Please refer to each as needed. -
Page 36: Performing With A Variety Of Tones
Performing with the Keyboard Performing with a Variety of Tones The RD-700 provides 468 types of Tones. Each one of these individual sounds is called a tone. Tones are assigned to the TONE SELECT buttons according to the tone category selected. -
Page 37: Specifying The Tone Number To Select A Tone ([Num Lock])
Play the keyboard, and you will hear the selected tone. When [NUM LOCK] is turned off, the TONE SELECT buttons included in the selected Tone numbers lit. Performing with the Keyboard For more on the RD-700’s internal tones, refer to the “Tone List” (p. 135). When changing tones in Layer mode (p. -
Page 38: Playing A Rhythm Set
Performing with the Keyboard Playing a Rhythm Set Among the tones that can be selected with the TONE SELECT buttons are Rhythm Sets, which are collections of a variety of percussion instrument sounds and special sound effects. Here’s how to select a Rhythm Set and play percussion sounds. -
Page 39: Selecting Wave Expansion Board Tones
Selecting Wave Expansion Board Tones Up to two optional wave expansion boards (SRX series) can be installed into the RD-700. Use the following procedure when selecting tones stored on an wave expansion board. fig.panel CONTROL Press ONE TOUCH [PIANO]. This selects a single tone to be played over the entire keyboard. - Page 40 The TONE SELECT button stops flashing and remains lit, and the selected tone is set. Wave Expansion Board Rhythm Set Tone Numbers When selecting a Wave Expansion Board Rhythm Set with the RD-700, the Wave Expansion Board Rhythm Sets are placed after Patches (called Tones on the RD-700).
-
Page 41: Playing Two Tones On The Keyboard
Save any settings you want to keep to a Setup (p. 56) before pressing ONE TOUCH [PIANO]. • To Turn Off [LAYER] or [SPLIT] (Extinguishing the Indicator) This switches the RD-700 to the mode in which the UPPER1 Tone is played by all keys. Performing with the Keyboard... -
Page 42: Playing With Two Layered Tones ([Layer])
When two TONE SELECT buttons are selected, then pressing any TONE SELECT button selects the Tone for that button, and the RD-700 reverts to Single mode. * The procedure described above does not switch the RD-700 to Layer mode when [LOWER] is selected in the PART SELECT buttons. -
Page 43: Playing Different Tones In Two Different Sections Of The Keyboard ([Split])
Playing Different Tones in Two Different Sections of the Keyboard ([SPLIT]) Such a division of the keyboard into right- and left-hand sections is called a “Split,” and the key where the division takes place is called the “Split Point.”The split-point key is included in the UPPER section. The Split Point has been set at the factory to “C4.”... -
Page 44: Changing Tones In Layer And Split Mode
Performing with the Keyboard Changing the Keyboard’s Split Point You can change the point at which the keyboard is divided (the Split Point) in Split mode. Hold down [SPLIT] for several seconds. A screen such as the following appears, and the current value of the setting is displayed. -
Page 45: Adjust The Volume Level For Individual Parts (Part Switch/Level)
CONTROL PART LEVEL Slider PART SWITCH Parts that are played on the RD-700 using the instrument’s internal sound generator are called Local Parts. You can use the PART SWITCHes and PART LEVEL sliders to make individual settings determining whether the sound for each part is played as well as the volume level for RHYTHM part and Local Parts (LOWER, UPPER1, and UPPER2). -
Page 46: Transposing The Key Of The Keyboard ([Transpose])
Performing with the Keyboard Transposing the Key of the Keyboard ([TRANSPOSE]) You can transpose performances without changing the keys you are playing, as well as change the pitch by an octave. This feature is called “Transpose.” This is a convenient feature to use when you want to match the pitch of the keyboard performance to a vocalist’s pitch, or perform using the printed music for trumpets or other transposed instruments. -
Page 47: Adding Reverberation To The Sound (Reverb Knob)
Adding Reverberation to the Sound (REVERB knob) The RD-700 can apply a reverb effect to the notes you play on the keyboard. Applying reverb adds pleasing reverberation to what you play, so it sounds almost as if you were playing in a concert hall. -
Page 48: Changing The Sound's Pitch In Real Time (Bender/Modulation Lever)
Adjusting the Level of the Sound’s Low, Mid, and High-Frequency Ranges (EQUALIZER) The RD-700 is equipped with a three-band equalizer. You can adjust the levels of the low-frequency, midrange, and high- frequency ranges using the EQUALIZER [LOW], [MID], and [HIGH] knobs, respectively. -
Page 49: Using The Convenient Functions In Performances
Using the Convenient Functions in Performances Creating Arpeggios from the Chords You Play ([ARPEGGIO]) Just by playing a chord, you can play an arpeggio (a chord that is played one note at a time) using the notes making up that chord. fig.panel CONTROL Press [ARPEGGIO], getting the indicator to light. -
Page 50: Changing The Arpeggio Style
Using the Convenient Functions in Performances Changing the Arpeggio Style You can select the way an arpeggio is played (the style) to match a variety of different musical genres. Press [ARPEGGIO], getting the indicator to light. Press CURSOR [ ] to go to the Arpeggio/Rhythm screen. The following Arpeggio/Rhythm screen appears. -
Page 51: Playing Rhythm ([Rhythm])
Playing Rhythm ([RHYTHM]) The RD-700 features internal drum patterns complementing Jazz, Rock, and other various musical genres. These drum patterns are referred to as “Rhythms.” You can turn Rhythms on and off individually in any key mode. You can perform using Rhythms combined with various functions, for example performing arpeggios while a Rhythm is playing. -
Page 52: Changing The Rhythm Pattern
Using the Convenient Functions in Performances Changing the Rhythm Pattern You can select the way a Rhythm is played (the pattern) to match a variety of different musical genres. Press PART SWITCH [RHYTHM] to make the button indicator light. The Rhythm begins playing. Press CURSOR [ ] to go to the Arpeggio/Rhythm screen. -
Page 53: Applying Effects To The Sound (Multi Effects)
Applying Effects to the Sound (MULTI EFFECTS) In addition to chorus (p. 47) and reverb (p. 47), the RD-700 also allows you to apply “multi-effects” to sounds. Multi-effects provides a collection of 65 different effects, such as distortion and rotary, from which you can choose. -
Page 54: Selecting Stored Settings ([Setup])
Using the Convenient Functions in Performances Selecting Stored Settings ([SETUP]) The RD-700’s Local Part (p. 31) and MIDI TX Part (p. 31) tone settings, effect settings, and other such settings are collectively referred to as a “Setup.” Once you’ve stored your preferred settings, and settings for the songs to be performed as a Setup, you can then switch whole groups of settings during a performance just by switching Setups. - Page 55 Try playing the keyboard. The settings are switched to those of the Setup that has been called up. Selecting Setups Without Pressing [NUM LOCK] Using the TONE SELECT buttons, you can specify groups of ten Setups at a time. 1. Press [SETUP], getting the indicator to light. At this time, turn [NUM LOCK] off.
-
Page 56: Storing Settings To Setups ([Write])
If you want to use the changed content as a new Setup, use the following procedure to save the settings to a Setup. You can also change the name of a Setup. You can store 100 Setups on the RD-700. fig.panel CONTROL Press [WRITE], getting the indicator to light. - Page 57 Press CURSOR [ where the characters are to be input. Press [INC/YES] or [DEC/NO] to enter the characters. The following characters are available. Space, A–Z, a–z, 0–9, ! “ # $ % & ‘ ( ) * +, - . / ; : < = > ? @ [ ¥ ] ^ _ ` { | } When EXPANSION [A] is pressed, a single-character blank space is inserted;...
- Page 58 Using the Convenient Functions in Performances Settings Not Saved in a Setup The following settings cannot be saved to a Setup. - Rec Setting (p. 95) - [CONTROL] knob positions (values) - System settings (p. 69) System settings are saved each time one of these parameters is changed. Setup <000>...
-
Page 59: Using The Rd-700 As A Master Keyboard
Using the RD-700 As a Master Keyboard By connecting an external MIDI device to the MIDI OUT connector on the RD-700’s rear panel, you can then control the external MIDI device with the RD-700. Normally, the RD-700 transmits Note messages from the MIDI OUT connector, but when [MIDI TX] is on, you can control not only Note messages, but a variety of other external MIDI device settings as well. -
Page 60: Midi Send Channel Settings
Transmit channel and the Receive channel for each of the external MIDI sound generator’s Parts. Sounds is produced when the MIDI channels for the sending device (the RD-700) and the receiving device (the external MIDI sound generator) are set to the same MIDI channel. -
Page 61: Selecting Sounds On An External Midi Device
Pressing [INC/YES] and [DEC/NO] simultaneously switches the settings value to “--- (OFF).” When this setting is “--- (OFF),” bank select messages will not be transmitted. Using the RD-700 As a Master Keyboard ] several times to Settings CC 32 0~127, ---(OFF) -
Page 62: Adjusting The Volume Of Each Part (Midi Tx Part)
Using the RD-700 As a Master Keyboard Adjusting the Volume of Each Part (MIDI TX Part) fig.panel CONTROL PART LEVEL Slider PART SWITCH When the [MIDI TX] indicator is on, you can use the PART SWITCH/ LEVEL controls to control the MIDI TX parts in the same way as with the Local parts (p. -
Page 63: Detailed Settings For Transmitted Parts ([Midi Tx])
MIDI TX parts. fig.LCD How to Make Settings 1. Press [MIDI TX], getting the indicator to light. The RD-700 is set to control the external MIDI devices. 2. Press CURSOR [ ], [ ], [ cursor to the parameter to be set. -
Page 64: Setting The Transposition For Each Individual Part (Key Transpose)
Using the RD-700 As a Master Keyboard transmitted (p. 62). Setting the Transposition for Each Individual Part (Key Transpose) You can perform with each part transposed to a different pitch. When the Keyboard Mode is Layer, you can create a richer sound by setting the two Tones to different octaves. -
Page 65: Smoothly Changing The Pitch (Portamento)
Pedal connected to the FC2 jack [CONTROL] Knobs Modulation Lever Bender Using the RD-700 As a Master Keyboard Setting the Change in Volume According to the Force Used to Play the Keyboard (Velocity) Set the change in volume that occurs in response to the force used to play the keyboard (velocity) and the maximum value of the change. -
Page 66: Making Detailed Settings For The Piano Tones (Piano Edit)
When ONE TOUCH [PIANO] is pressed, all settings other than the Piano Edit settings are switched to their status at the time the RD-700’s power was turned on. Store any arrangements of settings that you want to keep in Setup (p. 56). -
Page 67: Changing The Sense Of Space Surrounding The Sound (Ambience)
Making Detailed Settings for the Piano Tones (Piano Edit) Changing the Sense of Space Surrounding the Sound (Ambience) Changing the sound’s ambience allows you give your performances a sound resembling that obtained in a wide open space. Parameter Value The effect becomes deeper Ambience 0–5 as the value is increased. -
Page 68: Detailed Settings For Each Function ([Edit])
The process of changing tone parameters to create the tones you like, and changing the settings for various functions is known as “editing.” When [EDIT] is pressed and the indicator is lit, the RD-700 switches to “Edit mode.” You can save edited settings to Setups. -
Page 69: Setting Parameters
RD-700. You are returned to the Tone screen. Settings for system functions are saved in the RD-700 whenever a change is made to their parameters. These settings are not deleted even when the power is turned off. -
Page 70: Adjusting The Volume (Master Volume)
Using Program Change Messages to Switch Setups (Control Channel) You can switch the RD-700’s Setups with MIDI messages from an external MIDI device. Set the MIDI Receive channel for receiving the MIDI messages (Program Changes) from the external MIDI device to be used for switching Setups. -
Page 71: Setting The Device Id Number (Device Id)
If your pedal has an effect opposite of what you expect, set this parameter to Reverse. If you are using a Roland pedal (that has no polarity switch), set this parameter to STANDARD. Parameter... -
Page 72: Changing The Key Touch (Key Touch)
Detailed Settings for Each Function ([EDIT]) Changing the Key Touch (Key Touch) The setting below allows you to adjust the response you get from the keyboard when you finger the keys. Parameter Value Description SUPER An even lighter setting than LIGHT LIGHT. -
Page 73: Pedal, [Control] Knob, And Equalizer Settings (Control/Eq)
Pedal, [CONTROL] Knob, and Equalizer Settings (Control/EQ) You can change the functions assigned to the pedals and [CONTROL] knob and change the equalizer settings. How to Make Settings 1. Press [EDIT], getting the indicator to light. The Edit Menu screen appears. fig.Editmenu1.eps_150 2. -
Page 74: Changing The [Control] Knob Settings (Control/Src)
Detailed Settings for Each Function ([EDIT]) Changing the [CONTROL] Knob Settings (Control/Src) Normally, the [CONTROL] knob is used for making settings that adjust the multi-effects (MFX Control), but they can also be used for settings that change the way tones are played or the tempo. -
Page 75: Simulating The Creation Of Organ Tones (Tone Wheel Mode)
Simulating the Creation of Organ Tones (Tone Wheel Mode) When any of the “Tone Wheel 1–10” Tones is selected for any of the Local Parts (UPPER1, UPPER2, LOWER), you can perform in “Tone Wheel mode,” in which the creation of organ sounds is simulated. -
Page 76: Changing The Part Level Slider Feet Assignments (Harmonic Bar)
You are returned to the Tone screen. Setting the Multi-Effects, Reverb, and Chorus Effects (MFX/Reverb/Chorus) The RD-700 contains three effects processors: multi-effects, chorus, and reverb. Settings can be made separately for each effects processor. How to Make Settings 1. Press [EDIT], getting the indicator to light. -
Page 77: Making Multi-Effects Settings
(p. 78) and chorus (p. 78) effects discussed later in this volume are handled separately. MFX Source, MFX Dest On the RD-700, the MFX Type can be stored along with the tones assigned to each part. These settings determine which multi-effects are used, as well as the part to which the multi-effects are applied. -
Page 78: Making Reverb Settings
Detailed Settings for Each Function ([EDIT]) Making Reverb Settings Reverb adds the reverberation characteristics of halls or auditoriums. Four different types are offered, so you can select and use the type that suits your purpose. You can set the amount of reverb applied separately for each individual part (p. -
Page 79: Making Tone Settings (Tone Edit)
Chorus Feedback Sets the level at which the chorus sound is re-input (fed back) into the chorus. By using feedback, a denser chorus sound can be created. Higher values result in a greater feedback level. Values: 0–127 <Other Prm>, Value You can make more detailed chorus settings. -
Page 80: Selecting The Part To Be Set (
Detailed Settings for Each Function ([EDIT]) Selecting the Part to Be Set (<Part>, Tone) Choose the Part for which you want to make settings. Parameter 1–16 Parts assigned to the Local <Part> parts are indicated by a marker (UPPER1) appear- ing after the part name., Tone) -
Page 81: Creating Smooth Pitch Changes (Portamento Switch/Time)
Creating Smooth Pitch Changes (Portamento Switch/Time) Portamento is a function that causes the pitch to change smoothly from one note to the next note played. With the Mono/Poly parameter set to Mono, portamento is especially effective when simulating playing techniques such as a violin glissandos. -
Page 82: Making The Rhythm Settings (Rhythm Pattern)
Adjusting the Tempo (Tempo) Specify the tempo of the Rhythm. NOTE The RD-700 has only one tempo setting. Once you change the setting, the tempo indicated in the Tone screen and the tempo setting for the arpeggiator (p. 84) both change. -
Page 83: Changing The Drum Set (Rhy Set)
Changing the Drum Set (Rhy Set) You can change a rhythm’s drum set (set of drum and percussion tones). Parameter Value Rhy Set Refer to “Tone List” (p. 135). You can select Tones other than Rhythm Sets. When this setting is changed, the Part 10 Tone also changes. NOTE Depending on the Rhythm Set that is selected, the Rhythm Set may not play back properly. -
Page 84: Adjusting The Tempo (Tempo)
Tempo 20–250 With Clock Source (p. 70) set to MIDI, “M:” appears in the display, and the RD-700 is synchronized to the tempo of the external MIDI device. The tempo cannot be changed with the RD-700 when “M:” is indicated. -
Page 85: Changing The Octave Range In Arpeggio Style (Octave Range)
Parameter Value Description A reggae-type style. Ef- REGGAE fective when 3 notes are held. Style effective for percus- PERCUSSION sive instruments. The playing style of a HARP harp. The playing style of a SHAMISEN Shamisen. A style suggestive of a BOUND BALL bouncing ball. -
Page 86: Changing The Groove Feel (Beat Pattern/Accent Rate/Shuffle Rate)
Detailed Settings for Each Function ([EDIT]) Param Value Description Notes you press will be sounded DUAL two at a time, from low to high, UP& and then back down from high to DOWN low. DUAL Notes you press will be sounded RANDOM two at a time, in random order. -
Page 87: Keeping The Force Of The Notes Constant (Velocity)
Of the sixteen Internal Parts, you can select three of them to function as the three Parts (UPPER1, UPPER2, and LOWER) which can be freely controlled with the RD-700’s buttons and keyboard. These three Parts are collectively known as the “Local Parts.”... -
Page 88: Selecting The Part To Be Set (
Detailed Settings for Each Function ([EDIT]) 6. When you have finished making the settings, press [EDIT], extinguishing its indicator. You are returned to the Tone screen. Selecting the Part to Be Set (<Local Part>) Choose the Local Part for which you want to make settings. You can select the Local part by using the PART SELECT buttons.) -
Page 89: Turning The Controllers In Each Part On And Off
Detailed Settings for Each Function ([EDIT]) Setting MIDI Receive Parts (Internal Part Prm) The sixteen Parts played by the RD-700’s internal sound generator are referred to as “Internal Parts.” When connecting an external MIDI device to a sequencer or other device, by assigning the Receive channel to an Internal... -
Page 90: Selecting The Part To Be Set (
(Receive Channel) When using MIDI messages from an external MIDI device to play the RD-700, set the Receive channels for each of the RD- 700’s parts so they’re matched up with the channels that’ll be used for transmission by the external MIDI device., Tone) -
Page 91: Setting Reception And Blocking Of Midi Messages From External Midi Controllers
Setting Reception and Blocking of MIDI Messages from External MIDI Controllers You can change the RD-700’s tones by reception of MIDI messages generated through the actions of modulation levers, pedals, knobs, and other such external MIDI devices controls. You can set whether to have the following MIDI messages received (ON), or not (OFF) individually in each part. -
Page 92: Other Functions (Utility)
Transferring the RD-700’s Settings to an External MIDI Device (Bulk Dump) You can transfer the contents of Setups and the RD-700’s system settings to an external MIDI device. This operation is called “bulk dump.” Use this procedure to save the data to an external MIDI... -
Page 93: Bulk Dump Setup
RD-700. NOTE Be aware that when you restore SETUPs data to the RD-700, the data in the RD-700 will be overwritten and lost. 1. Use a MIDI cable to connect the MIDI OUT connector of the external sequencer to the MIDI IN connector of the RD-700. -
Page 94: Restoring The Settings To The Factory Condition (Factory Reset)
Detailed Settings for Each Function ([EDIT]) Restoring the settings to the factory condition (Factory Reset) The settings stored in the RD-700 can be returned to their factory settings. NOTE Executing “Factory Reset All” results in deletion of the Setups (p. 54). If you want to keep any data you have stored, use the “Bulk Dump SETUP”... -
Page 95: Connecting External Midi Devices
“Rec Mode” is a convenient feature to use when recording to an external sequencer. When using the REC Mode function, you can get the most suitable settings for recording the RD-700’s data to an external sequencer, without having to make all the Part and channel settings. -
Page 96: Recording The Performance
Setup to the external sequencer. For instructions on carrying out this operation, refer to “Transferring the RD-700’s Settings to an External MIDI Device (Bulk Dump)” (p. 92). 6. Perform on the RD-700. 7. When the performance is finished, stop recording with the external sequencer. -
Page 97: Playing The Rd-700'S Internal Sound Generator From An External Midi Device
Program Change messages from the external MIDI device to the RD-700 allows you to switch Setups and Tones. Switching Setups The MIDI messages transmitted by the external MIDI device will be received by the RD-700 to select Setups as shown in the following table. MIDI OUT Number 1–100... -
Page 98: Using The Rd-700 As A Gm Sound Module (Gm Mode)
GM and GM2 initial settings values, and the song is not played back correctly. • When the RD-700 receives a GS Reset message, the RD- 700 is enabled for the GS format (a shared set of specifications proposed by Roland for standardization of multi-timbral sound modules). -
Page 99: Appendices
Troubleshooting If the RD-700 does not function in the way you expect, first check the following points. If this does not resolve the problem, consult your dealer or a nearby Roland Service Station. * If certain messages appear in the display during operation, please refer to “Error Messages/Other Messages”... - Page 100 Do you have an external MIDI device connected? • You cannot set the tempo with the RD-700 when Clock Source is set to MIDI. Accordingly, if no external MIDI device is connected, then no tempo setting is made for the...
- Page 101 Edit mode (p. 80, p. 81), or Pitch is Odd C.T and F.T setting in MIDI TX screen.(p. 65). Has the RD-700 gone out of tune? Check the System Master Tune set- tings in Edit mode (p. 29). Has the pitch been changed by pedal...
- Page 102 Played Back Are you playing back GS Format Correctly song data? • Once the RD-700 receives a GS Re- set message, it then is enabled for GS Format. This permits playback of music files bearing the GS logo (GS music files). However, data...
-
Page 103: Error Messages/Other Messages
Error Messages/Other Messages Error messages Indication: MIDI Buffer Full Situation: Due to an inordinate volume of MIDI messages received, the RD-700 has failed to process them properly. Action: Reduce the amount of MIDI messages to be transmitted. Indication: MIDI Communication Error... -
Page 104: Effect/Parameter List
Effect/Parameter List Parameters with the “#” showing can be assigned to the MULTI-EFFECTS [CONTROL] knob. Set “MFX CONTROL” following the instructions in “How to Make Settings” (p. 76). 01: STEREO EQ (Stereo Equalizer) This is a four-band stereo equalizer (low, mid x 2, high). Low Freq (Low Frequency) Select the frequency of the low range (200 Hz/400 Hz). - Page 105 04: PHASER A phaser adds a phase-shifted sound to the direct sound, producing a twisting modulation that creates spaciousness and depth. Manual # Adjust the basic frequency from which the sound will be modulated. Rate # Adjust the frequency (period) of modulation. Depth Adjust the depth of modulation.
- Page 106 Effect/Parameter List 08: ROTARY The Rotary effect simulates the sound of the rotary speakers often used with the electric organs of the past. Since the movement of the high range and low range rotors can be set independently, the unique type of modulation characteristic of these speakers can be simulated quite closely.
- Page 107 Delay Dev (Pre Delay Deviation) Pre Delay determines the time from when the direct sound begins until the processed sound is heard. Pre Delay Deviation adjusts the differences in Pre Delay between each chorus sound. Depth Dev (Depth Deviation) Adjust the difference in modulation depth between each chorus sound.
- Page 108 Effect/Parameter List Balance (Effect Balance) # Adjust the volume balance between the direct sound and the chorus sound. With a setting of D100:0W only the direct sound will be output, and with a setting of D0:100W only the chorus sound will be output. Level (Output Level) Adjust the output level.
- Page 109 Mode (Feedback Mode) Select the way in which delay sound is fed back into the effect. NORMAL: The left delay sound will be fed back into the left delay, and the right delay sound into the right delay. CROSS: The left delay sound will be fed back into the right delay, and the right delay sound into the left delay.
- Page 110 Effect/Parameter List HF Damp Adjust the frequency above which sound fed back to the effect will be cut. If you do not want to cut the high frequencies of the feedback, set this parameter to BYPASS. Low Gain Adjust the gain of the low frequency range. Positive (+) settings will emphasize (boost) the low frequency range.
- Page 111 Level (Output Level) Adjust the output level. 22: 2V PCH SHIFT (2 Voice Pitch Shifter) A Pitch Shifter shifts the pitch of the direct sound. This 2-voice pitch shifter has two pitch shifters, and can add two pitch shifted sounds to the direct sound. Coarse A (Coarse Pitch A) #1 Adjust the pitch of Pitch Shift A in semitone steps (-2–+1 octaves).
- Page 112 Effect/Parameter List Time (Reverb Time) # Adjust the time length of reverberation. HF Damp Adjust the frequency above which the reverberant sound will be cut. As the frequency is set lower, more of the high frequencies will be cut, resulting in a softer and more muted reverberance.
- Page 113 Flg Bal (Flanger Balance) # Adjust the volume balance between the overdrive sound that is sent through the flanger and the overdrive sound that is not sent through the flanger. With a setting of “D100:0W,” only the overdrive sound will be output. With a setting of “D0:100W,” only the overdrive sound that is sent through the flanger will be output.
- Page 114 Effect/Parameter List Flg Bal (Flanger Balance) # Adjust the volume balance between the enhancer sound that is sent through the flanger and the enhancer sound that is not sent through the flanger. With a setting of “D100:0W,” only the enhancer sound will be output. With a setting of “D0:100W,” only the enhancer sound that is sent through the flanger will be output.
- Page 115 Delay Bal (Delay Balance) # Adjust the volume balance between the flanger sound that is sent through the delay and the flanger sound that is not sent through the delay. With a setting of “D100:0W,” only the flanger sound will be output. With a setting of “D0:100W,” only the flanger sound that is sent through the delay will be output.
- Page 116 Effect/Parameter List StpRateSw (Step Rate Switch) This setting determines whether the pitch is changed in a stepped fashion (ON) or not (OFF). Mix (Mix Level) Adjust the volume of the phase-shifted sound, relative to the direct sound. Low Gain Adjust the low frequency gain (amount of boost or cut). Positive (+) settings will emphasize (boost) the low frequency range.
- Page 117 Manual # Sets the point at which the two vowels will be switched. When set to 50, Vowels 1 and 2 switched in the same amount of time. Setting this higher than 50 increases the time for Vowel 1; setting this lower than 50 decreases the time for Vowel 1. Low Gain Specifies the low frequency gain (amount of boost or cut).
- Page 118 Effect/Parameter List HF Damp Adjust the frequency at which the high frequency range of the delayed sound returned to the input will be cut. If you do not want to cut the high frequencies of the feedback, set this parameter to BYPASS. Low Gain Adjust the low frequency gain (amount of boost or cut).
- Page 119 High Gain Adjust the high frequency gain (amount of boost or cut). Positive (+) settings will emphasize (boost) the high frequency range. Balance (Effect Balance) # Sets the volume balance between the direct sound and the effect sound. With a setting of D100:0W only the direct sound will be output, and with a setting of D0:100W only the effect sound will be output.
- Page 120 Effect/Parameter List PreFilter (Pre Filter Type) Adjust the type of filter that will be applied before the sound passes through the Lo-Fi effect. PostFilter1 (Post Filter 1 Type) Adjust the type of filter that will be applied after the sound passes through the Lo-Fi effect.
- Page 121 Mic Set (Mic Setting) Adjust the location of the mic that is recording the sound of the speaker. This can be adjusted in three steps, with the mic becoming more distant in the order of 1, 2, and 3. Mic Lvl (Mic Level) # Adjust the volume of the microphone.
- Page 122 Effect/Parameter List High Gain Adjust the high frequency gain. Positive (+) settings will emphasize (boost) the high frequency range. Level (Output Level) # Adjust the output level. 57: GATE The Gate effect cuts the reverb’s delay according to the volume of the sound input to the effects device.
- Page 123 AP Mid Sw (Anti Phase Middle Switch) This turns the Anti-Phase function on and off and sets the level settings for the Middle frequency ranges. When turned on, the counter-channel of stereo sound is inverted and added to the signal. AP Mid (Anti Phase Middle Level) Sets the level of the separate midrange (Middle) anti-phase function.
-
Page 124: Sympathetic Resonance
Effect/Parameter List Cutoff (Cutoff Frequency) Sets the cutoff frequency when a specific frequency band is cut off by a filter. StpRateSw (Step Rate Switch) Determines whether the pitch is changed in a stepped fashion (ON) or not (OFF). Step Rate # Adjust the rate at which the pitch will change. - Page 125 Fast/Hi Fast values). Level (Output Level) # Adjust the output level. When Using 3D Effects The following three 3D effects utilize RSS (Roland Sound Space) technology to create a spaciousness that cannot be produced by delay, reverb, chorus, etc. 48: 3D DELAY...
- Page 126 Effect/Parameter List Effects Parameter List “Making Multi-Effects Settings” (p. 77) ➔ Multi-effects Types are indicated in bold characters. “Parameter” refers to the parameter assigned to <Other Prm> in MFX Control. “Value” refers to the values that can be set using the [CONTROL] knobs or in Value.
- Page 127 10: LIMITER Parameter Threshold Threshold level Ratio Compression ratio Release Release time Post Gain Post gain Low Gain Low gain High Gain High gain Output pan Level Output level 11: HEXA-CHORUS Parameter Pre Delay Pre delay time Rate Rate Depth Depth Delay Dev Pre delay deviation...
- Page 128 Effect/Parameter List 18: MOD DELAY Parameter Delay L Delay time left Delay R Delay time right Feedback Feedback level Mode Feedback mode Rate Rate Depth Depth Phase Phase HF Damp HF damp Low Gain Low gain High Gain High gain Balance Effect balance Level...
- Page 129 25: GATED REVERB Parameter Type Gated Reverb type Pre Delay Pre delay time Gate Time Gate time Low Gain Low gain High Gain High gain Balance Effect balance Level Output level 26: OD→CHORUS Parameter OD Drive Drive OD Pan Overdrive pan Cho Delay Chorus pre delay time Cho Rate...
- Page 130 Effect/Parameter List 36: FLANGER→DELAY Parameter Flg Delay Flanger pre delay time Flg Rate Flanger rate Flg Depth Flanger depth Flg Fbk Flanger feedback level Flg Bal Flanger balance DelayTime Delay time Delay Fbk Delay feedback level Dly HFDmp HF damp Delay Bal Delay balance Level...
- Page 131 45: MULTI TAP DLY Parameter Delay 1 Delay time 1 Delay 2 Delay time 2 Delay 3 Delay time 3 Delay 4 Delay time 4 Pan 1 Output pan 1 Pan 2 Output pan 2 Pan 3 Output pan 3 Pan 4 Output pan 4 Level 1...
- Page 132 Effect/Parameter List 51: LOFI NOISE Parameter Type LoFi type Pst Filter Post Filter type Frequency Post Filter cutoff frequency Radio Dtn Radio detune Noise Lvl Noise Level Disc Type Disc NoiseType Disc LPF Disc Noise LPF Disc Lvl Disc Noise Level Low Gain Low gain High Gain...
- Page 133 60: 3D CHORUS Parameter Pre Delay Pre delay time Rate LFO rate Depth LFO depth Phase Phase Fltr Type Filter Type Cutoff Cutoff frequency Output mode Low Gain Low gain High Gain High gain Balance Balance Level Output level *1: 200, 250, 315, 400, 500, 630, 800, 1000, 1250, 1600, 2000, 2500, 3150, 4000, 5000, 6300, 8000 Hz 61: 3D FLANGER Parameter...
-
Page 134: Reverb Parameters
Effect/Parameter List →“Making Reverb Settings” (p. 78) “Parameter” refers to the parameter assigned to <Other Prm>. “Value” refers to the values that can be set in Value. Reverb Parameters REVERB Parameter Type Reverb/Delay type HF Damp Reverb/Delay HF damp Feedback Delay feedback *1: 200, 250, 315, 400, 500, 630, 800, 1000, 1250, 1600, 2000, 2500, 3150, 4000, 5000, 6300, 8000 Hz, BYPASS... -
Page 135: Tone List
Tone List MSB: Bank Select MSB (Control Number: 0) LSB: Bank Select LSB (Control Number: 32) PC: Program Change [PIANO] Tone Name St.Concert 1 St.Concert 2 Dynamic Pno1 Dynamic Pno2 St.Concert 3 BrightPiano1 BrightPiano2 MellowPiano1 MellowPiano2 Band Piano 1 Band Piano 2 Honky-Tonk Rock Piano 1 Rock Piano 2... - Page 136 Tone List [GTR/BASS] Tone Name Nylon Gtr 1 Nylon Gtr 2 Steel Gtr Solo Steel Steel Away 12str Gtr Jz Gtr Hall LetterFrmPat JC Strat Clear Guitar Searing Lead Dist Gtr Feed Me! Blusey OD RD Ac.Bass RD Upright Ac.Upright RD Fretless Fretless Dry Finger Bass...
- Page 137 Tone Name Beef FM Bass RubberBass 2 Attack Pulse Violin Slow Violin Viola Cello Contrabass Tremolo Str PizzicatoStr Harp Yang Qin Timpani Orche str Orchestra 60s Strings Slow Strings Syn.Strings1 Syn.Strings3 Syn.Strings2 Choir Aahs Chorus Aahs Voice Oohs Humming SynVox Analog Voice OrchestraHit Bass Hit...
-
Page 138: Rhythm Set List
Tone List Rhythm Set List * ---: No sound. * [EXC]: will not sound simultaneously with other percussion instruments of the same number. Note No. RD Pop Kit R&B Snare ----- ----- ----- ----- ----- Finger Snap 707 Claps Hand Clap 1 Hand Clap 2 Hand Clap 3 Pop Pedal HH... - Page 139 RD Pop Kit Note No. Falamenco Hi-Timbale Falamenco Lo-Timbale Falamenco Tmbl Flam Shekere 1 Shekere 2 Low Bongo Mute ----- ----- ----- ----- ----- ----- ----- ----- ----- ----- ----- ----- Wah Gtr Noise 1 Wah Gtr Noise 2 RD Rock Kit RD Jazz Kit Falamenco Hi-Timbale Falamenco Hi-Timbale...
- Page 140 Tone List GM2 STANDARD GM2 ROOM Note No. High-Q High-Q Slap Slap ScratchPush [EXC7] ScratchPush ScratchPull [EXC7] ScratchPull Sticks Sticks SquareClick SquareClick Mtrnm.Click Mtrnm.Click Mtrnm. Bell Mtrnm. Bell Mix Kick Mix Kick Standard KK1 Standard KK1 Side Stick Side Stick Standard SN1 Standard SN1 909 HandClap...
- Page 141 GM2 JAZZ GM2 BRUSH Note No. High-Q High-Q Slap Slap ScratchPush [EXC7] ScratchPush ScratchPull [EXC7] ScratchPull Sticks Sticks SquareClick SquareClick Mtrnm.Click Mtrnm.Click Mtrnm. Bell Mtrnm. Bell Jazz Kick 2 Jazz Kick 2 Jazz Kick 1 Jazz Kick 1 Side Stick Side Stick Standard SN1 Brush Swirl...
-
Page 142: Arpeggio Style List
Arpeggio Style List Style Motif 1/12 1/16 1/32 SINGLE UP, SINGLE DOWN, SINGLE UP&DOWN, SINGLE RANDOM, DUAL UP, DUAL DOWN, DUAL UP&DOWN, DUAL RANDOM, NOTE ORDER, GLISSANDO, BASS+UP 1–8, BASS+RND 1–3, TOP+UP 1–6 PORTAMENTO A PORTAMENTO B GLISSANDO GLISSANDO SEQUENCE A SEQUENCE B SEQUENCE C SINGLE UP, SINGLE DOWN, SINGLE UP&DOWN,... -
Page 143: Rhythm Pattern List
Rhythm Pattern List Rhythm Pattern Recommended Tempo ShufflePop 1 ShuffleR&B 1 R&B 1 Funk 1 8Beat Pop 1 16Beat Pop 1 8Beat Rock 1 16BeatRock 1 Acid Jazz Hip Hop Swing 1 Fast Swing 1 Blues 1 Blues 2 Latin Pop Salsa 1 8Bt Fusion 1 16BtFusion 1... -
Page 144: Setup List
Setup List → Owner’s Manual “Selecting Stored Settings ([SETUP])” (p. 54). No.001–020 “RHY: Setup”: These Setups let you enjoy performing with a session-like feel while playing a Rhythm. Be sure to check it out. For more on Rhythms, refer to the “Playing Rhythm ([RHYTHM])”... -
Page 145: Shortcut List
Shortcut List You can easily change settings for the following functions using a number of related buttons. * “[A] + [B]” indicates that you are to hold down [A] and press [B]. What to do Switching Arpeggio Hold On and Off Selecting Parts to Play Arpeggios Changing Transpose setting Changing the Keyboard’s Split Point... -
Page 146: Midi Implementation
MIDI Implementation Model: RD-700 (Digital Piano) Date: Mar. 1, 2001 Version: 1.00 1. Receive data ■Channel Voice Messages ●Note off Status 2nd byte 3rd byte n = MIDI channel number: 0H - FH (ch.1 - 16) kk = note number:... -
Page 147: Program Change
❍Release Time (Controller number 72) Status 2nd byte 3rd byte n = MIDI channel number: 0H - FH (ch.1 - 16) vv = Release Time value (relative change): 00H - 7FH (-64 - 0 - +63), * The Release Time parameter (EDIT:Tone Edit:Release Time) will change. ❍Attack time (Controller number 73) Status 2nd byte... -
Page 148: Channel Mode Messages
= ID number: an ID number (manufacturer ID) to indicate the manufacturer whose Exclusive message this is. Roland’s manufacturer ID is 41H. ID numbers 7EH and 7FH are extensions of the MIDI standard; Universal Non-realtime Messages (7EH) and Universal Realtime Messages (7FH). - Page 149 ❍GM2 System On Status Data byte Status 7EH 7FH 09H 03H Byte Explanation Exclusive status ID number (Universal Non-realtime Message) Device ID (Broadcast) Sub ID#1 (General MIDI Message) Sub ID#2 (General MIDI 2 On) EOX (End Of Exclusive) * When this messages is received, this instrument will turn to the GM mode. * Not received when the Rx GM2 System On parameter (EDIT:System:Rx GM2 System ON) is OFF.
- Page 150 41H, dev, 00H, 43H, 11H, aaH, bbH, ccH, ddH, ssH, ttH, uuH, vvH, sum Remarks Exclusive status ID number (Roland) devdevice ID (dev: 10H - 1FH, 7FH) model ID #1 (RD-700) model ID #2 (RD-700) command ID (RQ1) address MSB address address...
-
Page 151: Control Change
●Control Change * By selecting a controller number that corresponds to the setting of parameters of controllers (Control Src, Foot Controller Assign), the RD-700 can transmit any control change message. * These messages are not transmitted when MIDI Tx Parameter is OFF. - Page 152 MIDI Implementation ❍Panpot (Controller number 10) Status 2nd byte 3rd byte n = MIDI channel number: 0H - FH (ch.1 - 16) vv = Panpot: 00H - 40H - 7FH (Left - Center - Right) * These messages are transmitted when Pan value is set in MIDI Tx Mode. ❍Hold 1 (Controller number 64) Status 2nd byte...
-
Page 153: System Realtime Messages
00H, 00H, 00H, 01H, 00H, 00H Byte Explanation Exclusive status ID number (Universal Non-realtime Message) Device ID (use the same as the device ID of Roland) Sub ID#1 (General Information) Sub ID#2 (Identity Reply) ID number (Roland) 43H 01H Device family code (RD-700) - Page 154 MIDI Implementation ❍System Onetouch Piano Tone Backup +——————————————————————————————————————————————————————————————————————————————+ | Offset Address | Description |—————————————+————————————————————————————————————————————————————————————————| 00 00 | 00aa aaaa | Piano Stereo Width 00 01 | 0000 aaaa | Piano Nuance 00 02 | 0000 0aaa | Piano Ambience 00 03 | 0000 000a | Piano EQ Switch 00 04 | 000a aaaa | Piano EQ Frequency 200, 250, 315, 400, 500, 630, 800, | 1000, 1250, 1600, 2000, 2500, |...
- Page 155 | 0000 dddd | MFX Parameter 1 00 09 | 0000 aaaa | | 0000 bbbb | | 0000 cccc | | 0000 dddd | MFX Parameter 2 00 0D | 0000 aaaa | | 0000 bbbb | | 0000 cccc | | 0000 dddd | MFX Parameter 3 00 11 | 0000 aaaa | | 0000 bbbb |...
- Page 156 MIDI Implementation 00 1A | 0000 aaaa | | 0000 bbbb | | 0000 cccc | | 0000 dddd | Reverb Parameter 7 00 1E | 0000 aaaa | | 0000 bbbb | | 0000 cccc | | 0000 dddd | Reverb Parameter 8 00 22 | 0000 aaaa | | 0000 bbbb | | 0000 cccc |...
- Page 157 41H, dev, 00H, 43H, 12H, 7FH, 7FH, 7EH, ssH, nnH, sum Byte Explanation Exclusive status ID number (Roland) device ID (dev: 10H - 1FH) model ID #1 (RD-700) model ID #2 (RD-700) command ID (DT1) address address address From check sum EOX (End Of Exclusive) 4.
- Page 158 MIDI Implementation 40 1x 24 | 0000 000a | Rx. Bank Select LSB |—————————————+———————————+————————————————————————————————————————————————————| 40 1x 30 | 0aaa aaaa | Tone Modify 1 (Vibrato Rate) 40 1x 31 | 0aaa aaaa | Tone Modify 2 (Vibrato Depth) 40 1x 32 | 0aaa aaaa | Tone Modify 3 (TVF Cutoff Freq.) 40 1x 33 | 0aaa aaaa | Tone Modify 4 (TVF Resonance) 40 1x 34 | 0aaa aaaa | Tone Modify 5 (TVF&TVA Env.
- Page 159 ■Arpeggio Parameter List ●Arpeggio Style +—————————————————————————+—————————————————————————+—————————————————————————+ |value| parameter |value| parameter |value| parameter +—————————————————————————+—————————————————————————+—————————————————————————+ 0 | 1/ 4 15 | HEAVY SLAP 1 | 1/ 6 16 | LIGHT SLAP 2 | 1/ 8 17 | WALK BASS 3 | 1/12 18 | RHYTHM GTR 1 4 | 1/16 19 | RHYTHM GTR 2...
- Page 160 ■Example of an Exclusive Message and Calculating a Checksum Roland Exclusive messages (RQ1, DT1) are transmitted with a checksum at the end (before F7) to make sure that the message was correctly received. The value of the checksum is determined by the address and data (or size) of the transmitted Exclusive message.
- Page 161 ❍Equal Temperament This method of tuning divides the octave into 12 equal parts. It is currently the most widely used form of tuning, especially in occidental music. On the RD-700, the default settings for the Scale Tune feature produce equal temperament.
- Page 162 MIDI Implementation...
- Page 163 MIDI Implementation...
-
Page 164: Main Specifications
Main Specifications RD-700: Digital Piano (Conforms to General MIDI 2 System) ● Keyboard 88 keys (Progressive Hammer Action Keyboard) ● Part ● Maximum Polyphony 128 voices ● Wave Memory 64 M bytes (16-bit linear equivalent) ● Expansion Slot Wave Expansion Board SRX Series: 2 slots (*1) ●... -
Page 165: Index
Index AC Inlet ...14 Accent Rate ...86 Adjusting the Display Contrast ...28 Ambience ...67 [ARPEGGIO] ...12, 49 Arpeggio ...49, 83 Arpeggio Hold ...87 Arpeggio Style ...50 Arpeggio Style List ...142 Arpeggio Tempo ...50 Attack Time (MIDI TX Part) ...64 Attack Time (Tone) ...81 Bend Range (MIDI TX Part) ...64 <Band>... - Page 166 Index Gain ...74 GM Mode ...98 GM Sound Module ...98 GND Terminal ...14 Harmonic Bar ...75–76 Headphones ...14 [HIGH] knob ...12 [INC/YES] ...13, 33 Internal Part ...31 Internal Part Prm ...89 Intro/Ending ...83 Key Mode ...41 Key Range ...63 Arpeggio ...84 Local Part ...88 Key Touch ...71–72 Key Touch Offset ...72...
- Page 167 Recording To an External MIDI Sequencer ...95 Release Time (MIDI TX Part) ...64 Release Time (Tone) ...81 Resonance (MIDI TX Part) ...64 Resonance (Tone) ...81 Restoring the Factory Settings ...26 Reverb (MIDI TX Part) ...63 Reverb Reverb parameters ...134 Reverb Amount (Tone) ...80 Reverb Effect ...47 Reverb High Cut Frequency ...78 REVERB knob ...12, 47...
-
Page 168: Purpose-Oriented Index
Purpose-Oriented Index This index lists the main setting items relevant to play of the RD-700's keyboard. * [Edit]: aaa: bbb” indicates the bbb parameter in Edit screen aaa. Volume Setting Changing the Volume for the entire RD-700 ... VOLUME Slider (p. 25) ... - Page 169 MEMO...
-
Page 170: Information
Information When you need repair service, call your nearest Roland Service Center or authorized Roland distributor in your country as shown below. PHILIPPINES AFRICA AFRICA G.A. Yupangco & Co. Inc. 339 Gil J. Puyat Avenue EGYPT Makati, Metro Manila 1200,... - Page 171 This product complies with the requirements of European Directives EMC 89/336/EEC and LVD 73/23/EEC. FEDERAL COMMUNICATIONS COMMISSION RADIO FREQUENCY INTERFERENCE STATEMENT This equipment has been tested and found to comply with the limits for a Class B digital device, pursuant to Part 15 of the FCC Rules.
- Page 172 This owner’s manual is printed on recycled paper. 02565478 ’04-5-9N...