Table of Contents
Advertisement
Quick Links
Owner's Manual
Thank you, and congratulations on your choice of the Roland Fantom-X6/X7/X8.
201b
Before using this unit, carefully read the sections entitled: "IMPORTANT SAFETY
INSTRUCTIONS" (p. 2), "USING THE UNIT SAFELY" (p. 3–4), and "IMPORTANT NOTES"
(p. 4–5). These sections provide important information concerning the proper operation
of the unit. Additionally, in order to feel assured that you have gained a good grasp of
every feature provided by your new unit, Handbook and Owner's manual should be read
in its entirety. The manual should be saved and kept on hand as a convenient reference.
This Owner's Manual applies to the Fantom-X6, the Fantom-X7 and the Fantom-X8. The
manual uses the term "Fantom-X" to indicate all these three models.
Listening to the Demo Songs
Press [PLAY] to start demo song playback.
To stop the performance, press [STOP].
* The operation described here will play back one demo song.
In addition to this song, the Fantom-X contains other demo songs that let you experience
the amazing sounds of the Fantom-X. To listen to these demo songs, refer to p. 23.
202
Copyright © 2004 ROLAND CORPORATION
All rights reserved. No part of this publication may be reproduced in any form without the
written permission of ROLAND CORPORATION.
Rewind
Stop
Play
Advertisement
Table of Contents

Related Manuals for Roland Fantom-X6


Summary of Contents for Roland Fantom-X6
-
Page 1: Listening To The Demo Songs
The manual should be saved and kept on hand as a convenient reference. This Owner’s Manual applies to the Fantom-X6, the Fantom-X7 and the Fantom-X8. The manual uses the term “Fantom-X” to indicate all these three models. -
Page 2: Important Safety Instructions
WARNING: To reduce the risk of fire or electric shock, do not expose this apparatus to rain or moisture. CAUTION RISK OF ELECTRIC SHOCK DO NOT OPEN ATTENTION : RISQUE DE CHOC ELECTRIQUE NE PAS OUVRIR CAUTION: TO REDUCE THE RISK OF ELECTRIC SHOCK, DO NOT REMOVE COVER (OR BACK). -
Page 3: Using The Unit Safely
Roland. • When using the unit with a rack or stand recommended by Roland, the rack or stand must be carefully placed so it is level and sure to remain stable. If not using a rack or stand, you still... -
Page 4: Important Notes
• The unit should be located so that its location or position does not interfere with its proper ventilation. 101c • This unit for use only with Roland stand KS-12 (Fantom-X6/ Fantom-X7) / KS-17 (Fantom-X8). Use with other stands (or carts) is capable of resulting in instability causing possible injury. - Page 5 • Use a cable from Roland to make the connection. If using some other make of connection cable, please note the following precautions. • Some connection cables contain resistors. Do not use cables that incor- porate resistors for connecting to this unit.
-
Page 6: Table Of Contents
Contents USING THE UNIT SAFELY ...3 IMPORTANT NOTES ...4 Main Features ...15 Panel Descriptions ...16 Front Panel... 16 Rear Panel ... 18 Getting Ready ...19 Connecting an Amp and Speaker System... 19 Placing the Fantom-X8 on a Stand (For Fantom-X8 user) ... 20 Turning On the Power ... - Page 7 Playing in Patch Mode ...38 About the Patch Play Screen ... 38 Displaying Patch Play Screen ... 38 Selecting a Patch ... 39 Selecting Patches by Category (Patch Finder) ... 40 Selecting Patches from the List... 41 Auditioning Patches (Phrase Preview) ... 42 Creating a list of frequently used Patches and Performances (Live Setting)...
- Page 8 Contents Output... 73 Modulating Sounds (LFO) ... 74 Apply Portamento or Legato to the Sound (Solo/Porta) ... 77 Miscellaneous Settings (Misc) ... 78 Matrix Control Settings (Ctrl1–4)... 80 Setting Effects for a Patch (Effects/MFX/MFX Control/Chorus/Reverb) ... 82 Creating a Rhythm Set ...83 How to make Rhythm Set settings...
- Page 9 Creating a Performance ...107 Viewing the Part Settings as a List (Performance Part View) ... 107 Adjusting the Parameters of Each Part ... 107 Selecting the Parameter Controlled by the Realtime Controllers or D Beam Controller (Control Setting) ... 114 Make Settings for the Realtime Controllers and D Beam Controller (Ctrl)...
- Page 10 Contents Playing Rhythms ...135 About Rhythm Patterns... 135 Using Rhythm Groups... 135 Playing Rhythm ... 135 Turning Rhythm On and Off... 135 Determining the Tempo for Rhythm Pattern Performances ... 135 Select the Rhythm Group... 136 Rhythm Pattern Settings... 136 Selecting Rhythm Patterns...
- Page 11 Using the Pads...160 Using the Hold Function to Sustain a Sound ... 160 Using the Roll Function to Play Sounds... 160 Making Settings for the Pads (Pad Setting) ... 161 Specify the Currently Used Sound Generator ... 161 Settings You Can Make for Each Pad... 161 Settings that Apply to All Pads...
- Page 12 Contents Inserting a Blank Measure (Insert) ... 185 Transpose the Key (Transpose)... 185 Changing the Velocity (Volume) (Change Velocity) ... 186 Changing the MIDI Channel (Change Channel) ... 186 Modifying the Length of Notes (Change Duration) ... 187 Combining Two Phrase Tracks or Patterns into One (Merge) ... 188 Extracting and Moving a Part of Sequencer Data (Extract) ...
- Page 13 Making Reverb Settings (Reverb) ... 216 Mastering Effect... 217 Connecting to Your Computer via USB (USB Mode) ...218 About USB Functions... 218 Switching the Storage Mode and the MIDI Mode... 218 Transferring Files to or from Your Computer (Storage Mode) ... 219 Exchanging MIDI Messages with Your Computer (MIDI Mode)...
- Page 14 Contents Installing the Wave Expansion Board...240 Cautions When Installing an Wave Expansion Board ... 240 How to Install a Wave Expansion Board ... 240 Checking the Installed Wave Expansion Boards ... 241 Installation de la carte d’expansion Wave ...242 Précautions à prendre lors de l’installation d’une carte d’expansion Wave ... 242 Installation d’une carte d’expansion Wave ...
-
Page 15: Main Features
Main Features Cutting-edge sound engine that unifies audio and MIDI The Fantom-X inherits the same sound engine that was acclaimed on the Fantom-S, unifying synthesizer and sampler into a single sound generator. Sampled waveforms and waveforms imported from a PC or other external source can also be used as synthesizer waveforms. -
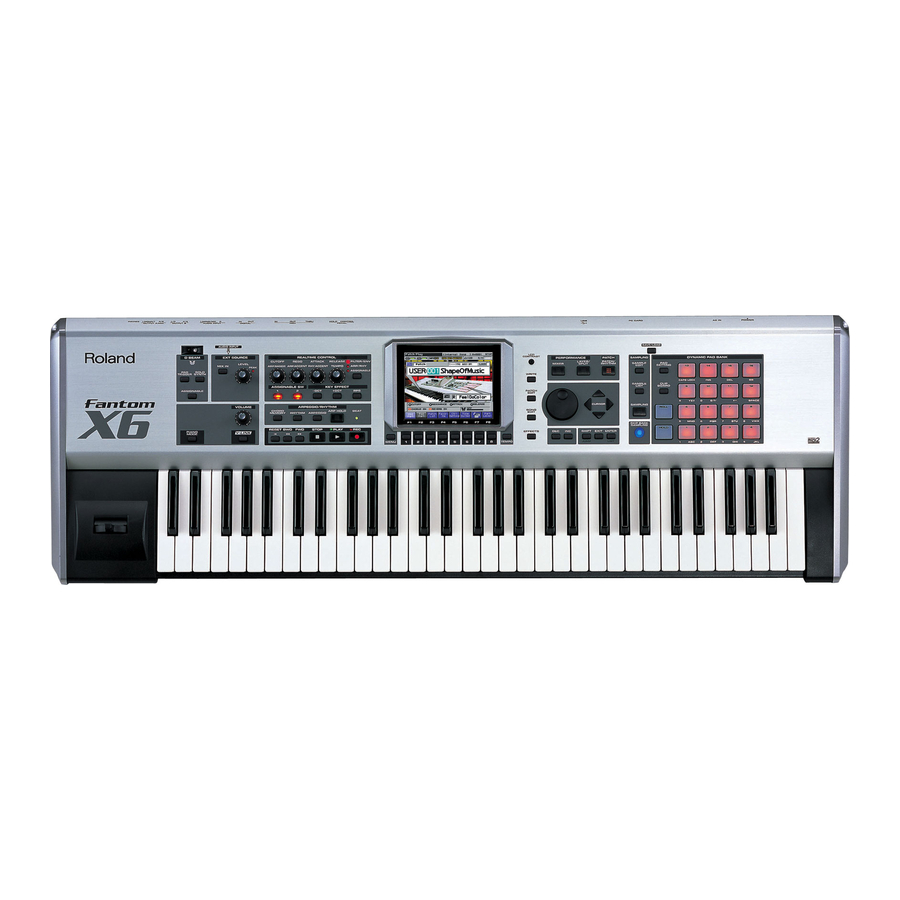
Page 16: Panel Descriptions
Panel Descriptions Front Panel fig.01-001 D BEAM D BEAM Switches D Beam function on/off. You can apply a variety of effects to sounds simply by moving your hand. -> (p. 121) [ASSIGNABLE] You can assign a variety of parameters and functions to D Beam to modify the sound in realtime. -
Page 17: Pad Setting
This allows you to control pitch bend or apply vibrato. Here you can install a wave expansion board (SRX series; sold separately) or install separately sold memory (DIMM). On the Fantom-X6/X7, this is located on the bottom panel. -> (p. 240, p. 242) [PIANO MODE] Switches to a special mode optimal for playing piano sounds. -
Page 18: Rear Panel
Panel Descriptions Rear Panel fig.01-002 fig.01-003 POWER ON Switch Press to turn the power on/off. -> (p. 21, p. 22) AC Inlet Connect the included power cord to this inlet. -> (p. 21) fig.01-004 CTL (CONTROL) PEDAL Jack You can connect optional expression pedals (EV-5, etc.) to these jacks. -
Page 19: Getting Ready
Getting Ready Connecting an Amp and Speaker System Since the Fantom-X contains no amplifier or speakers, you’ll need to connect it to audio equipment such as a keyboard amplifier, monitor speaker system or home stereo, or use headphones to hear its sound. Before hooking anything up, make sure that the power on all of your gear is turned OFF. -
Page 20: Placing The Fantom-X8 On A Stand (For Fantom-X8 User)
Getting Ready Placing the Fantom-X8 on a Stand (For Fantom-X8 user) If you want to place the Fantom-X8 on a stand, use the Roland KS-17. Place the instrument on the stand as follows. fig.02-001.e Place it so the center of the stand comes between the "a"... -
Page 21: Turning On The Power
Turning On the Power Once the connections have been completed (p. 19), turn on power to your various devices in the order specified. By turning on devices in the wrong order, you risk causing malfunction and/or damage to speakers and other devices. fig.bender.e Before turning on the Fantom’s power, consider these two questions: •... -
Page 22: Adjusting The Display Contrast (Lcd Contrast)
Getting Ready Adjusting the Display Contrast (LCD Contrast) The characters in the display may be difficult to view immediately after turning on the Fantom- X’s power or after extended use. Your viewing angle or the current lighting conditions can also affect the appearance of the display. -
Page 23: Listening To The Demo Songs
Press [EXIT] to return to the previous screen. * When you play back using the procedure of steps 1–5, the playback data will not be transmitted from the MIDI OUT connector. Copyright©Roland Corporation You can use the Song Edit screen to view the musical data of this song. -
Page 24: Various Performance Features
Various Performance Features Velocity/Aftertouch The force with which you play the keyboard, or the “velocity” with which you play, can affect the volume or timbre of a sound. Aftertouch—downward pressure you apply to a key after playing a note—can also affect the sound. fig.02-008 Pitch Bend/Modulation Lever While playing the keyboard, move the lever to the left to lower the pitch of the currently... -
Page 25: Control Pedal
Control Pedal If an optional expression pedal or pedal switch (EV-5, DP-2.) is connected to the rear panel PEDAL CONTROL jack, you can use the pedal to control the volume or various function. fig.02-011 Transpose (Trans) You can transpose the pitch of the keyboard in semitone steps, over a range of G–F# (-5– +6 semitones) by adjusting the Transpose parameter’s value. -
Page 26: Overview Of The Fantom-X
Fantom-X to also control external MIDI devices. The Sampler section A sampler is a device that captures sounds from a CD player or mic connected to the audio input or the digital input (or sounds from a wave file) as “samples.”... -
Page 27: Rhythm Sets
LFO (Low Frequency Oscillator) Use the LFO to create cyclic changes (modulation) in a sound. The Fantom-X has two LFOs. You can use the LFO to apply an effect to either the WG (pitch), the TVF (filter), or the TVA (volume). When an LFO is applied to the WG pitch, a vibrato effect is produced. -
Page 28: About Simultaneous Polyphony
Overview of the Fantom-X About Simultaneous Polyphony The Fantom-X can play a maximum of 128 sounds simultaneously. The following paragraphs discuss what this means, and what will happen when more than 128 simultaneous voices are requested from the Fantom-X. Calculating the Number of Voices Being Used The Fantom-X is able to play up to 128 notes simultaneously. -
Page 29: Temporary Memory
Temporary Memory Temporary Area This is the area that holds the data for the patch or performance that you’ve selected using the panel buttons. When you play the keyboard or play back a sequence, sound is produced based on data in the temporary area. When you edit a patch or performance, you do not directly modify the data in memory;... -
Page 30: How Effects Units Work In Different Modes
Overview of the Fantom-X How Effects Units Work in Different Modes In Patch Mode Multi-effects can be used individually by each patch and rhythm set. Chorus and reverb are each shared by patches and rhythm sets; the same effect applies to each tone. Adjusting the signal level to be sent to each effects unit (Send Level) provides control over the effect intensity that’s applied to each tone. -
Page 31: Songs And The Sound Generator Mode
Tempo Track The Tempo track records tempo changes of a song over time. It can be used for tempo changes during a song. If a song has the same tempo from beginning to end, the Tempo track can be ignored. When a song is first recorded on the Fantom-X, a tempo setting at the time of recording will be stored at the beginning of the Tempo track. -
Page 32: About The Sampling Section
Overview of the Fantom-X About the Sampling Section The Sampling section samples (records) external sounds from an audio device or mic as digital data. Sampled sounds can be played as a patch or rhythm set. You can also import WAV/AIFF format files and use them in the same way. -
Page 33: Basic Operation Of The Fantom-X
Basic Operation of the Fantom-X Switching the Sound Generator Mode The Fantom-X has two sound generating modes: Patch mode, Performance mode. You can select the sound generating mode (state) that is most appropriate for how you are playing the Fantom-X. Use the following procedure to switch between these modes. -
Page 34: About The Function Buttons
Overview of the Fantom-X About the Function Buttons The eight [F1]–[F8] buttons (function buttons) located below the display execute various functions, and their operation will differ depending on the screen. Functions will be listed in the bottom of the screen. fig.04-017 Window The somewhat smaller screens that appear temporarily on top... -
Page 35: Modifying A Value
Modifying a Value To modify the value, use the VALUE dial or the [INC]/[DEC] buttons. fig.04-021 In each screen of the Fantom-X, you can use the cursor to move the area displayed as highlighted, and modify its value. Each parameter has its own range of possible values, so you cannot set any value smaller than the minimum value or greater than the maximum value. -
Page 36: Assigning A Name
Overview of the Fantom-X Assigning a Name On the Fantom-X, you can assign names to each patch, rhythm set, performance, Song, Sample, and Pattern. The procedure is the same for any type of data. Press [CURSOR] to move the cursor to the location where you wish to input a character. -
Page 37: Registering And Recalling Frequently Used Screen Pages (Bookmark)
Registering and recalling frequently used screen pages (Bookmark) This function lets you register frequently used screen pages, and use the pads to access them. For example, if you find yourself frequently moving between the Patch Edit page and the Effect page, this function will help you switch between these two pages more efficiently. -
Page 38: Playing In Patch Mode
Playing in Patch Mode In Patch mode, the keyboard and the pads are each used to play a single sound (patch/rhythm set). The keyboard controller section and the pad controller section each have their own sound generator part, and each are connected by their own MIDI channel. -
Page 39: Selecting A Patch
Functions in the Patch Play screen fig.05-005.e Indicates the current sound generating mode. Indicates the volume of the Keyboard part and Pad part. Indicates multi-effects (MFX1, 2), chorus (CHO), reverb (REV), and masterring (MASTER) on and off. Indicates the name of the currently selected song, the measure location Indicates the time signature, and the tempo. -
Page 40: Selecting Patches By Category (Patch Finder)
Playing in Patch Mode Press [PATCH/RHYTHM] to access the Patch Play screen. fig.05-001.e Patch number Patch type Patch name Patch group Press [F7 (Part Kbd)] or [F8 (Part Pad)] to move the cursor to the pad part or the keyboard part. fig.05-006.e Patch type Patch group... -
Page 41: Selecting Patches From The List
The following categories can be selected. Category Contents - - - No Assign No assign AC.Piano Acoustic Piano EL.Piano Electric Piano Keyboards Other Keyboards (Clav, Harpsichord etc.) Bell Bell, Bell Pad Mallet Mallet Organ Electric and Church Organ Accordion Accordion Harmonica Harmonica, Blues Harp AC.Guitar... -
Page 42: Auditioning Patches (Phrase Preview)
Playing in Patch Mode Auditioning Patches (Phrase Preview) The Fantom-X allows you to preview patches by hearing a phrase appropriate for each type of patch. Press [PATCH/RHYTHM] to access the Patch Play screen. Press [F1 (Patch List)] to access the Patch List screen. fig.05-009_50 Press and hold [F7 (Preview)]. -
Page 43: Registering A Sound
Registering a sound Access the screen of the patch, rhythm set, or performance that you want to register. Press [MENU] to open the Menu window. Either turn the VALUE dial or press “Live Setting Edit,” and then press [ENTER]. The Live Setting Edit screen appears. fig.05-001c_50 You can also hold down [SHIFT] and press [ENTER] to access the Live Setting Edit screen. -
Page 44: Selecting Favorite Patches (Favorite Patch)
Playing in Patch Mode Selecting Favorite Patches (Favorite Patch) In the patch mode, You can bring together your favorite and most frequently used patches in one place by registering them in the favorite patch. By using this function, you can rapidly select favorite patches from Preset/User/Card area or a Wave Expansion Board. -
Page 45: Registering Favorite Rhythm Sets
Registering Favorite Rhythm Sets You can bring together your favorite and most frequently used rhythm sets in one place by registering them in the favorite patch. By using this function you can rapidly select favorite rhythm sets from Preset/User/Card area or a Wave Expansion Board. You can register a total of 64 sounds (8 sounds x 8 banks) as favorite patchs. -
Page 46: Transposing The Keyboard In Semitone Steps (Transpose)
Playing in Patch Mode Transposing the Keyboard in Semitone Steps (Transpose) Transpose changes keyboard pitch in units of semitones. This function is useful when you play transposed instruments such as trumpet or clarinet following a printed score. * Transpose applies only to the keyboard part. Press [PATCH/RHYTHM] to access the Patch Play screen. -
Page 47: Creating Smooth Pitch Changes (Portamento)
Creating Smooth Pitch Changes (Portamento) Portamento is an effect which smoothly changes the pitch from the first-played key to the next-played key. By applying portamento when Mono mode is selected (see the preceding item), you can simulate performance effects such as slurring on a violin. Press [PATCH/RHYTHM] to access the Patch Play screen. -
Page 48: Assigning A Parameter To A Controller
Playing in Patch Mode Knob Part Select Selects the part that will be controlled by the realtime control knobs. Value: KBD, PAD Assigning a Parameter to a Controller Here’s how to specify the parameter that will be affected when you operate a controller. -
Page 49: Osc Sync Switch
D Beam (Solo Synth) You can use the D Beam controller to perform in a way similar to on a mono synth. fig.05-019_50 When you press [F6 (Panel View)], the Panel View screen will appear, which displays the above parameters in graphical fashion, simulating an analog synthesizer. - Page 50 Playing in Patch Mode LFO Osc 1 Pitch Depth Specifies the depth to which the LFO will modulate the OSC1 pitch. Value: -63–+63 LFO Osc 2 Pitch Depth Specifies the depth to which the LFO will modulate the OSC2 pitch. Value: -63–+63 LFO Osc 1 Pulse Width Depth Specifies the depth to which the LFO will modulate the pulse width...
- Page 51 Knob fig.05-021_50 For details on these settings, refer to “Assigning a Parameter to a Controller” (p. 48). Knob parameters are valid only when the REALTIME CONTROL button is set to “ASSIGNABLE.” Knob Assign 1–4 (Realtime Control Knob Assign 1–4) Specify the functions that will be controlled by the [] knobs. Value CC01–31, 33–95: Controller numbers 1–31, 33–95 For more information about Control Change messages, please...
-
Page 52: Playing Percussion Instruments
Playing in Patch Mode Playing Percussion Instruments In Patch mode, you can play percussion instruments from the keyboard and pad by selecting a rhythm set. As the rhythm tone assigned to each key and pad varies by the rhythm set selected, you can play a wide range of percussion instruments. -
Page 53: Playing A Rhythm Set
Playing a Rhythm Set Press [PATCH/RHYTHM] to access the Patch Play screen, and then press [F6]. The Patch Play screen switches. Press [F7 (Part Kbd)] or [F8 (Part Pad)] to select the part. Select the rhythm set that you wish to play. Press a key or a pad on the keyboard to play a percussion instrument. -
Page 54: Playing In Piano Mode
• If you want to edit a patch, switch to Patch mode. • If you use a Hold pedal, we recommend that you use a Roland DP-8. If the DP-8 is used, you can control the amount of resonance by the depth to which you press the pedal. -
Page 55: Changing The Piano Sound (Open/Close)
Use the VALUE dial or [DEC][INC] to specify the desired touch. • Light: This sets the keyboard to a light touch. You can achieve fortissimo (ff) play with a less forceful touch than usual, so the keyboard feels lighter. This setting makes it easier for children, whose hands have less strength. -
Page 56: Creating A Patch
Creating a Patch With the Fantom-X, you have total control over a wide variety of settings. Each item that can be set is known as a parameter. When you change the values of parameters, you are doing what is referred to as Editing. -
Page 57: Editing In A Graphic Display (Zoom Edit)
Repeat steps 5-7 to set each parameter you want to edit. If you wish to save the changes you’ve made, press [WRITE] to perform the Save operation (p. 59). If you do not wish to save changes, press [EXIT] to return to the Patch Play screen. -
Page 58: Copying Patch (Tone) Settings (Copy)
Creating a Patch Copying Patch (Tone) Settings (Copy) This operation copies the settings of any desired patch to the currently selected patch. You can use this feature to make the editing process faster and easier. Press [PATCH/RHYTHM] to access the Patch Play screen, and select the part (keyboard part or pad part) that you want to edit and the copy-destination patch (p. -
Page 59: Saving Patches You've Created (Write)
Cautions When Using a Loop Waveform With many acoustic instruments such as piano and sax, extreme timbral changes occur during the first few moments of each note. This initial attack is what defines much of the instrument’s character. For such waveforms, it is best to use the complex tonal changes of the attack portion of the waveform just as they are, and to use the envelope only to modify the decay portion. -
Page 60: Auditioning The Save-Destination Patch (Compare)
Creating a Patch Turn the VALUE dial or use [INC][DEC] and [F2 (⇑)][F3 (⇓)] to select the write destination and patch number. The write destination can be either the Fantom-X’s internal user area (User), or a memory card (Card). By pressing [F6 (Compare)] you can check the save-destination patch (Compare function). -
Page 61: Patch Pan
Patch Category Specifies the type (category) of the patch. It also determines the phrase that will be sounded when using the Phrase Preview function. For details on the possible category names, refer to (p. 40). Patch Level Specifies the volume of the patch. Value: 0–127 Patch Pan Specifies the pan of the patch. -
Page 62: Modifying Waveforms (Wave)
Creating a Patch Resonance Offset Resonance Offset alters the resonance of the overall patch, while preserving the relative differences between the resonance values set for each tone in the Resonance parameter (p. 69). Range: -63– +63 * Resonance: emphasizes the overtones in the region of the cutoff frequency, adding character to the sound. -
Page 63: Changing How A Tone Is Sounded (Tmt)
Wave Gain Sets the gain (amplification) of the waveform. The value changes in 6 dB (decibel) steps—an increase of 6 dB doubles the waveform’s gain. If you intend to use the Booster to distort the waveform’s sound, set this parameter to its maximum value (p. 65). Value: -6, 0, +6, +12 Wave Tempo Sync When you wish to synchronize a Phrase Loop to the clock (tempo),... - Page 64 Creating a Patch fig.06-016 TYPE 3 TONE 1 (3) TONE 2 (4) This type mixes the sound of tone 1 (3) and tone 2 (4), applies a filter, and then applies a booster to distort the waveform. fig.06-017 TYPE 4 TONE 1 (3) TONE 2 (4) This type applies a booster to distort the waveform, and then...
- Page 65 Booster 1&2, 3&4 (Booster Gain) When a Structure Type of TYPE 3 or TYPE 4 is selected, you can adjust the depth of the booster. The booster increases the input signal in order to distort the sound. This creates the distortion effect frequently used with electric guitars.
-
Page 66: Key Fade Upper
Creating a Patch Key Fade Upper (Keyboard Fade Width Upper) This determines what will happen to the tone’s level when a note that’s higher than the tone’s specified keyboard range is played. Higher settings produce a more gradual change in volume. If you don’t want the tone to sound at all when a note below the keyboard range is played, set this parameter to “0.”... -
Page 67: Modifying Pitch (Pitch/Pitch Env)
Modifying Pitch (Pitch/Pitch Env) fig.06-029_50 For details on these settings, refer to “How to Make Patch Settings” (p. 56). Pitch Tone Coarse Tune ★ Adjusts the pitch of the tone’s sound up or down in semitone steps (+/-4 octaves). Value: -48– +48 Tone Fine Tune ★... -
Page 68: Pitch Env
Creating a Patch P-Env T4 V-Sens (Pitch Envelope Time 4 Velocity Sensitivity) Use this parameter when you want key release speed to affect the Time 4 value of the pitch envelope. If you want Time 4 to be speeded up for quickly released notes, set this parameter to a positive (+) value. -
Page 69: Modifying The Brightness Of A Sound With A Filter (Tvf/Tvf Env)
Modifying the Brightness of a Sound with a Filter (TVF/TVF Env) fig.06-033_50 For details on these settings, refer to “How to Make Patch Settings” (p. 56). Filter Type Selects the type of filter. A filter cuts or boosts a specific frequency region to change a sound's brightness, thickness, or other qualities. - Page 70 Creating a Patch Cutoff Key follow Use this parameter if you want the cutoff frequency to change according to the key that is pressed. Relative to the cutoff frequency at the C4 key (center C), positive (+) settings will cause the cutoff frequency to rise for notes higher than C4, and negative (-) settings will cause the cutoff frequency to fall for notes higher than C4.
-
Page 71: Adjusting The Volume (Tva/Tva Env)
TVF ENV F-Env Depth (TVF Envelope Depth) Specifies the depth of the TVF envelope. Higher settings will cause the TVF envelope to produce greater change. Negative (-) settings will invert the shape of the envelope. Value: -63– +63 F-Env Time KF (TVF Envelope Time Key Follow) Use this setting if you want the TVA envelope times (Time 2–Time 4) to be affected by the keyboard location. - Page 72 Creating a Patch Bias Bias causes the volume to be affected by the keyboard position. This is useful for changing volume through keyboard position (pitch) when playing acoustic instruments. fig.06-039.e LOWER UPPER Level Level – Bias Position LO&UP Level Level –...
-
Page 73: Output
A-Env T4 V-Sens (TVA Envelope Time 4 Velocity Sensitivity) The parameter to use when you want key release speed to control the Time 4 value of the TVA envelope. If you want Time 4 to be speeded up for quickly released notes, set this parameter to a positive (+) value. -
Page 74: Modulating Sounds (Lfo)
Creating a Patch Tone Out Level Set the level of the signal that is sent to the output destination specified by Tone Output Assign. Value: 0–127 Tone Chorus Send (Send Level (Output=MFX)) Specifies the level of the signal sent to the chorus for each tone if the tone is sent through MFX. - Page 75 Rate Detune (LFO1/LFO2 Rate Detune) LFO Rate Detune makes subtle changes in the LFO cycle rate (Rate parameter) each time a key is pressed. Higher settings will cause greater change. This parameter is invalid when Rate is set to “note.” Value: 0–127 Offset (LFO1/LFO2 Offset) Raises or lowers the LFO waveform relative to the central value...
-
Page 76: Step Lfo
Creating a Patch Pan Depth (LFO1/LFO2 Pan Depth) ★ Specifies how deeply the LFO will affect the pan. Value: -63– +63 Positive (+) and negative (-) settings for the Depth parameter result in differing kinds of change in pitch and volume. For example, if you set the Depth parameter to a positive (+) value for one tone, and set another tone to the same numerical value, but make it negative (-), the modulation phase for the two tones... -
Page 77: Apply Portamento Or Legato To The Sound (Solo/Porta)
Apply Portamento or Legato to the Sound (Solo/Porta) Solo/Portamento fig.06-047_50 For details on these settings, refer to “How to Make Patch Settings” (p. 56). Mono/Poly Specifies whether the patch will play polyphonically (POLY) or monophonically (MONO). The “MONO” setting is effective when playing a solo instrument patch such as sax or flute. -
Page 78: Miscellaneous Settings (Misc)
Creating a Patch Portamento Start When another key is pressed during a pitch change produced by portamento, a new pitch change will begin. This setting specifies the pitch at which the change will begin. Value PITCH: Starts a new portamento when another key is pressed while the pitch is changing. -
Page 79: Tone Delay Time
OFF-N: Rather than being played while the key is pressed, the tone begins to play once the period of time specified in the Delay Time parameter has elapsed after release of the key. This is effective in situations such as when simulating noises from guitars and other instruments. -
Page 80: Matrix Control Settings (Ctrl1-4)
Creating a Patch Tone Rx Pan Mode For each tone, specify how pan messages will be received. Value CONT: Whenever Pan messages are received, the stereo position of the tone will be changed. K-ON: The pan of the tone will be changed only when the next note is played. -
Page 81: Matrix Control 1–4 Source
Matrix Control 1–4 Source Sets the MIDI message used to change the tone parameter with the Matrix Control. Value OFF: Matrix control will not be used. CC01–31, 33–95: Controller numbers 1–31, 33–95 For more information about Control Change messages, please refer to “MIDI Implementation”... -
Page 82: Setting Effects For A Patch (Effects/Mfx/Mfx Control/Chorus/Reverb)
Creating a Patch Changing the TVF Envelope ● TVA ENV A-TIME: Changes the Env Time 1 parameter of the TVA envelope. TVA ENV D-TIME: Changes the Env Time 2 and Env Time 3 parameters of the TVA envelope. TVA ENV R-TIME: Changes the Env Time 4 parameter of the TVA envelope. -
Page 83: Creating A Rhythm Set
Creating a Rhythm Set With the Fantom-X, you have total control over a wide variety of settings. Each item that can be set is known as a parameter. When you change the values of parameters, you are doing what is referred to as Editing. -
Page 84: Editing In A Graphic Display (Zoom Edit)
Creating a Rhythm Set Editing in a Graphic Display (Zoom Edit) You can edit while viewing a graphic display of the most frequently used important parameters. Zoom Edit lets you edit the following parameters. Parameter page Pitch Envelope p. 91 p. -
Page 85: Cautions When Selecting A Waveform
Press [F5 (Tone Copy)]. The Rhythm Copy window appears. fig.07-003_50 Using [CURSOR] to move the cursor, select the “Source (copy-source)” bank and number, and the rhythm tone. Turn the VALUE dial or use [INC][DEC] to make the setting. Using [CURSOR] to move the cursor, select the “Destination (copy-destination)”... -
Page 86: Saving Rhythm Sets You've Created (Write)
Creating a Rhythm Set Saving Rhythm Sets You’ve Created (Write) Changes you make to sound settings are temporary, and will be lost if you turn off the power or select another sound. If you want to keep the modified sound, you must save it in the internal user memory or memory card. -
Page 87: Functions Of Rhythm Set Parameters
If you wish to change the save destination, re-specify the save-destination rhythm set by using Press [F7 (Write)]. Press [F8 (Exec)] once again to execute the Save operation. Functions of Rhythm Set Parameters This section explains the functions the different rhythm set parameters have, as well as the composition of these parameters. -
Page 88: Modifying Waveforms (Wave)
Creating a Rhythm Set Tone Pitch Bend Range (Rhythm Tone Pitch Bend Range) Specifies the amount of pitch change in semitones (4 octaves) that will occur when the Pitch Bend Lever is moved. The amount of change when the lever is tilted is set to the same value for both left and right sides. -
Page 89: Changing How A Rhythm Tone Is Sounded (Wmt)
Wave No. L (Mono) (Wave Number L (Mono)) Wave No. R (Wave Number R) This selects the Waves comprising the rhythm tone. Along with the Wave number, the Wave name appears at the lower part of the display. When in monaural mode, only the left side (L) is specified. When in stereo, the right side (R) is also specified. -
Page 90: Modifying Pitch (Pitch/Pitch Env)
Creating a Rhythm Set Wave Fine Tune Adjusts the pitch of the waveform’s sound up or down in 1-cent steps (+/-50 cents). Value: -50– +50 One cent is 1/100th of a semitone. The Fine Tune of the entire rhythm tone is set by the Tone Fine Tune parameter (p. -
Page 91: Tone Random Pitch Depth
Pitch Tone Coarse Tune (Rhythm Tone Coarse Tune) Selects the pitch at which a rhythm tone sounds. Value: C-1– G9 Set the coarse tuning for Waves comprising the rhythm tones with the Wave Coarse Tune parameter (p. 89). Tone Fine Tune (Rhythm Tone Fine Tune) Adjusts the pitch of the rhythm tone’s sound up or down in 1-cent steps (+/-50 cents). -
Page 92: Modifying The Brightness Of A Sound With A Filter (Tvf/Tvf Env)
Creating a Rhythm Set Modifying the Brightness of a Sound with a Filter (TVF/TVF Env) fig.07-012_50 For details on these settings, refer to “How to make Rhythm Set settings” (p. 83). Filter Type Selects the type of filter. A filter cuts or boosts a specific frequency region to change a sound's brightness, thickness, or other qualities. - Page 93 Cutoff V-Sens (Cutoff Velocity Sensitivity) Use this parameter when changing the cutoff frequency to be applied as a result of changes in playing velocity. If you want strongly played notes to raise the cutoff frequency, set this parameter to positive (+) settings. If you want strongly played notes to lower the cutoff frequency, use negative (-) settings.
-
Page 94: Adjusting The Volume (Tva/Tva Env)
Creating a Rhythm Set Adjusting the Volume (TVA/TVA Env) fig.07-013_50 For details on these settings, refer to “How to make Rhythm Set settings” (p. 83). Tone Level (Rhythm Tone level) Sets the volume of the rhythm tone. Use this parameter to adjust the volume balance between rhythm tones. -
Page 95: Output Settings (Output)
A-Env Level 1–3 (TVA Envelope Level 1–3) Specify the TVA envelope levels (Level 1–Level 3). These settings specify how the volume will change at each point, relative to the standard volume (the Rhythm Tone Level value specified in the TVA screen). -
Page 96: Setting Effects For A Rhythm Set (Effects/Mfx/Mfx Control/Chorus/Reverb)
Creating a Rhythm Set Tone Chorus Send (Send Level (Output=non MFX)) Sets the level of the signal sent to chorus for each tone if the tone is not sent through MFX. Value: 0–127 Tone Reverb Send (Send Level (Output=non MFX)) Sets the level of the signal sent to reverb for each tone if the tone is not sent through MFX. -
Page 97: Playing In Performance Mode
Playing in Performance Mode A performance contains settings that apply to each individual part, such as the patch (rhythm set) assigned to each part, and its volume and pan. Broadly speaking, Performance mode consists of two screens: Layer screen and Mixer screen. Use the Layer screen when you want to combine multiple sounds (patches or rhythm sets) to create complex sounds. -
Page 98: Functions In The Performance Layer/Mixer Screen
Playing in Performance Mode Functions in the PERFORMANCE Layer/Mixer Screen fig.08-002.e MIXER1 screen MIXER2 screen Indicates the current sound generating mode. Indicates the name of the currently selected song, the measure location, the time signature, and the sequencer status. Indicates the Octave Shift (Oct) and the Transpose (Trans). Indicates multi-effects (MFX), chorus (CHO), reverb (REV) and mastering (MASTER) on and off. -
Page 99: Selecting A Performance
Selecting a Performance The Fantom-X has two performance groups, including the User group and Preset groups, with each group storing 64 performances, for a total of 128 performances. USER This is the group inside the Fantom-X which can be rewritten. Performances you yourself create can be stored in this group. -
Page 100: Selecting Favorite Performances
Playing in Performance Mode Selecting Favorite Performances You can bring together your favorite and most frequently used performances in one place by registering them in the Favorite Performance. By using this function you can quickly select your favorite performances. For instructions on how to register to the Favorite Performance, refer to “Registering a Favorite Performance”... -
Page 101: Selecting The Part That You Want To Sound (Keyboard Switch)
Selecting the Part that You want to Sound (Keyboard Switch) Here's how to select the parts whose patch or rhythm set will sound. For each part, use the check box to specify whether that part will be played from the keyboard; this is called the “keyboard switch.” From the Layer screen, Use [CURSOR] to move the cursor to “KBD,”... -
Page 102: Combining And Playing Sounds Together (Layer)
Playing in Performance Mode Combining and Playing Sounds Together (Layer) In Performance mode you can play the sounds of all parts whose Internal Switch is on, and all connected parts. Combining the parts will produce, thicker, fatter sounds. fig.08-009.e Part 1 Part 2 (Rx ch.1) (Rx ch.2) -
Page 103: Using The Mixer Screen
Using the Mixer Screen Selecting Parts for a Layer or Split The currently selected part is called the “current part.” In the Mixer 2 screen, use fig.08-012 Current Part * Use [CURSOR] to move the “Part,” and turn VALUE dial or press [INC] [DEC] to select the part. -
Page 104: Editing The Part Settings
Playing in Performance Mode Selecting in the Mixer Screen Press [MIXER] to access the MIXER screen. to select a part. to move the cursor to the patch number. fig.08-014 Turn the VALUE dial or use [INC] [DEC] to select a patch. Selecting the Rhythm Set Press [MIXER] to access the MIXER screen. -
Page 105: Selecting A Part To Play Individually (Solo)
Selecting a Part to Play Individually (Solo) When playing back a song, you can choose to hear just a specific part play by itself. Press [MIXER] to access the Mixer screen. to move the cursor to the solo switch. Turn the VALUE dial or press [INC] or [DEC] to turn the SOLO switch on/off. -
Page 106: Viewing The Part Settings As A List (Performance Part View)
Playing in Performance Mode Viewing the Part Settings as a List (Performance Part View) In Performance mode you can view the part settings as a list. This is called the “Part View” screen. In this screen you can view a list that shows settings for all parts at once, such as the patch assigned to each part, and its volume and pan settings. -
Page 107: Creating A Performance
Creating a Performance With the Fantom-X, you have total control over a wide variety of settings. Each item that can be set is known as a parameter. When you change the values of parameters, you are doing what is referred to as Editing. - Page 108 Creating a Performance Part Level Adjust the volume of each part. This setting’s main purpose is to adjust the volume balance between parts. Value: 0–127 Part Pan Adjust the pan of each part. “L64” is far left, “0” is center, and “63R” is far right.
-
Page 109: Part Mono/Poly
[F3 (Pitch)] fig.09-003_50 For details on these settings, refer to “Adjusting the Parameters of Each Part” (p. 107). Part Octave Shift Adjusts the pitch of the part’s sound up or down in units of an octave (+/-3 octaves). Value: -3– +3 Note that when a rhythm set is assigned to a part, you cannot modify the Octave Shift parameter. -
Page 110: Part Release Time Offset
Creating a Performance [F4 (Offset)] fig.09-004_50 For details on these settings, refer to “Adjusting the Parameters of Each Part” (p. 107). Part Cutoff Offset Adjusts the cutoff frequency for the patch or rhythm set assigned to a part. Value: -64– +63 Patches also have a Cutoff Offset setting (p. -
Page 111: Keyboard Range Upper
Keyboard Range Upper (Part Keyboard Range Upper) Specifies the highest note that the tone will sound for each part. Value: LOWER–G9 When the Key Range (p. 65) is set for each individual tone in a patch, sounds are produced in the range where the Key Range of each tone and the Key Range for the part overlap. -
Page 112: Receive Switch
Creating a Performance Equal Temperament This tuning divides the octave into 12 equal parts, and is the most widely used method of temperament used in Western music. The Fantom-X employs equal temperament when the Scale Tune Switch is set to “OFF.” Just Temperament (Tonic of C) Compared with equal temperament, the principle triads sound pure in this tuning. -
Page 113: Midi Filter
Ext Pan (External Pan) If you want Pan messages to also be transmitted when you select a Performance, specify the desired value (L64–0–63R) for the part. If you do not want this message to be transmitted, set this to “OFF.” Value: L64–0–63R, OFF These messages will not be transmitted by parts whose Keyboard Switch is turned off. -
Page 114: Selecting The Parameter Controlled By The Realtime Controllers Or D Beam Controller (Control Setting)
Creating a Performance Selecting the Parameter Controlled by the Realtime Controllers or D Beam Controller (Control Setting) The Fantom-X lets you assign the parameters that will be affected when you operate the realtime control knobs, assignable switches, D Beam, pitch bend, or modulation lever. This lets you modify the sound in a variety of ways by operating the controllers. - Page 115 D Beam (Solo Synth) You can use the D Beam controller to perform in a way similar to on a mono synth. fig.09-014_50 For details on these settings, refer to “Selecting the Parameter Controlled by the Realtime Controllers or D Beam Controller (Control Setting)”...
- Page 116 Creating a Performance LFO Osc 2 Pitch Depth Specifies the depth to which the LFO will modulate the OSC2 pitch. Value: -63–+63 LFO Osc 1 Pulse Width Depth Specifies the depth to which the LFO will modulate the pulse width of the OSC1 waveform.
- Page 117 Knob fig.09-016_50 For details on these settings, refer to “Selecting the Parameter Controlled by the Realtime Controllers or D Beam Controller (Control Setting)” (p. 114). Knob parameters are valid only when the REALTIME CONTROL button is set to “ASSIGNABLE.” Knob Assign 1–4 (Realtime Control Knob Assign 1–4) Specify the functions that will be controlled by the [ Value...
-
Page 118: Control Switch Settings (Ctrl Switch)
Creating a Performance Tempo fig.09-018_50 For details on these settings, refer to “Selecting the Parameter Controlled by the Realtime Controllers or D Beam Controller (Control Setting)” (p. 114). Recommended Tempo If you want the sequencer tempo to change when you switch Performances, specify the tempo that will follow this change. -
Page 119: Changing The Settings Of The Patch Assigned To A Part
Control D Beam (Control D Beam Switch) Specifies whether each part will be controlled by the D Beam. Value: OFF, ON Control Knob (Control Knob Switch) Specifies whether each part will be controlled by the control knob. Value: OFF, ON Changing the Settings of the Patch Assigned to a Part When using patches in Performance mode, some settings such as... -
Page 120: Saving A Performance You've Created (Write)
Creating a Performance Saving a Performance You’ve Created (Write) Changes you make to sound settings are temporary, and will be lost if you turn off the power or select another sound. If you want to keep the modified sound, you must save it in the User area or a memory card. -
Page 121: Modifying The Sound In Real Time
Modifying the Sound in Real Time You can use the D Beam controller, realtime controllers, assignable switches or a pedal to modify the sound while you perform. Here we will explain the procedures and settings for using these functions in Patch mode. The operations are the same in Performance mode. -
Page 122: Making Settings For The D Beam Controller
Modifying the Sound in Real Time Making Settings for the D Beam Controller Assignable You can assign various functions to the D Beam controller and apply a wide range of effects to the sound in real time. Hold down [SHIFT] and press D BEAM [ASSIGNABLE]. The Assignable screen appears. - Page 123 Pad Control Mode This specifies how the D Beam will behave when it is obstructed. If this is set to MOMENTARY, the parameter will be on only while the D Beam is obstructed, and will turn off when you stop obstructing it. If this is set to LATCH, the parameter will alternately be switched on/off each time you obstruct the D Beam.
-
Page 124: Using Knobs Or Buttons To Modify The Sound (Realtime Controller)
Modifying the Sound in Real Time Resonance Emphasizes the portion of the sound in the region of the cutoff frequency, adding character to the sound. Excessively high settings can produce oscillation, causing the sound to distort. Value: 0–127 Level Sets the volume. Value: 0–127 Chorus Send Level Sets the level of the signal sent to chorus. -
Page 125: Changing Realtime Controller Settings
Changing Realtime Controller Settings Realtime Controller Knob Settings Hold down [SHIFT] and rotate one of the REALTIME CONTROL knobs. The Knob screen appears. fig.10-008_50 Move the cursor to the parameter that you want to set, and turn the VALUE dial or press [INC]/[DEC] to set it. If you want to save your settings, press [F8 (System Write)]. -
Page 126: Using A Pedal To Modify The Sound (Control Pedal)
If your pedal has an effect opposite of what you expect, set this parameter to “REVERSE.” If you are using a Roland pedal (that has no polarity switch), set this parameter to “STANDARD.”... - Page 127 Modifying the Sound in Real Time...
-
Page 128: Playing Arpeggios
Playing Arpeggios About Arpeggio The Fantom-X’s Arpeggio function lets you produce arpeggios automatically; simply hold down some keys, and a corresponding arpeggio will be played automatically. Not only can you use the factory-set Arpeggio Styles, which determine the way the arpeggio is played, but you can also freely rewrite Styles and enjoy performing your own original arpeggios. -
Page 129: Playing Arpeggios Along With The Sequencer
Connect an optional pedal switch (DP series etc.) to the HOLD PEDAL jack. Press [ARPEGGIO] to turn on the arpeggio. Play a chord while pressing the hold pedal. If you play a different chord or notes while the arpeggio is being held, the arpeggio will change accordingly. -
Page 130: Applying Staccato And Tenuto (Arp/Rhythm Duration)
Playing Arpeggios Applying Staccato and Tenuto (Arp/Rhythm Duration) This setting (duration) determines whether the sounds are played staccato (short and clipped), or tenuto (fully drawn out). * Grid settings are shared with the rhythm pattern. 30, 40, 50, 60, 70, 80, 90, 100, 120, Full Value: For example, when set to “30,”... -
Page 131: Hanging The Range Of The Arpeggio (Oct Range)
Hanging the Range of the Arpeggio (Oct Range) This adds an effect that shifts arpeggios one cycle at a time in octave units (octave range). You can set the shift range upwards or downwards (up to three octaves up or down). Value: -3–0–+3 You can also use a REALTIME CONTROL knob to control this. -
Page 132: Using The Dial Or [Inc][Dec] To Input Values
Playing Arpeggios Using the Dial or [INC][DEC] to Input Values In this method, you’ll use the cursor to specify the step or pitch that you want to input, and use the dial or [INC][DEC] to input values. This method is convenient when you want to edit or modify previously input data. -
Page 133: Using The Chord Memory Function (Chord Memory)
Using the Chord Memory Function (Chord Memory) About the Chord Memory Function Chord Memory is a function that allows you to play chords based on pre-programmed Chord Forms, just by pressing a single key on the keyboard. The Fantom-X can store 64 preset chord forms and 64 user chord forms. -
Page 134: Sounding A Chord In The Order Of Its Notes (Rolled Chord)
Using the Chord Memory Function (Chord Memory) Sounding a chord in the order of its notes (Rolled Chord) This causes the notes within a chord to be sounded consecutively, rather than simultaneously. Since the playback speed will change according to the force with which you play the keyboard, you can vary your playing dynamics to create a realistic simulation of playing a guitar. -
Page 135: Playing Rhythms
Playing Rhythms About Rhythm Patterns The Fantom-X contains 256 preset rhythm patterns. You can play a variety of rhythm patterns simply by pressing the pads. In addition to using these built-in rhythm patterns, you can also create your own. The 256 rhythm patterns are maintained as independent data; they are not part of a performance’s data. -
Page 136: Select The Rhythm Group
Playing Rhythms When you have made the setting, press [F8 (Close)]. Using a controller to adjust the playback tempo Since tempo control is assigned to one of the Fantom-X’s realtime control knobs, it’s easy to adjust the tempo at which the rhythm pattern will play back. -
Page 137: Changing The Beat And Shuffle (Grid)
Changing the Beat and Shuffle (Grid) This sets the particular note division and resolution in a “single grid” used in creating the pattern in an Rhythm Pattern, and how much of a “shuffle” syncopation is to be to applied (none/weak/ strong) to it (grid type). -
Page 138: Creating An Rhythm Pattern (Rhythm Pattern Edit)
Playing Rhythms Creating an Rhythm Pattern (Rhythm Pattern Edit) In addition to using the built-in Rhythm Patterns, you are free to create your own. After creating an original Rhythm Pattern, you can store it in the internal user memory. Broadly speaking, there are two ways to create an Rhythm Pattern. fig.11-007_50 Step-recording In this method, you use the keyboard and pads to step-record your... -
Page 139: Saving The Patterns You Have Created (Write)
Saving the Patterns You Have Created (Write) The rhythm patterns you create are temporary; they are deleted as soon as you turn off the power or select some other rhythm patterns. You can store 256 rhythm patterns in the User memory. Rhythm pattern settings are saved as independent data, not as part of the data for each patch. -
Page 140: Saving The Rhythm Group You Have Created (Write)
Playing Rhythms Saving the Rhythm Group You Have Created (Write) The Rhythm Group you create are temporary; they are deleted as soon as you turn off the power or select some other Style. You can store 32 Rhythm Groups in the User memory. Rhythm group settings are saved as independent data, not as part of the data for each patch. -
Page 141: Sampling
To turn it off, press [MIX IN] again. Making Input Source Settings (Input Setting) Connect your CD player, mic, or other audio source to the AUDIO INPUT jacks or to the DIGITAL IN connector located on the rear panel of the Fantom-X. -
Page 142: Input Effect Setup Settings
Sampling If you use AUDIO INPUT, turn the EXT SOURCE LEVEL knob to adjust the volume. * If you’re using DIGITAL IN, this adjustment is not necessary. fig.14-002 * If the volume of the external source is too high, the PEAK indicator will light. - Page 143 • Re-Sampling: [F2 (Re-Sampl)] Resample the sound of the internal sound generator. The sound of the external input will not be heard. * The volume of a phrase that you resample may be less than the volume of the original phrase. If necessary, execute the Normalize command (p.
-
Page 144: Dividing A Sample During Sampling
Sampling In the EXT SOURCE section of the panel, use LEVEL knob to adjust the input level of the external source. * If you’re using DIGITAL IN, this adjustment is not necessary. fig.14-002 * If the volume of the external source is too high, the PEAK indicator will light. -
Page 145: Sampling Earlier In Time (Skip Back Sampling)
Sampling Earlier in Time (Skip Back Sampling) Sometimes you may want to preserve a nice phrase that you happened to play a bit earlier. In such cases, you can use the Skip Back Sampling function to sample sounds that were played earlier in time. -
Page 146: Editing A Sample
Editing a Sample This section explains how you can edit a sample that you sampled/ imported Editing is performed in sample memory—a memory area dedicated to samples (p. 32). Selecting a Sample (Sample List) Select a sample from the list. Selecting a Sample Press [SAMPLE LIST]. -
Page 147: Loading A Sample
Loading a Sample Here’s how you can load a sample from the user area, a memory card, or a preset into sample memory. Press [SAMPLE LIST]. The Sample List display appears. From [F1 (Preset)]–[F3 (Card)], select the bank that contains the desired sample. -
Page 148: Importing An Audio File
Editing a Sample Importing an Audio File Here’s how an audio file (WAV/AIFF) can be loaded into memory as a sample. Place the audio files in the “TMP/AUDIO_IMPORT” folder on the user memory or memory card. For details on how you can use your computer to copy a file into the user area or memory card, refer to p. -
Page 149: Setting The Start/End Points Of The Sample
Setting the Start/End Points of the Sample You can specify the portion of the sample that will actually sound. You can also specify the region that is to be looped. Press [SAMPLE LIST] and select the sample that you want to edit (p. -
Page 150: Making Settings For Sample (Sample Parameters)
Editing a Sample Making Settings for Sample (Sample Parameters) Here you can make various settings for the sample. Press [SAMPLE LIST] and select the sample that you want to edit (p. 146). Press [SAMPLE EDIT] to access the Sample Edit screen, and press [F2 (Sample Param)]. -
Page 151: Assigning Samples To A Pad (Assign To Pad)
Assigning Samples to a Pad (Assign To Pad) Here’s how to assign samples as the rhythm tones of a rhythm set. For example, you can create an original rhythm set by replacing certain tones of a preset rhythm set with different samples. * From the Sample List screen you can also press [F7 (Load Utility)]->... -
Page 152: Assigning A Sample As A Patch To A Part (Assign To Keyboard)
Editing a Sample Assigning a Sample as a Patch to a Part (Assign to Keyboard) Here’s how you can use the currently selected sample to create a patch, and assign it to a keyboard part. * From the Sample List screen you can also press [F7 (Load Utility)]-> [F2 (Assign to Pad)] to execute Assign To Pad. -
Page 153: Creating A Multisample (Create Multisample)
Press [F7 (Load Utility)], and then press [F4 (Create Rhythm)]. The Create Rhythm window will appear. Patch Mode fig.15-013_50 Performance Mode fig.15-014_50 Either turn the VALUE dial or use [INC] [DEC] to select the part that you want to assign. Press [F8 (Select)]. - Page 154 Editing a Sample Press [SAMPLE LIST] to access the Sample List screen, and select the sample(s) that you want to include in your new multisample. If you want to select two or more samples from the sample list, press [F5 (Mark Set)] to add a check mark (✔) to each sample. Pressing [F4 (Mark Clear)] will clear the check mark.
-
Page 155: Unloading A Sample (Unload)
When you’ve finished setting the Original Key of all samples, create the multisample as described in “Creating a Multisample (Create Multisample)” (p. 153). Unloading a Sample (Unload) In the Sample Edit screen you can press [F1 (Unload)] to unload the currently selected sample and return to the previous screen. -
Page 156: Maximizing The Volume Of A Sample (Normalize)
Editing a Sample Maximizing the Volume of a Sample (Normalize) This operation raises the level of the entire sample as much as possible without exceeding the maximum level. In some cases, the volume of a phrase you resampled (p. 143) will be lower than the volume of the original phrase. -
Page 157: Dividing A Sample Into Notes (Chop)
Press [F5 (Time Strtch)]. fig.15-020_50 Press to select the parameter. • Edit Time Stretch BPM: Change the BPM of the sample to the BPM you specify. Time: Specify the length of the sample as a time value. Rate: Specify the length relative to the current length of the sample. -
Page 158: Joining Two Or More Samples (Combine)
Editing a Sample Automatically Dividing a Sample (Auto Chop) Here’s how you can automatically specify the points at which the sample is to be divided, and then divide the sample. From step 3 of p. 157, press [F6 (Auto Chop)]. The Auto Chop sub-window will appear. -
Page 159: Saving A Sample
Either turn the VALUE dial or use [INC][DEC] to set the value. • 1–16: The sample or silence to be combined • TYPE Value Sample: sample, Time: silent region (specified as time), Beat: silent region (specified as a note value) •... -
Page 160: Using The Pads
Using the Pads The pads of the Fantom-X function in the same way as the keyboard, and can also be used to play RPS and rhythm patterns. You can add dynamics to the sound by varying the force with which you strike the pads. -
Page 161: Making Settings For The Pads (Pad Setting)
Making Settings for the Pads (Pad Setting) Here you can make various settings for playing the pads; e.g., the note number that each pad will send to the sound generator section, the pad sensitivity, and the aftertouch sensitivity. Press [PAD SETTING]. The Pad Setting screen will appear. -
Page 162: Writing The Pad Settings
Using the Pads Setting the Velocity for All Sixteen Pads at Once Use this when you want to specify a common velocity for all sixteen pads. However if the pad velocity setting (of each pad) is set to other than Common, those settings will be used. •... -
Page 163: Assigning A Pattern To A Pad (Rps Function)
Assigning a Pattern to a Pad (RPS Function) The Fantom-X lets you assign a previously recorded phrase to a pad as a pattern, and play it by pressing that pad. For details, refer to (“Playing a Phrase at the Touch of a Finger (RPS Function)” (p. 203). -
Page 164: Playing Back A Song
Playing Back a Song This chapter explains how you can use the Fantom-X’s sequencer to play back a song. When you play back a song, we recommend that you use the sound generator in Performance mode. In Performance mode, up to sixteen different sounds can be played separately by the sixteen parts, making this mode ideal for playing songs that are multi-instrument ensembles of drums, bass, piano, etc. -
Page 165: Various Playback Methods
Press [PLAY] to start Chain Play. Starting from the song of step 1. If you want to stop playback before it is finished, press [STOP]. If you want to begin playback from midway through the chain, to move to the desired step, and then press [PLAY]. -
Page 166: Changing The Playback Tempo Of A Song
Playing Back a Song Changing the Playback Tempo of a Song The tempo at which a song will play back is recorded on its tempo track, but the tempo of the entire song can be adjusted during playback. The tempo at which the song actually plays is called the playback tempo. -
Page 167: Using The D Beam Controller To Start/Stop Song Playback
Using the D Beam Controller to Start/Stop Song Playback You can start/stop song playback by passing your hand over the D Beam controller. Select the song that you want to play back (p. 164). Hold down [SHIFT] and press D BEAM [ASSIGNABLE]. The D Beam Assignable screen appears. -
Page 168: Recording Songs
Recording Songs This chapter explains the procedure for using the Fantom-X’s sequencer to record a song. Before you begin this procedure, put the sound generator in Performance mode. Normally, when recording or playing back a song, you will put the sound generator in Performance mode. -
Page 169: Specify The Time Signature
Specify the Time Signature Before you record a new song, you must specify the time signature. However, a time signature of 4/4 is automatically specified when you perform the Song Initialize operation or when the power is turned on, so you will need to make this setting only if you want to record a new song in a different time signature. -
Page 170: Recording Your Performance As You Play It (Realtime Recording)
Recording Songs Recording Your Performance as You Play It (Realtime Recording) Realtime Recording is the recording method in which your keyboard playing and controller operations are recorded just as you perform them. Use this recording method when you want to capture the nuances of your own performance. -
Page 171: Recording Tempo Changes In A Song (Tempo Recording)
Recording Tempo Changes in a Song (Tempo Recording) If you want the tempo to change during the song, you can record those tempo changes in the Tempo track. If tempo changes have already been recorded in the tempo track, they will be rewritten. Set the following recording parameters in addition to the basic settings described in step 3 of “Basic Operation for Realtime Recording”... -
Page 172: Correct The Timing Of Your Playing As You Record (Recording Quantize)
Recording Songs Correct the Timing of Your Playing as You Record (Recording Quantize) The Quantize function automatically corrects inaccuracies in the timing of your keyboard or pad performance, aligning the notes to accurate timing intervals. During realtime recording, you can quantize while you record. -
Page 173: Erasing Unwanted Data While You Record (Realtime Erase)
Turn the VALUE dial or press [INC]/[DEC] to add a check mark. The message will be recorded if you assign a check mark (✔), and will not be recorded if you remove the check mark. If you press [F6 (All Off)], no sequencer data will be recorded. If you press [F7 (All On)], all of the sequencer data will be recorded. -
Page 174: Inputting Data One Step At A Time (Step Recording)
Recording Songs Inputting Data One Step at a Time (Step Recording) Step Recording is the method of inputting notes and rests individually, as if you were writing them onto a musical staff. In addition to inputting notes, this method can also be used to create a song by joining patterns. - Page 175 • Step Back Cancel the previously input note. • Tie Extend the length of the previously input note by the current setting. • Rest Inputs a rest. First set the Note Type parameter to a length that is the same as the rest you want to input, and then press [F3 (Rest)].
-
Page 176: Assigning A Pattern To A Phrase Track
Recording Songs Assigning a Pattern to a Phrase Track You can create a song by combining previously recorded patterns. This is done using step recording to assign patterns to a phrase track. However, please be aware that the patterns themselves are not placed in the phrase track. -
Page 177: Editing Songs
Editing Songs This chapter explains the procedure for editing songs. Loading the Song You Want to Edit When you edit a song, you’re modifying a song that’s already recorded into Temporary Song. When you’re going to edit a song saved to user memory or memory card, you have to first load it into the Temporary Area. -
Page 178: Viewing The Data Within A Track
Editing Songs Viewing the data within a track The Fantom-X can record data for multiple MIDI channels in a single track. From the Song Edit screen, press [F6 (Track View)] to see which channel(s) of data are found in each track. This screen graphically shows the note data of each channel. -
Page 179: Assigning Markers (Locate Positions) To A Song
Turn the VALUE dial or press [DEC] to select “MUTE.” Note that if you save a song with a Phrase track muted in the Standard MIDI File format, that Phrase track’s data will not be saved. If you save a song that has a muted Phrase track in the MRC Pro song format, the mute status of the track will also be saved. -
Page 180: Editing Sequencer Data Over The Specified Range (Track Edit)
Editing Songs Editing Sequencer Data Over the Specified Range (Track Edit) Track Edit lets you edit areas of sequencer data that you specify. Basic Operation for Track Editing Access the Song Edit screen, and then load the song you want to edit (p. 177). While editing a pattern, press [SONG EDIT] and then press [F2 (PTN)] to access the Pattern Edit screen. -
Page 181: Aligning A Song's Timing (Quantize)
Aligning a Song’s Timing (Quantize) In the chapter “Recording Songs” (p. 168), we explained Recording Quantize, which lets you quantize during realtime recording. Alternatively, it is also possible to quantize a song that has already been recorded. The Fantom-X has a Preview function that allows playing back the results of a Quantize operation while you are still setting parameters (before actual execution). - Page 182 Editing Songs Rate (Shuffle Quantize Rate) This parameter is used when Shuffle Quantize is selected. Specifies how far apart you want a down-beat specified by the Shuffle Resolution parameter to be from the up-beat that immediately follows. By shifting the timing of an up-beat, you can create a “swing”...
-
Page 183: Erasing Unwanted Performance Data (Erase)
Range Min, Range Max Specifies the range of note numbers to be quantized. For example, if you want to quantize the range between C3 and C4, set “Note Min” to “C3,” and set “Note Max” to “C4.” You can also specify the key range by pressing keys on the keyboard. -
Page 184: Deleting Unwanted Measures (Delete)
Editing Songs Deleting Unwanted Measures (Delete) This function deletes a specified area of sequencer data, and moves the subsequent data to fill the gap. As a result, the measure length will be shortened by the number of deleted measures. fig.19-012_50 For details on the settings, refer to “Basic Operation for Track Editing”... -
Page 185: Inserting A Blank Measure (Insert)
Status Selects the type of data to be copied. Value NOTE Poly Aftertouch Control Change Program Change Channel Aftertouch Pitch Bend System Exclusive Tune Request Pattern Call If the source track is set to “TEMPO,” the Status parameter will not be available. Range Min, Range Max If you have selected “NOTE,”... -
Page 186: Changing The Velocity (Volume) (Change Velocity)
Editing Songs Range Min, Range Max Specifies the range of note numbers to be transposed. For example, if you want to transpose notes in the range of C3 through C4, set “Range Min” to “C3” and “Range Max” to “C4.” You can also specify the key range by pressing keys on the keyboard. -
Page 187: Modifying The Length Of Notes (Change Duration)
Measure, For (Edit Range) Specifies the range of measures in which the MIDI channel will be changed. If you set “For” to “ALL,” all measures will be specified. Status Selects the type of data for which you wish to change the MIDI channel. -
Page 188: Combining Two Phrase Tracks Or Patterns Into One (Merge)
Editing Songs Combining Two Phrase Tracks or Patterns into One (Merge) The sequencer data of two phrase tracks or patterns will be combined into one. fig.19-019_50 For details on the settings, refer to “Basic Operation for Track Editing” (p. 180) Src Track / Src Pattern (Source Track) Specifies the phrase track or pattern that is to be merged. -
Page 189: Shifting Performance Data Forward And Back (Shift Clock)
Extract Mode Specifies whether you want to keep the sequencer data at the destination. Value MIX: The data at the destination will combine with the extracted data. REPLACE: The data at the destination will be erased and replaced by the extracted data. If you select “REPLACE,”... -
Page 190: Thinning Out The Sequencer Data (Data Thin)
Editing Songs Bias Specify the amount (number of ticks) by which the sequencer data will be moved. Value: -4800– +4800 Status Selects the type of data to be shifted in time. Value NOTE Polyphonic Aftertouch Control Change Program Change Channel Aftertouch Pitch Bend System Exclusive Tune Request... -
Page 191: Swapping Two Phrase Tracks Or Patterns (Exchange)
Status Selects the type of data to be thinned. Value Polyphonic Aftertouch Control Change Channel Aftertouch Pitch Bend Range Min, Range Max If you set the Status parameter to “P.AFT” or “C.C,” specify the range of data. Set “Range Min” to the lowest value of the range, and “Range Max”... -
Page 192: Editing Individual Items Of Sequencer Data (Micro Edit)
Editing Songs Editing Individual Items of Sequencer Data (Micro Edit) Micro Edit lets you edit individual items of sequencer data recorded in a song, such as MIDI messages and tempo data. Editing Sequencer Data (Basic Procedure in the Microscope) Access the Microscope screen when you want to view the sequencer data recorded in a song. -
Page 193: Sequencer Data Handled By A Phrase Track/Pattern
Microscope screen, press [EXIT]. • In the case of a Roland type IV system exclusive message, the checksum can be calculated automatically when you finalize the values. If you do not want to calculate the checksum automatically, press [F1 (Auto Sum)] to turn off the light. -
Page 194: Viewing Sequencer Data (View)
Editing Songs Data Handled by the Beat Track The Beat track records time signature data. Beat Change This specifies the time signature (Beat). Viewing Sequencer Data (View) Since a phrase track or pattern contains a large amount of sequencer data, the display may be cluttered and difficult to read. For this reason, the Fantom-X lets you specify the type(s) of sequencer data that will be displayed in the screen. -
Page 195: Erasing Sequencer Data (Erase)
Erasing Sequencer Data (Erase) If desired, you can erase just an individual event of sequencer data. You can also use the same operation to erase individual items of data from the tempo track or beat track. It is not possible to erase the tempo change located at the beginning of the tempo track, the beat change located at the beginning of the beat track, or the pattern beat. -
Page 196: Changing The Tempo Midway Through The Song
Editing Songs Changing the Tempo Midway Through the Song If you want to change the tempo midway through the song, insert a new Tempo Change into the tempo track. The song will play back at that tempo following the location at which the tempo change was inserted. -
Page 197: Assigning A Name To A Song (Song Name)
Assigning a Name to a Song (Song Name) You can assign a song name to a song, or edit the song name. This song name is independent of the file name assigned when saving a song to user memory or memory card. Although you are not required to assign a song name, you can assign one using up to 15 characters, and you may find it a convenient way to store a title or memo that will help you organize your songs. -
Page 198: Saving/Loading A Song (Save/Load)
Saving/Loading a song (Save/Load) Songs you record are initially held in Temporary Area. A song in Temporary Area will be lost when you turn off the power or when you load a different song. If you want to keep the song, you must save it to user memory or a memory card. -
Page 199: Saving A Song With Samples (Save Song+Samples)
* When samples are saved, they will automatically be overwritten onto the same numbers of the same bank in the sample list. The samples will be saved with a file name of “smpl****.wav (aif)” in the “Roland/Smpl folder” of user memory or memory card. The number of the file name will correspond to the number in the sample list. -
Page 200: Saving Samples (Save All Samples)
Saving/Loading a song (Save/Load) Press [F1 (User)] (User memory) or [F2 (Card)] (Memory card) to select the location where you want to save the song. If you decide to cancel, press [F7 (Cancel)]. Press [F8 (Save)]. A screen will ask you for confirmation. If you decide to cancel, press [F7 (Cancel)]. -
Page 201: Loading A Song (Load)
If you assign a file name that is identical to one already existing in the user area or the memory card, a message of “File “****” Already Exists! Over Write OK?” will ask you for confirmation when you attempt to save the file. If it is OK to overwrite the existing file, press [F8 (OK)]. -
Page 202: Loading A Song (Load Song)
Saving/Loading a song (Save/Load) Loading a song (Load Song) Here’s how you can load a song into Temporary Area. From the Save/Load Menu screen, press [F6 (Load Song)]. fig.20-007_50 * By pressing in the above screen, you can specify the type of songs that will be displayed. -
Page 203: Playing A Phrase At The Touch Of A Finger (Rps Function)
Pattern parameter, Playback Mode parameter, and Mute Group parameter are set for each key. Although the Fantom-X6 has a 61-note keyboard and the Fantom-X7 has a 76-note keyboard, you can also make settings for all keys in the range of E0 to G9. -
Page 204: Using The Rps Function While You Perform
Playing a Phrase at the Touch of a Finger (RPS Function) • Velocity Sens (Velocity Sensitivity) Turn this “OFF” if you want the pattern to play back at the volume at which it was recorded. If you want to vary the pattern playback volume according to the strength with which you pressed the key, select either “LOW,”... -
Page 205: Recording A Performance Using The Rps Function
Recording a Performance Using the RPS Function A performance that uses the RPS function can be recorded in real time in the same way as a conventional performance. This provides an easy way to remix patterns and create a song. If you use the RPS function during realtime recording, the pattern performance will be recorded just as it occurs. -
Page 206: Adding Effects
Adding Effects This section explains the procedures and settings for applying effects in each mode. For details of the Fantom-X’s onboard effects, refer to “About the Onboard Effects” (p. 29). Turning Effects On and Off The Fantom-X’s onboard effects can be turned on/off as a whole. Turn these settings OFF when you wish to listen to the unprocessed sound as you create a sound, or when you wish to use external effects processors instead of the built-in effects. -
Page 207: Applying Effects In Patch Mode
Applying Effects in Patch Mode In Patch mode you can use two multi-effects (MFX1, MFX2), one chorus, and one reverb. Multi-effect 1 (MFX1) will operate according to the effect settings of the patch or rhythm set assigned to the Keyboard part. Multi-effect 2 (MFX2) will operate according to the effect settings of the patch or rhythm set assigned to the Pad part. - Page 208 Adding Effects Tone Output Assign Specifies how the direct sound of each tone will be output. Value: Output in stereo through multi-effects. You can also MFX: apply chorus or reverb to the sound that passes through multi-effects. A, B: Output to the OUTPUT A (MIX) jack or OUTPUT B jack in stereo without passing through multi-effects.
-
Page 209: Reverb Type
Chorus Output Select Specifies how the sound routed through chorus will be output. Value Output to the OUTPUT jacks in stereo. MAIN: Output to reverb in mono. REV: M+R: Output to the OUTPUT jacks in stereo, and to reverb in mono. When set to “MAIN”... -
Page 210: Applying Effects In Performance Mode
Adding Effects Applying Effects in Performance Mode In Performance mode you can use three multi-effects (MFX1, MFX2, MFX3), one chorus, and one reverb. For each of the three multi- effects, the chorus, and the reverb, you can specify whether it will operate according to the effect settings of the performance, or according to the effect settings of the patch or rhythm set assigned to the part you specify. -
Page 211: Chorus Output Select
Part Reverb Send Level Sets the level of the signal sent to reverb for each part. Value: 0–127 For the following parameters – individually for three systems multi-effects (MFX1–MFX3). MFX Type (Multi-Effects Type) Use this parameter to select from among the 78 available multi- effects. - Page 212 Adding Effects Reverb Type Selects the type of reverb. Value 0 (Off): Reverb is not used. Normal reverb 1 (Reverb): 2 (SRV Room): This reverb simulates typical room acoustic reflections. 3 (SRV Hall): This reverb simulates typical concert hall acoustic reflections. This reverb simulates a reverb plate, a 4 (SRV Plate): popular type of artificial reverb unit that...
-
Page 213: Making Multi-Effects Settings (Mfx1-3)
Making Multi-Effects Settings (MFX1–3) Here we will explain how to make multi-effects settings in Performance mode. fig.22-008_50 Each time you press the [F3 (MFX1/2/3)] button, it will alternate between 1, 2, and 3. For details on these settings, refer to “Making Effect Settings” (p. -
Page 214: Multi-Effects Control
Adding Effects Destination 1–4 (Multi-Effects Control Destination 1–4) Sets the multi-effects parameters to be controlled with the multi- effects control. The multi-effects parameters available for control will depend on the multi-effects type. For details, refer to “Multi-Effects Parameter” (p. 270). Sens 1–4 (Multi-Effects Control Sensitivity 1–4) Sets the amount of the multi-effects control’s effect that is applied. -
Page 215: Specifying The Multi-Effect Structure (Mfx Structure)
Specifying the multi-effect structure (MFX Structure) Here’s how to specify how MFX 1–3 will be connected. * This parameter is not found in Patch mode. fig.22-010_50 For details on these settings, refer to “Making Effect Settings” (p. 206) Structure Type Specify how MFX1–3 will be connected. -
Page 216: Making Reverb Settings (Reverb)
Adding Effects Making Reverb Settings (Reverb) Here we will explain how to make reverb settings in Performance mode. The procedure is the same when making settings in Patch mode. fig.22-012_50 For details on these settings, refer to “Making Effect Settings” (p. -
Page 217: Mastering Effect
Mastering Effect This is a stereo compressor (limiter) that is applied to the final output of the Fantom-X. It has independent high, mid, and low ranges. Independently for the high-frequency, mid-frequency, and low-frequency regions, this compresses any sounds that exceed the specified level, making the volume more consistent. -
Page 218: Connecting To Your Computer Via Usb (Usb Mode)
Connecting to Your Computer via USB (USB Mode) About USB Functions The Fantom-X has two modes of USB functionality: storage mode for transferring files, and MIDI mode for sending and receiving MIDI messages. You must switch between these two modes on the Fantom-X;... -
Page 219: Transferring Files To Or From Your Computer (Storage Mode)
Windows Me/2000 users A drive named “Removable disk” will be displayed within My Computer. Below that drive there will be folders named “ROLAND” and “TMP.” • Macintosh, Windows XP users A drive icon named “FANX USER” will appear on the desktop. -
Page 220: Macintosh Users
TMP/TEXT folder Then import the text file. • Do not use your USB-connected computer to delete or rewrite any files placed in the ROLAND/SND folder. Exiting Storage Mode Windows Me/2000/XP Users In My Computer, right-click the “removable hard disk” icon and execute “Remove.”... - Page 221 “.TXT”. Place the text file you created in step 1 in the following location of the Fantom-X. • Windows Me/2000/XP users Removable Disk/ROLAND/SNG folder • Macintosh users FANX USER/ROLAND/SNG folder * “/” indicates the levels of the directory structure.
-
Page 222: Exchanging Midi Messages With Your Computer (Midi Mode)
Connecting to Your Computer via USB (USB Mode) Exchanging MIDI Messages with Your Computer (MIDI Mode) Driver Installation and Settings In order to use the Fantom-X as a USB MIDI device from your computer, you must first install the USB MIDI driver. The USB MIDI driver is on the included “Fantom-X Driver CD-ROM.”... -
Page 223: File-Related Functions (File Utility)
• The Fantom-X can only handle filenames consisting of single-byte alphanumeric characters. • Don’t use your computer to delete or overwrite the files located in the ROLAND/SND folder. When copying files from your computer into the Fantom-X’s user area or memory card, place them in the following folders. -
Page 224: Copying A File (Copy)
File-Related Functions (File Utility) Copying a File (Copy) Here’s how you can copy a file to a different folder. As described in the basic procedure, select the file that you want to copy. [F1 (User)] [F2 (Card)]: Select the memory Select the folder Move between folder levels Press [F8 (Copy)]. -
Page 225: Settings Common To All Modes (System Function)
Settings Common to All Modes (System Function) Settings that affect the entire operating environment of the Fantom- X, such as tuning and MIDI message reception, are referred to as system functions. This section explains how to make settings for the System functions and describes the functions of the different System parameters. -
Page 226: Functions Of System Parameters
If your pedal has an effect opposite of what you expect, set this parameter to “REVERSE.” If you are using a Roland pedal (that has no polarity switch), set this parameter to “STANDARD.”... -
Page 227: Sync/Temp
MMC Output (MMC Output Switch) Turn this “ON” if you want to synchronize with a hard disk recorder, such as one from the Roland VS series. When set “ON,” MMC (MIDI Machine Control) related commands (Play, Stop and Locate) will be transmitted. -
Page 228: Metronome
Settings Common to All Modes (System Function) Types of MTC The types of MTC that can be selected by the Fantom-X are shown below. Select the same frame rate as that set for the external device. When not using a video device, then any frame rate may be selected as long as the rates are the same on both devices being synchronized. -
Page 229: Sound
Sound Local Switch The Local Switch determines whether the internal sound generator is disconnected (OFF) from the controller section (keyboard, Pad, pitch bend/modulation lever, knobs, buttons, D Beam controller, pedal, and so on); or not disconnected (ON). Normally this is left “ON,” but if you wish to use the Fantom-X’s keyboard and controllers to control only external sound modules, set it to “OFF.”... -
Page 230: Midi
Settings Common to All Modes (System Function) Output Gain This adjusts the output gain from the Fantom-X’s Analog Out and Digital Out. When, for example, there are relatively few voices being sounded, boosting the output gain can let you attain the most suitable output level for recording and other purposes. -
Page 231: Usb
Soft Through (Soft Through Switch) Thru function re-transmits all messages received at the MIDI IN connector to the MIDI OUT connector without modifying them in any way. Value: OFF, ON Remote Keyboard Sw (Remote Keyboard Switch) Set this parameter “ON” when you want to use an external MIDI keyboard instead of the Fantom-X’s keyboard. -
Page 232: Scale Tune
Settings Common to All Modes (System Function) Scale Tune Scale Tune Switch Turn this on when you wish to use a tuning scale other than equal temperament. Value: OFF, ON One set of Scale Tune settings can be created in Patch mode. In Performance mode, this can be set for each part of the performance (p. -
Page 233: System Ctrl
System Ctrl Sys Ctrl 1–4 Source System Control Assign selects the MIDI message used as the System Control. System Control This function, which departs from previously used methods, and instead allows you to use MIDI messages to change tone settings in realtime, is called the Matrix Control (p. 80). Similarly, the function allowing you to use MIDI messages to change multi-effects settings in realtime is called the Multi- effects Control (p. -
Page 234: Start Up
Settings Common to All Modes (System Function) Start up Load Preset Samples at Startup Specifies whether the preset samples will be loaded into memory at power-on (ON) or not (OFF). Value: OFF, ON Load User Samples at Startup Specifies whether the samples of the user area and memory card will be loaded into memory at power-on (ON) or not (OFF). -
Page 235: Data Management Functions Reset To Default Factory Settings (Factory Reset)
* To cancel, press [F7 (Cancel)]. Fantom-X backup data must not be used to perform a Restore into other models in the Fantom-X series (i.e., models other than the Fantom-X6/X7/X8). Restoring User Data that You Backed Up (User Restore) Here’s how user data saved on a memory card by the User Backup operation can be reloaded back into the user memory of the Fantom-X. -
Page 236: Using Fantom-X Editor
Using Fantom-X Editor To help you take even greater advantage of its functionality, the Fantom-X comes with Fantom-X Editor software. Fantom-X Editor assigns parameters to sliders and knobs in the computer screen, allowing you to work efficiently in a graphical editing environment. Installing Fantom-X Editor into Your Computer Detailed instructions on installing the software can be found in the... -
Page 237: Fantom-X Editor System Requirements
Fantom-X Editor System Requirements System Requirements (Windows) • Operating System Microsoft® Windows® XP Microsoft® Windows® Me Microsoft® Windows® 2000 Professional Microsoft® Windows® 98 • CPU/Clock Pentium®/Celeron™ processor 400 MHz or higher Pentium® III 500 MHz or higher (recommended) • Memory (RAM) 128 M bytes or more 256 M bytes or more (recommended) •... -
Page 238: About V-Link
About V-LINK What is V-LINK? V-LINK ( ) is a function that allows music and images to be performed together. By using MIDI to connect two or more V-LINK compatible devices, you can easily enjoy performing a wide range of visual effects that are linked to the expressive elements of a music performance. -
Page 239: V-Link Parameters
V-LINK Parameters Note Tx Ch Value: 1-16 MIDI channel that will switch Edirol DV-7PR clips/palettes and will control dissolve time. Clip 1 Note No. Pads 1–16 correspond to Edirol DV-7PR clips (or palettes). We recommend that you press [PAD SETTING] to access the Pad setting screen, and set to “Note,”... -
Page 240: Installing The Wave Expansion Board
• Use a Phillips screwdriver that is suitable for the size of the screw (a number 2 screwdriver, Fantom-X6/X7 only). If an unsuitable screwdriver is used, the head of the screw may be stripped. -
Page 241: Checking The Installed Wave Expansion Boards
fig.30-004 There are four slots inside. As shown in the following illustration, plug the connector of the Wave Expansion Board into the connector of the relevant slot, and at the same time insert the board holder through the hole of the Wave Expansion Board. -
Page 242: Installation De La Carte D'expansion Wave
Sur les modèles Fantom-X, retirer uniquement les vis illustrées dans le schéma ci-dessous et retirer le couvercle. Sur le modèle Fantom-X6/X7, le couvercle est situé sur le panneau inférieur. Sur le modèle Fantom-X8, il est placé sur le panneau avant. -
Page 243: Vérification Des Cartes D'extension Audio Aprés Installation
fig.30-004 Il y a quatre emplacements à l’intérieur. Comme le montre l’illustration ci-dessous, branchez le connecteur de la carte d’expansion Wave dans la fente appropriée et, en même temps, insérez le support de carte de circuits imprimés dans l’ouverture de la carte d’expansion Wave. fig.30-005.f Carte d’extension Wave (serie SRX) Support à... -
Page 244: Expanding The Memory
• Use a Phillips screwdriver that is suitable for the size of the screw (a number 2 screwdriver, Fantom-X6/X7 only). If an unsuitable screwdriver is used, the head of the screw may be stripped. -
Page 245: Removing The Memory
Paying attention to the location of the notch on the memory module and the orientation, insert it vertically within the guides at either side of the socket. fig.31-004 If you have difficulty inserting the memory module, try tilting it a bit and inserting one end at a time. Move the white clips upward, and press them until the memory module is locked in place. -
Page 246: Ajouter De La Mémoire
Sur les modèles Fantom-X, retirer uniquement les vis illustrées dans le schéma ci-dessous et retirer le couvercle. Sur le modèle Fantom-X6/X7, le couvercle est situé sur le panneau inférieur. Sur le modèle Fantom-X8, il est placé sur le panneau avant. -
Page 247: Retrait Du Module De Mémoire
Prenez bien note de l’emplacement et de l’orientation de l’encoche du module de mémoire et insérez-le verticalement à l’intérieur des guides qui se trouvent de chaque côté de la prise. fig.31-004 * Si vous éprouvez de la difficulté à insérer le module de mémoire, inclinez-le légèrement et insérez une extrémité... -
Page 248: Using A Memory Card
Using a Memory Card The Fantom-X features a PC card slot, allowing you to use not only PC card type memory cards, but also other types of media, such as CompactFlash and Smart Media, via the appropriate PC card adaptor. Before Using the Memory Card Make sure that the correct side of the card is facing upward, and... -
Page 249: Troubleshooting
If the Fantom-X does not function in the way you expect, first check the following points. If this does not resolve the problem, consult your dealer or a nearby Roland Service Station. * If any sort of message is being displayed on the screen during an operation, refer to Error Messages (p. - Page 250 Troubleshooting The sound is interrupted. Sounds will be interrupted if more than 128 voices are used simultaneously. • Reduce the number of Tones that you are using. • Increase the Voice Reserve setting for parts that must not drop out. (p. 111) When I play the keyboard, notes do not stop.
-
Page 251: Issues Related To Effects
Issues Related to Effects Effects not applied. Check the following points. • The “MFX,” “CHO,” “REV” or “MASTER” effect switches located in the upper part of the PLAY screen may have been turned off. Press [EFFECTS]/[F8 (Effect Sw)] to turn them on. •... -
Page 252: Issues Related To Sequencer
Troubleshooting Issues Related to Sequencer Song data does not play back correctly Check the following points. • Has the Receive General MIDI/General MIDI 2 System On Switch been turned ON? Set the Rx GM System ON/Rx GM2 System ON parameter (SYSTEM/MIDI) to “ON”... -
Page 253: Issues Related To Midi And External Devices
• Is the data concentrated at the beginning of the beats in the sequence data? Avoid overlapping data with the same timing by setting an offset of 1–2 clocks instead. Data may easily become concentrated at the beginning of the beats in the song data when, for example, the song data is input using Step Recording, or if the data is quantized after being input with a keyboard in real time. -
Page 254: Issues Related To Sampling
• An audio cable may be broken. • Could you be using an audio cable with a built-in resistor? Use a connection cable that does not contain a resistor (e.g., Roland PCS series). External input sound is not stereo/is not monaural Check the following points. -
Page 255: Parameter List
Parameter List Patch Parameter General Group (P.60) Parameter Patch Name * Specify when writing. Patch Category Patch Level Patch Pan Patch Priority Octave Shift Patch Coarse Tune Patch Fine Tune Stretch Tune Depth Analog Feel Analog Feel Depth Cutoff Offset Resonance Offset Attack Time Offset Release Time Offset... - Page 256 Parameter List Pitch Group (P.67) Parameter Tone Coarse Tune Tone Fine Tune Random Pitch Depth Pitch Key Follow Bend Range Up Pitch Bend Range Up Bend Range Down Pitch Bend Range Down P-Env V-Sens Pitch Envelope Velocity Sensitivity P-Env T1 V-Sens Pitch Envelope Time 1 Velocity Sensitivity P-Env T4 V-Sens Pitch Envelope Time 4 Velocity Sensitivity...
- Page 257 TVA Env Group (P.72) Parameter A-Env T1 V-Sens TVA Envelope Time 1 Velocity Sensitivity A-Env T4 V-Sens TVA Envelope Time 4 Velocity Sensitivity A-Env Time KF TVA Envelope Time Key Follow A-Env Time1–4 TVA Envelope Time 1–4 A-Env Level1–3 TVA Envelope Level 1–3 Output Group (P.73) Parameter Patch Out Assign...
- Page 258 Parameter List Misc Group (P.78) Parameter Tone Delay Mode Tone Delay Time Tone Env Mode Tone Rx Bender Tone Receive Pitch Bend Switch Tone Rx Expression Tone Receive Expression Switch Tone Rx Hold-1 Tone Receive Hold Switch Tone Rx Pan Mode Tone Receive Pan Mode Tone Redamper Sw Tone Redamper Switch...
-
Page 259: Rhythm Set Parameter
Rhythm Set Parameter General Group (P.87) Parameter Rhythm Set Name * Specify when writing. Rhythm Tone Name Rhythm Level Rhythm Set Level Assign Type Mute Group Tone Env Mode Rhythm Tone Envelope Mode Tone Pitch Bend Range Rhythm Tone Pitch Bend Range Tone Receive Expression Rhythm Tone Receive Expression Switch Tone Receive Hold-1... - Page 260 Parameter List Pitch Env Group (P.91) Parameter P-Env Depth Pitch Envelope Depth P-Env V-Sens Pitch Envelope Velocity Sensitivity P-Env T1 V-Sens Pitch Envelope Time 1 Velocity Sensitivity P-Env T4 V-Sens Pitch Envelope Time 4 Velocity Sensitivity P-Env Time1–4 Pitch Envelope Time 1–4 P-Env Level 0–4 Pitch Envelope Level 0–4 TVF Group (P.92)
- Page 261 Effect Group (P.207) Parameter Type Multi-Effects Type MFX Output Level Multi-Effects Output Level MFX Chorus Send Level Multi-Effects Chorus Send Level MFX Reverb Send Level Multi-Effects Reverb Send Level MFX Output Assign Multi-Effects Output Assign Source 1–4 Multi-Effects Control Source 1–4 Destination 1–4 Multi-Effects Control Destination 1–4 Sens 1–4...
-
Page 262: Performance Parameter
Parameter List Performance Parameter General Group (P.120) Parameter Performance Name * Specify when writing. Part View Group (P.107) Parameter [F1 (Level/Pan)] Patch Type Patch Bank Patch Number Keyboard Switch Solo Switch Mute Switch Part Level Part Pan [F2 (Output Effect)] Part Output Assign Part Output MFX Select Part Output Level... - Page 263 Parameter [F8 (MIDI Filter)] Program Change Receive Program Change Switch Bank Select Receive Bank Select Switch Pitch Bend Receive Pitch Bend Switch Polyphonic Key Pressure Receive Polyphonic Key Pressure Switch Channel Pressure Receive Channel Pressure Switch Modulation Receive Modulation Switch Volume Receive Volume Switch Receive Pan Switch...
- Page 264 Parameter List Arpeggio Group (P.128) Parameter Arp Switch Arpeggio Switch Arp Grid Arpeggio Grid Arp Duration Arpeggio Duration Arpeggio Switch Arpeggio Hold Arpeggio Style Arpeggio Motif Arpeggio Velocity Arpeggio Part Arpeggio Octave Range Arpeggio Accent Rate Rhythm Group (P.135) Parameter Rhy Switch Rhythm Switch Rhythm Pattern Grid...
-
Page 265: Rhythm Group Parameter
Rhythm Group Parameter Rhythm Group Group (P.139) Parameter Recommended Rhy Recommended Rhythm Set Pad Mode Rhy Ptn Number Rhythm Pattern Number Rhy Ptn Velocity Rhythm Pattern Velocity Pad Note Pad Velocity Sample Parameters Sample Group (P.150) Parameter Sample Name Loop Mode Loop Tune Original Key tempo... -
Page 266: System Parameters
Parameter List System Parameters Pedal/D Beam Group (P.226) Parameter D Beam Sens D Beam Sensitivity Control Pedal Assign Control Pedal Polarity Hold Pedal Polarity Continuous Hold Pedal Keyboard Group (P.226) Parameter Keyboard Velocity Keyboard Sens Keyboard Sensitivity Aftertouch Sens Aftertouch Sensitivity Sync/Tempo Group (P.227) Parameter Sync Mode... - Page 267 MIDI Group (P.230) Parameter Device ID Device ID Number Performance Control Channel Kbd Patch Rx/Tx Ch Keyboard Patch Receive/Transmit Channel Pad Patch Rx/Tx Ch Pad Patch Receive/Transmit Channel Transmit Program Change Transmit Program Change Switch Transmit Bank Select Transmit Bank Select Switch Transmit Active Sensing Transmit Active Sensing Switch Transmit Edit Data...
- Page 268 Parameter List Startup Group (P.234) Parameter Load Preset Samples at Startup Load User Samples at Startup Load Demo Song at Startup Rec Track Sellect Power Up Mode System Information Group (P.234) Parameter Features Displays the main features of the Fantom-X. Memory Info Memory Information SRX Info...
- Page 269 V-LINK Group (P.239) Parameter Note Tx Ch Note Transmit Channel Clip 1 Note No. Clip 1 Note Number Play Speed Ctrl Play Speed Control Dissolve Time Ctrl Tx Ch Control Transmit Channel Color Cb Ctrl Color Cb Control Color Cr Ctrl Color Cr Control Brightness Ctrl Brightness Control...
-
Page 270: Effects List
Effects List Multi-Effects Parameter The multi-effects feature 78 different kinds of effects. Some of the effects consist of two or more different effects connected in series. Parameters marked with a sharp “#” can be controlled using a specified controller (Two setting items will change simultaneously for “#1”... - Page 271 01: EQUALIZER This is a four-band stereo equalizer (low, mid x 2, high). fig.MFX-01 L in 4-Band EQ R in 4-Band EQ Parameter Value Low Freq 200, 400 Hz Low Gain # -15– +15 dB Mid1 Freq 200–8000 Hz Mid1 Gain -15–...
- Page 272 Effects List 05: SUPER FILTER This is a filter with an extremely sharp slope. The cutoff frequency can be varied cyclically. fig.MFX-05 L in Super Filter R in Super Filter Parameter Value Description Filter Type LPF, BPF, Filter type HPF, NOTCH Frequency range that will pass through each filter LPF: frequencies below the cutoff...
- Page 273 08: AUTO WAH Cyclically controls a filter to create cyclic change in timbre. fig.MFX-08 L in Auto Wah 2-Band EQ R in Auto Wah 2-Band EQ Parameter Value Description Filter Type LPF, BPF Type of filter LPF: The wah effect will be applied over a wide frequency range.
- Page 274 Effects List 11: PHASER A phase-shifted sound is added to the original sound and modulated. fig.MFX-11 L in Phaser R in Phaser Parameter Value Description Mode 4-STAGE, 8- Number of stages in the phaser STAGE, 12-STAGE Manual # 0–127 Adjusts the basic frequency from which the sound will be modu- lated.
- Page 275 15: RING MODULATOR This is an effect that applies amplitude modulation (AM) to the input signal, producing bell-like sounds. You can also change the modulation frequency in response to changes in the volume of the sound sent into the effect. fig.MFX-15 L in Ring Mod...
- Page 276 Effects List 20: SLICER By applying successive cuts to the sound, this effect turns a conventional sound into a sound that appears to be played as a backing phrase. This is especially effective when applied to sustain- type sounds. fig.MFX-20 L in Slicer R in...
- Page 277 23: CHORUS This is a stereo chorus. A filter is provided so that you can adjust the timbre of the chorus sound. fig.MFX-23 Balance D L in Balance W Chorus Balance W Chorus R in Balance D Parameter Value Description Filter Type OFF, LPF, HPF Type of filter...
- Page 278 Effects List 26: HEXA-CHORUS Uses a six-phase chorus (six layers of chorused sound) to give richness and spatial spread to the sound. fig.MFX-26 L in Balance D Balance W Hexa Chorus Balance W R in Balance D Parameter Value Description Pre Delay 0.0–100.0 ms Adjusts the delay time from the...
- Page 279 30: 3D FLANGER This applies a 3D effect to the flanger sound. The flanger sound will be positioned 90 degrees left and 90 degrees right. fig.MFX-30 3D Flanger Parameter Value Description Filter Type OFF, LPF, HPF Type of filter Cutoff Freq 200–8000 Hz Basic frequency of the filter Pre Delay...
- Page 280 Effects List 33: 2BAND FLANGER A flanger that lets you apply an effect independently to the low- frequency and high-frequency ranges. fig.MFX-33 L in High Band Flanger Split High Band Feedback Low Band Flanger Low Band Feedback High Band Feedback High Band Flanger Low Band Feedback Split...
- Page 281 35: OVERDRIVE Creates a soft distortion similar to that produced by vacuum tube amplifiers. fig.MFX-35 L in Over 2-Band drive Simulator R in Parameter Value Description Drive # 0–127 Degree of distortion Also changes the volume. Amp Type SMALL, Type of guitar amp BUILT-IN, SMALL: small amp 2-STACK,...
- Page 282 Effects List 40: COMPRESSOR Flattens out high levels and boosts low levels, smoothing out fluctuations in volume. fig.MFX-40 L in Compressor 2-Band EQ R in Compressor 2-Band EQ Parameter Value Description Attack # 0–127 Sets the speed at which compression starts Threshold # 0–127...
- Page 283 44: LONG DELAY A delay that provides a long delay time. fig.MFX-44 L in Long Delay Feedback R in Parameter Range Explanation Delay Time 0–2600 ms, note Delay time from when the original sound is heard to when the delay sound is heard Phase NORMAL, INVERSE...
- Page 284 Effects List 47: 3TAP PAN DELAY Produces three delay sounds; center, left and right. fig.MFX-47 Balance D L in Left Tap Triple Tap Delay Center Tap Feedback Right Tap R in Balance D Parameter Value Description Delay Left/ 0–2600 ms, Adjusts the time until the delay sound Right/Center note...
- Page 285 Parameter Range Explanation Delay 3 Feed- -98– +98% Proportion of the delay sound back # that is to be returned to the in- put of the tap delay (negative values invert the phase) Delay HF 200–8000 Hz, BY- Frequency at which the low- Damp PASS frequency content of the tap...
- Page 286 (D) and the delay sound (W) Level 0–127 Output level 55: TAPE ECHO A virtual tape echo that produces a realistic tape delay sound. This simulates the tape echo section of a Roland RE-201 Space Echo. fig.MFX-55 L in Direct Level Echo Level Tape Echo...
- Page 287 57: LOFI COMPRESS This is an effect that intentionally degrades the sound quality for creative purposes. fig.MFX-57 L in Compressor Lo-Fi R in Compressor Lo-Fi Parameter Value Description Pre Filter 1–6 Selects the type of filter applied to the Type sound before it passes through the Lo-Fi effect.
- Page 288 Effects List 61: PITCH SHIFTER (Feedback Pitch Shifter) A stereo pitch shifter. fig.MFX-61 L in Pitch Shifter Pitch Shifter R in Parameter Value Description Coarse #1 -24– +12 semi Adjusts the pitch of the pitch shifted sound in semitone steps. Fine #1 -100–...
- Page 289 Parameter Value Description Type ROOM1, Type of reverb ROOM2, ROOM1: dense reverb with STAGE1, short decay STAGE2, ROOM2: sparse reverb with HALL1, HALL2 short decay STAGE1: reverb with greater late reverberation STAGE2: reverb with strong early reflections HALL1: reverb with clear rever- berance HALL2: reverb with rich rever- berance...
- Page 290 Effects List 68: OVERDRIVE → DELAY fig.MFX-68 L in Balance D Overdrive Delay Feedback R in Balance D Parameter Value Description Overdrive 0–127 Degree of distortion Drive # Overdrive Pan # L64–63R Stereo location of the over- drive sound Delay Time 0–2600 ms, note Adjusts the delay time from the direct sound until the de-...
- Page 291 74: ENHANCER → DELAY fig.MFX-74 L in Enhancer Feedback R in Enhancer Parameter Value Enhancer Sens # 0–127 Enhancer Mix # 0–127 Delay Time 0–2600 ms, note Delay -98– +98 % Feedback # Delay HF Damp 200–8000 Hz, BYPASS Delay Balance # D100:0W–D0:100W Level 0–127...
- Page 292 EQ High Freq EQ High Gain Level When Using 3D Effects The following 3D effects utilize RSS (Roland Sound Space) technology to create a spaciousness that cannot be produced by delay, reverb, chorus, etc. 52: 3D DELAY 29: 3D CHORUS...
-
Page 293: Chorus Parameters
About the STEP RESET function 06: STEP FILTER 16: STEP RING MODULATOR 19: STEP PAN 20: SLICER 63: STEP PITCH SHIFTER The above five types contain a sixteen-step sequencer. For these types, you can use a multi-effect control to reset the sequence to play from the first step. -
Page 294: Reverb Parameters
Effects List Reverb Parameters These settings allow you to select the desired type of reverb, and its characteristics. Parameter Value Description Reverb 0 (OFF), Type of reverb Type 1 (REVERB), 0 (OFF): Reverb is not used. 2 (SRV ROOM), 1 (REVERB): Normal reverb 3 (SRV HALL), 2 (SRV ROOM): This simulates typical 4 (SRV PLATE),... - Page 295 05: NOISE SUPPRESSOR Suppresses noise during periods of silence. Parameter Range Explanation Threshold 0–127 Volume at which noise suppres- sion will begin Release 0–127 Time from when noise suppres- sion begins until the volume reaches zero. 06: CENTER CANCELER Removes the sounds that are localized at the center of the stereo input.
-
Page 296: Error Messages
— Please perform the Factory Reset operation. If this does not resolve the problem, please contact your dealer or the nearest Roland Service Center. Delete unneeded data. Check that the MIDI cable has not been disconnect- ed or broken. -
Page 297: About Midi
About MIDI MIDI (Musical Instruments Digital Interface) is a standard specification that allows musical data to be exchanged between electronic musical instruments and computers. MIDI With a MIDI cable connecting MIDI devices that are equipped with MIDI connectors, you can play multiple instruments with a single keyboard, have multiple MIDI instruments perform in ensemble, program the settings to change automatically to match the performance as the song progresses, and more. -
Page 298: Midi Implementation
MIDI Implementation 1. Receive Data (Sound Source Section) ■Channel Voice Messages * Not received in Performance mode when the Receive Switch parameter (PERFORM/ MIDI) is OFF. ●Note off Status 2nd byte 3rd byte n = MIDI channel number: 0H - FH (ch.1 - 16) kk = note number: 00H - 7FH (0 - 127) vv = note off velocity:... - Page 299 ❍Hold 1 (Controller number 64) Status 2nd byte 3rd byte n = MIDI channel number: 0H - FH (ch.1 - 16) vv = Control value: 00H - 7FH (0 - 127) 0-63 = OFF, 64-127 = ON * Not received when Tone Receive Hold-1 parameter (PATCH/MISC or RHYTHM/ GENERAL) is OFF.
- Page 300 MIDI Implementation ❍Portamento control (Controller number 84) Status 2nd byte 3rd byte n = MIDI channel number: 0H - FH (ch.1 - 16) kk = source note number: 00H - 7FH (0 - 127) * A Note-on received immediately after a Portamento Control message will change continuously in pitch, starting from the pitch of the Source Note Number.
- Page 301 = ID number: an ID number (manufacturer ID) to indicate the manufacturer whose Exclusive message this is. Roland’s manufacturer ID is 41H. ID numbers 7EH and 7FH are extensions of the MIDI standard; Universal Non-realtime Messages (7EH) and Universal Realtime Messages (7FH).
- Page 302 MIDI Implementation ❍GM System Off Status Data byte Status 7EH, 7F, 09H, 02H Byte Explanation Exclusive status ID number (Universal Non-realtime Message) Device ID (Broadcast) Sub ID#1 (General MIDI Message) Sub ID#2 (General MIDI Off) EOX (End Of Exclusive) * When this messages is received, this instrument will return to the Performance mode. ●Universal Realtime System Exclusive Messages ❍Master Volume Status...
- Page 303 41H, dev, 00H, 6BH, 11H, aaH, bbH, ccH, F7H ddH, ssH, ttH, uuH, vvH, sum Remarks Exclusive status ID number (Roland) device ID (dev: 10H - 1FH, 7FH) model ID #1 (Fantom-X6/X7/X8) model ID #2 (Fantom-X6/X7/X8) command ID (RQ1) address MSB address address...
- Page 304 Byte Explanation Exclusive status ID number (Roland) Device ID (dev: 00H - 1FH, 7FH) Model ID #1 (Fantom-X6/X7/X8) Model ID #2 (Fantom-X6/X7/X8) Command ID (DT1) Address MSB: upper byte of the starting address of the data to be sent Address:...
- Page 305 ❍Volume (Controller number 7) Status 2nd byte 3rd byte n = MIDI channel number: 0H - FH (ch.1 - 16) vv = Volume: 00H - 7FH (0 - 127) * In Performance mode, these messages are not transmitted when External Level parameter (PERFORMANCE/PART) is OFF.
- Page 306 Universal Non-realtime System Exclusive Message” and Data Set 1 (DT1) are the only System Exclusive messages transmitted by the Fantom-X. ●Universal Non-realtime System Exclusive Message ❍Identity Reply Message (Fantom-X6) Receiving Identity Request Message, the Fantom-X6 send this message. Status Data byte 7EH, dev, 06H, 02H, 41H, 6BH, 01H,...
- Page 307 3. Data reception (Sequencer Section) 3.1 Messages recorded during recording ■Channel Voice Messages ●Note Off Status 2nd byte 3rd byte n=MIDI channel number: 0H - FH (ch.1 - ch.16) kk=note number: 00H - 7FH (0 - 127) vv=note off velocity: 00H - 7FH (0 - 127) * Not received when the Note parameter (Recording Select window) is OFF.
- Page 308 This is the ID number (manufacturer ID) that specifies the manufacturer whose exclusive message this is. Roland’s manufacturer ID is 41H. ID numbers 7EH and 7FH are defined in an expansion of the MIDI standard as Universal Non-real-time messages (7EH) and Universal Realtime Messages (7FH).
- Page 309 ■System Realtime Messages ●Timing Clock Status * Received when Sync Mode parameter (System/Sync/Tempo) is set to SLAVE-MIDI. ●Start Status * Received when Sync Mode parameter (System/Sync/Tempo) is set to SLAVE-MIDI or REMOTE. ●Continue Status * Received when Sync Mode parameter (System/Sync/Tempo) is set to SLAVE-MIDI or REMOTE.
- Page 310 MIDI Implementation 4. Data transmission (Sequencer Section) 4.1 Messages transmitted during playing Recorded messages are transmitted during playback. 4.2 Soft Thru setting Messages (except System Common and System Realtime Messages) that are received are then sent out when Soft Thru parameter (System/Sync/Tempo) is switched to ON. 4.3 Messages that are generated and transmitted 4.3.1 Messages Appearing When Synchronizing with Other Devices...
- Page 311 * Transmission of “#” marked address is divided to some packets. For example, ABH in hexadecimal notation will be divided to 0AH and 0BH, and is sent/received in this order. * “<*>” marked address or parameters are ignored when the Fantom-X6/X7/X8 received them.
- Page 312 MIDI Implementation 00 04 | 00aa aaaa | Master Key Shift 00 05 | 0aaa aaaa | Master Level 00 06 | 0000 000a | Scale Tune Switch 00 07 | 0000 000a | Patch Remain 00 08 | 0000 000a | Mix/Parallel |—————————————+———————————+————————————————————————————————————————————————————| 00 09 | 000a aaaa | Performance Control Channel 00 0A | 0000 aaaa | Kbd Patch Rx/Tx Channel...
- Page 313 00 06 | 0000 000a | Continuous Hold Pedal |—————————————+———————————+————————————————————————————————————————————————————| 00 07 | 0aaa aaaa | Pedal Assign START/STOP, PUNCH-I/O, TAP-TEMPO, | 00 08 | 0000 0aaa | Pedal Polarity |—————————————+———————————+————————————————————————————————————————————————————| 00 09 | 0000 aaaa | Beam Sens 00 0A | 0aaa aaaa | Beam Assign ARP-OCT-UP, ARP-OCT-DW, ARP-STEP, | 00 0B | 0aaa aaaa | Beam Range Lower 00 0C | 0aaa aaaa | Beam Range Upper...
- Page 314 MIDI Implementation 00 36 | 00aa aaaa | MFX3 Control Channel 00 37 | 0000 aaaa | MFX Structure |—————————————+————————————————————————————————————————————————————————————————| | 00 00 00 38 | Total Size +——————————————————————————————————————————————————————————————————————————————+ ❍Performance Common MFX +——————————————————————————————————————————————————————————————————————————————+ | Offset Address | Description |—————————————+————————————————————————————————————————————————————————————————| 00 00 | 0aaa aaaa | MFX Type 00 01 | 0aaa aaaa | MFX Dry Send Level 00 02 | 0aaa aaaa | MFX Chorus Send Level 00 03 | 0aaa aaaa | MFX Reverb Send Level...
- Page 315 | 0000 cccc | | 0000 dddd | Chorus Parameter 10 00 2C | 0000 aaaa | | 0000 bbbb | | 0000 cccc | | 0000 dddd | Chorus Parameter 11 00 30 | 0000 aaaa | | 0000 bbbb | | 0000 cccc | | 0000 dddd | Chorus Parameter 12 00 34 | 0000 aaaa |...
- Page 316 MIDI Implementation |—————————————+———————————+————————————————————————————————————————————————————| 00 22 | 0aaa aaaa | Part Vibrato Rate (CC# 76) 00 23 | 0aaa aaaa | Part Vibrato Depth (CC# 77) 00 24 | 0aaa aaaa | Part Vibrato Delay (CC# 78) |—————————————+———————————+————————————————————————————————————————————————————| 00 25 | 0aaa aaaa | Part Scale Tune for C 00 26 | 0aaa aaaa | Part Scale Tune for C# 00 27 | 0aaa aaaa | Part Scale Tune for D 00 28 | 0aaa aaaa | Part Scale Tune for D#...
- Page 317 00 54 | 0000 aaaa | | 0000 bbbb | Recommended Tempo |—————————————+———————————+————————————————————————————————————————————————————| 00 56 | 0000 000a | Rolled Chord 00 57 | 0000 00aa | Rolled Chord Type |—————————————+————————————————————————————————————————————————————————————————| | 00 00 00 58 | Total Size +——————————————————————————————————————————————————————————————————————————————+ ❍Arpeggio Common +——————————————————————————————————————————————————————————————————————————————+ | Offset...
- Page 318 MIDI Implementation 00 45 | 0000 000a | Chord Note70 00 46 | 0000 000a | Chord Note71 00 47 | 0000 000a | Chord Note72 00 48 | 0000 000a | Chord Note73 00 49 | 0000 000a | Chord Note74 00 4A | 0000 000a | Chord Note75 00 4B | 0000 000a | Chord Note76 00 4C | 0000 000a | Chord Note77...
- Page 319 00 41 | 0000 aaaa | | 0000 bbbb | Pad 8 Rhythm Pattern Number 00 43 | 0aaa aaaa | Pad 9 Mode 00 44 | 0aaa aaaa | Pad 9 Note Number 00 45 | 0aaa aaaa | Pad 9 Velocity 00 46 | 0000 000a | Pad 9 Rhythm Pattern Group 00 47 | 0000 aaaa | | 0000 bbbb | Pad 9 Rhythm Pattern Number...
- Page 320 MIDI Implementation 00 3A | 0aaa aaaa | Matrix Control 2 Sens 3 00 3B | 00aa aaaa | Matrix Control 2 Destination 4 PAN-LFO2, LFO1-RATE, LFO2-RATE, | TMT, FXM, MFX1, MFX2, MFX3, MFX4, | 00 3C | 0aaa aaaa | Matrix Control 2 Sens 4 |—————————————+———————————+————————————————————————————————————————————————————| 00 3D | 0aaa aaaa | Matrix Control 3 Source OFF, CC01 - CC31, CC33 - CC95, |...
- Page 321 00 61 | 0000 aaaa | | 0000 bbbb | | 0000 cccc | | 0000 dddd | MFX Parameter 21 00 65 | 0000 aaaa | | 0000 bbbb | | 0000 cccc | | 0000 dddd | MFX Parameter 22 00 69 | 0000 aaaa | | 0000 bbbb | | 0000 cccc |...
- Page 322 MIDI Implementation | 0000 dddd | Reverb Parameter 17 00 47 | 0000 aaaa | | 0000 bbbb | | 0000 cccc | | 0000 dddd | Reverb Parameter 18 00 4B | 0000 aaaa | | 0000 bbbb | | 0000 cccc | | 0000 dddd | Reverb Parameter 19 00 4F | 0000 aaaa |...
- Page 323 |—————————————+———————————+————————————————————————————————————————————————————| 00 5E | 000a aaaa | Bias Level 00 5F | 0aaa aaaa | Bias Position 00 60 | 0000 00aa | Bias Direction LOWER, UPPER, LOWER&UPPER, ALL 00 61 | 0000 0aaa | TVA Level Velocity Curve 00 62 | 0aaa aaaa | TVA Level Velocity Sens 00 63 | 0aaa aaaa | TVA Env Time 1 Velocity Sens 00 64 | 0aaa aaaa | TVA Env Time 4 Velocity Sens 00 65 | 000a aaaa | TVA Env Time Keyfollow...
- Page 324 MIDI Implementation 00 4D | 0000 aaaa | | 0000 bbbb | | 0000 cccc | | 0000 dddd | MFX Parameter 16 00 51 | 0000 aaaa | | 0000 bbbb | | 0000 cccc | | 0000 dddd | MFX Parameter 17 00 55 | 0000 aaaa | | 0000 bbbb | | 0000 cccc |...
- Page 325 | 0000 dddd | Reverb Parameter 12 00 33 | 0000 aaaa | | 0000 bbbb | | 0000 cccc | | 0000 dddd | Reverb Parameter 13 00 37 | 0000 aaaa | | 0000 bbbb | | 0000 cccc | | 0000 dddd | Reverb Parameter 14 00 3B | 0000 aaaa | | 0000 bbbb |...
-
Page 326: System Parameter
MIDI Implementation 01 07 | 0000 000a | WMT4 Wave FXM Switch 01 08 | 0000 00aa | WMT4 Wave FXM Color 01 09 | 000a aaaa | WMT4 Wave FXM Depth 01 0A | 0000 000a | WMT4 Wave Tempo Sync 01 0B | 0aaa aaaa | WMT4 Wave Coarse Tune 01 0C | 0aaa aaaa | WMT4 Wave Fine Tune 01 0D | 0aaa aaaa | WMT4 Wave Pan... - Page 327 40 1x 47 | 0aaa aaaa | Scale Tuning G 40 1x 48 | 0aaa aaaa | Scale Tuning G# 40 1x 49 | 0aaa aaaa | Scale Tuning A 40 1x 4A | 0aaa aaaa | Scale Tuning A# 40 1x 4B | 0aaa aaaa | Scale Tuning B |—————————————+———————————+————————————————————————————————————————————————————| 40 2x 00 | 0aaa aaaa | Mod Pitch Control...
- Page 328 MIDI Implementation 6. Supplementary Material ■Decimal and Hexadecimal Table (An “H” is appended to the end of numbers in hexadecimal notation.) In MIDI documentation, data values and addresses/sizes of Exclusive messages, etc. are expressed as hexadecimal values for each 7 bits. The following table shows how these correspond to decimal numbers.
- Page 329 ■Example of an Exclusive Message and Calculating a Checksum Roland Exclusive messages (RQ1, DT1) are transmitted with a checksum at the end (before F7) to make sure that the message was correctly received. The value of the checksum is determined by the address and data (or size) of the transmitted Exclusive message.
-
Page 330: Rhythm Set
MIDI Implementation <Bank Select and Program Change Correspondence Chart> Patch Group USER CARD PR-A PR-B PR-C PR-D PR-E PR-F PR-G PR-H GM(2) XP-A XP-B XP-C XP-D * The XP groups vary depending on the Wave Expansion Board(s) you’ve installed. For information about an SRX series board, refer to the Owner’s Manual that came with it. - Page 331 (Sound Generator Section) MIDI Implementation Chart Model Fantom-X6/X7/X8 Function... Basic Default 1–16 Channel Changed 1–16 Default Mode 3 Mode Messages Mono, Poly Altered ************** Note 0–127 Number : True Voice ************** Note On Velocity Note Off After Key's Touch Channel's...
-
Page 332: Sequencer Section
(Sequencer Section) Model Fantom-X6/X7/X8 Function... Basic Default Channel Changed Default Mode Messages Altered Note Number : True Voice Note On Velocity Note Off After Key's Touch Channel's Pitch Bend 0–119 Control Change Program : True Number Change System Exclusive : Quarter Frames... -
Page 333: Specifications
Specifications Fantom-X6/X7/X8: Synthesizer Keyboard (Conforms to General MIDI 2 System) Keyboard [X6] 61 keys (with velocity and channel aftertouch) [X7] 76 keys (with velocity and channel aftertouch) [X8] 88 keys (Progressive Hammer action Mechanism and channel aftertouch) Sound Generator Section... -
Page 334: Power Supply
Specifications Chord Memory Preset: User: Display Graphic 320 x 240 dots backlit LCD (Color) Pads 16 pads, Velocity and Aftertouch sensitive Controllers Pitch Bend/Modulation Lever Control Knob x 4 Assignable Switch x 2 D Beam Controller Connectors Headphones Jack A (MIX) Output Jacks (L/MONO, R): 1/4 inch TRS phone type B Output Jacks (L, R): 1/4 inch phone type Input Jacks (L/MONO/MIC, R): 1/4 inch phone type Hold Pedal Jack (Half Pedal recognition) -
Page 335: Index
Index Symbols +OCT/-OCT ... 24 .BMP ... 220 .MID ... 31 .SVQ ... 31, 223 .TXT ... 220, 223 .WAV ... 148, 202, 220, 223 A-Env Level 1–3 Patch ... 73 Rhythm Set ... 95 A-Env T1 V-Sens Patch ... 72 Rhythm Set ... - Page 336 Index Card File ... 223 Format ... 223 Patch ... 39 Performance ... 99 Sample ... 146 Song ... 199 Storage ... 219 USER ... 52 Card Format ... 224 Category ... 61 Ch/Part Change Duration ... 187 Change Velocity ... 186 Copy ...
- Page 337 Deleting Dividing Point ... 158 File ... 224 Measure ... 184 Sample ... 147 Demo Song ... 23 Destination 1–4 ... 214 Device ID ... 230 Digital Input Level ... 141 Dissolve Time ... 239 Drop Format ... 228 Dst ... 184 Dst Measure ...
- Page 338 Index Hold ... 160 Hold Pedal ... 24 Hold Pedal Polarity Control Pedal ... 126 System Parameter ... 226 Import Audio File ... 148 Text File ... 221 Import Audio ... 148, 202, 220 Import BMP ... 43, 221 Import Text ... 221 Importing Audio file ...
- Page 339 Magnify ... 186–187 Manual Punch-In ... 171 Master Key Shift ... 230 Master Level ... 229 Master Tune ... 229 Mastering ... 217 Mastering Effect ... 29, 217 Matrix Control ... 80 Matrix Control 1–4 Source ... 81 Measure, For Change Channel ...
- Page 340 Index Name ... 36 File Name ... 199 Song Name ... 197 Non-Drop Format ... 228 Normalize ... 156 Note ... 161 Note Tx Ch ... 239 Note Type ... 174 Number of Voices ... 111 Oct ... 24 Oct Range ... 131 Octave Shift ...
- Page 341 P-Env Depth Patch ... 68 Rhythm Set ... 91 P-Env Level 0–4 Patch ... 68 Rhythm Set ... 91 P-Env T1 V-Sens Patch ... 67 Rhythm Set ... 91 P-Env T4 V-Sens Patch ... 68 Rhythm Set ... 91 P-Env Time 1–4 Patch ...
- Page 342 Index Receive Hold 1 ... 113 Receive Modulation ... 113 Receive Pan ... 113 Receive Pitch Bend ... 113 Receive Polyphonic Key Pressure ... 113 Receive Program Change ... 113, 231 Receive Switch ... 112 Receive Volume ... 113 Recommended Tempo ... 118 Record RPS ...
- Page 343 Solo/Portamento ... 77 Song ... 30 Playing ... 164 Song Clear ... 168 Song File ... 31 Song Name ... 197, 199 Sound Generator Section ... 26 Source 1–4 ... 213 Split ... 33, 97, 102 Split Frequency High ... 217 Split Frequency Low ...
- Page 344 Index Tone Name ... 87 Tone Out Assign Patch ... 73 Rhythm Set ... 95 Tone Out Level Patch ... 74 Rhythm Set ... 95 Tone Output Assign ... 208 Tone Output Level ... 208 Tone Pan Patch ... 72 Rhythm Set ...
- Page 345 Voice Reserve ... 28, 111 Volume ... 186 WAV ... 148, 202, 220, 223 Wave ... 88 Patch ... 62 Wave Alter Pan Sw ... 90 Wave Bank Patch ... 62 Rhythm Set ... 88 Wave Coarse Tune ... 89 Wave Expansion Board ...
- Page 346 MEMO...
- Page 347 Model Name : Fantom-X6/X7/X8 Type of Equipment : Synthesizer Keyboard Responsible Party : Roland Corporation U.S. Address : 5100 S. Eastern Avenue, Los Angeles, CA 90040-2938 (323) 890-3700 Telephone : This product complies with the requirements of European Directives EMC 89/336/EEC and LVD 73/23/EEC.
- Page 348 Information When you need repair service, call your nearest Roland Service Center or authorized Roland distributor in your country as shown below. AFRICA PHILIPPINES G.A. Yupangco & Co. Inc. EGYPT 339 Gil J. Puyat Avenue Makati, Metro Manila 1200, Al Fanny Trading Office...