RocketFish RF-AHD35 User Manual
Sata hard drive enclosure kit
Hide thumbs
Also See for RF-AHD35:
- Manual de l'utilisateur (41 pages) ,
- Guía del usuario (40 pages) ,
- Quick setup manual (2 pages)
Table of Contents
Advertisement
Advertisement
Table of Contents

Related Manuals for RocketFish RF-AHD35


Summary of Contents for RocketFish RF-AHD35
- Page 1 3.5" SATA Hard Drive Enclosure RF-AHD35 User Guide...
-
Page 2: Table Of Contents
Introduction Congratulations on your purchase of the Rocketfish RF-AHD35 SATA Hard Drive Enclosure Kit. You can install a high-speed SATA hard drive into this enclosure and connect it to a computer using either a USB 2.0 or eSATA port. This enclosure also has a built-in USB 2.0 hub and memory card... -
Page 3: Safety Information
• Two-slot card reader that supports SD, MMC, MS, MS PRO, xD, Compact Flash (Type I / II), and IBM Microdrive. • Two external USB 2.0 downstream ports. • One-button backup to easily backup, restore, and synchronize data between your Windows PC and the enclosure in USB mode. RF-AHD35... -
Page 4: Package Contents
• Rapid heat dissipation. • Can stand or lie down while operating. • Supports Plug-and-Play and is hot swappable. • Has one power on with backup active indicator and one card reader active indicator. Package contents • 3.5" SATA hard drive enclosure •... -
Page 5: Identifying Components
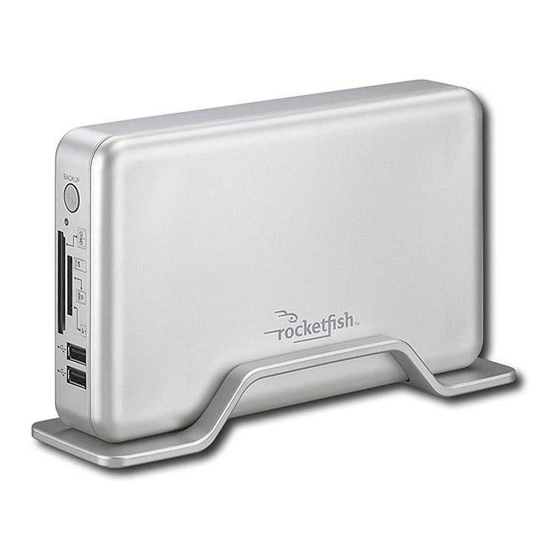
Identifying components Front BACKUP button Card reader LED CF/MD slot SD/MMC/MS /MS PRO/xD slot USB ports RF-AHD35... - Page 6 Back Status indicators LED indicators LED Backup button Card reader Description Solid The hard drive is turned on. Flashing Data is being transmitted between your computer and the hard drive. The hard drive is turned off. Solid A memory card is in the reader. Flashing Data is being transmitted between your computer and the card reader.
-
Page 7: Using The Hard Drive Enclosure
• Handle the printed circuit board (PCB) edges only. Avoid touching the onboard electronic components. To install your 3.5" SATA hard drive in the enclosure: 1 Remove the four screws from the back of enclosure, then open the front cover plate. RF-AHD35... - Page 8 2 Secure one metal brace to each side of the drive using two screws. 3 Place four rubber pads onto each of the two metal braces on the hard drive as shown. 4 Slide the drive into the enclosure, firmly connect the SATA connector, then secure the drive to the enclosure by tightening the four screws through the rubber pads.
- Page 9 5 Put the front cover plate back on the enclosure, then secure it with the four screws you previously removed. 6 Place four rubber feet on the back of the case, then put four rubber feet on the stand. RF-AHD35...
-
Page 10: Connecting The Enclosure To Your Computer
Connecting the enclosure to your computer Before connecting your external storage enclosure: • Confirm that your system supports SATA. If your system does not support SATA, please install an eSATA host card. • Confirm that the eSATA port on your system is working properly. - Page 11 If your motherboard does not, follow these steps to set up your RF-AHD35: 1. Shut down your computer. 2. Turn on your RF-AHD35, then connect it to your computer. 3. Power on your computer. Notes: Windows XP/2000/Vista/7 No drivers are necessary when using Windows XP/2000/Vista/7.
- Page 12 Note: Most USB devices require that USB device software drivers be installed before connecting them to a computer. When installing a USB device, always follow the USB peripheral’s installation instructions provided by the manufacturer. Using your memory card reader The enclosure provides two memory card slots. Memory card slots SD/MMC/MS/MS-PRO/xD CF/MD...
- Page 13 3 When Windows notifies you that it is safe to do so, unplug the enclosure from your computer. To disconnect the enclosure from your Macintosh computer without shutting it down: 1 Drag the USB icon into the TRASH. 2 Unplug the enclosure. RF-AHD35...
-
Page 14: Installing The Software
Installing the software The installation CD includes backup software to enable you to back up your files. Note: This Roxio BackOnTrack software runs only on Windows 7, Windows Vista, and Windows XP computers using USB. Important: Before installing the backup software, make sure that your Windows operating system has been updated to the latest service pack. - Page 15 3 Click Install Roxio® BackOnTrack™ 3 LE. The Welcome screen opens. RF-AHD35...
- Page 16 4 Click NEXT. The Roxio End-User License Agreement screen opens.
- Page 17 5 Read the license agreement, then click NEXT to agree. The Customer Information screen opens. RF-AHD35...
- Page 18 6 Enter your information, then click NEXT. The Choose Setup Type screen opens.
- Page 19 7 Choose the setup type, then click Install to start installation. It may take several minutes to install the software. RF-AHD35...
- Page 20 8 When installation is complete, the Setup Wizard Completed screen opens. 9 Click FINISH to complete the installation.
-
Page 21: Using Your Enclosure
Using your enclosure Starting Roxio BackOnTrack To start Roxio BackOnTrack: 1 Press the backup button (the button with the Rocketfish logo on it) on the front of the enclosure. Or, click Start, BackOnTrack, then click BackOnTrack Home. The first time you run the software, the Product Registration screen opens. - Page 22 2 Complete the Product Registration information as prompted (first time only). The main screen opens. 3 To back up or restore files, follow the on-screen guide. For help, press F1 or click Help. Customizing your card reader To make the memory card slots easier to recognize, you can customize the drive icons.
- Page 23 1 Insert the included Multimedia Card Reader CD into your disc drive. The software starts automatically. If it doesn’t, browse your disc drive, then double-click Run.exe. 2 Click Install Multimedia Card Reader. The following screen opens. 3 Click Next, then follow the on-screen instructions to install the software. RF-AHD35...
- Page 24 4 Click Finish to complete the multimedia card reader software installation. Your computer restarts. After the multimedia card reader software is installed, Windows displays new drive icons for each of the slots instead of the standard Windows drive icon. When Windows detects a card in a slot, the corresponding drive icon turns from gray to a color that indicates the card type.
-
Page 25: Appendix
Most hard drives should come with a CD that includes its installation program. If not, visit the manufacturer’s website to see if a download is available. If the manufacturers program is not available, try the following instead: RF-AHD35... - Page 26 Caution: Doing the following will erase any existing data on the drive. If the drive is damaged and you wish to recover the data, continuing may overwrite the existing information! Creating a new partition in Windows XP/2000/Vista/7 To create a new partition in Windows XP/2000/Vista/7: 1 Right click on "My Computer"...
- Page 27 2 Select the new hard drive you are trying to install. 3 Click the Erase tab. 4 Choose a volume format and assign a name to the new drive. 5 Click Erase. 6 Once complete, your new hard drive should be mounted on your desktop. RF-AHD35...
-
Page 28: Troubleshooting
Note: If the hard drive will not mount on your system, format the drive with a FAT32 or NTFS partition first through a PC system. Once formatted, connect the [name of enclosure] to your Mac and run the Disk Utility tool again. You should now be able to format the drive into a Mac partition and mount the drive Troubleshooting... - Page 29 If a different memory card works, replace the original memory card. • Shine a flashlight into the empty card slots. Check if any pin inside is bent. Straighten bent pins with the end of a mechanical pencil or paper clip. RF-AHD35...
-
Page 30: Specifications
My memory card appears in My Computer but I get errors when writing or reading • Make sure that the memory card is fully inserted into the slot. • Try a different memory card of the same type in the same slot. -
Page 31: Legal Notices
• One card reader active indicator • One power on with backup active indicator • Windows 2000 • Windows XP • Windows Vista • Windows 7 • Mac OS X version 10.3.x or higher 32°F~104°F (0°C~40°C) 20% ~ 80% RH FCC Class B, ICES-003 RF-AHD35... -
Page 32: Fcc Warning
This equipment has been tested and found to comply within the limits for a class B digital device, pursuant to Part 15 of the FCC Rules. These limits are designed to provide reasonable protection against harmful interference in a residential installation. This equipment generates, uses, and can radiate radio frequency energy and, if not installed and used in accordance with the instructions, may cause harmful interference to radio communications. -
Page 33: One-Year Limited Warranty
Products and parts replaced under this warranty become the property of Rocketfish and are not returned to you. If service of Products and parts are required after the Warranty Period expires, you must pay all labor and parts charges. - Page 34 • Damage due to incorrect operation or maintenance • Connection to an incorrect voltage supply • Attempted repair by anyone other than a facility authorized by Rocketfish to service the Product • Products sold as is or with all faults • Consumables, such as fuses or batteries...
- Page 35 7601 Penn Avenue South, Richfield, Minnesota, U.S.A. 55423-3645 © 2009 Best Buy Enterprise Services, Inc. All rights reserved. ROCKETFISH is a trademark of Best Buy Enterprise Services, Inc. Registered in some countries. All other products and brand names are trademarks of their respective owners.
- Page 36 7601 Penn Avenue South, Richfield, MN 55423-3645 USA © 2009 Best Buy Enterprise Services, Inc. All rights reserved. ROCKETFISH is a trademark of Best Buy Enterprise Services, Inc. All other products and brand names are trademarks of their respective owners.