RocketFish RF-HD3025 User Manual
Usb 3.0 2.5" sata hard disk drive enclosure
Hide thumbs
Also See for RF-HD3025:
- Manual de l'utilisateur (18 pages) ,
- Quick setup manual (2 pages) ,
- Guía del usuario (18 pages)
Table of Contents
Advertisement
Advertisement
Table of Contents

Related Manuals for RocketFish RF-HD3025


Summary of Contents for RocketFish RF-HD3025
- Page 1 USB 3.0 2.5" SATA Hard Disk Drive Enclosure RF-HD3025 User Guide...
-
Page 2: Table Of Contents
USB 3.0 2.5" SATA Hard Disk Drive Enclosure Contents Introduction ...3 Safety information ...3 Important safety instructions ...3 Features...3 Package contents ...3 System requirements ...3 Setting up your hard drive enclosure ...4 Installing your hard drive in the enclosure ...4 Connecting the enclosure to your computer...5 Installing the software...7 Using your enclosure ...8... -
Page 3: Introduction
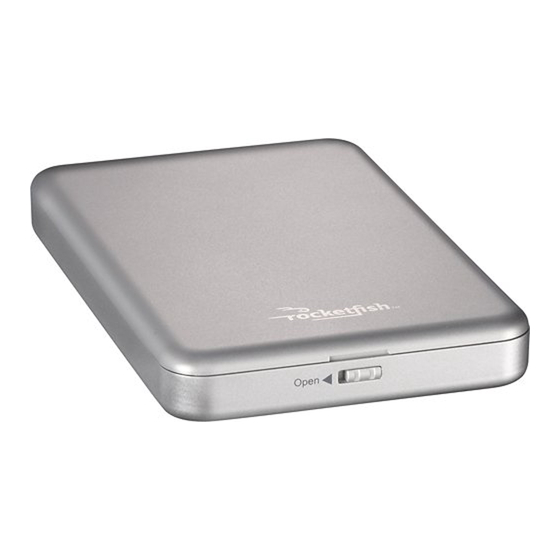
Congratulations on the purchase of your new Rocketfish RF-HD3025 external hard drive enclosure kit. The USB 3.0 Rocketfish 2.5" SATA hard drive enclosure lets you install a high-speed SATA hard drive and connect it to a computer via a USB 3.0 port. -
Page 4: Setting Up Your Hard Drive Enclosure
For highest performance and reliability, install the latest updates and service pack (SP). For Windows, go to the Start menu and select Windows Update. Physical description Front Lock switch to open the case Back Backup button with USB 3.0 Micro-B port power/activity LED Status indicators The following table describes the power-on and... -
Page 5: Connecting The Enclosure To Your Computer
6 for more information. Notes for Macintosh users: If you do not see an additional drive in your system, select Disk Utilities from the Utilities folder, then select the external enclosure and format the drive to meet your requirements. RF-HD3025... -
Page 6: Creating A New Partition
Creating A New Partition Note: For new hard drives, you need to initialize and partition your hard drive before it will appear in Windows Explorer. The best way to partition a new hard drive is by using the manufacturer’s program. Most hard drives should come with a CD that includes its installation program. -
Page 7: Installing The Software
Read the license agreement, then click on “I accept the terms of the License Agreement. ” Click NEXT to proceed. The Choose Setup Type screen opens. Choose the setup type, then click Next to start installation. The Ready to Install screen opens. RF-HD3025... -
Page 8: Using Your Enclosure
Using your enclosure Starting Roxio Back On Track To start Roxio Back On Track: Press the backup button (the button with the Rocketfish logo on it) on the front of the enclosure. -OR- Click Start, BackOnTrack (folder), then click BackOnTrack. -
Page 9: Selecting Files To Back Up
Tip: You can add to the list of file extensions included in any file category by using the controls on the Backup options panel. See “Backup Files options“ on page 12 for more information. RF-HD3025... -
Page 10: Creating A New Backup Files Project
Creating a custom category Most computer files are defined by the two-, three-, or four-letter extension placed at the end of their names. Plain text files, for example, can be identified by their .txt file extension. When you record a Backup Files project, the program is simply searching your computer for files with extensions that correspond to the categories you selected. -
Page 11: Using The Backup Files Scheduler
Windows 7, click Start, All Programs, Accessories, System Tools, Task Scheduler. Note: See Windows Help and Support for information on using the Windows Scheduler. Remember that scheduling changes made directly in the Windows Scheduler are not displayed in the Backup Files project window. RF-HD3025... -
Page 12: Backup Files Options
Backup tips • All of the discs used in a Back Up Files project must be the same general format. • In a multi-disc Back Up Files project, files are assigned based on the size of the first disc you use. -
Page 13: Restoring Files
Click Add or Remove Programs (Windows XP) or Programs and Features (Windows Vista and Windows 7). Locate Roxio BackOnTrack on the list, then click Change/Remove (Windows XP) or Uninstall (Windows Vista and Windows 7). Follow the on-screen instructions to remove the software completely from your computer. RF-HD3025... -
Page 14: Troubleshooting
After the software is uninstalled, restart your computer if prompted. Troubleshooting I do not see the • Make sure that the USB cable is connected firmly to enclosure/additional drive in your enclosure and computer. my system • Make sure that the USB cable is not broken. •... -
Page 15: One-Year Limited Warranty
Products and parts replaced under this warranty become the property of Rocketfish and are not returned to you. If service of Products and parts are required after the Warranty Period expires, you must pay all labor and parts charges. - Page 16 Distributed by Best Buy Purchasing, LLC 7601 Penn Avenue South, Richfield, MN 55423-3645 USA © 2010 BBY Solutions, Inc. All rights reserved. ROCKETFISH is a trademark of BBY Solutions, Inc. All other products and brand names are trademarks of their respective owners. 10-1085...