
Related Manuals for Icom IP501H


Summary of Contents for Icom IP501H
- Page 1 INSTRUCTION MANUAL IP ADVANCED RADIO SYSTEM IP501H 1 BEFORE USING 2 BASIC OPERATION 3 ADVANCED OPERATION 4 SET MODE 5 OPTIONAL PRODUCTS 6 FOR YOUR REFERENCE INDEX...
-
Page 2: Table Of Contents
■ HM-215/BC-218 description ………………… 5-10 ■ Key Lock function………………………………… 1-7 ■ Charging VS-3 ………………………………… 5-11 ■ Pairing the IP501H with the BC-218 or VS-3 5-12 2. BASIC OPERATION ……………………………… 2-1 ■ Connecting and disconnecting ……………… 5-15 ■ Transmitting and receiving ……………………… 2-2 ■... -
Page 3: Before Using
Section BEFORE USING ■ Attaching the antenna ............1-2 ■ Attaching the hand strap ............1-2 ■ Attaching the belt clip ............1-2 ■ Attaching the battery pack ........... 1-2 ■ Turning ON the power/Adjusting the audio level ....1-3 ■... -
Page 4: Attaching The Antenna
BEFORE USING ■ Attaching the antenna ■ Attaching the belt clip L Remove the battery pack before attaching or removing Hold this part to turn. the belt clip. Belt clip Battery pack Slide the belt clip in the direction of the arrow until the belt clip locks in place, and makes a ‘click’... -
Page 5: Turning On The Power/Adjusting The Audio Level
In the 3G mode, the received signal strength is indicated by icon. In the LTE mode, the icon is displayed. L When the transceiver location is out of the service area, or cannot receive the control signal, the (out-of-area) icon blinks. If the IP501H has not been registered, displayed. -
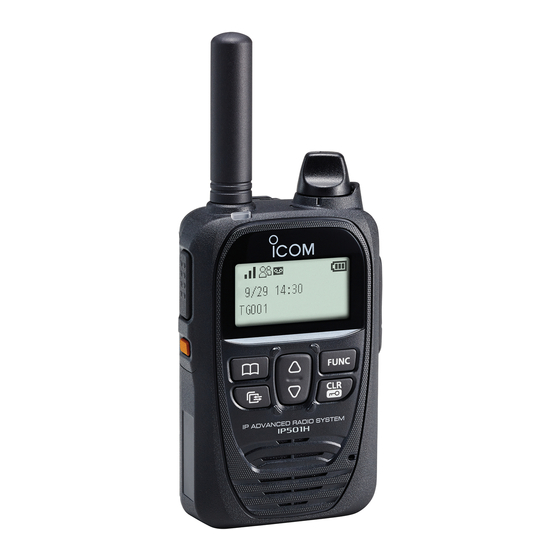
Page 6: Panel Description
BEFORE USING ■ Panel description [送信/受信]ランプ [TX/RX] indicator アンテナ Antenna When connecting optional equipment (pp. 2-2 and 2-3) (p. 1-2) Turn OFF • Be sure to turn OFF the power before connecting or disconnecting [電源/音量] [PWR/VOL]* [PTT](送信) optional equipment to or from the ツマミ... -
Page 7: Icons And Indications
• If "F" has been displayed for more than 10 minutes, reboot the transceiver. • If the battery status indication is (nearing exhaustion) or (exhausted), the firmware update will not start. Blink Charge the battery pack, then restart the IP501H and do the firmware update. -
Page 8: About The Key Operations
BEFORE USING ■ About the key operations [Address] key* [FUNC] key* Selects the message, Status Selects a calling party or group from this list. or Talk group to send. Push [▲]/[▼] to select “All Call,” “Group Call” Message or “Individual Call.” Individual Gather immediately 00001... -
Page 9: Battery Alert Beep
BEFORE USING ■ Battery alert beep When the battery is almost exhausted, the battery status indicator “ ” starts blinking, and warning beeps sound every 30 seconds. Charge the battery pack immediately. (Section 5) When the battery is nearly exhaustion: Blinks Blinks Automatically turned OFF... -
Page 10: Basic Operation
Section BASIC OPERATION ■ Transmitting and receiving ..........2-2 ■ Using the Address Book ............2-4 ■ Using the Call history ............2-5... -
Page 11: Transmitting And Receiving
BASIC OPERATION ■ Transmitting and receiving Hold down [PTT] Receive a call While holding down [PTT], speak into the microphone at When a Call is received, the received audio is heard. your normal voice level. • [TX/RX] indicator lights green while receiving. •... -
Page 12: Power Off
BASIC OPERATION ■ Transmitting and receiving (continued) Talk while receiving a call Turning OFF the power: Turn [PWR/VOL] maximum counter clockwise until it makes a “click” sound. While receiving a call, push [PTT] to talk in the full duplex L Wait for 10 seconds before you turn ON the transceiver mode* like a telephone call. -
Page 13: Using The Address Book
BASIC OPERATION ■ Using the Address Book The [Address] key can be used, depending on a preset. Ask your dealer for details. Select a call-to party from the Address book A l l 1. Push [Address] to select a Call type. (Example: Group call) L Push this key several times to select “All,”... -
Page 14: Using The Call History
BASIC OPERATION ■ Using the Call history The [Call history] key can be used, depending on a preset. Ask your dealer for details. Select a call-to party from the Call history Tx log 10/3 12:57 1. Push [Call history] to select a call history ( “RX log”... - Page 15 BASIC OPERATION ■ Using the Call history (continued) Deleting history logs: 1. While holding down [FUNC], turn ON the power. 2. Release [FUNC] when “SET” is displayed. 3. Push [FUNC] or [Address] several times to select “LOG.” 4. Push [▲]/[▼] to select “CLR,” then push [Call history]. •...
-
Page 16: Advanced Operation
Section ADVANCED OPERATION ■ Sending a message (Message Call) ........3-2 ■ Viewing received messages ..........3-3 ■ Status Call ................3-3 ■ About the Group (or Talkgroup) Call ........3-4 ■ Selecting a Talkgroup number with the [FUNC] key .... 3-5 ■... -
Page 17: Sending A Message (Message Call)
ADVANCED OPERATION ■ Sending a message (Message Call) This function may be used, depending on a presetting. Ask your dealer for details. Select a call-to party A ll 1. Push [Address] to select a Call type. (Example: Individual) L Push this key several times to select “All,” “Group (Talkgroup),” “Individual”... -
Page 18: Viewing Received Messages
ADVANCED OPERATION ■ Viewing received messages This function may be used only when the Talkgroup Call function is assigned to the [Call history] key. Ask your dealer for details. 1. Push [Call history] to select “Rx MSG log.” Rx MSG log 2. -
Page 19: About The Group (Or Talkgroup) Call
The Talkgroup Call function enables the user to communicate with call-to parties in the same Talkgroup. For example, in the illustration below, when IP501H “00004” in its normal group “10001” selects Talkgroup “20001,” it is excluded from group “10001,” and can communicate with only IP501Hs “0006” and “0008” that belong to group “20001.”... -
Page 20: Selecting A Talkgroup Number With The [Func] Key
ADVANCED OPERATION ■ Selecting a Talkgroup number with the [FUNC] key This function may be used only when the Talkgroup Call function is assigned to the [FUNC] key. Ask your dealer for details. 1. Push [FUNC] to select “Talkgroup.” Talkgroup 2. -
Page 21: About The [Option] Key
LYou can cancel the call by pushing [Option] again. Clear Down L The IP501H can terminate the Telephone call when: • The call type is “Individual” and the call was initiated by the telephone. • The call is initiated by the IP501H. -
Page 22: Recording
ADVANCED OPERATION ■ Recording The Recording function records the audio of received calls. The recording duration of a single file is up to 1 minute. The oldest file will be automatically overwritten when the 5th call is recorded. L You can play the recorded audio only when the Playback function is assigned to [Option] by your dealer. LAs the default setting, you can record only Individual calls. - Page 23 ADVANCED OPERATION ■ Recording (continued) 2. Turning ON the Recording mode 1. Push [FUNC] to select “Recording.” 2. Push [▲]/[▼] to select “ON." 3. Push [CLR/LOCK]. Recording • The Recording mode is ON, and the Recording mode icon is displayed. •...
- Page 24 ADVANCED OPERATION ■ Recording (continued) 4. Deleting all the recorded audio history 1. While holding down [FUNC], turn ON the power. • Enter the Set mode. 2. Release [FUNC] when “SET” is displayed. 3. Push [FUNC] several times to select “Delete Record Audio.” 4.
-
Page 25: Pocket Beep Function
(p. 4-4) displayed. L You cannot listen to the call until you reply to the • When a call is received, the notification beep sounds call. After pushing [PTT] on the IP501H, the mute is released. and “ ” blinks... -
Page 26: About The Vox Function
ADVANCED OPERATION ■ About the VOX function The VOX function automatically switches between receive and transmit during voice operation. When the VOX function is ON, speak into the headset microphone to transmit, then stop speaking to listen. In full-duplex, you can speak and listen to the call-to party at the same time. To use this function, an optional headset and a VOX converter cable, shown below are required. -
Page 27: Emergency Call Function
マイク Microphone NOTE: Icom is not responsible for the destruction or damage caused by using the Emergency Call function. This function may not properly work under the following circumstances or conditions: • Remaining battery capacity is low. • Surrounding area or environment. -
Page 28: Lone Worker Function
ADVANCED OPERATION ■ Lone Worker function When the Lone Worker function is activated, the Emergency function (p. 3-12) is automatically turned ON after the IP501H has been left without any operation for the specified time period. To reset the timer, operate any key or the volume control within the specified time period. -
Page 29: Set Mode
Section SET MODE ■ Entering to the Basic Set mode ........... 4-2 ■ Entering to the Advanced Set mode ........4-2 ■ Operation in the Set mode ..........4-3 ■ Set mode item list ..............4-4... -
Page 30: Entering To The Basic Set Mode
SET MODE There are 2 types of Set mode: Basic and Advanced. ■ Entering to the Basic Set mode You cannot transmit nor receive while the transceiver is in the Set mode. 1. While holding down [FUNC], turn ON the power. 2. -
Page 31: Operation In The Set Mode
• Delete Recorded Audio • Delete Bluetooth Device • Search Bluetooth Device Key-Touch Beep Vo • Initialize Bluetooth Unit * After performing these functions, IP501H automatically restarts. L Updating the fi rmware takes approximately 10 minutes. Key-Touch Beep Vo [FUNC] [FUNC]キー... -
Page 32: Set Mode Item List
Item Description Option/Range Default Deletes logs. – – – , CLR (Clear) – – – Initializes the IP501H. Reset Returns to the default values except NO or YES the Bluetooth pairing list. FIRM UP Updates the firmware. NO or YES Sets the successful tone for Individual calls. - Page 33 Enable When the “SideTone” item is set to “Enable,” this item is fixed to “Disable.” Sets the Noise Cancelling function. Noise Canceller ( commonly used for an IP501H, ear- Disable or Enable Enable phone MIC and headset) BackLight Sets the backlight operating function.
- Page 34 SET MODE ■ Setting item list (continued) The shaded items (■ ■) are also displayed in the Basic Set mode. LItems or default values may differ according to a presetting. Ask your dealer for details. Item Description Option/range Default Toggles receiving and transmitting by momentarily pushing [PTT].
- Page 35 SET MODE ■ Setting item list (continued) The shaded items (■ ■) are also displayed in the Basic Set mode. LItems or default values may differ according to a presetting. Ask your dealer for details. Default Item Description Option/range Toggles receiving and transmitting by momentarily pushing [PTT] on a Bluetooth headset.
-
Page 36: Optional Products
® ■ HM-215/BC-218 description ..........5-10 ■ Charging VS-3 ..............5-11 ■ Pairing the IP501H with the BC-218 or VS-3 ....5-12 ■ Connecting and disconnecting .......... 5-15 ■ Deleting a Bluetooth device from the pairing list ....5-21 ■ Initializing the pairing list of the IP501H ......5-22 ■... -
Page 37: Optional Products
OPTIONAL PRODUCTS ■ Optional products Carrying case Cables OPC-2006LS: Plug Adapter Cable LC-185 (For use with BP-272) OPC-2328: PTT Switch Cable OPC-2359: PTT Switch Cable Battery Pack OPC-478UC* : Programming Cable BP-272: Li-ion Battery Pack (Same as supplied) OPC-2144: Plug Adapter Cable (Minimum: 1880 mAh, Typical: 2000 mAh) Speaker-Microphones Chargers... -
Page 38: Standard Charging Time And Battery Life
• Immediately stop using the battery pack if it emits an 3.5 hours (approximately) Charging time abnormal odor, heats up, or is discolored or deformed. If Charging with the BC-202IP2 any of these conditions occur, contact your Icom dealer or distributor. -
Page 39: Battery Pack Cautions
Only Icom pressure. Battery damage may not be visible on the outside battery packs are tested and approved for use with Icom of the case. Even if the surface of the battery does not show transceivers or charged with Icom chargers. - Page 40 10°C ~ 40°C (50°F ~ 104°F) BC-218: 10°C ~ 40°C (50°F ~ 104°F) Icom recommends charging the battery at 25°C (77°F). The battery may heat up or rupture if charged out of the specified temperature range. Additionally, battery performance or...
-
Page 41: Charging With The Optional Bc-202Ip2
(Supplied with the battery pack is fully charged, lights green. BC-202IP2) Charging indicator If the indicator Blinks orange, read the IP501H instruction Charging: Orange Charged: Green manual on the Icom web site. • The charger automatically restarts charging when the Rapid charger (Optional BC-202IP2) attached battery pack voltage drops. -
Page 42: Charging With The Optional Bc-218
■ Insert the IP501H into the BC-218 You can insert and charge a transceiver that has the belt clip attached. Attach the belt clip, then insert the IP501H into the BC-218 until it is locked in place. Belt clip BC-218... -
Page 43: Bluetooth ® Operation
IP501H and and receive the headset audio. The VS-3 has a [PTT] BC-218. switch, so you can transmit in the same way as using the transceiver’s [PTT] switch. - Page 44 • Selecting the disconnect device from the pairing list (pp. 5-20 and 5-21) Deleting a Bluetooth device from the pairing list (p. 5-21) Initializing the pairing list (IP501H) (p. 5-22) Initializing the pairing list (BC-218) (p. 5-23) Initializing the pairing list (VS-3) (p. 5-24) TIP: You can configure the Bluetooth function In the Set mode.
-
Page 45: Hm-215/Bc-218 Description
OPTIONAL PRODUCTS ■ HM-215/BC-218 description Insert the HM-215 into the BC-218's MIC jack, and place the BC-218 on a flat surface. IP501H Front view Rear view Bluetooth button Hold down for 3 seconds to turn Supplied belt clip the Bluetooth function ON or OFF. - Page 46 OPTIONAL PRODUCTS ■ Charging VS-3 Fully charge the VS-3 before using. Charging is also R DANGER! necessary when the LED blinks red every 3 seconds. The charging time is approximately 3 hours. If the LED does not turn OFF after 3 hours of charging, 1.
-
Page 47: Pairing The Ip501H With The Bc-218 Or
® those devices, or move away from them. • When the Bluetooth function is turned OFF, the audio is output from the IP501H. Be sure to not set the IP501H's volume level too high. LGuaranteed Bluetooth devices are the BC-218 and VS-3. (as of December 2017) 1. - Page 48 OPTIONAL PRODUCTS ■ Pairing the IP501H with the BC-218 or VS-3 (continued) 2. Enter the Pairing mode with the BC-218 1. Connect the optional HM-215 to the BC-218. 2. When the Bluetooth function is OFF, hold down the Bluetooth button of either the BC-218 or HM-215) for approximately 6 seconds until the Bluetooth indicator starts alternately blinking red and blue.
-
Page 49: Set Mode
OPTIONAL PRODUCTS ■ Pairing the IP501H with the BC-218 or VS-3 (continued) 3. Search for Bluetooth devices 1. While holding down [FUNC], turn ON the power. • Enters the Set mode. 2. Release [FUNC] when “SET” is displayed. 3. Push [FUNC] several times to select “Search Bluetooth Device.”... -
Page 50: Connecting And Disconnecting
2. Hold down the Bluetooth button on the BC-218 for 3 seconds. • The Bluetooth function is ON, and the Bluetooth indicator Blinks blue. • After a few seconds, a beep sounds and the Bluetooth connection between the IP501H and the BC-218 is established. - Page 51 2. Hold down the [PWR] button on the VS-3 for 3 seconds. • The Bluetooth function is ON, and the Bluetooth indicator Blinks blue. • After few seconds, a beep sounds and the Bluetooth connection between the IP501H and the VS-3 is established. Example Earphone (3.5 (d) mm)
- Page 52 3. Push [▲]/[▼] to select a Bluetooth device to connect. 4. Push [Call history]. Unconnected • After few seconds, a beep sounds and the Bluetooth connection between the IP501H and the selected device is established. 5. Push [CLR/LOCK]. Pairing List • Exits the Set mode.
- Page 53 HM-215 NOTE: • When you remove the IP501H from the BC-218 then insert the IP501H again within 10 minutes, the Bluetooth connection is automatically established again. • When 10 minutes has passed after the IP501H is removed from the BC-218, the BC-218's Bluetooth function is automatically turned OFF.
- Page 54 Disconnecting with the BC-218 when the Bluetooth indicator blinks blue z Hold down the Bluetooth button on the BC-218 for 3 seconds. • Sounds a beep then melody (Scale goes down), and the Bluetooth connection between the IP501H and the BC-218 is disconnected.
- Page 55 Disconnecting the VS-3 when the LED blinks blue z Hold down the [PWR] button on the VS-3 for 3 seconds. • Sounds a beep then melody (Scale goes down), and the Bluetooth connection between IP501H and VS-3 are disconnected. Example Earphone (3.5 (d) mm)
-
Page 56: Deleting A Bluetooth Device From The Pairing List
• To cancel deleting, push any key other than [Call history]. 6. Push [Call history]. Delete Bluetooth De • The selected device is deleted from the pairing list, then exits the Set mode. ICOM BT-000:00-00 [電源/音量]ツマミ [PWR/VOL] Delete Bluetooth Completed to delete [FUNC]キー... -
Page 57: Initializing The Pairing List Of The Ip501H
– – – 4. Push [▲]/[▼] to select “YES.” • To cancel the initialization, push any key other than [Call history]. 5. Push [Call history]. • The pairing list is initialized and IP501H automatically restarts. Initialize Bluetooth [電源/音量]ツマミ [PWR/VOL] [FUNC]キー... -
Page 58: Initializing The Pairing List Of The Vs-3
OPTIONAL PRODUCTS ■ Initializing the pairing list of the BC-218 If you have some troubles with the Bluetooth operation, initialize the pairing list, as shown below. 1. Connect the HM-215 to the BC-218. 2. Hold down the Bluetooth button on the BC-218 for 3 seconds, to turn ON the Bluetooth function. •... -
Page 59: Initializing The Pairing List Of The Vs-3
OPTIONAL PRODUCTS ■ Initializing the pairing list of the VS-3 If you have some troubles with the Bluetooth operation, initialize the pairing list, as shown below. 1. Hold down [PWR] on the VS-3 for 3 seconds, to turn ON the Bluetooth function. •... -
Page 60: Installing The Mba-7/Mbf-1 On A Flat Surface
OPTIONAL PRODUCTS ■ Installing the MBA-7/MBF-1 on a flat surface 1. Clean the surface where the MBF-1 is attached to. LTo install the MBF-1, approximately 90 mm of flat surface is necessary. 2. Attach the MBA-7 to the MBF-1. Move the holder left or right to the best viewing position, Slot then tighten the lock knob. - Page 61 OPTIONAL PRODUCTS ■ Installing the MBA-7/MBF-1 (continued) 3. Make sure that the surface where MBF-1 is attached to is clean and dry, then attach the MBF-1. 4. Adjust the angle and position of MBA-7 with the MBF-1's adjusting dial and screw. Adjust the position by the dial or screw.
- Page 62 OPTIONAL PRODUCTS ■ Installing the MBA-7/MBF-1 (continued) Attach the strap to the hook. Attach the hook to a hole. Hook Adjust the length. Attach the strap to the MBA-7. If there is no hook to hang it: Make a hole and drill a tapping screw. 5-27...
-
Page 63: For Bp-272)
OPTIONAL PRODUCTS ■ LC-185 (For BP-272) Optional MB-57L (Shoulder strap) can be attached. Snap LC-185 Snap When you charge the BC-272 attached to the IP501H with LC-185, open the bottom part and insert to the BC-218, as shown below. BC-218 5-28... -
Page 64: When Connecting Optional Equipment
OPTIONAL PRODUCTS ■ When connecting optional equipment • Be sure to turn OFF the power before connecting or disconnecting optional equipment to or from the jack. • Remove the cable by holding the plug not cable. • Insert the plug securely when connecting the cable. LAttach the jack cover when no optional equipment is connected. -
Page 65: For Your Reference
Section FOR YOUR REFERENCE ■ Troubleshooting ..............6-2 ■ Specifications ..............6-4... -
Page 66: Troubleshooting
– The battery pack’s over-discharge protec- Remove the battery pack from the tion circuitry is activated. IP501H, then charge it for a while. – Attach the battery pack to the IP501H again, then turn ON the power. No sound comes from Volume level is set too low. - Page 67 – devices. No audio output from IP501H is in the Bluetooth signal detecting Push the Bluetooth button on the BC-218 IP501H after sequence. (Approximately 20 seconds) to disconnect the Bluetooth device, the Bluetooth connection then turn OFF the BC-218 power.
-
Page 68: Specifications
FOR YOUR REFERENCE ■ Specifications D General Operating temperature range: –10°C ~ +60°C (14°F ~ 140°F) Humidity: Less than 25 ~ 85% (Without condensation) Dimensions: 59 (W) × 95 (H) × 32 (D) mm (Projections not included, with BP-272) Weight: Approximately 240 g (Including antenna and BP-272) Power supply: 7.4 V (with BP-272 Li-ion battery pack: 1880 mAh) - Page 69 FOR YOUR REFERENCE ■ Specifications (continued) D BC-202IP2 (Option) rapid charger Input voltage: DC 12 ~ 16 V (Used with the supplied BC-123S power adapter) Operating temperature range: 10°C ~ 40°C (50°F ~ 104°F) Weight: Approximately 105 g (Power adapter not included) Dimensions: 88.0 (W) ×...
- Page 70 INDEX [Address] key ……………………… 1-6, 2-4, 3-5, 4-2 Echo Canceller ……………………………………… Antenna ……………………………………………… Emergency Call ……………………………… 3-6, 3-12 Audio output level adjustment …………………… "F" blinks …………………………………………… Back Light function …………………………… 2-3, 4-5 Firmware update ……………………………… 1-5, 4-4 Battery pack ………………………………………… Full duplex mode ……………………………………...
- Page 71 INDEX P-Bell function ……………………………………… 3-10 Pocket Beep function ……………………………… 3-10 PTT Lock …………………………………………… Receive Buffer ……………………………………… Received Call Notification Volume………………… Received Call Notification ………………………… Recording Recording function ………………… 2-3, 3-7, 4-7 Play ………………………………………… 3-6, 3-8 Recording Call type …………………………… Record data ………………………… 2-3, 3-7, 6-2 Deleting recorded audio ………………………...
- Page 72 A7415-3EX-1 © 2017–2018 Icom Inc. 1-1-32 Kamiminami, Hirano-ku, Osaka 547-0003, Japan...