
Related Manuals for Rangemaster 110 DUAL FUEL U109600-02


Summary of Contents for Rangemaster 110 DUAL FUEL U109600-02
-
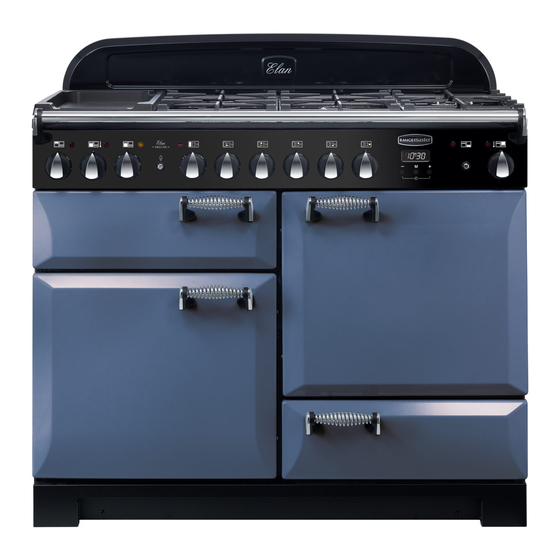
Page 1: Users Guide
110 Dual Fuel with Glide-out™ grill Users Guide Installation & Service Instructions U109600-02... - Page 2 Be safe Warning Accessible parts will become hot in use. To avoid burns and scalds children should be kept away. You need clean fresh air - so does your cooker. Burner flames produce exhaust gases, heat and moisture. Make sure that the kitchen is well ventilated: keep natural ventilation holes open or install a powered cooker hood that vents outside.
-
Page 3: Table Of Contents
Contents Hotplate Burners The Griddle The Wok cradle The Glide-out™ Grill The Ovens The Clock Both Ovens Multi-function oven Handyrack Oven shelves Storage Multi-function Oven cooking guide Oven Cooking chart - Conventional and full Fan oven functions Page 17 Cleaning your cooker Moving your cooker Troubleshooting General Safety Instructions... -
Page 4: Hotplate Burners
Hotplate Burners The drawing by each knob indicates which burner that knob controls. Press the igniter button and push in and turn a knob to the large flame symbol ( ). Adjust the flame height to suit by turning the knob. On this cooker the low position is beyond high, not between high and off. -
Page 5: The Griddle
durability of the enamel and may be cleaned off with a metal cleaner such as 'Brasso' . The Griddle The griddle fits the centre left pan support, front to back. It is designed for cooking food on directly. Don’t use pans of any kind on it. The griddle surface is non-stick and metal cooking utensils (e.g. -
Page 6: The Wok Cradle
The Wok cradle The Rangemaster Wok cradle is designed to fit a Typhoon Professional 14” Wok. If you use a different Wok make sure that it fits the cradle. Woks vary very widely in size and shape. It’s important that the Wok sits down on the pan support - but if the Wok is too small the cradle will not support it properly. -
Page 7: The Glide-Out™ Grill
The Glide-out™ Grill Caution: Accessible parts may be hot when the grill is in use. Young children should be kept away. Before using the grill for the first time, make sure that all packing materials have been removed and then to dispel manufacturing odours, turn on the grill and run for 30 minutes with the grill pan in position, pushed fully back, and the grill door open. -
Page 8: The Ovens
The Ovens During use the appliance becomes hot. Care should be taken to avoid the touching heating elements inside the oven. Before using for the first time, to dispel manufacturing odours turn the ovens to 230°C and run for an hour. -
Page 9: The Clock
The Clock You can use the timer to turn the ovens on and off. The clock must be set to the time of day before the ovens will work. Setting the time of day Timer knob When the clock is first connected the display will flash ( ) and ( To set the clock to read... - Page 10 To start & stop the oven automatically Before you set the clock, you must have two numbers clearly in mind. The ‘cook time’ , which is the period of time you want the oven to cook. The ‘stop time’, which is the time of day you want the oven to stop cooking.
-
Page 11: Both Ovens
After a few seconds the display will revert to show the time of day. The ovens can now be used normally. Cooking using the timer The timer can be used to turn just one oven or both on and off automatically. The start and stop time must be the same for both ovens but different cooking temperatures can be set. -
Page 12: Multi-Function Oven
Multi-function oven The Multi-function oven is on the left hand side. It has many varied uses. We suggest you keep a careful eye on your cooking until you are familiar with each function. Remember - not all functions will be suitable for all food types. Please remember that all cookers vary - temperatures in your new Elan ovens may differ to those in your previous cooker. -
Page 13: Handyrack
Conventional oven (top and base heat) This function combines the heat from the top and base elements. It is particularly suitable for roasting and baking pastry, cakes and biscuits. Food cooked on the top shelf will brown and crisp faster than on the lower shelf, because the heat is greater at the top of the oven than at the base, as in ‘Fan assisted oven’... -
Page 14: Oven Shelves
Oven shelves the shelf guard should be at the back pointing upwards As well as the flat shelves some models are supplied with drop shelves. The drop shelves increases the possibilities for oven shelf spacing. The oven shelves can be easily removed and refitted. -
Page 15: Storage
Storage The bottom drawer is for storing oven trays and other cooking utensils. It can get very warm, don’t store anything in it that may melt or catch fire. The drawer can be removed completely for cleaning etc. To remove the drawer, pull it fully forward Lift up the ends of the plastic clips (one each side) to release the catches holding the drawer to the side runners and at the same time pull the drawer forward... -
Page 16: Multi-Function Oven Cooking Guide
Multi-function Oven cooking guide Remember - not all functions will be suitable for all food types. The oven control settings and cooking times given are intended to be used only as a guide. Individual tastes may require the temperature to be altered to provide a preferred result. -
Page 17: Oven Cooking Chart - Conventional And Full Fan Oven Functions
Oven Cooking chart - Conventional and full Fan oven functions Food Temperature FISH ROAST MEATS Beef with bone Beef without bone Lamb Pork Stuffed and rolled - Add approx. 10 mins. per 500g to above cooking times or cook at 200°C for 20mins. then 160°C for remainder. -
Page 18: Cleaning Your Cooker
Cleaning your cooker Essential information Before thorough cleaning isolate the electricity supply. Remember to switch on the electricity supply before use. Never use paint solvents, washing soda, caustic cleaners, biological powders, bleach, chlorine based bleach cleaners, coarse abrasives or salt. Don’t mix different cleaning products - they may react together with hazardous results. - Page 19 To fit the small inner burner, find the larger electrode notch in the burner rim. Line this up with the white ignition electrode and place the inner burner on the large base ring. A - Electrode notch, B - Ignition electrode Now fit the two trim rings, making sure that they are sitting down properly.
- Page 20 Cleaning Table Hotplate Part Hotplate Top Pan Supports, Wok Cradle (some models only) Warming Zone (some models only) Burner Caps Burner Trim Rings (some models only) and Burner Head Griddle Plate (some models only) Outside of cooker Part Door, Door surround and Storage Drawer exterior.
- Page 21 Do not use any abrasive substance. DO NOT put the side runners in a dishwasher When you have finished, hook the side rails back onto the sides of the chamber. To refit the frame pull the side rails forward and for each side in turn support the side rail and press the frame down into the side rails.
-
Page 22: Moving Your Cooker
Moving your cooker Switch off the electricity supply. The cooker is heavy; two people may be required to move it. First remove the drawer. Pull it right out and lift up the ends of the plastic clips (one each side) to release the catches holding the drawer to the side runners and at the same time pull the drawer forward and away from the side runners. -
Page 23: Troubleshooting
Troubleshooting Steam is coming from the oven During cooking, food naturally produces steam, particularly when cooking foods with high water content (e.g. oven chips). There may be some steam visible at the grille at the rear of the hotplate. This is perfectly normal. - Page 24 Oven temperature getting hotter as the cooker gets older If turning the knob down has not worked or only worked for a short time then you may need a new thermostat. This should be fitted by a service person. Grill not cooking properly Are you using the pan and trivet supplied with the cooker? Is the pan being used on the runners, not the floor of the compartment? Is the grill pan...
-
Page 25: General Safety Instructions
General Safety Instructions In the UK the cooker must be installed by a CORGI registered engineer. The installation must be in accordance with the installation instructions and comply with the relevant regulations and also the local gas and electricity supply companies’ requirements. If you smell gas Don’t turn electric switches on or off. - Page 26 Never wear loose-fitting or hanging clothes while using the appliance. Be careful when reaching for items stored in cabinets over the hotplate. Flammable material could be ignited if brought in contact with a hot surface unit and may cause severe burns. Take great care when heating fats and oils, as they will ignite if they get too hot.
-
Page 27: Installation
Installation Dear Installer Before you start your installation, please complete the details BELOW. If your customer has a problem relating to your installation they will be able to contact you easily. Thank you Installer’s Name Installer’s Company Installer’s Telephone number You must be aware of the following safety requirements &... - Page 28 You will need the following equipment to complete the cooker installation satisfactorily STABILITY BRACKET If the cooker is to be supplied with gas through a flexible hose, a stability bracket or chain must be fitted. These are not supplied by with the cooker but are available at most builders’...
- Page 29 Positioning the Cooker The diagrams below show the minimum recommended distance from the cooker to nearby surfaces. The cooker should not be placed on a base. The hotplate surround should be level with, or above, any adjacent work surface. Above hotplate level a gap of 75mm should be left between each side of the cooker and any adjacent vertical surface.
- Page 30 side runners. For safety’s sake push the drawer runners back out of the way. Put the drawer somewhere it will be safe until you have finished the installation. Fit the levelling tool on the rectangular adjuster as shown below. LOWER THE FRONT ROLLER by doing 14 complete (360°) turns clockwise.
-
Page 31: Gas Connection
Fitting the splash back The cooker can be installed with or without the supplied splashback. To fit splash remove the two fixing screws (3mm hexagonal socket head) and nuts that pass through the top of the rear flue grille. Hold the splash back in position. From the rear refit the 2 fixing screws and nuts. -
Page 32: Electrical Connection
Electrical Connection This appliance must be installed by a qualified electrician to comply with the relevant Institute of Electrical Engineers (I.E.E.) regulations and also the local electricity supply company requirements. WARNING: THIS APPLIANCE MUST BE EARTHED Note The cooker must be connected to the correct electrical supply as stated on the voltage label on the cooker, through a suitable cooker control unit incorporating a double pole switch having a contact separation of at least 3mm in all... -
Page 33: Conversion To Lp Gas
Disconnect from electricity and gas before servicing. Check appliance is safe when you have finished. Conversion to LP gas Check in the Technical Data section at the back of the book that the cooker is convertible to the gas you want to use. -
Page 34: Servicing Notes
Disconnect from electricity and gas before servicing. Check appliance is safe when you have finished. Servicing Notes When servicing or replacing gas carrying components disconnect from gas before commencing operation and check appliance is gas sound after completion. When checking for gas leaks use a liquid leak detector at all joints and connections to check for leaks in the system. - Page 35 Disconnect from electricity and gas before servicing. Check appliance is safe when you have finished. 7. To Remove A Thermostat Remove control panel (see 2) and cooktop (see 3). Open the appropriate oven door and remove the oven shelves. Right hand oven Remove oven roof.
- Page 36 Disconnect from electricity and gas before servicing. Check appliance is safe when you have finished. 15. To Change Oven Door Outer Panel Remove the two plastic blanking plugs from the door handles. Remove the 4mm Hex headed screws holding the handle to the door with the hexagon key tool.
- Page 37 Disconnect from electricity and gas before servicing. Check appliance is safe when you have finished. Remove the fixings that secure the inner back to the oven rear. Lift the removable panel away. Re-assemble in reverse order. Ensure that the retaining fixings are fully tightened. For the left hand oven unscrew the 2 thermostat phial fixing screws.
-
Page 38: Circuit Diagram
Circuit Diagram Grill energy regulator Left hand Multi function oven thermostat Multi function oven function control Clock Right hand oven thermostat Grill elements Multi function oven base element Multi function oven top element (outer pair) Multi function oven browning element (inner pair) Multi function oven fan element M Multi function oven fan Right hand fan oven element... -
Page 39: Technical Data
Technical Data This cooker is category II It is supplied set for group H natural gas. A conversion kit from NG to LP gas is packed with the cooker. INSTALLER: Please leave these instructions with the User. DATA BADGE LOCATION : Cooker back, serial number repeater badge below oven door opening. Country of Destination: GB Natural Gas Butane... - Page 40 �������������� ����������� ������� �����...